manuals.online logo
Brands
  1. Home
  2. •
  3. Brands
  4. •
  5. RuggON
  6. •
  7. Tablet
  8. •
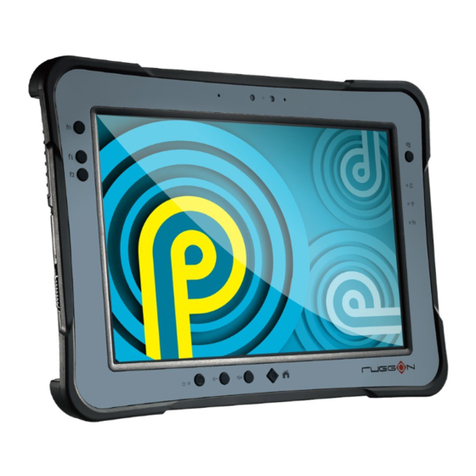
  9. RuggON RUGGPAD PX-501 Installation guide

RuggON RUGGPAD PX-501 Installation guide

1
PX-501
FAQ/Troubleshooting
Guide
2
Table of Contents:
Display & Touch …………………………………………………………………………………………..3
Peripherals ……………………………………….……………………………………………………4
BIOS , OS, General Software …...……………………………………………………………………10
Power & Battery ………………………………………………………………………………………..17
3
Q: How to calibrate touch screen for Windows platform
A: No Need. The touch screen has been fine-tuned for Windows environment.
Q: How can I change my Windows 7 desktop icon size?
A: Go to Start > Control Panel > Display > Make text and other items larger or smaller.
Choose "Medium - 125%" or manually customize the text size by "Set customer text size (DPI)". Click Apply in the
main Display Window then click Log off now to save changes.
4
Q: How to troubleshoot if 2D barcode scanner failed to scan properly
A:Supported Decode Mode :
1D symbologies: EAN/UPC, RSS, Code 39, Code 128, UCC/EAN 128, ISBN, ISBT, Interleaved, Matrix, Industrial
and Standard 2 of 5, Codabar, Code 93/93i, Code 11, MSI, Plessey, Telepen, postal codes.
2D symbologies: Data Matrix, PDF417, Micro PDF 417, Maxicode, QR, Aztec, EAN.UCC composite
You can set up your 2D barcode scanner in a basic configuration by scanning configuration barcodes using the
right/left trigger button. Follow the instructions below 1~4. For a complete setup of specific symbologies including
other language for keyboard interface setup, please install the EasySet software for more details.
1). Reset factory defaults
<CCMD>4006
2). Select interface
USB - USB cable mode - Keyboard HID
<SW>684000 3). Select symbologies
For example,
QR code Enable <SW>554001
4). Select keyboard settings
For example,
North America (*) <SW>674000
(Optional)
Start a new line of text for every barcode scanned
Brazilian Portuguese Windows <SW>67400A
Postamble - Carriage Return + Line Feed (*) <SW>60C100020D0A Note:
*= factory default
5
Basic Function Test
When the Barcode scanner has been configure as USB cable mode- Keyboard HID, you can execute the Notepad utility to
perform simple function test:
Windows:
Q: How to install WWAN module:
A:
1) Please open the service door on the bottom case and find the WWAN slot.
6
2) Install the WWAN module and secure by screw, connect both AUX and MAIN antenna cables.
Place Acetate tape attach on both connections.
7
Q: SnapOn Smartcard / NFC Test Guide
A:
1. If your OS is provided by Ruggon, you can find the test utility in C:\Drivers/SCR, extract the
RCC utility.
2. Smartcard insert direction
3. A yellow circle will appear on the icon if a card read correctly.
8
SnapOn NFC:
9
10
Q: GPS Function Demo:
A:
Please download u-center GPS evaluation software to test GPS module :
http://www.u-blox.com/en/evaluation-tools-a-software/u-center/u-center.html
1). Set baud rate to 9600bps
2). Connect to GPS module via appropriate serial port#
3.If your demonstration is indoor and not able to receive the GPS signal well, you can open the Text Consol to
see whether the NMEA code is constantly displaying or not.
11
3-1:REAL Outdoor GPS Working Situation:
12
Q:Why light sensor doesn’t work?
A:
1. Please make sure the DashOn utility can be found in Desktop. If not, please contact technical service
representative to download and install it.
2. Please check the Brightness setting is in Auto or Manual mode
3. You can use finger to cover Light Sensor then see the change of screen brightness.
13
Q:How to enter BIOS CMOS Setup
A:1.After system power on, press and hold tablet’s Home button immediately till Boot Menu show up.
2.Touch “Main”to enter Setup.
14
AC power adapter must attach to tablet in order to avoid battery power
lost during below BIOS/EC re-flash and OS recovery.
Q:How to do BIOS/EC Re-flash
A:
Because BIOS re-flash must be done under system Internal Shell environment. So, please well prepare
a FAT32 formatted USB pen drive. AC power adapter must attach to tablet in order to avoid battery power lost
during re-flash.
1. Copy all the downloaded BIOS files to USB pen drive.
2. Press & hold tablet’s HOME button first then press power button.
3. Once Boot Menu show up, just simply touch to enter Internal Shell.
4. Internal Shell Operating Command:
fs1:->change drive path to USB pen drive
dir:Display data folder
cd BIOS file folder
cd EFI64
WB
You can also find a .pdf file of System BIOS Update Procedure in downloaded BIOS file folder to flash the
BIOS under Windows. Please be reminded again, EC doesn’t support Windows mode flash.
**Once the BIOS re-flash done, you must power Off->On to restart the system as well.
15
To update EC:
after entering EC data folder, simply execute F; command example:
fs1:->change drive path to USB pen drive
dir:Display data folder
cd EC file folder
F
Q: OS image Recovery Guide:
A:
1. Preparing a 16GB(min.) FAT32 formatted USB pen drive.
2. Copying all the image files(folder no need) to USB pen drive then inserting to tablet.
3. Entering BIOS CMOS Setup ->Boot Feature ->Enable CSM Support & Legacy Boot-> Save & Exit
4. After system restart, press and hold Home button till Boot Menu show up.
16
5. Touch to select USB pen drive.
6. Once WinPE boots up, Recovery will auto start.
**When the recovery complete, system will return to DOS prompt like above of DOS prompt. You
cannot reboot the system by Ctrl+Alt+Del key but just simply press Power button to turn off
system. Power On again to enter OS.
17
Q:Where can I find the Windows Embedded 8.1 Industry Pro/ Windows 10 IoT product key to do
Windows Activation?
A: Windows Embedded 8.1 Industry Pro / Windows 10 IoT provides activation check/activate via Internet. If
your tablet’s OS originally come from RuggON, you can just skip the activation product key fill in at 1’st
startup setting. Once the OS boots up, make sure the Internet connection well. OS activation will auto
executive after 10~15 min.
You can refer below capture to check whether the OS is activated or not:
Windows 8.1
Windows 10 IoT
18
Q:Why system can’t boot from USB pen drive?
A: Mostly caused by incompatible with USB 2.X or below pen drive due to the system is designed main for USB 3.0
support.
Please refer above topic of How to Enter BIOS CMOS Setup to change below items:
Main=>Boot Features=>CSM Support:YES, Legacy Boot:On
Advanced=>System Component=>xHCI mode:Off
Q: Is it possible to open both front and rear webcam at the same time
A: No. Due to system design, only one webcam (either front or rear) can be used at any one time.
Double click on AmCap webcam icon located on desktop to run the webcam program (or open from hotkey utility), and
go to "Devices" to select the desired webcam you intend to use.
Q: Audio input/output has no sound
A:
1). Please open DashOn utility UI, look Volume Control and adjust audio volume (or uncheck the "mute" option).
19
2). Right click on speaker icon in task bar, and select "Recording devices". Click "Microphone", and select "Properties"
and go to "Levels" tab to adjust MIC recording level and MIC boost gain accordingly.
20
Q: External battery not detected
A: Please check if the lock/unlock latch on the external battery is switched to “Lock”position for battery detect
Battery unlock
Battery locked
Battery release
clip

Other manuals for RUGGPAD PX-501

1

Other RuggON Tablet manuals

RuggON PM-521 User manual

RuggON

RuggON PM-521 User manual

RuggON VX-601 User manual

RuggON

RuggON VX-601 User manual

RuggON LUNA 3 User manual

RuggON

RuggON LUNA 3 User manual

RuggON PM-511 User manual

RuggON

RuggON PM-511 User manual

RuggON PA-301 User manual

RuggON

RuggON PA-301 User manual

RuggON PM-511 User manual

RuggON

RuggON PM-511 User manual

RuggON PM-311 User manual

RuggON

RuggON PM-311 User manual

RuggON PM-521 User manual

RuggON

RuggON PM-521 User manual

RuggON PM-521 User manual

RuggON

RuggON PM-521 User manual

RuggON PX501C8H User manual

RuggON

RuggON PX501C8H User manual

RuggON LUNA 3 User manual

RuggON

RuggON LUNA 3 User manual

RuggON PM-522 User manual

RuggON

RuggON PM-522 User manual

RuggON PA-501 User manual

RuggON

RuggON PA-501 User manual

RuggON PA-301 User manual

RuggON

RuggON PA-301 User manual

RuggON PM-522B4N User manual

RuggON

RuggON PM-522B4N User manual

RuggON RUGGPAD PX-501 User manual

RuggON

RuggON RUGGPAD PX-501 User manual

RuggON RuggPad SOL PA501 User manual

RuggON

RuggON RuggPad SOL PA501 User manual

RuggON PA-501 User manual

RuggON

RuggON PA-501 User manual

Popular Tablet manuals by other brands

Magic W3 quick start guide

Magic

Magic W3 quick start guide

FOSSIBOT Tab 10 WiFi user manual

FOSSIBOT

FOSSIBOT Tab 10 WiFi user manual

Go Clever M723G quick start guide

Go Clever

Go Clever M723G quick start guide

Recordex iMMPad SE quick start guide

Recordex

Recordex iMMPad SE quick start guide

Huawei IDEOS S7 Slim user guide

Huawei

Huawei IDEOS S7 Slim user guide

Conker ST7 user manual

Conker

Conker ST7 user manual

Archos 101 helium series Technical specifications

Archos

Archos 101 helium series Technical specifications

Lenovo YOGA BOOK YB1-X90F Safety, warranty & quick start guide

Lenovo

Lenovo YOGA BOOK YB1-X90F Safety, warranty & quick start guide

Mimo Monitors Adapt-IQ 7" MCT-70QDS quick start guide

Mimo Monitors

Mimo Monitors Adapt-IQ 7" MCT-70QDS quick start guide

Fujitsu LifeBook Stylistic Q550 Getting started

Fujitsu

Fujitsu LifeBook Stylistic Q550 Getting started

Asus Transformer Pad TF701T user manual

Asus

Asus Transformer Pad TF701T user manual

Venturer CT9773W23 user manual

Venturer

Venturer CT9773W23 user manual

Zte Optik Get started

Zte

Zte Optik Get started

Coby Kyros MID7042 user manual

Coby

Coby Kyros MID7042 user manual

Intel Web Tablet Product guide

Intel

Intel Web Tablet Product guide

Archos Arnova 8G3 user manual

Archos

Archos Arnova 8G3 user manual

Samsung SM-T825C user manual

Samsung

Samsung SM-T825C user manual

Huawei MediaPad M2 8.0 quick start

Huawei

Huawei MediaPad M2 8.0 quick start

manuals.online logo
manuals.online logoBrands
  • About & Mission
  • Contact us
  • Privacy Policy
  • Terms and Conditions

Copyright 2025 Manuals.Online. All Rights Reserved.