RUKO U11 PRO User manual

14+
for age
User Manual
v3.0


Copyright ©2021 Ruko All Rights Reserved.
Contents
1
1 Using This Manual
2 Package Contents
3 Drone Presentation
1.1 Legend
1.2 Read Before the First Flight
1.3 Download the Ruko GPS App
3
3
3
3
4
5
5
5
6
8
9
10
11
12
12
12
14
15
15
17
18
19
19
4 Remote Controller Presentation
5 Ruko GPS App Presentation
3.1 Important
3.2 U11 Pro Drone Diagram
3.3 Camera
3.4 Intelligent Flight Battery
3.5 Drone Status Indicator
3.6 How to Replace the Propeller
3.7 How to Replace the Arm
4.1 Remote Controller Diagram
4.2 Using the Remote Controller
4.3 Controlling the Drone Default Setting
5.1 App Introduction
5.2 Return to Home
5.3 Point of Interest
5.4 Follow Me Mode
5.5 Waypoint

6 Flight
5.6 Filters
5.7 Take off/Landing
5.8 How to Find the Lost Drone
5.9 Flight Record
5.10 Flight Setting and Beginner Mode
20
21
21
22
22
23
23
23
24
28
28
7 Warning
30
8 Specifications
6.1 Flight Environment Requirements
6.2 Pre-Flight Checklist
6.3 How to Fly in Outdoor Environment
6.4 How to Fly in Indoors
Copyright ©2021 Ruko All Rights Reserved.2

Copyright ©2021 Ruko All Rights Reserved. 3
U11Pro User Manual
The following terms are used throughout the product literature to indicate various levels
of potential harm when operating this product :
Read the following documents before using Ruko U11 Pro :
User Manual
Quick Start Guide
Disclaimer and Safety Guidelines
It is recommended to watch all tutorial videos on the official Ruko website and read the
disclaimer and safety guidelines before using them for the first time. Prepare for your first
flight by reviewing the quick start guide and refer to this user manual for more information.
1.1 Legend
1.2 Read Before the First Flight
Recommend Warning Hints & Tips Reference
1 Using This Manual
The operating temperature of this product is 0°F to 104° F.
It does not meet the standard operating temperature for military-grade application
(-67°F to 257° F), which is required to endure greater environmental variability.
Operate the product appropriately and only for applications that meet the operating
temperature range requirements of that grade.
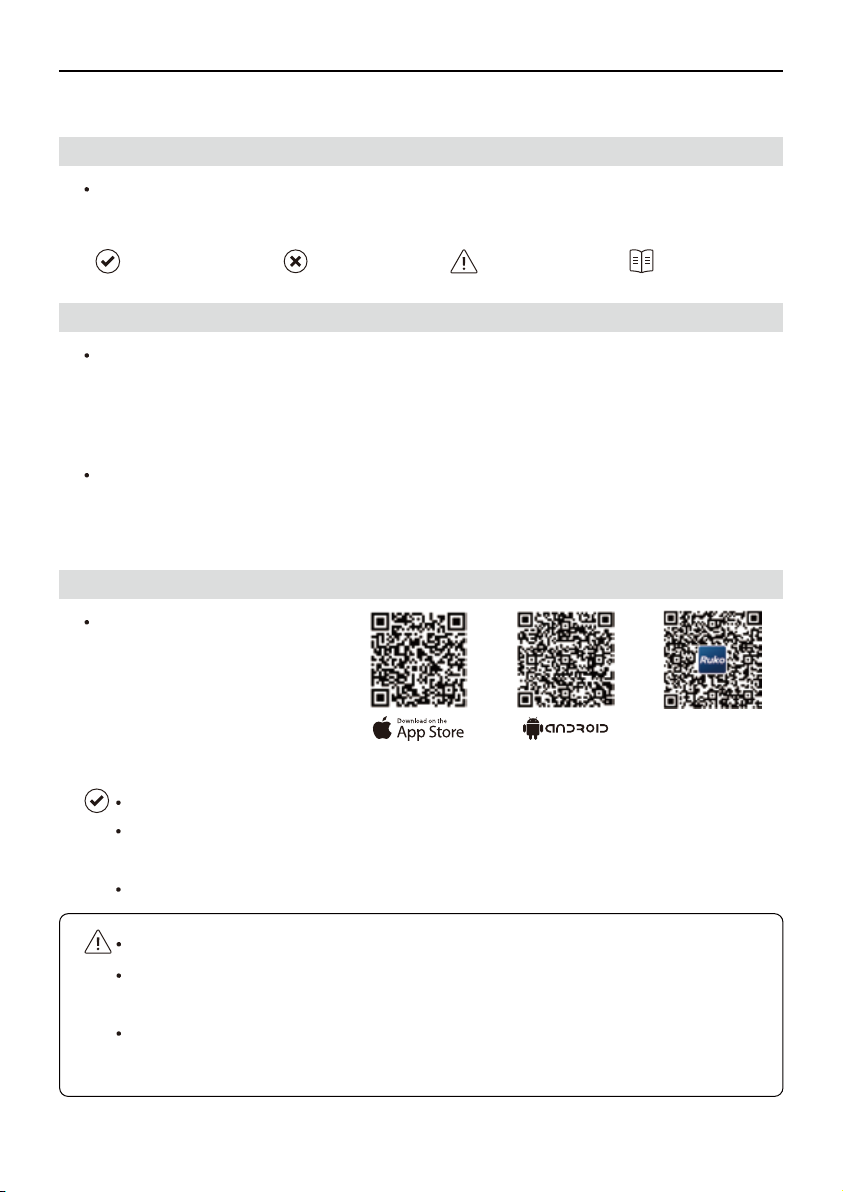
Make sure to use the Ruko GPS
app during flight. Scan the QR
code on the right to download
the APP.
1.3 Download the Ruko GPS App
Android System : The Android version of Ruko GPS is compatible with Android v5.0
and later.
For the first flight, please check the flight guidance video.
iOS System : The iOS version of Ruko GPS is compatible with iOS v9.0 and later.
①
②
③
Flight Guidance
Video

U11Pro User Manual
2 Package Contents
Drone (no battery) Transmitter Drone Battery
Phone Holder Propeller A
Propeller B
USB Charging Cable
Copyright ©2021 Ruko All Rights Reserved.4
User ManualScrewdriver Screw
Disclaimer and Safety Guidelines Quick Start Guide
* The content of the package is subject to the actual product

Copyright ©2021 Ruko All Rights Reserved. 5
U11Pro User Manual
Thank you for purchasing from Ruko. Please read all instructions and warnings carefully
before operating. Please also keep this instruction manual for future reference and
maintenance.
The U11 Pro Drone is NOT a toy and is not suitable for people under the age of 14.
It requires correct assembly and debugging to avoid any accident before every flight.
Inappropriate use of the product could result in personal injury or property damages.
In the event of a problem during use. operating, or maintenance, please feel free to contact
our after sale service team.
This drone is equipped with Optical Flow Positioning and GPS Positioning systems. It can
fly indoors and outdoors and has functions such as Return To Home, Route Planning, Follow
Me, and Point of Interest.
3.1 Important
3.2 U11 Pro Drone Diagram
3 Drone Presentation
Front Camera
Rear
Propeller A
Propeller B
Rear folding arm
Front folding arm
Propeller B
Propeller A
Rear folding arm
Front folding arm

U11Pro User Manual
Camera Profile
Ruko U11 Pro drone is equipped with a 120° wide-angle camera, and the tilt angle is adjust-
able from -90° to 0°.
Storing Photos and Videos
Take photos or record videos without an SD card inserted. The file will be directly stored on
the mobile device.
Insert the SD card, and the video pixels stored in the SD card are better.
3.3 Camera
Front LED (Red)
Power switch
Battery
Front
Rear
Front LED (Red)
SD card slot
Battery Indicator
Rear LED (Green)
Copyright ©2021 Ruko All Rights Reserved.
6
SD card is not included
Refer to the page 13 to know how
to adjust the angle of the camera.
0°
-90°

Do NOT remove the SD card from the drone while it is powered on. Otherwise, the
SD card may be damaged.
Before shooting important photos or videos, shoot a few images to test the
camera is operating correctly.
Make sure to power off the drone correctly. Otherwise, the camera parameters
will not be saved and any recorded videos may be damaged. Ruko is not responsible
for any failure of an image or video to be recorded or having been recorded in a way
that is not machine readable.
Click the SD card icon to format the SD card and select FAT32 as the file
system at the same time.
The capacity of SD card must be 32GB or smaller.
U11Pro User Manual
Take photos or record videos without an SD card inserted. The file will be directly stored on
the mobile device.
Insert the SD card, and the video pixels stored in the SD card are better.
Storage Mode Photo Resolution Video Resolution
Mobile Phone 3840x2160P 1280x720P
SD Card 2048x1152P 2048x1152P
Copyright ©2021 Ruko All Rights Reserved. 7

Copyright ©2021 Ruko All Rights Reserved.
8
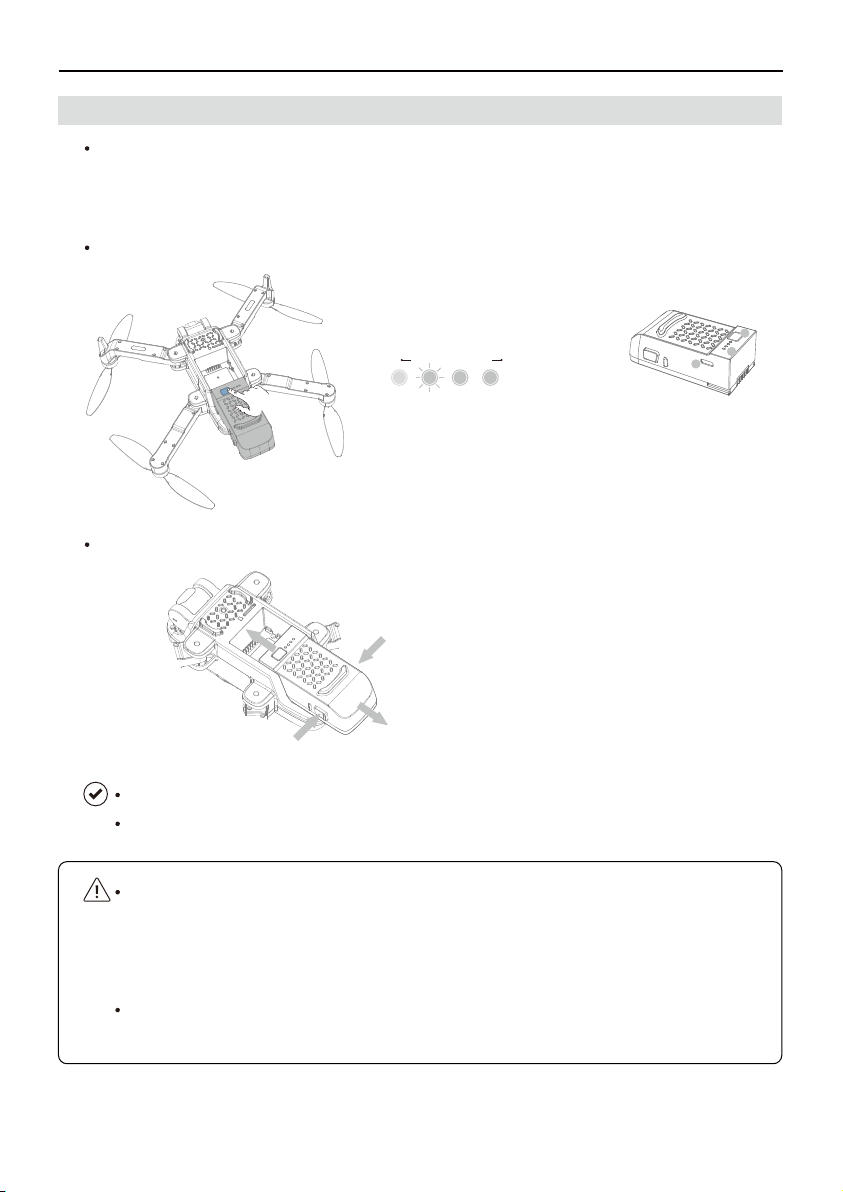
Installing: Install the Intelligent Flight Battery in the drone before use. Insert the
battery in the battery compartment and secure the battery clamp. A clicking sound
indicates the battery is fully engaged. Make sure that the battery is fully inserted
and the battery cover is secure in place.
Removing: Press the battery clamp and detach the battery from the battery
compartment to remove it.
The Ruko U11 Pro Intelligent Flight Battery is a 7.6 V, 1900 mAh battery with smart charging
and discharging functionality. Refer to the Ruko U11 Pro Disclaimer & Safety Guidelines on
the battery before use.
U11Pro User Manual
Battery Diagram
Installing/Removing the Battery
3.4 Intelligent Flight Battery
Low Electricity High
①
Power on/off
②
Battery LED Light
③
Type-C charging port
Tips: Press the power button for 3 seconds to power on/off.
1
3
2
①
Press the clamp
Press the clamp
①
②
Remove it
Installing: Insert it in the battery compartment
Removing:
Make sure that the battery is mounted firmly before flying.
DO NOT detach the battery when the drone is powering on.

U11Pro User Manual
Precautions for Charging
5V/2A~3A
Battery
LED lights are flashing when it's charging
All lights stay on when it's fully charged
Original USB cable
Refer to the Ruko U11 Pro Disclaimer & Safety Guidelines before use.
Users take full responsibility for all usage and operations.
Refer to the following table to understand the status of the different indicators.
3.5 Drone Status Indicator
①
②
③
Front LED Light
④
Front LED Light Battery LED Light
Rear LED Light
Indicator status Meaning
The Front LED light (Red) is flashing slowly,
Rear Led light (Green) stays on and then goes off
The Rear LED light (Green) is flashing slowly,
Front LED lights (Red) stay on
All LED lights are flashing alternately
First, all LED lights are flashing quickly, then all
LED lights are flashing alternately
All LED lights stay on during outdoor
The power of the drone is turned on
Horizontal calibration is completed
Vertical calibration is completed
Gyroscope calibration is completed
The searching GPS signal is successful
Copyright ©2021 Ruko All Rights Reserved. 9

Install carefully. Failure to comply with instructions could result in personal injury
and property damage.
Make sure the propeller is properly installed, or the drone might not work normally.
Only use the propeller accessories provided by RUKO, or it may damage to the drone.
U11Pro User Manual
3.6 How To Replace the Propeller
①
Make sure the mark of the new propeller must be matched with the arm.
Loose the screws of motors.
②
Take out the damaged propeller.
③
Replace damaged blades with new ones.
④
Install propeller securely and tighten screws.
⑤
Complete.
⑥
Copyright ©2021 Ruko All Rights Reserved.
10

Copyright ©2021 Ruko All Rights Reserved. 11
U11Pro User Manual
3.7 How To Replace the Arm
①
Make sure the new arm is the correct one for replacement.
Loose the screws of the arm.
②
Remove the drone cover.
③
Melt the connected wire(s) using welding tool and remove it, and then replace the damaged
arm with new ones.
④
Re-connects the wire(s) and weld firmly with the welding tool.
⑤
Securely tightened screws.
⑥

Powering On/Off
The remote controller should be fully recharged before use
in the first time.
Know the current battery level through APP while flying. If
the battery level is too low, please stop flying.
U11Pro User Manual
Ruko U11 Pro comes equipped with a remote controller. The built-in battery of the controller
has a capacity of 3.7V 1200 mAh.
4.1 Remote Controller Diagram
Powering On/Off
Charging the Battery
4.2 Using the Remote Controller
4 Remote Controller Presentation
Video
Left Joystick /
Trim (press down)
GPS Switch
Right Joystick
Power Switch Return To Home
Speed Switch
Follow Me Mode Point of Interest Mode
Photo
Adjust Camera Angle
Phone Holder
5V/2A~3A Adapter
(Not Including)
Charging Time:
About 2.5 hours
Original USB cable
Indicators
②①
①
②
③
Copyright ©2021 Ruko All Rights Reserved.
12

Copyright ©2021 Ruko All Rights Reserved. 13
U11Pro User Manual
The remote controller can't work while charging, please fully charged before use.
Refer to Disclamer & Safety Guidelines to get more information about precautions for
charging and daily maintenance of the battery.
Tips: Flying indoors is slower than outdoors.
Controlling the Camera
GPS Button
Adjust Camera Angle Take Photo
Take Video
①
Adjust Camera Angle: Use to adjust the angle of the camera.
①
②
③
①
②
③
①
②
GPS mode is turned on by default.
Long Press to turn off GPS mode, blue LED lights of remote
control goes off.
GPS mode must be turned off when flying indoors.
Speed Switch Button
Default Medium Speed Mode.
Press this button once to enter High-Speed Mode.
Press this button twice to enter Low- Speed Mode.

U11Pro User Manual
4.3 Controlling the Drone Default Setting
Left Joystick Right Joystick
RightLeft
Fly to RightFly to Left
Down
Up
Backward
Forward
Down Down
Up Up
Rotate RightRotate Left
Trun RightTurn Left
Copyright ©2021 Ruko All Rights Reserved.
14

U11Pro User Manual
5.1 App Introduction
5 APP Presentation
①
Back: Tap to return to the home screen.
One Key Take Off/Landing: Tap the icon to initiate auto take off or landing.
②
RTH: Tap the icon to initiate Smart RTH and have the aircraft return to the Take off Point.
③
More Functions: Tap the icon to display the menu for more functions.
④
GPS Status: Displays the current GPS signal strength.
⑤
12
11
GPS Mode
Joystick GPS follow Filters VR
WayPoint Orbit Camera Angle
D:0.0m H:0.0m VS:0.0m/sDS:0.0m/s
2
3
4
13 14 15
5 6 7 8
10
9
1
8
N
S
M E
Joystick GPS follow Filters VR
WayPoint Orbit Camera Angle
222120
19181716
Copyright ©2021 Ruko All Rights Reserved. 15

11
12
13
14
15
16
17
18
19
20
21
22
⑥
⑦
⑧
⑨
⑩
U11Pro User Manual
Controller Battery Information: Displays the current battery level of the remote controller.
Drone Battery Information: Displays the current battery level of the drone.
System Settings: Tap to view information about Beginner Mode, Flight logs, Calibrate, and
other settings.
SD Card Information: Display the SD card (not included), tap to format the SD card.
Shutter Button: Tap to take a photo.
Record Button: Tap to start or stop recording a video.
Gallery: Tap this button to preview photos and videos.
Attitude Indicator: Displays information such as the orientation and tilt angle of the aircraft.
Flight Telemetry: Displays the distance between the aircraft and the Take-off Point, height
from the Take-off Point.
Flight Speed: Displays the aircraft's horizontal and vertical speed.
Joystick: Tap it to enter joystick control. It has the functions same as the joysticks of remote
control.
GPS Follow: Tap this button to initiate Follow Me function, and tap it again to cancel Follow
Me function.
Filters: Tap this button to initiate the Filters function. There are 6 special photo effects
selected.
VR: Tap this button to initiate the VR function.
WayPoint: Tap this button to initiate the Route Planning function, up to 21 flight points can
be set.
Point of Interest: Tap this button to initiate Point of Interest function. The aircraft circles
around the subject.
Camera Angle: Tap this button to adjust the camera angle.
Make sure to fully charge your mobile device before launching RUKO GPS.
Familiarize yourself with the related regulations in your area. You are solely
responsible for being aware of all relevant regulations and flying in a way that is
compliant.
DO NOT accept phone calls or use texting features during the flight if you are using
a mobile phone as your display device.
The app is designed to assist your operation. Use eyes and sound discretion and DO
NOT rely on the app to control the aircraft.
Copyright ©2021 Ruko All Rights Reserved.
16

Copyright ©2021 Ruko All Rights Reserved. 17
The aircraft will automatically return to the Take-off Point when the battery level is
low. There is two modes in low battery RTH.
When in low battery, it will return to the 30m (98 ft) RTH altitudes above the
Take-off Point, the user can cancel RTH by pressing the RTH button on the APP or
press RTH button on the remote controller, you can cancel RTH and fly it within a
radius of 30m (98 ft) from Take off Point.
When in super low battery, it will return to the 30m (98 ft) RTH altitudes above the
Take off Point, then landing, the user can't cancel RTH but can control the direction
to avoid obstacles while landing.
U11Pro User Manual
5.2 Return to Home
Ruko U11 Pro drone doesn't have obstacle avoidance.
DO NOT turn off the remote control while flying.
The aircraft automatically flies back to the Take-off Point when Smart RTH is initiated, the
aircraft enters Low Battery RTH or Failsafe RTH the during the flight.
Waiting for GPS signal 8
D:0.0m H:0.0m VS:0.0m/sDS:0.0m/s
N
S
M E
If the GPS signal is sufficient, Smart RTH can be used to bring the aircraft back to the Take
off Point.
Smart RTH is initiated either by tapping in RUKO GPS APP or by pressing the RTH button on
the remote controller.
Exit Smart RTH by tapping in RUKO GPS or by pressing the RTH button on the remote controller.
The default RTH altitude is 20m (65.6 ft) . Tap the button to enter to close beginner mode, then
set the return altitude as you want.
If the altitude of the drone is less than 20m (65.6 ft) , it ascends to the 20m (65.6 ft) RTH altitude and
then flies back to the Take-off Point.
Smart RTH
Low Battery RTH
Low Battery RTH is triggered when the Intelligent Flight Battery is depleted to the point that
the safe return of the aircraft may be affected.

U11Pro User Manual
Copyright ©2021 Ruko All Rights Reserved.
18
Point of Interest is initiated either by tapping in RUKO GPS APP or by pressing
the Point of Interest button on the remote controller. And the remote controller
sounds beeps to start the Point of Interest Mode.
The White LED Light(No.4 Light) of remote control stays on while in Point of Interest
Mode. Exit Point of Interest by tapping in RUKO GPS or by pressing the Point of
Interest button on the remote controller.
The aircraft tracks the static subject in a circle based on the radius and flight speed that is
set, such as building, lighthouse, etc.
Failsafe RTH
If the GPS mode was successfully open, Failsafe RTH automatically activates after the remote
controller signal is lost for more than 5 seconds, it will automatically cancel the Failsafe RTH
when the remote controller receives the signal from the drone, you can continue operating it.
GPS Mode
Joystick GPS follow Filters VR
WayPoint Orbit Camera Angle
D:0.0m H:0.0m VS:0.0m/sDS:0.0m/s
8
N
S
M E
5.3 Point of Interest
How to adjust the circle radius and flight speed?
①
You can push the Right Joystick up or down to adjust the the circle radius.
Other manuals for U11 PRO
3
Table of contents
Other RUKO Drone manuals