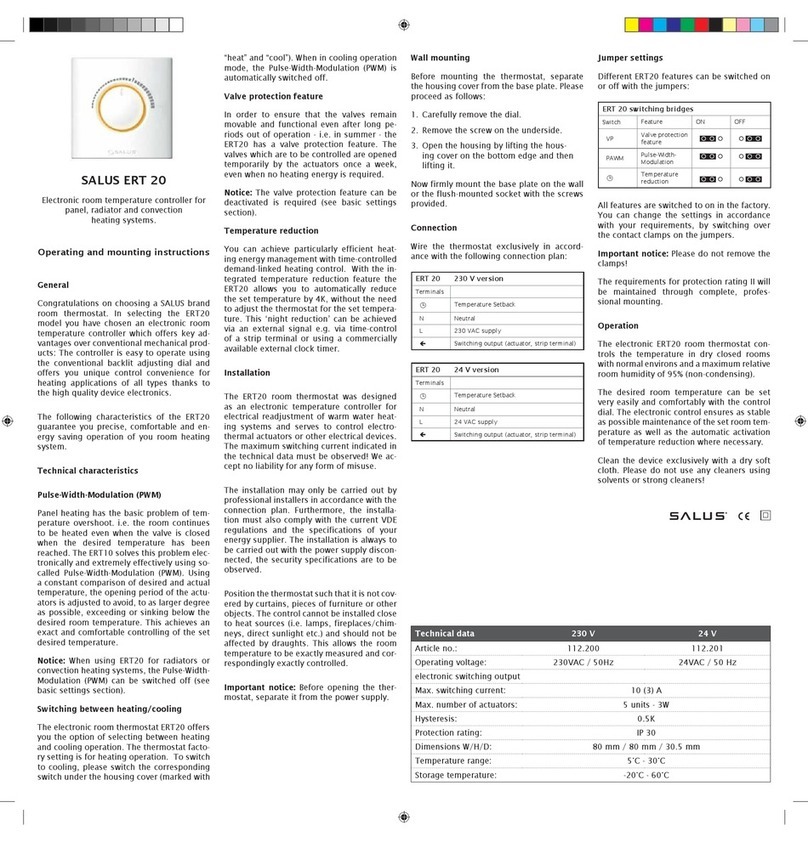
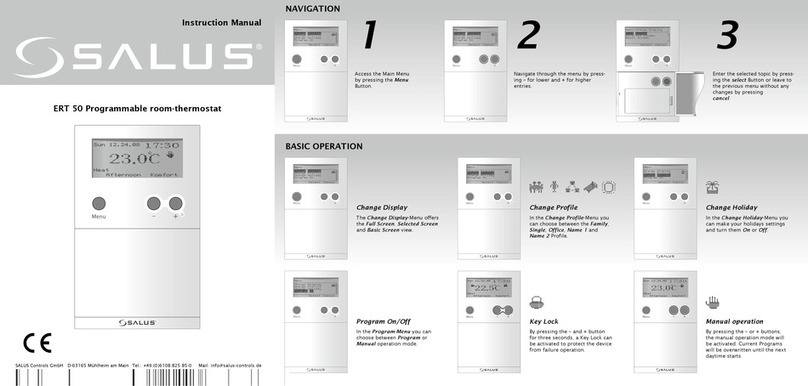
4. There are two mounting holes located at the back
housing. Mark their locations on the wall where the
thermostat to be installed. Drill two 6mm holes, insert
the wall anchors provided, and then mount the ther-
mostat on the wall using the two mounting screws.
Note: Wall anchors are not needed if the thermostat
is mounted on a wooden wall. In this case drill two
2.6 mm holes instead of 6mm.
5.
Wiring: The thermostat is designed to switch
230VAC/7A maximum. Never exceed the limit
or it will damage the termostat or cause fire.
The three terminals of the thermostat are la-
beled NIN (Neutral Input), LIN (Live Input) and
LOUT (Live Output). Identify the wires and
connect them to the thermostat accordingly.
IMPORTANT: Ensure that the electric supply is cut
off before installing the thermostat.
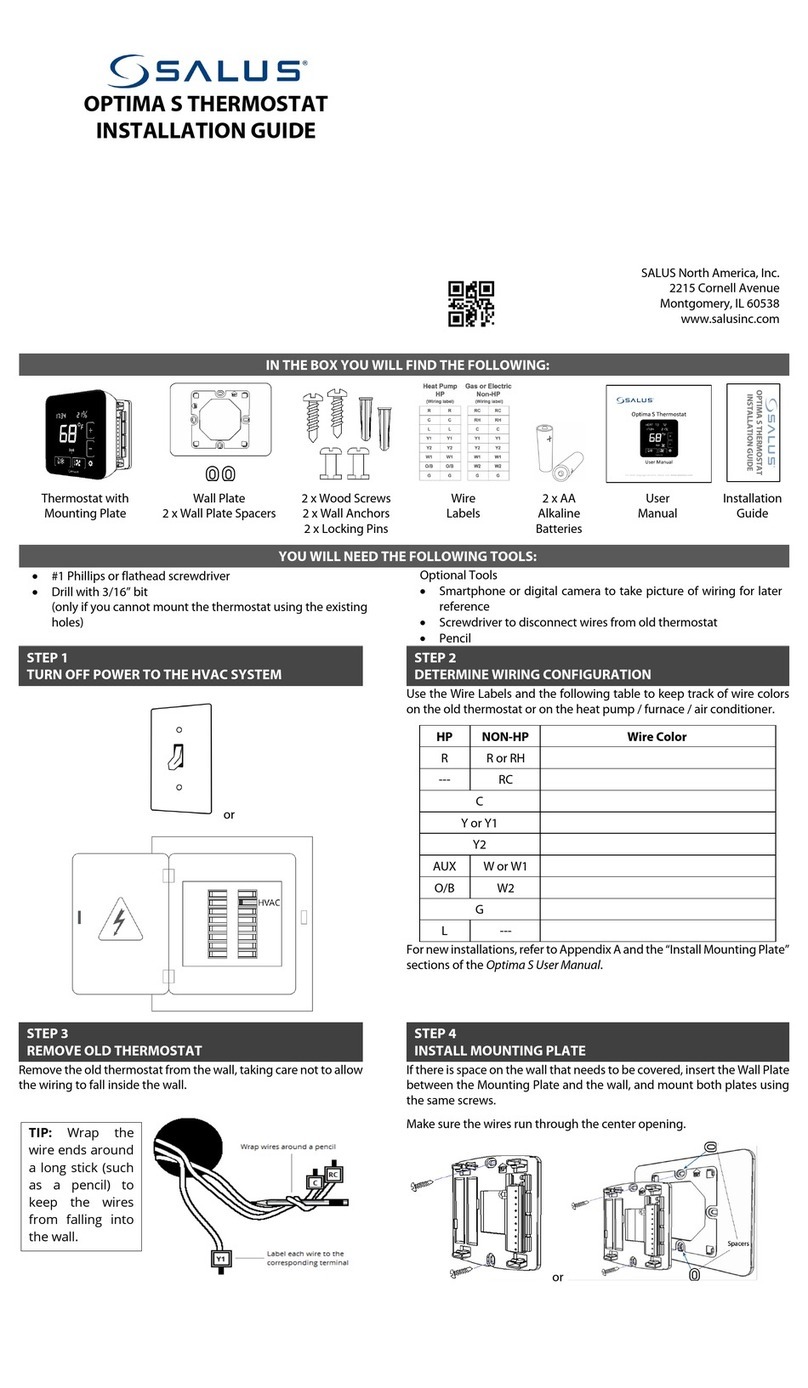
6. Turn the knob so that the marking on the dial meet
the one on the housing, replace the front cover and
tighten the screw.
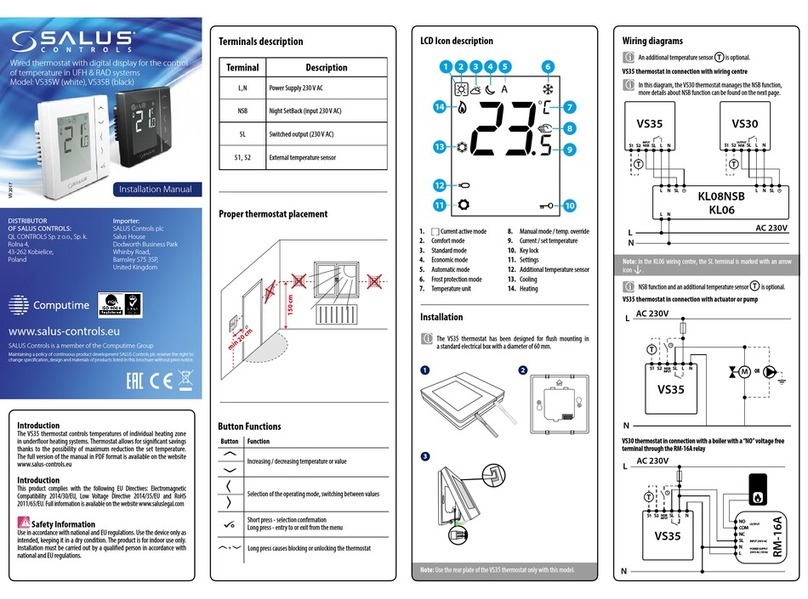
7. Turn on the electric supply. The Heating Indicator
(red LED) will ash twice which indicates successful
installation. The thermostat will then enter a “warm-
up” mode (lasts about 3 to 10 seconds, depending
on different conditions). It is indicated by turning on
the Heating indicator.
Note: If the LED fails to ash, cut off the electric
supply and retry after 30 seconds. (“To cut off” the
electric supply means to cut off the electric input
to the thermostat terminals, but not by setting the
thermostat switch to OFF.)
THERMOSTAT TH-3
Line Voltage Thermostat with Setback function
Instruction Manual
TH-3 Line Voltage Thermostats are designed for tempe-
rature control of a heating system. The device incorpo-
rates HEAT/OFF function selection. TH-3 also includes
the feature of set-back temperature for energy saving
purposes. The thermostats are intended for indoor use.
Typical applications include residential quarters, ofces,
schools, workshops and retail outlets, etc.
Technical data
Type: 230VAC Line voltage thermostat
for single stage heating system
Temperature control range: 5°C - 30°C
Set-back Temperature (TH-3): 5 °C
Set-back period (TH-3): 6 hours, repeated
daily
Maximum switching voltage: 250VAC, 50/60Hz
Maximum switching current: 7A resistive,
3A inductive
Control switch: MCU controlled
relay switch
System indication:
Output status indicated by an
LED Set-back condition
indicated by a bicolor LED for
indication of set-back mode
and set-back temperature
Operating temperature: 0°C to 40°C
Storage temperature: -20°C to 60°C
Installation instructions
1. IMPORTANT: Ensure that the electric supply is cut
off before installing the thermostat
2. Select a suitable location for the thermostat: it should
be where free air can be reached and far away from
heat sources, e.g., TV set, furnace or direct sun
light, etc. It is recommended that the thermostat be
mounted about 1.5m above the oor.
3. Open the front cover of the thermostat by removing
the screw at the bottom of the thermostat.
GB
IM-TH3-GB-01
Operating Instruction
1.
To turn on thermostat control, set the Slide Switch to
HEAT. This will enable the room temperature control.
2. To turn off the thermostat control, set the Slide Switch
to OFF. This will turn off the room temperature control
(heating system will always turn off).
3. Room temperature is adjusted by setting the Tem-
perature Setting Dial.
4. When the heating system is turned on, the Heating
Indicator will turn on.
Note: To prevent rapid cycling, there is a built-in swit-
ching time delay. The thermostat may not respond
instantly when the temperature setting is changed.
Automatic Setback temperature
Setback temperature is an energy saving feature. It
lowers the room temperature at night (to save ener-
gy) and returns to normal setting in the daytime (for
comfort).
The Setback temperature of TH-3 is 5 degrees lower
than the current dial setting. i.e., If the dial is set at 22°C,
then the Setback temperature is 17°C. The Setback
period of TH-3 is 6 hours.i.e., If the thermostat changes
to Setback temperature at 23:00, then it will return to
normal setting at 05:00. The Setback - normal tempera-
ture cycling will repeat everyday until it is disabled.
Operation:
1. Press the Setback Button „)“ to change to Set-back
temperature. The Setback Indicator (bicolor LED)
will turn yellow.
2. Six hours later after changing to Set-back temperatu-
re, it will return to normal temperature. The Setback
Indicator will change to green.
3. At the same time next day, the thermostat will return
to Setback temperature again.
4. To disable setback temperature, press Setback Buton
again. The Set-back Indicator will turn off
Salus Controls plc
Salus House,
Dodworth Business Park South,
Dodworth, Barnsley, S75 3SP
Web: www.salus-tech.com


