SAMCHULLY PAC User manual

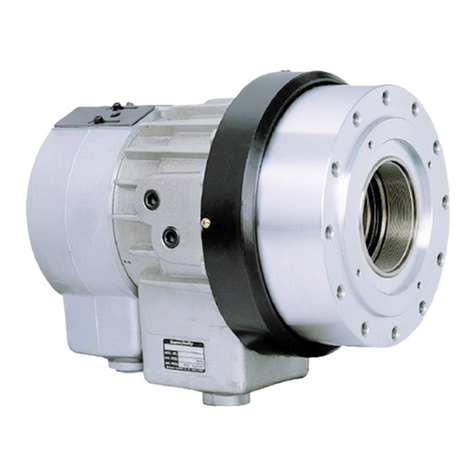
Mega-Bore Pneumatic Self-Contained Chuck
PAC
Instruction Manual
대관통경 공압형 엑츄에이터척 취급설명서

Please read and understand DANGER/
WARNING items in this maunal before
operating the chuck.
Please keep this manual by your side
for answers to any questions you may
have and to check.
척을 조작하기 전에 이 설명서의 위험/경고 항
목을 잘 읽고 숙지해 주십시오.
이 설명서를 궁금한 사항이나 점검할 사항 등
필요할 때 참조할 수 있도록 잘 보관하십시오.
IMPORTANT
중요
Model Number
PAC Series

3
Instruction Manual
Instruction Manual
삼천리기계의 제품을 사용해 주셔서 진심으로
감사 드립니다. 본 취급설명서에 따라 제품의
사용방법을 바르게 이해하시고, 귀사의 생산에
기여할 수 있도록 활용하여 주십시오.
또한, 알아두면 편리한 제품의 성능 등에 관하여
유의사항으로 설명해 두었습니다. 본 취급설명
서는 분실되지 않도록 항상 제품 가까이에 보관
하여 주십시오.
면책과 취급설명서의 사용법에 관하여
이 제품은 선반 주축의 양단에 설치되어, 주로
유정관 등의 긴 파이프를 파악하여 가공하는데
사용됩니다. 이 제품은 공작물을 고정하기 위
한 죠를 포함하고 있으며, 그것들은 척에 내장
되어 있는 에어실린더를 통해 작동합니다. 이
이상의 용도로 사용하는 경우에는 대리점이나
소비자 상담실에 문의하여 주시기 바랍니다.
본 취급설명서의 경고 사항에 따르지 않아 발
생하는 인사사고, 사망, 상해, 상실에 관하여는
책임을 지지 않습니다.
본 취급설명서의 내용은, 여러 환경에 의해 운
전, 조작, 점검, 보수시에 잠재하고 있는 위험
을 모두 예측하고 있는 것이 아닙니다. 할 수
없는 일, 해서는 안되는 일이 무수히 존재하고
있습니다. 본 취급설명서에는 그 전 사항을 모
두 나열하고 있지는 않습니다. 그러므로, 본 설
명서에서 ‘가능하다.’ 또는 ‘해도 좋다.’라고 기
재되어 있지 않는 한, ‘가능치 않다.’, ‘해서는 안
된다.’로 해석하시기 바랍니다. 본 설명서에 기
재되어 있지 않은 운전, 조작, 점검, 보수를 행
하는 경우, 안전에 관련된 의문이 생길시에는
대리점 또는 소비자 상담실에 반드시 확인하여
주시기 바랍니다.
제품의 보증기간은 구매 후 1년이며, 보증서
는 설명서 마지막 부분에 있습니다. 제품의 순
정부품 이외의 부품을 사용했을 경우 발생하
는 인사 사고(사망, 상해, 손실 등)에 관하여는
책임을 지지 않습니다. 또한, 순정 부품 이외의
가 제작한 부품을 사용하신 경우, 제품에 대한
전 보증은 무효화됩니다.
Thank you so much for choosing Sam-
chully. Please read this manual care-
fully and fully understand the pro-
cedures for installation, operation,
inspection and maintenance before
operating the product. Keep this
manual handy as it contains detailed
information on product functionality.
Disclaimer and how to use the
instruction manual
This product is mounted at both ends
of the lathe spindle, and is mainly
used to identify and process long
pipes such as oil wells. This product
contains jaws to hold the workpiece,
and they are operated via an air
cylinder built into the chuck. If you
want to use it for more than this,
please contact your dealer or
customer service center. We are not
responsible for any personnel
accidents, death, injury, or loss
caused by not following the warnings
in this instruction manual.
The contents of this instruction
manual do not predict all potential
risks during operation, inspection
and maintenance depending on
various environments. There are count-
less things that can’t be done and things
that shouldn’t be done. This instruction
manual does not list all of them.
Therefore, in this manual, ‘it is
possible’ or, unless it is written as ‘You
may do it’, please interpret it as
‘Impossible’ or ‘You must not’. If you
are operating, inspecting, or performing
maintenance other than those
described in this manual, or if you
have any questions about safety, be
sure to check with your dealer or
customer service center.
The warranty period of the product
is one year after delivery, and the
warranty is located at the end of the
manual. We are not responsible for
personnel accidents (death, injury,
loss, etc.) that occur when parts oth-
er than genuine parts of the prod-
uct are used. In addition, if you use
parts manufactured by , other than gen-
uine parts, the entire warranty on the
product will be void.
머리말 / Precautions /
Power Chuck
4Power Chuck
경고 용어
안전 경고 기호
안전하게 사용하기 위해서 필요한 경고사항
을 본서에 기재했으니, 반드시 읽어 주십시오.
문장 중의
!
마크는 특히 주의하여 주십시오.
산업용 기계이므로 사용자 또는 이 장비를 사
용하는 다른 사람에게 위험할 수 있는 항목이
나 조작에는 “안전 경고 기호” 를 사용하여 사
용자의 주의를 환기시킵니다. 안전 경고 기호
로 표시한 지침을 잘 읽고 반드시 준수해 주
십시오.
적절한 안전 절차와 지침을 준수하지 않으면
사망에 이르거나 중상을 입게 되는 매우 위험
한 상황을 나타냅니다.
적절한 안전 절차와 지침을 준수하지 않으면
사망에 이르거나 중상을 입을 수 있는 잠재적
으로 위험한 상황을 나타냅니다.
적절한 안전 절차와 지침을 준수하지 않으면
가벼운 상처나 부상을 입을 가능성이 있는 잠
재적으로 위험한 상황을 나타냅니다.
제품의 성능 및 오류나 실수를 막기 위한 지
침입니다.
Warning symbol
To ensure safe operation, please read
this instruction manual and pay
particular attention to the
!
symbol
which emphasizes important
information.
!
Warning term
Indicates an imminently hazardous
situation which, if not avoided, will result
in death or serious injury. These warning
messages include the preventive
actions that are indispensable to
avoiding danger.
Indicates a potentially hazardous
situation which, if not avoided, will
result in death or serious injury. These
warning messages include the preventive
actions that are indispensable to
avoiding danger.
Indicates a potentially hazardous
situation which, if not avoided, could
result in minor injury or machine
damage.
Instructions for optimal performance
and avoiding errors or mistakes.
DANGER
DANGER
위험
DANGER
危险
WARNING
WARNING
경고
WARNING
警告
CAUTION
CAUTION
주의
CAUTION
注意
IMPORTANT
IMPORTANT
유의사항
IMPORTANT
危 险
머리말 / Precautions /

Instruction Manual
5
Instruction Manual
목 차
사용 및 안전을 위하여 8
개요 15
2-1. 모델형식 표기 15
2-2. 구조 작동 15
설치 16
3-1 설치 16
3-2 체결 21
기능 22
4-1 작동원리 22
4-2 공기전달 시스템 23
4-3 파일럿 컨트롤 체크밸브 24
4-4 클램핑 또는 죠 움직임 24
사용상의 주의 25
5-1. 파악력과 회전속도의 관계 25
5- 2. 파악중심 높이와 정적 파악력 및 플런져 추력과의 관계,
탑-죠의 질량 모멘트와 파악력 손실 관계 28
5-3 소프트 죠의 성형 31
5-4. 사용시 주의사항 35
5-5. 시운전 37
유지보수 39
6-1. 유지 39
6-2. 급유 41
6-3. 하드죠와 소프트 탑죠 42
6-4. 분해와 조립 43
고장 및 대책 45
사양 48
부품도 49
01.
02.
06.
05.
04.
03.
07.
08.
09.

6Power Chuck
Power Chuck
Operation for safety 8
Summary 15
2-1. Model coding 15
2-2. Construction and operation 15
Mounting 16
3-1. Mounting 16
3-2.
Tightening
21
Function 22
4-1. Principle of Operation 22
4-2. Air transmission 23
4-3. Pilot controlled check valve 24
4-4. Clamping or jaw actuation 24
Precautions 25
5-1. Relation of total gripping force and speed 25
5-2. Relation of grip center height grip force and
plunger input force, Relation of top jaw mass
moment and grip force loss 28
5-3 Forming of soft jaws 31
5-4. Precautions for use 35
5-5. trial run 37
Maintenance and inspection 39
6-1. Commissioning 39
6-2. Lubrication 41
6-3. Hard and soft top jaws 42
6-4. Disassembly and assembly 43
Trouble shooting 45
Specification 48
Parts list 49
01.
02.
06.
05.
04.
03.
07.
08.
09.
Contents

7
Instruction Manual
Instruction Manual
01.
02.
06.
05.
04.
03.
07.
08.
09.

Power Chuck
8Power Chuck
ON
OFF
NO!
사용 전에 알아두셔야 할 것, 지켜야 할 것을 정
리해 놓았습니다. 반드시 읽어주십시오.
당사는 이 취급설명서에 따르지 않은 경우에
발생하는 불량, 사고에 관한 책임은 지지 않습
니다.
Please read this book before using
th chuck, and follow directions given
herein. We can not assume any
responsibility for any damage or
accidents caused through things
that is not specified in this manual.
척 회전 중에 전환밸브를 조작하시 마십시오.
Never operate selector valve and solenoid
valve during spindle rotation.
문을 열고 스핀들을 회전시키면 안됩니다.
Never start the machine with door open.
신체의 일부나 의복이 말려들어가 부상당하는 위험이 있습니다.
Danger by catching operator in a machine.
공작물 또는 죠를 교환할때는 스핀들을 반드시 정지 시킨후 문을 열고 교환하십시오.
After spindle should be stopped, please open the door and change it.
Danger by discharge of chuck or workpiece.
회전 중에 조작하면 파악된 공작물이 이탈(비산) 될 위험이 있습니다.
Danger by discharge of clamped workpiece during spindle rotation.
척의 회전속도는 최대 허용치를 확인하시고 회전속도
제한치를 넘지 마십시오.
Do not exceed recommended speed of
chuck related with Max. permissible input
force.
공작물 이탈 (비산) 의 위험이 있습니다.
Danger by discharge of chuck or workpiece.
Power switch off before setting, inspecting,
lubricating or changing the chuck.
척의 설치, 보수점검, 윤활, 수리 시에는 반드시 설치기
계의 전원을 끄십시오.
비산
Scatter
分散
수동전환 밸브
솔레노이드 밸브
Manual selector valve
Solenoid valve
手动转换阀
电磁阀
DANGER
위험
DANGER
危险
01. 사용 및 안전을 위하여 / Operation for safety /

Instruction Manual
9
Instruction Manual
윤활유 (그리스) 부족시 파악력이 저하되어 공작물 이탈 (비산) 위험이 있습니다.
Danger by discharge of workpiece related with lowering gripping
force caused by unsufficint lubrication.
공압은 0.8MPa (8.2 kgf/cm^2)을 넘기지 마시오.
내압점검 : 최소 2주/1회, 꼭 척 내압 유지상태를 측정할 것.
Do not exceed Max 0.8MPa (8.2 kgf/cm^2)
in air pressure
Internal pressure check: At least 2 weeks/1 time, be sure to measure the state of maintaining the internal
pressure of the chuck.
척이 파손되어 물려진 공작물이 이탈 (비산) 될 위험이 있습니다.
에어 누출시 파악력이 저하되어 공작물이 이탈(비산)의 위험이 있습니다.
에어 누출이 확인된 경우는 꼭 수리를 하십시오. 반드시 언클램프 상태에서 척 측면에
압력계를 부착, 에어 압력을 허용 최대 압력으로 설정하였을 때, 압력 손실이 1시간에
0.5bar를 넘을 경우 수리가 필요합니다.
점검후 볼트를 반드시 정 위치에 제대로 부착해야 하며, 그렇지 않을 경우 에어 누출의
원인이 될 수 있습니다. 이때 동봉된 다른 볼트로 교체해 주십시오.
Danger by discharge of chuck or workpiece in case of damaging of
chuck.
When air leaks, the gripping force is reduced, and there is a risk of the
workpiece falling off (scattering).
If an air leak is confirmed, be sure to repair it. When the pressure
gauge is attached to the side of the chuck in the unclamped state
and the air pressure is set to the maximum allowable pressure, repair
is required if the pressure loss exceeds 0.5 bar per hour.
After inspection, the bolts must be properly attached to the correct
position, otherwise it may cause air leakage. In this case, replace it
with the other included bolts.
Do not forget to grease chuck.
윤활은 확실히 행하여 주십시오.
그리스 주입기
그리스 니플
압력계
Grease gun
Grease nipple
Pressure gauge
黄油枪
油嘴
压力计
Pressure
Guage
WARNING
경고
WARNING
警告

Power Chuck
10 Power Chuck
표준 소프트 죠가 아닌 특수 탑죠를 사용할 경우 공압과
최고 회전수를 낮추어 주십시오.(Page28~31)
If using a special top jaw other than the
standard soft jaw, lower the pneumatic
pressure and top speed.(Page28~31)
긴 공작물을 가공할 때는 방진구 및 심압대로 센터를
지지하여 주십시오.
When machining a long workpiece, support
it with a center, tailstock or steady rest.
긴 공작물을 가공할 때 공작물의 이탈 (비산) 위험이 있습니다.
Danger by discharge of workpiece, if it is too long.
높은 죠의 사용 시, 에어 압력을 낮추지 않으면 척이 파손되어 물려진 공작물이 이탈
(비산)될 위험이 있습니다.
When using a high jaw, if the air pressure is not lowered, there is a risk
of the chuck breaking and the bitten workpiece dislodging (scattering).
클램프 구간에서만 소재가 클램프 되어야 합니다.
The workpiece should be clamped only in
the clamp section.
C
R
클램프 가능 구간
특수 죠 높이
표준 소프트 죠 높이
공작물
Special jaw height
Standard soft jaw height
Workpiece
공작물 심압대
센터
Workpiece Tailstock
Center
WARNING
경고
WARNING
警告
척, 죠, 공작물에 충격을 가하지 마십시오.
Never hammer chuck, jaws or gripped
workpiece.
척 파손시 공작물 이탈 (비산) 될 위험이 있습니다.
Danger by discharge of chuck or workpiece in case of
damaging of chuck.
NO!
SHOCK
R(급속 스트로크) 구간에서 파악할 경우, 파악력 부족에 의해 공작물 이탈(비산)의 위
험이 있습니다. (Page37)
When grasping in the R (Rapid Stroke) section, there is a risk of the
workpiece falling off (scattering) due to insufficient gripping force.
(Page37)

Instruction Manual
11
Instruction Manual
주류 또는 약물을 마시고 조작하는 것은 절대엄금하십시오.
Never attempt to operate a machine while
under the influence of alcohol or drugs.
척 파손시 공작물 이탈 (비산) 될 위험이 있습니다.
Danger by discharge of chuck or workpiece in case of
damaging of chuck.
판단력저하 또는 오조작의 위험이 있습니다.
Danger by operation fault and lowering judgement.
공작물의 내경을 클램프하지 마십시오.
Do not clamp the inner diameter of the workpiece.
Do not attempt to modity chuck.
척을 임의로 수정 또는 개조하지 마십시오.
NO!
NO!
주류, 약물
Alcohol, Drugs
급속 이송구간의 스트로크는 사용할수 없습니다. 하지만 내경을 파악할 경우, 급속 이
송구간에 소재를 클램프 할 위험이 있으며 이때 공작물이 이탈 (비산) 될 위험이 있습니
다. 또한, 내경 클램프시에는 압력저하 체크밸브가 작동하지 않습니다.
The stroke in the rapid traverse section cannot be used.
However, if the inner diameter is determined, there is a risk of clamp-
ing the workpiece in the rapid traverse section, and there is a risk of
the workpiece falling off (scattering). Also, the pressure drop check
valve does not work when clamping the inner diameter.
NO!
WARNING
경고
WARNING
警告

Power Chuck
12 Power Chuck
공작물을 파악시킬 때 손가락이 끼지 않도록 주의하십시오.
When gripping workpiece, make sure your
hand is out of gripping area.
When lifting chuck, use eyebolt or wire rope.
척 탈부착시 아이볼트 및 와이어로프를 사용하여 주십시오.
낙하시 신체의 일부가 손상될 위험이 있습니다.
Danger by dropping.
손가락이 부러지거나 절단의 위험이 있습니다.
Danger or finger broken or cut.
아이볼트
와이어로프
선반
Eyebolt
Wire rope
Lathe
CAUTION
주의
CAUTION
注意
Secure clamp bolts with specified torque.
볼트는 적정 토크로 체결하여 주십시오.
토크가 부족하거나 클 경우 볼트가 파손되어 척이나 공작물이 비산하여 위험합니다. 볼트를 조일 경우 스핀들과 척이 회전하지 않도록 고정시키십시오. 작업시 손이 미끄러져 부
상의 위험이 있습니다. 동봉된 WRENCH는 임시적인 조임 용으로 사용, 토크 관리가 가능한 공구를 사용하여 주십시오.
If the torque is insufficient or too large, the bolt may be damaged and the chuck or workpiece will scatter, which is dangerous. When tightening bolts,
make sure the spindle and chuck do not rotate. There is a risk of injury due to slipping of the hands while working. Use the included WRENCH for
temporary tightening, and use a tool that can manage torque.
척 체결 볼트
죠 체결 볼트
Chuck mounting bolt
Jaw mounting bolt
볼트크기
Bolt size
체결토크
Tightening torque
M5 7.8 N.m (0.8kgf.m)
M6 12.7 N.m (1.3kgf.m)
M8 38.2 N.m (3.9kgf.m)
M10 72.6 N.m (7.4kgf.m)
M12 106.8 N.m (1.3kgf.m)
M14 170.6 N.m (17.4kgf.m)
M16 250.0 N.m (25.5kgf.m)
M20 402.1 N.m (41.0kgf.m)
M22 539.4 N.m (55.0kgf.m)
M24 666.0 N.m (67.9 kgf.m)
NO!

Instruction Manual
13
Instruction Manual
가공에 필요한 파악력은 가공 테스트에 의해 사용자가
결정, 가공 전에 필요한 파악력이 발생하고 있는지 확
인하십시오.
The gripping force required for machining is
determined by the user through a machining
test, and before machining, confirm that the
required gripping force is being generated.
적정한 파악력이 발생하기 위해 충분한 시간, 에어 공
급이 이루어지도록 회로를 설계하십시오.
Design the circuit to provide sufficient time and
air supply for proper gripping force to occur.
When machining large unbalanced
workpieces, reduce the rotational speed.
불균형한 대형 공작물을 가공하는 경우, 회전속도를 낮
추십시오.
Design the circuit so that there is no air
supply during spindle rotation.
스핀들 회전 중에는 에어 공급이 되지 않도록 회로를
설계하십시오.
공작물의 불균형에 따른 원심력이 발생, 공작물이 이탈(비산)의 위험이 있습니다.
Centrifugal force is generated due to the imbalance of the workpiece,
and there is a risk of the workpiece falling off (scattering).
스핀들 회전 중에 에어를 공급하면 디스트리뷰터 링 내부의 ‘프로파일 씰’이 회전중 마
찰로 손상, 파악력 부족으로 인해 공작물이 이탈(비산)의 위험이 있습니다.
If air is supplied during spindle rotation, there is a risk that the ‘profile
seal’ inside the distributor ring may be damaged by friction during
rotation, and the workpiece may be dislodged (scattered) due to
insufficient gripping power.
필요한 파악력을 얻을 수 있도록 에어 압력을 조절하십시오. 파악력이 부족하면 공작
물이 이탈(비산)의 위험이 있습니다.
Adjust the air pressure to get the grip you need. Insufficient gripping
power can cause the workpiece to fall out (scatter).
파악 조작을 하면 죠는 곧 작동하여 공작물을 파악하지만, 척 내압이 설정 압력에서 안
정될 때까지 적당한 파악력은 발생하지 않습니다. 가공물 없이 완전 클램프 상태에서
4~5초 정도 추가로 에어가 공급되도록 회로 설계를 하여야 합니다.
척의 내압이 설정 압력에 도달하지 않으면, 파악력 부족으로 공작물이 이탈(비산)하여
위험합니다. (필요시 언클램프 상태에서 척 측면의 PT Plug를 탈착, 압력계를 부착하
여 필요 시간을 확인하여 주십시오.)
When the gripping operation is performed, the jaws will immediately
operate to grip the workpiece, but adequate gripping force will not be
generated until the chuck internal pressure stabilizes at the set pressure.
The circuit must be designed so that additional air is supplied for
about 4 to 5 seconds in the fully clamped state without a workpiece.
If the internal pressure of the chuck does not reach the set pressure, the
workpiece may dislodge (scatter) due to insufficient gripping force,
which is dangerous. (If necessary, remove the PT Plug on the side of
the chuck in the unclamped state and attach a pressure gauge to
check the required time.)
WARNING
경고
WARNING
警告

14 Power Chuck
Power Chuck
수직형 선반에서는 사용하지 마십시오.
Do not use on vertical lathes.
1시간 이상 연속으로 사용할 경우, 1시간 마다 ‘압력저
하 체크밸브’를 이용하여 내압의 저하 등 변화가 있는
지 확인하십시오.
When using continuously for more than 1
hour, use the ‘pressure drop check valve’
every hour to check if there is any change
such as a drop in internal pressure.
Maintain an adequate amount of lubricator
oil in the air control unit (one drop per 2-3
clamping cycles), and drain the water inside
the filter regularly.
에어 컨트롤 유닛의 lubricator 오일 양을 적절하게 유
지(2~3 클램핑 사이클 당 한 방울), 또한 필터 내부의
물은 정기적으로 배출시킵시오.
The chuck should not be grasped by the chuck.
If machining is not performed for more than
1 hour from the air supply, check the work-
piece again before machining.
에어 공급으로부터 1시간 이상 가공하지 않을 시에는
가공전, 공작물을 재 파악하여 주십시오.
척으로 척을 파악해서는 안 됩니다.
각 척의 허용 조건을 혼동하기 쉬우며, 사용되는 척에 대해 돌출량이 길어짐에 따라 소
형 공작물을 가공하고자 회전 속도를 높이는 등 허용조건을 넘어서 사용함에 따라 척
이나 공작물이 파손, 비산등의 위험이 있습니다.
It is easy to confuse the permissible conditions of each chuck, and as
the amount of protrusion for the chuck used increases, there is a risk
of breakage or scattering of the chuck or the work piece by exceeding
the permissible conditions, such as increasing the rotational speed to
process small workpieces.
실린더 내부의 녹이 발생하여 동작 불량 또는, 파악력 저하로 공작물이
이탈(비산)의 위험이 있습니다.
There is a risk that the work piece may be dislodged (scattered) due
to the occurrence of rust inside the cylinder, resulting in malfunction
or reduced gripping power.
에어 누출에 의한 척의 내압이 저하되면, 파악력 부족으로 공작물이 이탈(비산)의
위험이 있습니다.
If the internal pressure of the chuck decreases due to air leakage,
there is a risk of the workpiece being dislodged (spattered) due to in-
sufficient gripping power.
에어 누출에 의해 내압이 저하되면 파악력 부족으로 공작물이 이탈(비산)의 위험이 있
습니다. 에어 누출시 반드시 수리 후 사용해 주십시오.
If the internal pressure is lowered by air leakage, there is a risk of the
workpiece falling off (scattering) due to insufficient gripping force.
In case of air leakage, be sure to repair it before use.
칩이나 절삭유가 척 내부에 침입하여 동작 불량이나 파악력의 저하되어 공작물이
이탈(비산)의 위험이 있습니다.
There is a risk that chips or coolant may enter the chuck and cause
malfunction or decrease in gripping power, causing the workpiece to
dislodge (scatter).
CAUTION
주의
CAUTION
注意

15
Instruction Manual
Instruction Manual
개요 / Summary
02. /
2-1. 모델형식 표기
대관통경 공압형 엑츄에이터척, PAC 모델들
의 형식 표기는 아래와 같습니다.
2-2. 구조 작동
대관통경 공압형 엑츄에이터척 PAC는 기본적
으로 척 바디, 백 플레이트, 웨지 플런져, 마스
터 죠, 피스톤, 링, 커버, 디스트리뷰터로 구성
되어 있습니다.
내장된 공압 유닛으로부터 공급받는 에어가 척
내부의 공압회로를 거쳐 웨지 플런져를 전진,
혹은 후진시켜 척에서 필요로 하는 파악력을
제공합니다.
디스트리뷰터의 공압포트로 공급된 공압은 공
압회로와 로크밸브를 통하여 척 내부로 공급되
어 웨지 플런져를 작동시킵니다.
공급된 공압은 로크밸브를 통해 척 내부에서
유지되며 공급이 중단되어도 척 내부의 공압
이 손실되지 않습니다.
압력저하 체크밸브는 내부의 스프링을 이용해
척 내부에 공급된 공압이 일정 수준 이하로 떨
어지게 되면 작동(저속 회전시)하여 정지 신호
를 CNC 기기에 보내줍니다.
2-1. Model coding
The Mega-Bore Pneumatic
Self-Contained Chuck, PAC is model
coded as below.
2-2. Construction and operation
The Standard Mega-Bore Pneumatic
Self-Contained Chuck is basically
composed of chuck body, back plate,
wedge plunger, master jaw, piston,
ring, cover, and distributor.
The air supplied from the built-in
pneumatic unit moves the wedge
plunger forward or backward
through the pneumatic circuit inside
the chuck to provide the visibility
required by the chuck.
The pneumatic supplied to the distributor’s
pneumatic port is supplied to the
chuck through the pneumatic circuit
and the lock valve to operate the
wedge plunger.
The supplied pneumatic pressure is
maintained inside the chuck through
the lock valve, and even if the supply
is stopped, the pneumatic pressure
inside the chuck is not lost.
The pressure drop check valve uses
an internal spring to operate (when
rotating at low speed) when the air
pressure supplied to the chuck falls
below a certain level and sends a
stop signal to the CNC machine.
Standard Mega-Bore Pneumatic
Self-Contained Chuck
표준 대관통경 공압형
엑츄에이터척
PAC 47 191 R
척 호칭경(외경Φ)
관통경 호칭
급속 스트로크
Chuck nominal dia.(O.D.Ø)
Chuck nominal through hole diameter
Rapid stroke
Fig.1
후면
커버
피스톤
웨지 플런져
디스트리뷰터
백 플레이트
프론트 바디
링
마스터 죠
REAR
Cover
Piston
Wedge Plunger
Distributor
Back Plate
FRONT Body
Ring
Master Jaw
정면
FRONT

Power Chuck
16 Power Chuck
3-1. 설치
디스트리뷰터 링 (D-RING)(그림1)
D-RING은 척과 완전히 분리된 부품이며, 척
은 회전체인 반면 D-RING은 비회전체 입니다.
D-RING은 장비에서 D-RING BRACKET을
통하여 고정시킵니다.
장비의 스핀들에 척 아답터를 이용하여 척을 조
립하면, D-RING의 위치(거리)가 결정됩니다.
D-RING BRACKET을 통하여 D-RING을 고
정시키며, 이때 중요한 것은 D-RING과 척 바디
사이의 간격이 1.5mm를 유지하는 것입니다.
1.5mm간격이 유지 되지 않고, 더 작을 경우
에는 D-RING과 척 바디가 간섭이 발생할 수
있으며, 간격이 더 클 경우에는 에어공급이 원
활하지 않아 척의 작동에 문제가 생길 수 있
습니다.
3-1. Mounting
Distributor Ring (D-Ring) (Fig1)
The D-RING is a completely separate
part from the chuck, and the chuck is
a rotating body whereas the D-RING
is a non-rotating body.
D-RING is fixed through D-RING
BRACKET in the equipment.
When the chuck is assembled using
the chuck adapter on the spindle of
the machine, the position (distance)
of the D-RING is determined.
The D-RING is fixed through the
D-RING BRACKET. At this time, the
important thing is to maintain the
1.5mm gap between the D-RING and
the chuck body.
If the distance of 1.5mm is not maintained,
and if it is smaller, the D-ring and the
chuck body may interfere. If the gap
is larger, the air supply is not smooth,
which may cause problems in the
operation of the chuck.
Fig. 2
Check the chuck for any damage.
Check the face and outer diameter
runout of the spindle head and chuck
adapter.
The acceptable value according to
DIN6386 and ISO3089 is 0.005mm.
The surface on which the chuck is
assembled must be within the
standard and clean.
When assembling the chuck and
adapter, consider the length of the
fastening screw. A thread that is
too long may contact the end of the
tapped part being assembled or
damage the spindle.
척에 손상이 있는지 없는지 확인하십시요.
스핀들 헤드과 척 아답터의 면과 외경 런아웃
을 확인하십시요. DIN6386과 ISO3089에
따라 인정되는 수치는 0.005mm 입니다. 척
이 조립되는 면은 반드시 면이 기준치 이내에
들어와야 하며, 깨끗해야 합니다.
척과 아답터 조립시 체결나사의 길이를 고려
하십시요. 너무 긴 나사는 조립되는 탭 가공부
의 끝에 접촉하거나 스핀들에 손상을 줄 수 있
습니다.
Distributor Ring
디스트리뷰터 링
分配盘环
分配器环支架
主轴箱
PAC Chuck
气动起动器卡盘
PAC 척
디스트리뷰터 링 브라켓
Distributor ring bracket
주축대
Head Stock
설치 / Installation
03. /

Instruction Manual
17
Instruction Manual
Fig. 3
디스트리뷰터링 체결부
Screwed face at the distributor ring
将此面固定在分配环上
Type PAC-100560R
ØA 830
ØB
ØC
ØD
880
785
850
30°
30°
B
A
∅6.0
∅6.0
15 15
높이
Height
高
C
D
스핀들 체결부
Screwed face at the spindle box
将此面固定到主轴箱上
INSTALLATION OF D-RING BRACKET
The height of the D-RING BRACKET
is determined by the distance
between the surface where the
D-RING BRACKET will be attached
and the D-RING (1.5mm away from
the chuck body).
The shape of D-RING BRACKET can be
designed as desired. However, when
air is supplied to and discharged
from the chuck, an outlet is required
so that the air can be discharged
smoothly.
The air outlet can have any hole
shape or can be machined into a
groove shape.
At this time, the position of the outlet
should be in the downward direction.
If it is located on the upper side or the
side, cutting oil or foreign substances
may not be discharged after entering
the D-RING BRACKET, which may
cause a problem.
If there is no or small air outlet, the
movement speed of the jaw may be
slow.
When installing D-RING, the D-RING
and chuck body outer diameter and
concentricity must be within 0.1.
If the concentricity is out of 0.1, the air
supply may not be smooth and it will
adversely affect the durability of the
seal inside the D-RING
D-RING BRACKET의 설치
D-RING BRACKET의 높이는 D-RING
BRACKET이 부착될 단면과 D-RING (척 바
디와 1.5mm 떨어진 상태)의 거리로 결정됩
니다.
D-RING BRACKET의 형상은 원하는 데로 설
계 할 수 있습니다. 다만, 척에 에어가 공급되
고 배출될 때 에어가 원활히 배출될 수 있도록
배출구가 필요합니다.
에어 배출구는 홀 형태도 상관없고, 홈의 형태
로 가공해도 괜찮습니다.
이때, 배출구의 위치는 아래쪽 방향에 위치해
야 합니다. 위쪽이나 측면에 위치할 경우, 절삭
유나 이물질 등이 D-RING BRACKET내부로
들어간 뒤 배출되지 않아 문제될 수 있습니다.
에어 배출구가 없거나 작을 경우에 죠의 동작
속도가 느려 질 수 있습니다.
D-RING 설치 시 D-RING과 척 바디외경과 동
심도를 0.1 이내로 맞추어야 합니다.
동심도가 0.1이 벗어날 경우 에어 공급이 원활
하지 않을 수 있으며, D-RING내부의 씰의 내
구성에도 좋지 않은 영향을 주게 됩니다.

Power Chuck
18 Power Chuck
WARNING
WARNING
경고
WARNING
警告
How to install the chuck
Mount the chuck adapter on the
spindle and assemble the chuck on
the adapter.
(D-RING is assembled using a crane
with the chuck hanging over it)
After tightening the chuck bolt,
assemble the D-RING to the D-RING
BRACKET.
Be careful not to damage the D-RING
and SEAL during installation.
After adjusting the chuck outer
diameter runout, and the D-RING
also adjusting the concentricity to
the chuck outer diameter, tighten
the fastening bolts with the specified
torque.
At this time, be sure to check the
1.5mm gap between the chuck body
and the D-ring once again, and if it
does not match, use a washer to
adjust the distance.
Complete the chuck installation by
checking the prescribed outer
diameter runout and concentricity.
There should be no contact between
the D-RING and the chuck body when
the chuck rotates.
After installing the chuck, perform an
operation test using a hose and
fittings of at least 1/2” size or larger, and
then install the top jaw and check if
the chuck’s grip is good. (hold for 1
hour without loss of grip)
척을 설치하는 방법
스핀들에 척 아답터를 장착하고, 아답터에 척
을 조립합니다.
(D-RING은 척에 걸쳐놓은 상태로 크레인을
사용하여 조립)
척 볼트를 체결한 뒤 D-RING을 D-RING
BRACKET에 조립합니다.
설치 시 D-RING 및 SEAL이 손상되지 않도
록 주의하십시요.
척 외경 런아웃을 맞추고, D-RING 또한 척의
외경에 동심도를 맞춘 뒤, 규정된 토크로 체결
볼트를 체결 합니다.
이때, 다시한번 척 바디와 D-RING사이의 간
격 1.5mm를 반드시 확인하며, 맞지 않는 다
면 와셔 등을 이용하여 거리를 맞춰야 합니다.
규정된 외경 런아웃 및 동심도 등을 확인하여
척의 설치를 마칩니다.
척이 회전할 때 D-RING과 척 바디의 접촉이
없어야 합니다.
척의 설치를 마친 후 최소 1/2”크기 이상의 호
스와 피팅을 사용하여 작동 테스트를 하며, 탑
죠를 장착하고 척의 파악력이 잘 나오는지 확
인 합니다. (파악력의 손실 없이 1시간 유지)
The distributor ring must be aligned
with the outside diameter of the
chuck in such a way that a minimum
true-running and face play tolerance
of 0.1 mm is achieved.
디스트리뷰터링은 0.1 mm의 최소 회전정도
및 페이스 플레이 오차가 달성될 수있는 방법
으로 척의 외부 지름과 일치시켜야 합니다.

Instruction Manual
19
Instruction Manual
Fig. 4
2
[1] [2]
6
근접 스위치 / Proximity switch / 接近开关
Pressure drop check valve
The pressure drop check valve
operates when the internal pressure
drops when the chuck is grasping,
and detects it with the proximity
switch to prevent scattering of the
workpiece due to the decrease in
gripping force.
Adjust the internal spring by tightening
or loosening the set screw located on
the front of the chuck.
Therefore, if the internal pressure is
higher than the spring, the pressure
drop check valve does not move.
When the internal pressure is
lowered to a certain pressure due to
air leakage, etc., the pressure drop
check valve is moved by the spring
and the detection plate can be
detected by the proximity switch.
By default, the spring of the pressure
drop check valve is set at 6 bar.
It works when the withstand pressure
drops below about 5 Bar.
Based on this, when supplying air
to the chuck, the sensing plate is
spaced 6mm away from the
distributor ring [2] until the pneumatic
pressure reaches 5 Bar.
As soon as the internal pressure
exceeds 5 Bar, the sensing plate
moves toward the front of the chuck
and maintains a 2mm gap with the
distributor ring. Also, when the internal
pressure is reduced, when the internal
pressure drops below 5 Bar, the sensing
plate moves toward the rear of the
chuck to maintain a 6mm gap [2]
with the distributor ring.
However, since it is controlled using a
spring, the sensing plate may
reciprocate when high pressure is
applied instantaneously.
Therefore, in this case, adjust the
proximity switch not to detect the
proximity switch for several seconds
immediately after air supply.
압력저하 체크밸브
압력저하 체크밸브는 척이 파악시에 내압이 저
하되면 동작하여 근접스위치로 검출함으로서
파악력의 저하에 따른 가공물의 비산을 미연
에 방지합니다.
척 전면에 위치한 세트스크류를 조이거나 풂으
로서 내부의 스프링을 조절합니다. 따라서 내
압이 스프링보다 높을 경우 압력저하 체크밸브
는 움직이지 않습니다. 공기의 유출 등으로 내
압이 일정 압까지 낮아지게 되면 스프링에 의
해 압력저하 체크밸브가 움직임으로서 감지판
을 근접스위치로 검출할수 있게 됩니다.
출하 시의 설정에 의해 압력저하 체크밸브의
스프링은 6 Bar에 설정되어 있습니다. 이는 내
압이 약 5 Bar 이하로 떨어지면 작동합니다.
이를 기준으로 척에 에어 공급시 공압이 5 Bar
에 도달할 때까지 감지판은 디스트리뷰터 링과
6mm 간격[2]으로 있습니다.
내압이 5 Bar를 넘기는 순간 감지판이 척
전면 방향으로 이동하며 디스트리뷰터 링과
2mm 간격을 유지합니다. 또한, 내압 감소 시,
내압이 5 Bar 이하로 내려가면 감지판이 척
후방 방향으로 이동하여 디스트리뷰터 링과
6mm 간격[2]을 유지하게 됩니다.
단, 스프링을 이용하여 조절하기 때문에 순간
적으로 고압의 압력이 공급될 경우 감지판이
왕복운동을 하는 경우가 발생합니다.
따라서 이럴 경우 에어 공급 직후 수 초간은
근접 스위치를 검지하지 않도록 조정합니다.

Power Chuck
20 Power Chuck
Fig. 5
1
2
3
4
The pressure drop check valve operates
only when the pressure is lower than
the set pressure. (If set to 5Bar, it does
not work at 5.5Bar)
Do not set the pressure too low than
the pressure used for processing. (Set
the pressure to about 1 bar lower.)
압력저하 체크밸브는 설정된 압력 이하일때만
작동하게 됩니다.
(5Bar로 설정시 5.5Bar에선 동작 안함)
가공에 사용하는 압력보다 너무 낮은 압력으로
설정하지 마십시오.
(1Bar 정도 낮은 압력으로 설정할 것.)
How to set the pressure drop check valve
1) After disassembling the set screw
(1) on the front of the PAC chuck,
tighten the set screw (2) visible
inside it all the way in a clockwise
direction. (15-20mm depth based
on the chuck surface)
2) After setting the pressure to 1Bar
lower than the pressure to be used
for processing, start supplying air.
- Example) When using 6Bar, set to
5Bar
3) The pressure of the spring (3) is
higher than the pneumatic pressure
due to the set screw (2), so the
sensing plate (4) does not work.
- If the sensing plate moves, stop the
equipment and tighten the set
screw (2) more strongly (until the
sensing plate moves toward the
front of the chuck).
4) While loosening the set screw (2)
little by little in a counterclockwise
direction, the sensing plate (4)
stops as soon as it moves.
5) At this time, it is the moment when
the pushing force of the spring (3)
and the internal pressure of the
chuck become similar, and the
pressure drop check valve operates
at the corresponding pressure.
6) Finally, re-tighten the setscrew (1)
that was disassembled in the first
place.
압력저하 체크밸브 설정방법
1) PAC 척 전면부의 세트스크류(1)를 분해
한 뒤, 그 안쪽에 보이는 세트스크류(2)를
시계방향으로 조입니다.(척 표면 기준으로
15~20mm 깊이)
2) 가공에 사용할 압력보다 1Bar 정도 낮은
압력으로 설정한 뒤, 에어 공급을 시작합
니다.
- 예시) 6Bar를 사용시 5Bar로 설정
3) 세트스크류(2)로 인해 스프링(3)이 밀어내
는 힘이 공압보다 높아 감지판(4)은 작동하
지 않습니다.
- 감지판이 움직일 경우, 장비를 정지한 뒤, 세
트스크류(2)를 더 강하게 조입니다.(감지판
이 척 전면 방향으로 움직일 때까지)
4) 세트스크류(2)를 시계반대방향으로 조금씩
풀면서 감지판(4)이 움직이는 순간 멈춥
니다.
5) 이때 스프링(3)이 미는 힘과 척의 내압이 비
슷해지는 순간이며, 해당 압력에 압력저하
체크밸브가 작동하게 됩니다.
6) 마지막으로 처음에 분해했던 세트스크류
(1)를 다시 강하게 조입니다.
CAUTION
CAUTION
주의
CAUTION
注意
Table of contents
Other SAMCHULLY Industrial Equipment manuals

SAMCHULLY
SAMCHULLY SD-E User manual

SAMCHULLY
SAMCHULLY SD-E User manual

SAMCHULLY
SAMCHULLY STA User manual

SAMCHULLY
SAMCHULLY SR-200 User manual

SAMCHULLY
SAMCHULLY SD User manual

SAMCHULLY
SAMCHULLY SYH User manual

SAMCHULLY
SAMCHULLY HCH User manual

SAMCHULLY
SAMCHULLY Multi Series User manual

SAMCHULLY
SAMCHULLY DY-125 Series User manual

SAMCHULLY
SAMCHULLY SH User manual