Scott SAG-BOY User manual

CONFORME AUX EXIGENCES DE SECURITE - NF R30-020
F
OWNERS MANUAL
BEDIENUNGSANLEITUNG
MANUEL D’UTILISATION
BIKE
OWNERS
MANUAL
2007
©2005 Scott Sports SA – all rights reserved
WWW.SCOTT-SPORTS.COM
Scott Sports SA
Route du Crochet 17
1762 Givisiez / Switzerland
www.scott-sports.com
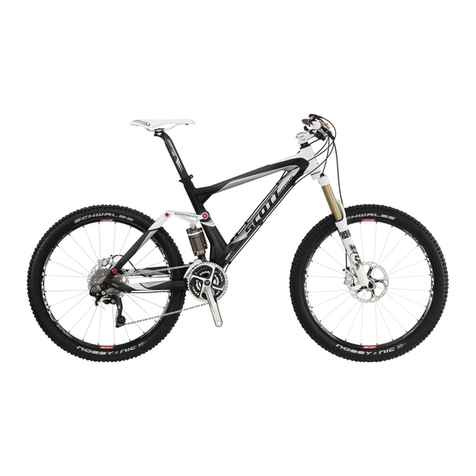
«SAG-BOY»
The length of the grey beam shows the optimum eye-to-eye distance of the rear shocks.
Der graue Balken zeigt den optimalen Bolzenabstand des Dämpfers.
La longueur de la barre grise représente l’écart optimal entre les points de fixation
de l’amortisseur.
HIGH OCTANE

OWNER’S MANUAL 2007
ENGLISH
01
00
CONTENT
DEUTSCH
FRANÇAIS
> Concept High Octane p. 2
> Characteristics p. 2
> Adjustable head angle p. 3-4
> Adjustable seat angle p. 4
> Adjustable saddle height p. 5
> Adjustable BB offset p. 5
> Adjustable rear travel p. 6
> Special DH pivot p. 7
> Bottle p. 7
> Weight p. 7
> Tires and wheels p. 7
> Set-Up High Octane p. 8
> Replaceable Drop Outs p. 9
> Set-Up of other suspension models p. 10
> Front fork set-up p. 11
> Pivot maintenance p. 11
> Warranty periods p. 12
CONTENT

OWNER’S MANUAL 2007
ENGLISH
03
02
DEUTSCH
FRANÇAIS
Ultra-light, stiff and multi-adjustable chassis.
Geometry High Octane DH:
Eccentric headset insert, for an individual adjustment of
the headangle, without reducing the BB Offset and seat
angle!
This can be found on all Octane from 2000 to 2002 and
on the Octane DH from 1999 to 2001.
High Octane DH :
Serially mounted black headset insert which permits an
adjustment of the head angle from 64,5° to 67,5°, in a
11/8”standard. Silver headset insert for OnePointFive-
Standard and adjustment of the head angle from 66° to
68° in the small spare part box, which comes with the
bike/framesets.
How to adjust the headangle:
Since the head angle adjustment has proved itself
on team bikes of our DH-World cup team we also
offer it on our OCTANE models.
You only need:
-A40mm wrench (11/8”)
-The 56mm wrench (OnePointFive) which accom
panies the bike/frameset
-Atorque wrench with a 4mm Allen key
1. Loosen the 3 screws on the head tube with a
4mm Allen key but do not remove them comple-
tely. These screws hold the internal head tube in
place. (It is not necessary to disassemble the
fork or any other components.)
2.. Turn the silver/black headset insert with a
40mm wrench (11/8”) or with the 56mm wrench
(OnePointFive) which accompanies the bike/fra
meset. Check the slot on the bottom side and in
front of the internal head tube. The slot should
always be in line with the slot of the head tube
clamp.
High end World Cup Down Hill full suspension bike
with outstanding techniques, an individually adjustable
geometry, and the weight of a freeride bike. The triple
chain wheel and the position of the pivot also make
this bike perfect for Hardcore Freeriders.
Depending on the equipment it can either be the ultimate
weapon for World Cup Downhill, the ultimate hardcore
Freerider or even the super fast Dualbike
The perfect basis for all leisure time riders: depending
on what the rider wants, the frame/bike can be changed
and equipped differently without having to buy a
whole new frame each time.
CONCEPT CARACTERISTICS
INDIVIDUALLY ADJUSTABLE
HEAD ANGLE
Size Head angle Fork length TT Horizon Seatangle Top ST CST Length BB OS
S 66°/68° 544 555 67°-73° 475 437 + 40
L 66°/68° 544 590 67°-73° 475 437 + 40
Headtube High Octane 1.5” Headtube High Octane 1 1/8”torque wrench with a
4mm Allen key

OWNER’S MANUAL 2007
ENGLISH
05
04
DEUTSCH
FRANÇAIS
We recommend the flatter angle for downhill and the
steeper angle for freeriding.
3. Important: check the alignment again and make sure
that there is no gap in between the head tube
flange and head tube clamp.
4. Tighten all screws with 6Nm.
ADJUSTMENT OF THE SADDLE
HEIGHT:
INDIVIDUALLY ADJUSTABLE
SEAT ANGLEHEADANGLE ADJUSTMENT
INDIVIDUALLY ADJUSTABLE BB
OFFSET
73° for uphill: upper hole on the seat tower
70° for freeride use: middle hole on the seat tower
67° for DH: lower hole on the seat tower
Plus/minus 15 mm
This strongly influences both the head and seat
angles and is the so called adjustable head angle
for other brands.
On the High Octane, the individual adjustment of
the angle allows to settle this negative effect.
Please note the "high” and "low” markings on the
mounted adjustment-plates (also enclosed in the
spare part box) for the different lengths of the
suspension.
Headtube
gap
check alignment seat angle adjustment
adjustment-plates for different lengths of
suspension.
Important !
The seat post has to be brought into the saddle
tube at a minimum of 90 mm and must not stick
out more than 25mm at the bottom end.

OWNER’S MANUAL 2007
ENGLISH
07
06
DEUTSCH
FRANÇAIS
When using a 190mm rearshock (eye to eye 190mm,
travel 51mm), you can only have one of the following
rear travels:
137mm, 150mm, 160mm, 170mm and 180mm.
The rear travel can be adjusted on the main frame
through the drillings at the shock mounts. In the top
drilling the rear travel is the shortest and on the
contrary on the lowest hole you have the longest rear
travel.
The pivot is situated between the middle and the big
chain wheel. This allows a good traction when doing
some DH and an excellent uphill performance when
using the middle chain wheel only. In contrast to other
DH bikes, the small chain wheel can still be used.
The pivot was slightly moved forward for a neutral
pedaling while standing on the pedals.
With the use of the 222mm rearshock (Eye to eye:
222mm ; Travel : 70mm), you can have any of the follo-
wing rear travels:
180mm, 195mm, 210mm, 225mm or 240mm.
250mm is even possible with a Rock Shox Deluxe Pro
suspension. The rear travel is adjustable thanks to the
different drillings on the shockmounts fixed to the main
frame. If you want the shortest rear travel, you have to
use the top assembling hole. If you want the longest
one, it is the bottom assembling hole that counts.
BOTTLE
ADJUSTABLE REAR TRAVEL
WEIGHT
TIRES AND WHEELS
Mounting plates 190mm for suspension: A 0.5 litre bottle fixed on a dirt free and practical spot,
that is to say on top of the lower tube, allows the free-
rider to ride without camelback.
DH riders do not usually ride with camelback, and as
most of DH bikes do not offer any possibility for fixing
a bottle, it is advised that riders get used to dehydration
beforehand, with longer training sessions.
Very light frame: only 3.5kg without suspension. The
whole bike, with all the specs that are specified in the
catalogue, weighs only 15.9kg. This is an incredible
performance for a suitable WC-DH bike that can easily
be ridden uphill without needing a lift or a shuttle…
3” tires max can be mounted.
Compatible to 24”
Because of the adjustable geometry, it can be perfectly
adapted to a 24” race bike for more hardcore use.
Mounting plates for DH suspension:
ADJUSTABLE REAR TRAVEL
drillings on the shock mounts Rearshocks in position « front - top »
IMPORTANT !
Note that you have to mount Rearshocks
always with the container (Piggy Pack), as
shown underneath in the positions "front-top”.
Mounting the suspension in a different position
can lead to severe damages at the frame, the
rear and the suspension!
SPECIAL DH PIVOT
OWNER’S MANUAL 2007
ENGLISH
09
08
DEUTSCH
FRANÇAIS
SET-UP HIGH OCTANE
For the adjustment of the negative travel (SAG) of High
Octane it is really important to check first if the coil
fits to the weight of the rider.
Inline we will have size S/M equipped with coil 500x
2.75 for recommended weight of rider at 75-82 kg, size
L/XL with coil 600 x 2.75 for recommended weight of
rider at 80-87 kg.
If the recommended coil for the weight of the rider is
mounted on the bike, you can start to adjust the SAG.
With an eye to eye distance of 222mm and a shock
travel of 70mm we recommend a SAG of 25mm.
When sitting on the bike there should be an eye to eye
distance of 197mm.
An easy way to control the SAG is to use the SAG-Boy
on the back of the full suspension manual.
For the correct adjustment of the different variables
of the Rear Shock please consider the Manuel of the
rearshock manufacture.
Springs available:
Print Weight of Rider
on coil
350 x 2.75 60- 70 kg
500 x 2.75 75- 82 kg
600 x 2.75 80- 87 kg
650 x 2.75 85- 95 kg
750 x 2.75 95- xx kg
Important !
After a dismantlement of the rear shock, the
rearshock should be tightened with a torque of
8Nm. If this is not done correctly the suspen-
sion can be damaged.
Please check the tightening torques of the screws on
the pictures below.
Drop out for 12mm through axle system rear hub:
REPLACEABLE DROPOUTS
7
44in-lbs
5Nm
79in-lbs
9Nm
79in-lbs
9Nm

OWNER’S MANUAL 2007
ENGLISH
11
10
DEUTSCH
FRANÇAIS
If you want to use a different suspension model than
one from Scott or one of the recommended, make sure
that the suspension can’t damage the frame.
Please follow the instruction below:
Please make sure that the rear shock or its accessory
parts do not touch the frame when mounting or
suspending.
For doing so remove the coil, install the shock and
compress the shock completely.
If the shock touches the frame while doing so do not
use this shock in order to avoid damage to frame,
swing arm or shock.
Please check this issue on all travel adjustment options.
For the set-up of the front fork please use the fork
specific manual attached to the bike.
The pivot and bearings on the Scott High Octane are
extremely easy to look after.
An external treatment with a grease spray after every
bike wash is all you have to do. We do not recommend
heavy grease sprays since these will leave a film on
the parts which is difficult to remove. We also recom-
mend the same maintenance for the chain.
If you have to change the bearings you can order them
included to a service kit at your local Scott dealer with
parts number 15.1.860.208.0.000. In addition you can
buy them at any hardware store with international
parts number 3803.2 RS.
In case of a change of bearings or the rear swing arm
you should contact your local Scott Dealer because you
will need special tools for disassembly and assembly.
For advice concerning the serially mounted e-13
chain device please look in the manual of the
company e-13.
CHAIN DEVICE
FRONT FORK SET-UP
SET-UP OF OTHER SUSPENSION
MODELS: PIVOT MAINTENANCE

OWNER’S MANUAL 2007
ENGLISH
13
12
DEUTSCH
FRANÇAIS
SCOTT bikes are made using the most innovative produc-
tion and quality methods. They are equipped with best
components of well known parts suppliers.
Doing so SCOTT warrants its frames and swingarms
for two years for defects in material and/or work-
manship in case of purchase of completely assembled
new bikes. The warranty period starts at the day of
purchase.
This warranty is limited to the first buyer, what means
the first person who uses the bike and only with the use
it was made for. The bike is to purchase via authorized
SCOTT-dealers to the exclusion of purchases via internet
auctions.
In case of a warranty claim the decision to repair or to
replace the defective part is up to SCOTT. Non defective
parts will only be replaced at the guarantee’s own
expense.
Wear and tear elements are not covered by the warranty.
WARRANTY PERIODS FOR
HIGH OCTANE DH
Model ___________________________
Year ___________________________
Size ___________________________
Frame number ____________________
You will find at the end of this manual a protocol for the
handing over of the bike which will remain in copy at
the SCOTT dealer after acceptance and signature of the
consumer.
It is obligatory to show this protocol of handing over
together with the bike or the defective part in case of
awarranty claim given that it provides evidence of
purchase. Otherwise no warranty is granted.
Claims must be made directly through an authorized
dealer with the protocol of handing over. For information
regarding the nearest dealer, write or call this company
or the national SCOTT distributor.
Normal wear, accident, neglect, abuse, improper assembly,
improper maintenance by other than an authorized dealer
or use of parts or devices not consistent with the use
originally intended for the bicycle as sold (downhill
races, freestyle, stunts) are not covered by this warranty.
Under reservation of national warrant of merchantability.
WARRANTY PERIODS FOR
HIGH OCTANE DH
Other manuals for SAG-BOY
1
Table of contents
Other Scott Bicycle manuals

Scott
Scott SPARK MY22 User manual

Scott
Scott Scale Carbon 2014 User manual

Scott
Scott G-Zero Endurance User manual

Scott
Scott Voltage FR 700 User manual

Scott
Scott GAMBLER 2020 User manual

Scott
Scott KIDS User manual

Scott
Scott REFLEX FX User manual

Scott
Scott GENIUS 920 Configuration guide

Scott
Scott Addict Disc User manual

Scott
Scott Road User manual

Scott
Scott XXS/47 User manual

Scott
Scott Time Trial Machine User manual

Scott
Scott S / 900 User manual

Scott
Scott PLASMA 4 User manual

Scott
Scott GENIUS LT User manual

Scott
Scott 2014 Scale Carbon User manual

Scott
Scott ISO 4210:2014 User manual

Scott
Scott Bicycle User manual

Scott
Scott 2007 Bike User manual

Scott
Scott Foil Di2 User manual