SDI radii xpert User manual

radii xpert
Professional LED Curing Light
Instructions For Use
Please read these instructions before operating this unit
Product description
Thank you for purchasing the Radii Xpert LED curing light. The Radii Xpert is a high performance light source for the intraoral polymerization of
light-cured materials with photoiniator(s) in the wavelength range of 440 nm - 480 nm (standard curing tip). It has been designed to consistently
produce optimum polymerization for all light-cured materials in order to produce high-quality restorations.
Target assist technology, a special low power light, has been incorporated into the Radii Xpert to assist users to accurately position the curing tip
before polymerization begins.
The Radii Xpert is a high quality medical device which has been designed in accordance to the latest science and technology for curing lights.
Each unit comes with an international power supply and is suitable for power outlets from 100 - 240 Volts.
Your Smile. Our Vision.
www.sdi.com.au
Smarter design.
Optimal cure every time.
2
SAFETY, WARNINGS & CAUTIONS
Use of the Radii Xpert is restricted to qualified medical professionals in accordance with the safety instructions below:
1. Do not open or alter the Radii Xpert in anyway. Only dealers authorised by SDI Ltd may open the housing and repair
the device.
2. Do not introduce any objects into the unit with the exception of replacement parts handled in accordance with this manual.
3. Only charge the Radii Xpert handpiece in the Radii Xpert charger.
4. Connect the power plug into a suitable grounded and approved outlet.
5. Always unplug the power to the charger during cleaning of the unit.
6. Do not use damaged power cord.
7. Should you have any reason to suspect the safety of the Radii Xpert to be compromised, the unit must be taken out of
operation and appropriately labelled to prevent third parties from inadvertently using a potential defective unit.
1. The Radii Xpert emits a high intensity light and must only be used as indicated in this manual.
2. Do not look directly into the light source.
3. Operator, assistants and patient must always wear appropriate blue light blocking eye protection or use a blue light
blocking light shield.
4. Restrict exposure to the oral cavity in which clinical treatment is intended.
5. Avoid direct contact of curing tip with soft tissues and mucosa.
1. Radii Xpert can only be operated with the supplied LED tip and is not compatible with previous Radii model
of LED attachments.
2. Condensation resulting from unit being transferred from a cold to a warm environment may be a potential risk.
The unit should only be turned on after it is completely equilibrated to ambient temperature.
3. Use only genuine SDI Ltd parts when replacing defective components as directed in this manual.
4. Do not operate the unit in the proximity of flammable mixtures.
5. Keep solvents, flammable liquids and sources of intense heat away from the unit as they may damage the
plastic housing.
6. Do not allow cleaning agents to enter the Radii Xpert as this may short circuit the unit.
7. Do not use the Radii Xpert in patients or by users:
a. with heart pacemaker implants who have been advised to be cautious with regard to their exposure to small
electrical devices.
b. with a history of photo biological reactions (including individuals with urticaria solaris or erythropoietic
protoporphyria) or who are currently on photo-sensitising medication (including 8-methoxypsoralen or
dimethylchlorotetracycline).
c. who have history of retinal disease.
d. who have had surgery for eye cataracts.
Seek advice from their prescribing medical practitioner prior to operating the Radii Xpert on these patients.
8. Prior to each use of the Radii Xpert, ensure that the emitted intensity is sufficient to safely guarantee polymerization.
9. The Radii Xpert was developed and tested in accordance to relevant EMC regulations and standards to conform with legal
requirements. Due to variables that may exist within the work environment, such as power supply, wiring and the ambient
conditions that can affect the EMC properties of the Radii Xpert, EMC disruption may occur. If this happens, move the unit
to a different location.
10. SDI Ltd accepts no liability for any damage resulting from the use of the Radii Xpert for any other purpose than the
polymerization of light-cured dental materials.
SHOCK HAZARD
HIGH INTENSITY
LIGHT
CAUTION
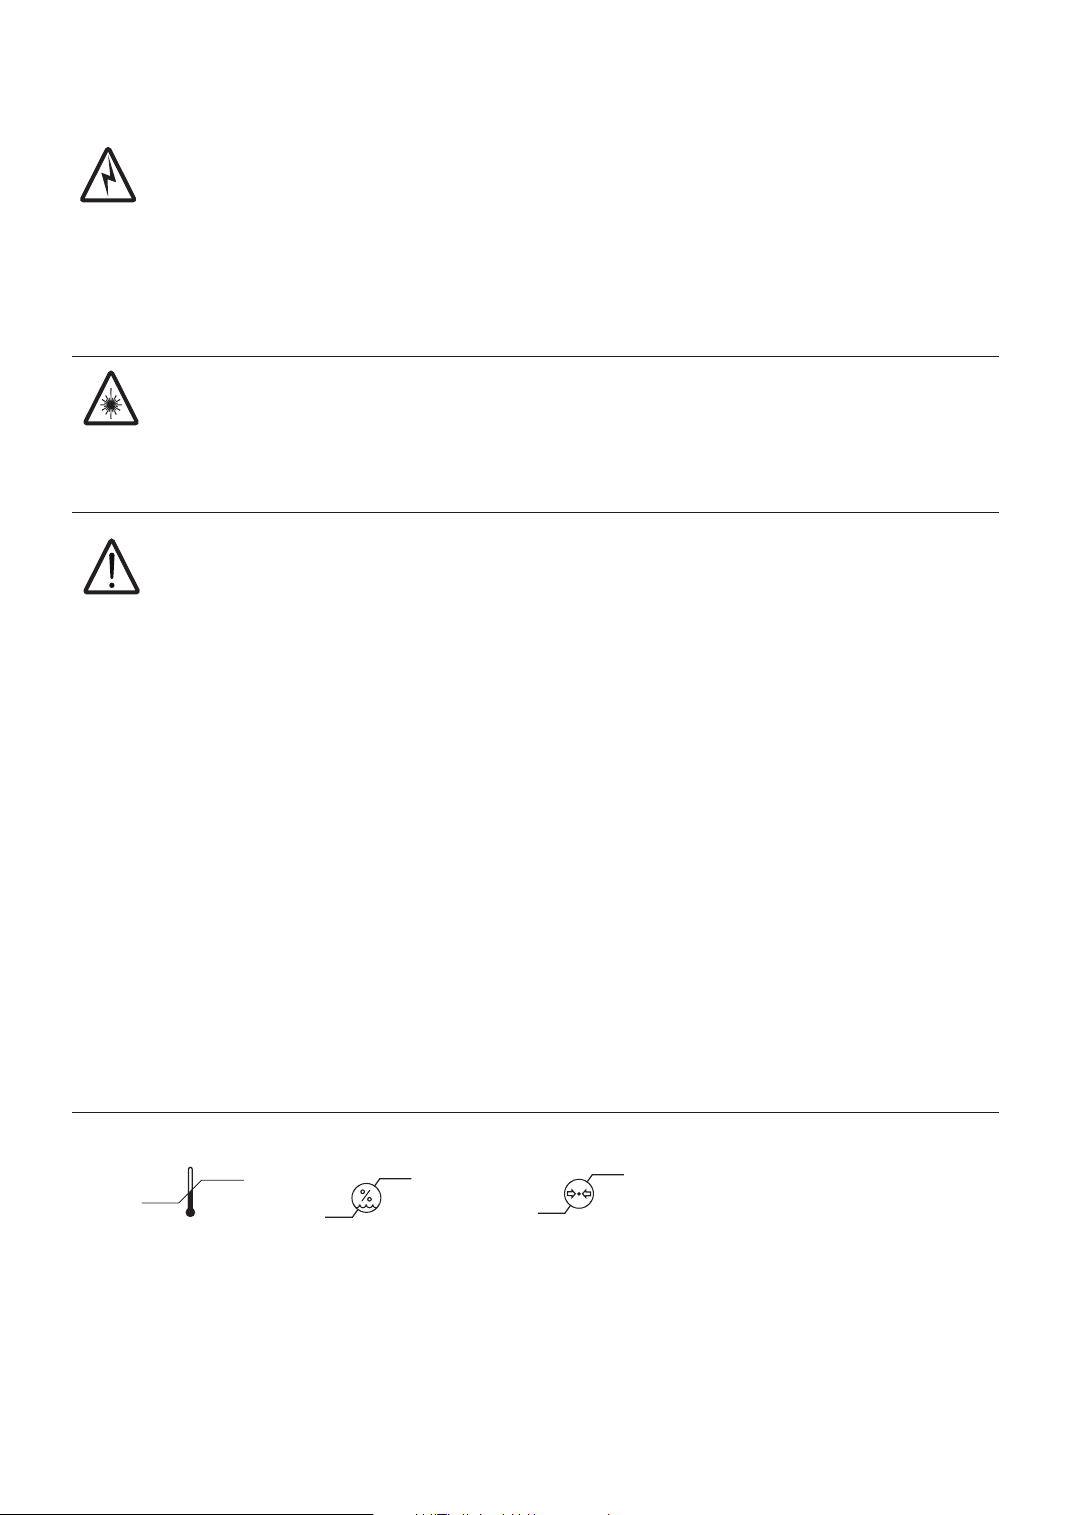
TRANSPORT AND STORAGE CONDITIONS
Ambient
temperature:
85%
max
10%
+40°
+104° F
C
32°F
0° C1060 hPa
500 hPa
0.5 atm
1.0 atm
Relative
humidity:
Atmospheric
pressure:

3
CAUTION
Do not autoclave the
LED light attachment or
any part of the Radii Xpert.
PRODUCT OVERVIEW
AC power pack
with international
plug adaptor heads
Intensity indicator
light check with
blue LED’s status indicator
Charging
charging (low battery) - solid red
charging - pulsing green
fully charged - solid green
Charging dock
User interface
- control buttons
- function display
- adjustable timer with countdown
power on
favourites mode timer units
- s = seconds
- mins =minutes
activate curing
sound icon
countdown timer
battery status
Handpiece
Rotatable
LED attachment
Status indicator
charging (low battery) - solid red
charging - pulsing green
fully charged - solid green
curing in progress - solid blue
radii
xpert
20
s
20
s
CHARGING DOCK
Operating voltage 100 – 240 V – 50 / 60 Hz
Power input 12 V DC
Dimensions Length: 142 mm, Width: 70 mm,
Height: 70 mm
Weight 155 g
Classification Class II - double insulated
Safety IEC 60601-1
EMC
(Electro-Magnetic Compliance)
IEC 60601-1-2
Protection from
electrical shock
Type BF
Protection from ingress
of liquids
Handpiece: IPX4
Charging dock: IPX3
INDICATIONS FOR USE
1. Standard curing attachment:
• To polymerize all light-cured products in the wavelength range of 440 nm - 480 nm (standard curing tip)
TECHNICAL DATA
HANDPIECE
Wavelength emission range Standard curing attachment:
440 nm - 480 nm
Wavelength peak Standard curing attachment:
460 nm
Dimensions Length: 255 mm
Diameter: 30 mm
Weight 185 g
CHARGER AND HANDPIECE
Time to charge low battery For everyday case approximately
3 hours
Time to charge flat battery Allow 5 - 6 hours.
(Best left on overnight)
Operating temperature 10°C - 40°C (50°F - 104°F)
Relative humidity 10 % - 85 %
Atmospheric pressure 0.5 atm - 1.0 atm
(500 hPa to 1060 hPa)
Total height with handpiece 290 mm
POWER PLUG WITH INTERNATIONAL AC ADAPTERS
Input voltage 100 – 264 V – 50 / 60 Hz
Output voltage 12 V DC
Output current 1.0 A
Dimension 38 mm H x 45 mm W x 70 mm L
Weight 104 g / 3.66 ounces
Rating Medical grade (UL, CE, RoHS,
WEEE)

4
Charging dock (Figure 1)
1. Slide the correct AC adapter head into the power plug and plug into power supply. Tilt it slightly and apply slight pressure until you hear it
snap into place.
2. Plug the other end of the AC power plug into the back of the charging dock.
3. Place charging dock on a suitable flat table top and turn the power ON.
4. The LED lights on the charging dock will flash once from all red to all green to all blue. This indicates the unit is ready to use.
Handpiece (Figure 2)
1. Remove the Radii Xpert handpiece from its packaging and place into the charging dock.
2. Allow the Radii Xpert to fully charge until status ring and all five lights on the charging base illuminate solid green.
Note:
1. During charging, the status ring and lights on the charging base illuminate pulsing green.
2. The Radii Xpert contains a lithium ion rechargeable battery that does not have any memory and can be recharged at any time.
Operating
1. Remove the Radii Xpert handpiece from the charging dock and place a hygienic barrier sleeve.
Note: Ensure the Radii Xpert barrier sleeve fits flush over the lens without wrinkling/folds. Seam of the sleeve should be
positioned down the sides of the attachment and handpiece. (Figure 3)
2. Rotate the curing tip to desired position.
3. Press (top button) and hold. A very low intensity light will illuminate to assist you to position the curing tip in the oral cavity. When the
tip is in the correct position, release your finger tip and curing will commence. Status ring illuminates solid blue with the standard curing tip
attached. The LCD displays 20, counting down to 0.
4. One long beep will sound when curing finishes and the status ring goes OFF.
5. Press to start another 20 second cure.
6. To change pre-set curing time (temporary setting), press (bottom button) and hold for 1-2 seconds. Numbers on LCD start flashing.
7. Press to scroll up through the options from last setting used. Press once to select. Numbers on LCD stop flashing.
8. Discard barrier sleeve after each patient.
9. Clean and sanitise the handpiece. See MAINTENANCE AND CLEANING section in this manual.
Note:
1. Single patient use hygienic Radii Xpert barrier sleeve (100 pieces is included in each kit) is strongly recommended to prevent cross
contamination and protect the lens cap from dental material adhering to its surface and body. These sleeves have been especially designed
to produce optimal emission.
2. Light output may be significantly reduced if the wrong barrier sleeve is used or not correctly placed.
Curing time
1. Follow the recommended curing times published by the manufacturer of your restorative materials.
2. The indicated curing times usually assume the light tip is held at the correct position over the material being polymerized.
QUICK START-UP
ALL FIGURES CAN BE FOUND ON PAGE 9
Check the content of the box for completeness and any possible transportation damage. If parts are damaged or missing, contact your local
SDI Ltd representative immediately.
Factory settings
The factory setting of the Radii Xpert’s standard curing attachment is 20 seconds per exposure cycle.
QUICK LIGHT INTENSITY STATUS CHECK USING THE BUILT-IN INTENSITY INDICATOR (Figure 4)
1. Gently place the LED attachment tip on the test area
of the charging dock. Ensure the tip is level and central
within the test area. If not centered, it may give you lower
readings.
2. Activate the light.
All 5 blue LEDs 100%
4 blue LEDs 90%
3 blue LEDs 80%
2 blue LEDs 70%
1 blue LED 60%
5
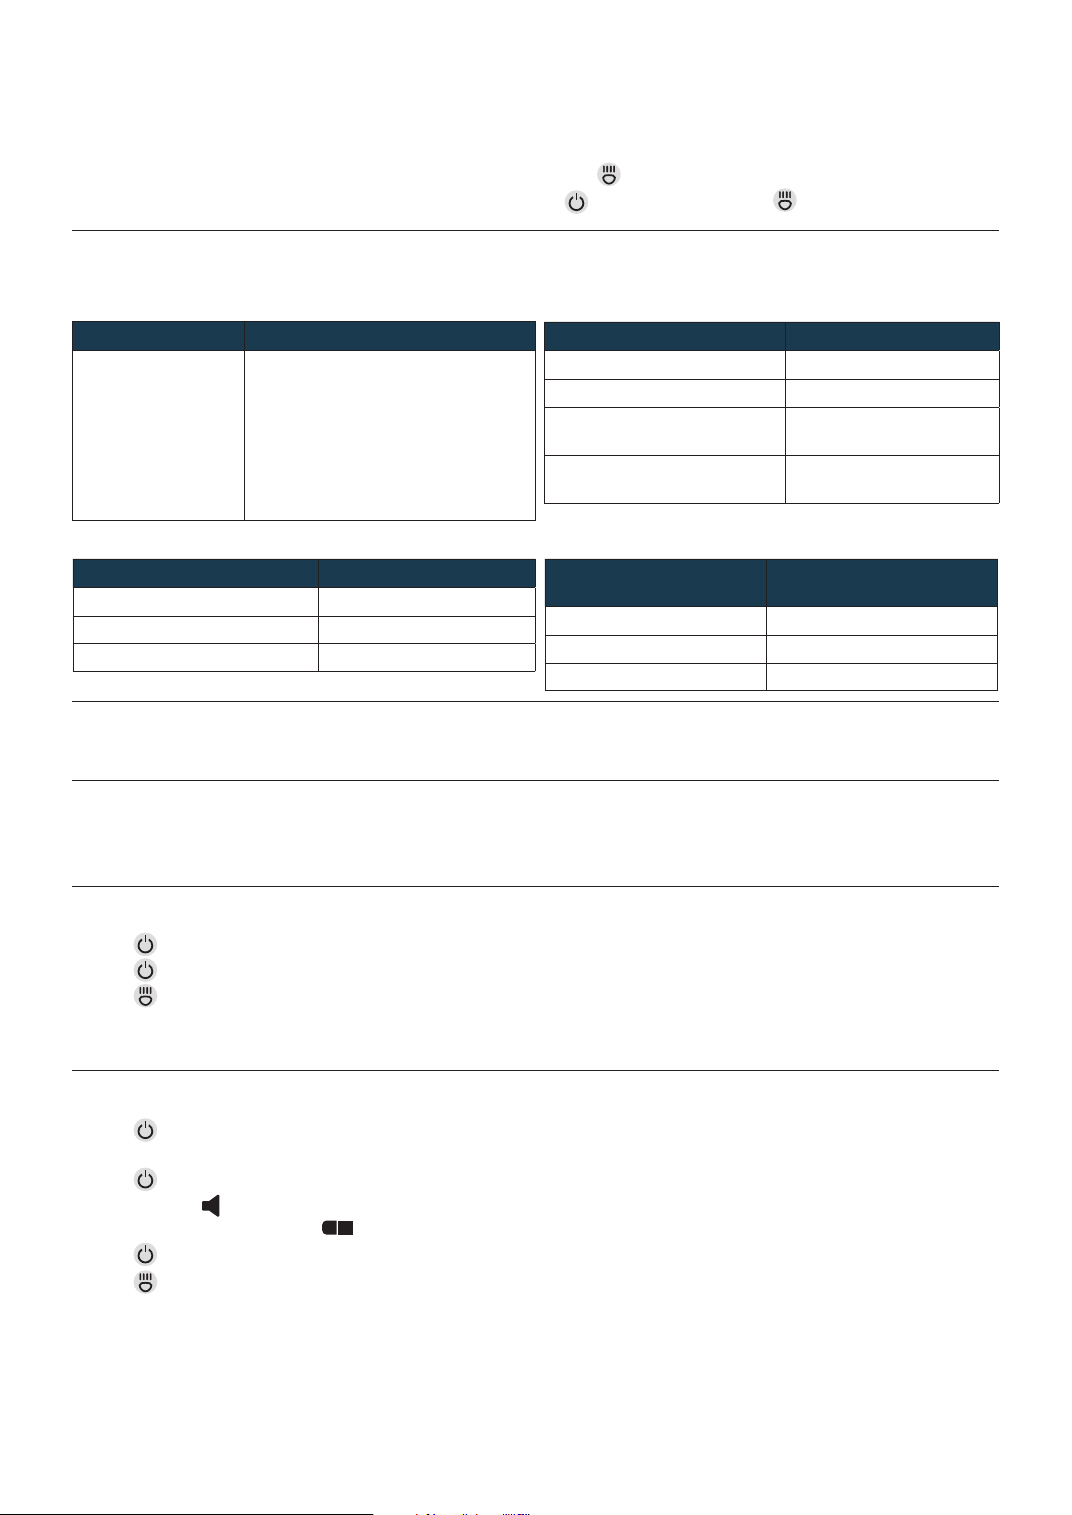
SLEEP MODE
The Radii Xpert will go into a sleep mode (LCD turns OFF) when it is:
1. Sitting on the charging dock or
2. Not in use for more than 3 minutes
The unit will automatically wake up when removed from the charging dock. Press to start curing.
If the unit turns OFF / goes into sleep mode outside the charging dock, press once to wake unit up. Press to start curing.
OPERATION
1. Handpiece
LED ATTACHMENT PROGRAM
Standard curing
attachment
(440 nm - 480 nm)
• Default curing time: 20 seconds
• LCD counting down
20, 19, 18….3,2,1
• User option curing time:
2, 10, 20 seconds
Note: Observe Instructions for Use of the
material applied when selecting
curing time.
STATUS - WHILE CHARGING STATUS RING INDICATOR
Charging (low battery) Solid red
Charging in progress Pulsing green
Charge completed Solid green
STATUS - WHILE CHARGING CHARGING DOCK
INDICATOR
Charging (low battery) Solid red
Charging in progress Pulsing green
Charge completed Solid green
2. Charging dock lights display (while handpiece is charging)
STATUS - WHILE OPERATION STATUS RING INDICATOR
Positioning light (target assist) Solid yellow
Curing in progress Solid blue
LED attachment too warm
(allow to cool)
1 red flash, then shuts off
Charge level low Solid blue for 1 second and
2 short beeps
HOW TO CHANGE THE LED (Figure 5)
To change the LED attachment, carefully pull off the LED attachment from the handpiece and click in a new LED attachment.
HOW TO CHANGE THE LENS CAP (Figure 6)
1. Turn the lens cap anti-clockwise to remove.
2. Replace with a new lens cap by screwing it on clockwise.
HOW TO SET FAVOURITE CURING TIME (Figure 7)
1. Press and hold for 1-2 seconds. Numbers on LCD start flashing.
2. Press to scroll up through the options from last setting used.
3. Press and hold for 1-2 seconds to save. Numbers on LCD stop flashing. Status ring illuminates solid green for 2 seconds with one short
beep, to confirm selection is saved.
4. A star appears on the bottom left of the LCD screen. Unit is ready to use.
HOW TO ADJUST THE AUDIO VOLUME (Figure 8)
1. Press to turn the unit on.
2. Remove the LED attachment from the Radii Xpert handpiece.
3. Press and hold for 1-2 seconds to activate change mode.
4. Speaker symbol lights up.
5. Bar graph displays volume settings
6. Press to scroll through options. Buzzer will sound to demonstrate the volume level (mute, low, medium, high).
7. Press and hold for 1-2 seconds to save. Status ring illuminates solid green for 2 seconds with one short beep, to confirm
selection is saved.
8. A star appears on the bottom left of the LCD screen. Re-insert the LED attachment. Unit is ready to use.

6
HOW TO CHANGE THE BATTERY
1. Hold the handpiece in the palm of your left hand.
2. Use your right hand to turn the bottom of the handpiece approximately 10 degrees anti-clockwise (twist then pull, Figure 9).
3. Carefully remove the battery from the handpiece.
4. Insert a new battery and lock in position twisting it 10 degrees clockwise (push then twist, Figure 10).
5. Turn ON the Radii Xpert handpiece and place it into the charging dock until status ring shows solid green.
Note: The LED attachment does not have to be attached to the handpiece to charge the battery.
6. Dispose of used battery in accordance to local regulations. Do not dispose with unsorted household waste.
Battery Life Expectancy: Battery life is dependent on the amount of use and LED efficiency. SDI Ltd guarantees the battery to have a minimum
of 300 total discharges. To extend the life of your Radii Xpert battery, keep it on the charging dock at the end of each day if possible.
PROBLEM POSSIBLE CAUSE SOLUTION
Handpiece status ring flashes red. Handpiece over heated. Allow handpiece to cool down before reuse.
Handpiece status ring shows solid red. Battery low. Handpiece can still be used for curing. Return to
charging dock as soon as possible.
Handpiece status ring flashes blue once
and goes OFF.
Battery empty. Return to charging dock for charging.
No light appears on the charging dock
when handpiece is docked.
No power. 1. Check all connections are clean and properly
connected.
2. Ensure power outlet is switched ON.
3. If the above does not work, move the whole
unit to a different powerpoint.
4. Call your local SDI Ltd representative for repair.
Unit works fine yesterday but will not turn
on this morning.
Moisture from condensation. 1. Check for sign of moisture inside the barrier
sleeve.
2. Remove barrier sleeve and allow unit to dry for
a few hours.
No audio beep heard when connecting
with the handpiece.
Battery empty. Return to charging dock for charging.
The light intensity is too low. 1. Dirty or scratched lens cap.
2. Barrier sleeve.
Check and clean lens cap. Replace if required.
Ensure barrier sleeve fits tightly over the emission
tip.
The LCD on the handpiece flashes. Unit is in the setting mode. Press once to come out of the setting mode.
Battery shows corrosion or emits a
scorched odour.
Do not use unit. Call your local SDI Ltd representative.
The dental material does not
cure completely.
Wrong attachment? Ensure the correct LED attachment is used. Check
material specifications for curing requirement
from the manufacturer.
I want to delete my favourite setting and
go back to the factory setting.
Place the handpiece on the charging dock.
Press (top & bottom button)
simultaneously for 1-2 seconds, then status ring
illuminates solid yellow for 4 seconds and returns
to factory setting.
The handpiece has been on the charger
overnight. Status ring still showing red and
handpiece felt very hot.
Charging problem. Battery maybe at the
end of its useful life.
Replace battery.
The light emission does not start when the
button is pressed.
Battery is flat. Return to charging dock for charging.
The LED attachment does not fit
the handpiece.
Wrong Radii LED attachment. LED attachments from previous model of
Radii are not compatible with the Radii Xpert.
TROUBLE SHOOTING

7
Do not autoclave the LED light attachment
or any part of the Radii Xpert.
Liquids must not enter any part of the
handpiece or charger.
Do not spray liquids directly onto, or apply
copious amounts of liquids to the Radii Xpert.
Instead, spray solutions on a cloth to wipe.
Handpiece
1. After each use, remove and dispose of barrier sleeve.
2. Wipe the Radii Xpert handpiece with a disinfectant wipe
(benzalkonium base) or soft cloth moistened with isopropyl
alcohol/ethyl alcohol based cleaners.
3. Do not wipe electrical contacts at the base of the handpiece.
Use a dry cloth to clean if required.
4. Allow handpiece to air dry before placing a new barrier sleeve.
Note: If using anti-bacterial wipes, ensure they are not soaked in excess liquid.
Liquid residue must not enter any part of the handpiece or charger.
Charging dock
1. Disconnect power from charging dock.
2. Wipe surface with a disinfectant wipe (benzalkonium base) or soft cloth moistened with isopropyl alcohol/ethyl alcohol based cleaners.
3. Use an air gun to blow off any debris collected inside the handpiece holder and carefully wipe clean without wetting the electrical contacts.
MAINTENANCE AND CLEANING
STORAGE DURING EXTENDED PERIODS OF NON-USE
If the Radii Xpert is not to be used for an extended period of time, ie during holiday periods, fully charge the handpiece or keep it on the
charging dock with the power ON.
The Radii Xpert has a built in safety feature to prevent the battery from discharging totally.
DISPOSAL INSTRUCTION
Do not dispose unserviceable battery and curing lights as unsorted municipal waste. Hazardous substances are present in electronic
equipment and present potential risks to human health and the environment if disposed of in municipal landfills which are not
designed to prevent migration of substances into the soil and groundwater.
Please dispose of in accordance to your specific country regulations.
CAUTION
CLEANING AGENT APPROVED FOR USE CLEANING AGENT NOT APPROVED FOR USE
70% Isopropanol alcohol Oxidising agents such as hydrogen peroxide
Neutral-enzymic cleaner High alkaline detergents
Ethyl alcohol based Hand soaps and dish soaps
Antiseptic benzalkonium chloride wipes Abrasive cleaners
Chlorhexidine gluconate Acetone based cleaners
Glutaldehyde Bleach based cleaners
Any cleaners with phosphoric acid
Ammonia or iodine complex solution
WARRANTY
SDI Ltd provides a three (3) year warranty against defects in materials or workmanship from the date of purchase to the original purchaser of this
product with the exception of the battery which has a two (2) year warranty. User is responsible for determining the suitability of the product
for user’s application. If this unit is defective within the warranty period, SDI Ltd or your local approved service centre will repair the unit at no
cost. This warranty is only valid providing an inspection indicates that any such defect developed during normal and proper use subject to the
conditions below.
SDI Ltd shall under no circumstances be liable for incidental or consequential damages. The warranty does not apply to any damage or defect
caused by the user’s failure to follow the instructions for use or the other user error in operating or maintaining the unit. Although SDI Ltd offers
services to repair the Radii Xpert after the expiration of the warranty, SDI Ltd only guarantees the availability of such services and replacement
parts for two (2) years after the model has been discontinued.
Only the above warranty shall be applicable, all other warranties, expressed or implied are hereby excluded.
Claim
In case of a claim under warranty, the complete unit (handpiece, charging dock, AC power plug and LED attachment) is returned, carriage paid
to the dealer or directly to SDI Ltd together with a copy of the purchase document together with a clear description of the defect. Ensure you
have your Radii Xpert’s serial number ready when communicating with the Customer Service team.
Registering your Radii Xpert warranty
To speed up your warranty claim, it is advisable to register your Radii Xpert with SDI Ltd as soon as possible using the following two options:
1. Fill out the warranty card included in kit and return with a copy of your receipt to:
SDI Ltd PO Box 314 Bayswater, VIC 3153 AUSTRALIA
2. Alternatively goto http://www.sdi.com.au/warranty to register your warranty.
8
Guidance and manufacturer’s declaration - electromagnetic emissions
The Radii Xpert is intended for use in the electromagnetic environment specified below. The customer or the user of the Radii Xpert should assure that it is used in such an environment.
Emissions test Compliance Electromagnetic environment - guidance
RF emissions
CISPR 11
Group 1 The Radii Xpert uses RF energy only for its internal function.
Therefore, its RF emissions are very low and are not likely to cause
any interference in nearby electronic equipment.
RF emissions
CISPR 11
Class B The Radii Xpert is suitable for use in all establishments,
including domestic establishments. The Radii Xpert is powered
by 1 x 3.7 V 2600 mAh DC Lithium ion battery thus Harmonic
emission and Voltage Harmonic emissions fluctuation/flicker
emissions are not applicable.
Harmonic emissions IEC 61000-3-2 Not applicable
Voltage fluctuations / flicker emissions IEC 61000-3-3 Not applicable
Table 201 - Guidance and MANUFACTURER’S declaration - ELECTROMAGNETIC EMISSIONS - for all equipment and systems
Table 202 - Guidance and MANUFACTURER’S declaration - Electromagnetic IMMUNITY - for all equipment and systems
Table 204 - Guidance and MANUFACTURER’S declaration - Electromagnetic IMMUNITY - for all equipment and systems that are not LIFE-SUPPORTING
Guidance and manufacturer’s declaration - electromagnetic immunity
The Radii Xpert is intended for use in the electromagnetic environment specified below. The customer or the user of the Radii Xpert should assure that it is used in such an environment.
IMMUNITY test IEC 60601 test level Compliance level Electromagnetic environment - guidance
Electrostatic discharge (ESD) IEC 61000-4-2 +/- 6 kV contact
+/- 8 kV air
+/- 6 kV contact
+/- 8 kV air
Floors should be wood, concrete or ceramic tile.
If floors are covered with synthetic material, the
relative humidity should be at least 30%.
Power frequency (50/60 Hz) magnetic field
IEC 61000-4-8
3 A/m 3 A/m Power frequency magnetic fields should be at levels characteristic of a
typical location in a typical commercial or hospital environment.
Guidance and manufacturer’s declaration - electromagnetic immunity
The Radii Xpert is intended for use in the electromagnetic environment specified below. The customer or the user of the Radii Xpert should assure that it is used in such an environment.
IMMUNITY test IEC 60601 test level Compliance level Electromagnetic environment - guidance
Radiated RF IEC 61000-4-3 3 V/m 80 MHz to 2,5 GHz 3 V/m Portable and mobile RF communications equipment should be used
no closer to any part of the TENS PRO 900, including cables, than
the recommended separation distance calculated from the equation
applicable to the frequency of the transmitter.
Recommended separation distance
Where P is the maximum output power rating of the transmitter in
watts (W) according to the transmitter manufacturer and d is the
recommended separation distance in metres (m). Field strengths
from fixed RF transmitters, as determined by an electromagnetic site
survey, ashould be less than the compliance level in each frequency
range.b Interference may occur in the vicinity of equipment marked
withthe following symbol:
NOTE 1 At 80 MHz and 800 MHz, the higher frequency range applies.
NOTE 2 These guidelines may not apply in all situations. Electromagnetic propagation is affected by absorption and reflection from structures, objects and people.
a Field strengths from fixed transmitters, such as base stations for radio (cellular/cordless) telephones and land mobile radios, amateur radio, AM and FM radio broadcast and TV broadcast cannot
be predicted theoretically with accuracy. To assess the electromagnetic environment due to fixed RF transmitters, an electromagnetic site survey should be considered. If the measured field strength
in the location in which the Radii Xpert is used exceeds the applicable RF compliance level above, the Radii Xpert should be observed to verify normal operation. If abnormal performance is
observed, additional measures may be necessary, such as re-orienting or re-locating the Radii Xpert. bOver the frequency range 150kHz to 80MHz, field strengths should be less than 10/Vm.
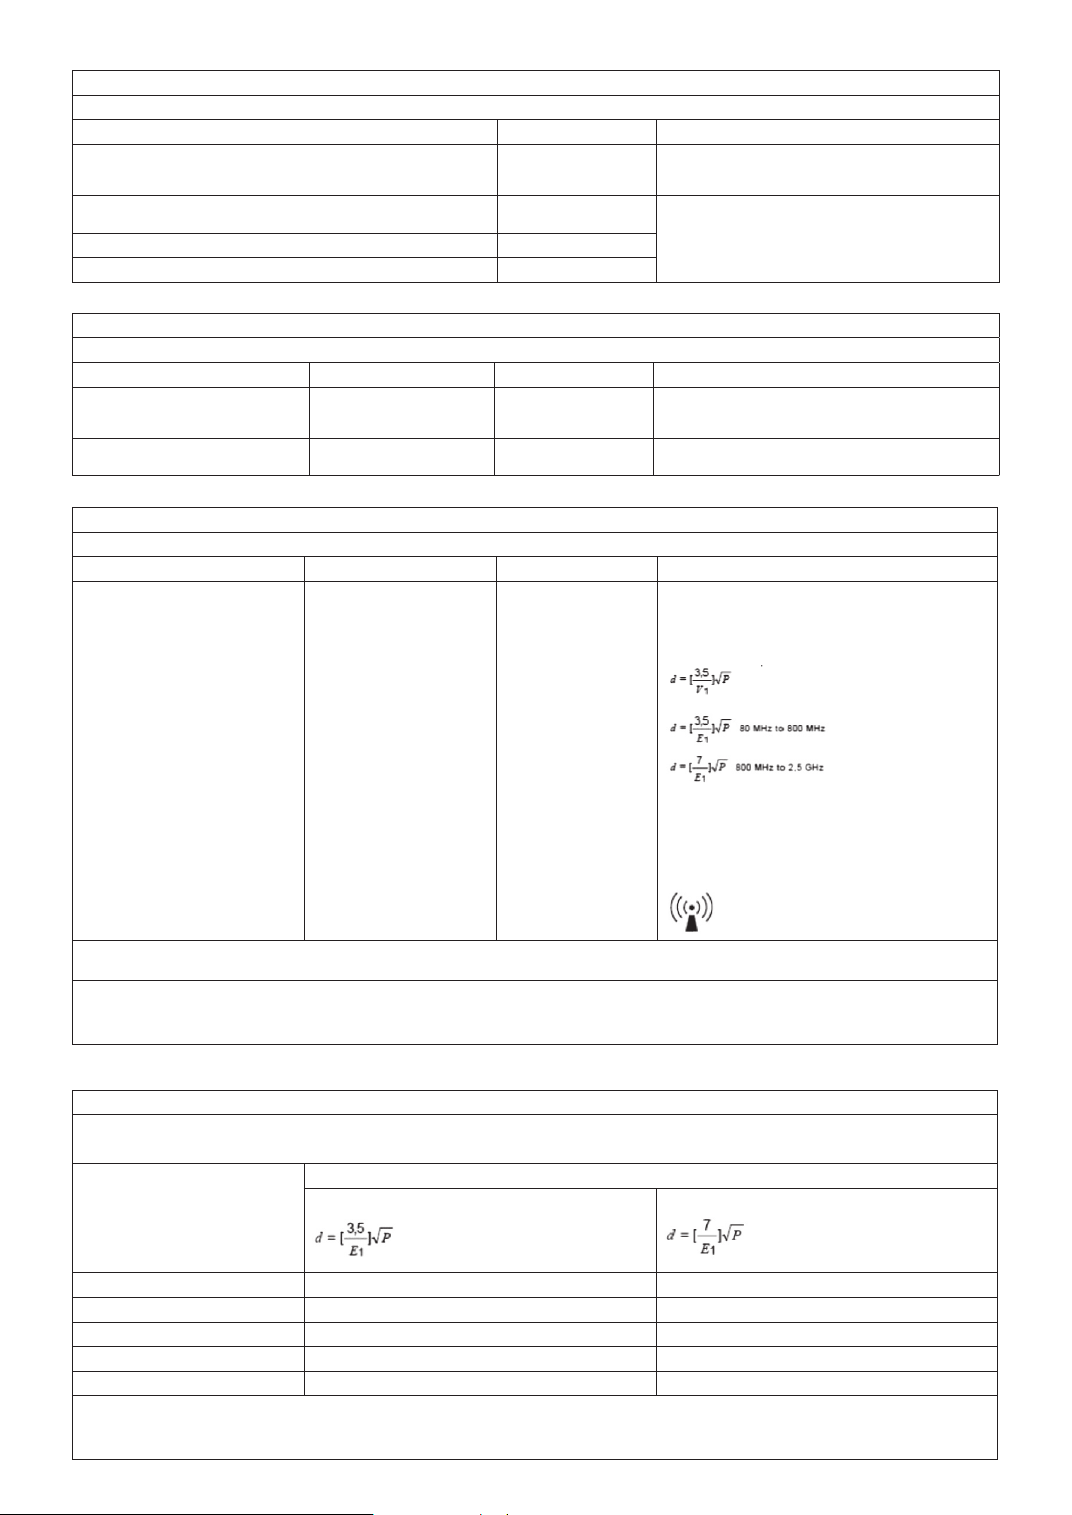
Table 206 - Recommended separation distances between portable and mobile RF communications equipment and the equipment and systems - for equipment and
systems that are not LIFE-SUPPORTING
Recommended separation distances between portable and mobile RF communications equipment and the Radii Xpert
The Radii Xpert is intended for use in an electromagnetic environment in which radiated RF disturbances are controlled. The customer or the user of the Radii Xpert can help prevent electro-
magnetic interference by maintaining a minimum distance between portable and mobile RF communications equipment (transmitters) and the Radii Xpert as recommended below, according to
the maximum output power of the communications equipment.
Rated maximum output power of
transmitter W
Separation distance according to frequency of transmitter m
80 MHz 10 800 MHz 800 MHz a 2,5 GHz
0,01 0.12 0.23
0.1 0.38 0.73
1 1.2 2.3
10 3.8 7.3
100 12 23
For transmitters rated at a maximum output power not listed above, the recommended separation distance din metres (m) can be estimated using the equation applicable to the frequency of
the transmitter, where Pis the maximum output power rating of the transmitter in watts (W) according to the transmitter manufacturer.
NOTE 1 At 80 MHz and 800 MHz, the separation distance for the higher frequency range applies.
NOTE 2 These guidelines may not apply in all situations. Electromagnetic propagation is affected by absorption and reflection from structures, objects and people.

9
20
FIGURES
1.
radii
xpert
20
s
3.
2.
4.
5.
7.
8.
6.
radii
xpert
Made in Australia by SDI Limited
Bayswater, Victoria 3153
Australia 1800 337 003
Austria 00800 0225 5734
Brazil 0800 770 1735
France 00800 0225 5734
Germany 0800 1005759
Ireland 00800 0225 5734
Italy 00800 0225 5734
New Zealand 0800 734 034
Spain 00800 0225 5734
United Kingdom 00800 0225 5734
USA & Canada 1 800 228 5166
www.sdi.com.au
SDI Germany GmbH
Hansestrasse 85
51149 Cologne
Germany
Tel +49 2203 9255 0
CAUTION: FOR PROFESSIONAL USE ONLY.
FEDERAL LAW RESTRICTS THIS DEVICE TO
SALE BY OR ON THE ORDER OF A DENTIST.
ACN 008 075 581
9.
radii
xpert
10o
radii
xpert
10o
1 2
10.
radii
xpert
10o
radii
xpert
10o
12
20
s
correct
fit + tighten
clockwise
rotate anti-clockwise
to remove
fit + tighten
clockwise
rotate anti-clockwise
to remove

10

11

Last revision 25-09-17
PAK41330 E
Other manuals for radii xpert
1
Table of contents
Other SDI Dental Equipment manuals


Popular Dental Equipment manuals by other brands

Dentsply Sirona
Dentsply Sirona X-Smart Pro Instructions for use

3M ESPE
3M ESPE CapMix instruction manual

Durr Dental
Durr Dental XR 24 Installation and operating instructions

FINO
FINO VITESSE SF User information

Durr Dental
Durr Dental Hygosonic Installation and operating instructions

KaVo
KaVo OP 3D Vision Service manual


