manuals.online logo
Brands
  1. Home
  2. •
  3. Brands
  4. •
  5. Sealey
  6. •
  7. Vacuum Cleaner
  8. •
  9. Sealey PC460.V2 User manual

Sealey PC460.V2 User manual

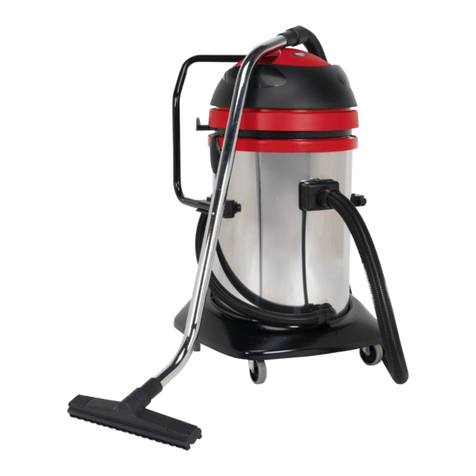
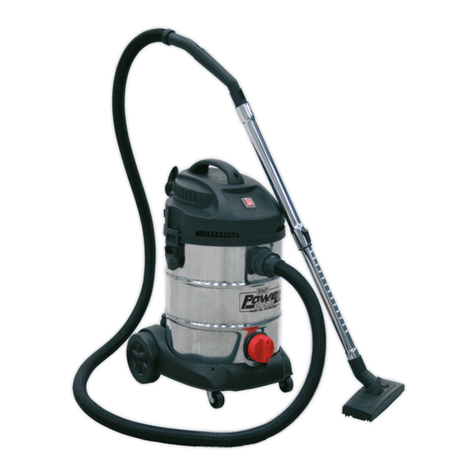
60L WET & DRY VACUUM CLEANER 2400W
STAINLESS DRUM, 230V, WITH ACCESSORIES
MODEL NO:
PC460.V2
Thank you for purchasing a Sealey product. Manufactured to a high standard, this product will, if used according to these
instructions, and properly maintained, give you years of trouble free performance.
IMPORTANT: PLEASE READ THESE INSTRUCTIONS CAREFULLY. NOTE THE SAFE OPERATIONAL REQUIREMENTS, WARNINGS & CAUTIONS. USE
THE PRODUCT CORRECTLY AND WITH CARE FOR THE PURPOSE FOR WHICH IT IS INTENDED. FAILURE TO DO SO MAY CAUSE DAMAGE AND/OR
PERSONAL INJURY AND WILL INVALIDATE THE WARRANTY. KEEP THESE INSTRUCTIONS SAFE FOR FUTURE USE.
1. SAFETY
1.1. ELECTRICAL SAFETY
WARNING! It is the user’s responsibility to check the following:
9Check all electrical equipment and appliances to ensure that they are safe before using. Inspect power supply leads, plugs and
all electrical connections for wear and damage. Sealey recommend that an RCD (Residual Current Device) is used with all electrical
products. It is advised the rated residual operating current does not exceed 30mA
9Children from age 8 years and above, persons with reduced physical, sensory, or mental capabilities those with lack of experience
and knowledge can use the appliance, if they have been given supervision or instruction concerning use of the appliance in a safe
way to understand the hazards involved.
8Children shall NOT play with the appliance.
8Cleaning and user maintenance on the appliance shall not be made by children without supervision.
9The appliance shall be disconnected from its power source during service and when replacing parts and, if that the removal of
the plug is foreseen, it shall be clearly indicated that the removal of the plug has to be such that an operator can check from any of
the points to which he has access that the plug remains removed.
Electrical safety information. It is important that the following information is read and understood:
9Ensure that the insulation on all cables and on the appliance is safe before connecting it to the power supply.
9Regularly inspect power supply cables and plugs for wear or damage and check all connections to ensure that they are secure.
Important: Ensure that the voltage rating on the appliance suits the power supply to be used and that the plug is tted with the
correct fuse.
8DO NOT pull or carry the appliance by the power cable.
8 If the supply cord is damaged, it must be replaced by the manufacturer, its service agent or similarly qualied persons in order to
avoid a hazard.
8DO NOT pull the plug from the socket by the cable.
8DO NOT use worn or damaged cables, plugs or connectors. Ensure that any faulty item is repaired or is replaced immediately by a
qualied electrician.
If the cable or plug is damaged during use, switch o󰀨 the electricity supply and remove from use.
 Ensurethatrepairsarecarriedoutbyaqualiedelectrician.
1.2. GENERAL SAFETY
9Disconnect the cleaner from the power supply before servicing, changing accessories, or performing any maintenance.
9Use only genuine parts and accessories. Unauthorised parts and accessories may be dangerous and will invalidate your warranty.
9
Maintain the cleaner in good condition. Use an authorised agent for servicing. Keep machine clean, but DO NOT use solvents.
9(For dry vacuuming ensure the cloth filter is firmly in place before operating the cleaner.)
8DO NOT operate the unit without the cartridge filter in place (except when wet vacuuming). Using the cleaner without a cloth
filter will cause machine faults and will invalidate your warranty.
9Wear protective clothing and gloves.
8DO NOT allow children or untrained persons to operate the cleaner.
8DO NOT place attachments close to your face (especially eyes, ears, etc). DO NOT point the hose end at other persons or animals.
▲DANGER! DO NOT vacuum hot or glowing ash, cigarette ends, inflammable, explosive, corrosive or other dangerous substances.
8DO NOT leave machine running unattended. Turn power supply OFF, and DO NOT leave the vicinity until motor has come to a
complete stop.
8DO NOT operate the cleaner while under the influence of drugs, alcohol or impairing medication, or if you are tired.
8DO NOT use the cleaner in the rain or in very damp conditions.
8DO NOT use the cleaner for a task it is not designed to perform.
9When not in use, store the cleaner in a safe, dry, childproof location.
2. INTRODUCTION
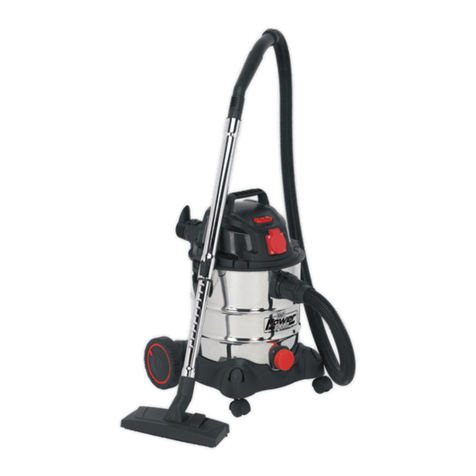
Industrial stainless-steel drum with tough composite base and head. Supplied with 1.5m EVA hose, wet oor nozzle, dry oor nozzle,
crevice tool, stainless steel rigid tubes, cloth lter, cloth bag and vac brush. Tank has easy empty cap with screw-on hose. Fitted with
two castor and two xed wheels. Cable storage hooks mounted on frame, accessories and extension tube holders on base.
Original Language Version
© Jack Sealey Limited
Read before rst
use Wear eye
protection Indoor use only Wear protective
clothing Wear protective
gloves
PC460.V2 Issue 1 14/11/23
3. SPECIFICATION
Model No:.......................................................PC460.V2
Cloth bag....................................................PC460CBV2
Cloth lter...................................................PC460CFV2
Drum size ...................................................................60L
Fuse rating: ................................................................ 13A
Motor Power:..................................................... 2x1200W
Plug Type:............................................................3 Pin BS
Power Supply Cable Length:.....................................1.5m
Supply ......................................................................230V
4. CONTENTS
Original Language Version
© Jack Sealey Limited PC460.V2 Issue 1 14/11/23
No Parts No Parts
1 Top Handle 37 Wheel axle
2 Screw 38 Axle support (Lower)
3 Cable sleeve 39 Wheel axle retainer
4 Power cable 40 Screw
5 Top cover 41 Fixed wheel
6 Screw 42 Caster wheel
7 Wire grip 43 Chain small
8 Middle cover 44 Trolley base
9 Middle cover base 45 Drainage nut
10 Upper gasket 46 Drainage hose seal
11 Motor 47 Drainage hose
12 Air outlet lter 48 Drainage hose
connecting ring
13 Lower gasket 49 Outlet block
14 Air direction plate 50 Drainage hose clip
15 Motor base 51 Screw
16 Gasket seal 52 Vacuum hose
17 Bottom base 53 Handle pin
18 Bottom base seal 54 Handle pin holder
19 Screw+nut 55 Hose inlet base (Front)
20 Screw 56 Screw
21 Big cloth lter 57 Hose inlet base (Rear)
22 Basket frame 58 Screw
23 Stainless steel tank 59 Float basket
24 Tank clip 60 Safety valve
25 Rivet 61 Crevice nozzle
26 Buckle 62 Round brush
27 Support pin 63 Squeegee nozzle
28 Screw M4 x 35 64 Brush nozzle
29 Trolley handle 65 Tube extension
30 Location button 66 Seal ring (for middle
cover base)
31 Turnover board 67 Terminal block
32 Screw+gasket 68 Screw
33 Turnover support shelf 69 Rubber block
34 Support handle 70 Capacitor
35 Rivet 71 Inductance
36 Axle support (Upper) 72 Power switch
5. ASSEMBLY
5.1. Undo clasps.
5.2. Lift off the motor head assembly.
5.3. Remove contents from inside the drum.
5.4. Turn the drum upside down and insert the castors ensuring they are pushed all the way in.
5.5. Insert the rear rubber wheels and attach to the rear axle if not already assembled.
5.6. Insert the cloth filter and bag.
5.7. For wet vacuum cleaning ensure that the cloth filter is removed.
5.8. Replace the motor head onto the drum.
5.9. Align up the motor head with the clasps and snap into place,by applying pressure at the mid point of the clasps.
5.10. Insert the large end of the hose into the front inlet of the drum and lock in place by turning fully clockwise.
5.11. Choose the desired nozzle and push it onto the suction tube.
6. DRY VACUUM CLEANING
WARNING! Ensure you read, understand and apply Section 1 ‘Safety Instructions’.
WARNING! DO NOT vacuum hazardous substances.
6.1. Ensure the machine is unplugged from the power supply.
6.2. Ensure cloth filter and cloth bag are fitted.
6.3. Reposition the head onto the drum, and clip in place.
6.4. Insert the larger end of the flexible hose into the front inlet on the drum and lock in place. Push the required attachment/suction tube onto
the free end of the hose.
6.5. Plug in the power supply.
6.6. Switch to the ‘On’ (position ‘I’) from one or both sides.
6.7. When you have completed vacuuming, press the switch/switches to the ‘Off’ (position ‘0’).
7. WET VACUUM CLEANING
WARNING! Ensure you read, understand and apply Section 1 ‘Safety Instructions’. Reminder: Remove plug from power supply before
opening unit.
8DO NOT vacuum solvents, explosives, inflammable and/or hazardous liquids such as petrol, oil, spirits, paint, thinners, acids etc.
8DO NOT use cloth filter or cloth bags when wet vacuuming.
7.1. Ensure the machine is unplugged from the power supply. Make sure the tank is clean and free from dust and dirt.
7.2. Remove the cloth filter and replace motor head assembly onto the drum.
7.3. Fit the desired nozzle (to the same flexible hose used in dry cleaning).
7.4. Ensure the switches are in the ‘Off’ (position ‘0’) before plugging into the power supply (both switches).
7.5. Press the switch or switches to the ‘On’ (position ‘I’).
NOTE:To vacuum large quantities of liquid, from a sink or tank etc, DO NOT immerse the nozzle completely in the liquid, leave a gap at
the top of the nozzle opening to allow an air inflow. The machine is fitted with a float valve which stops the suction action when the tank
has reached its maximum capacity. The user will notice an increase in motor speed. When this happens, turn off the machine,
disconnect from power supply, remove the motor head assembly from the drum and empty the liquid into a suitable receptacle or
drain. To continue vacuuming, refit the head and proceed. After wet vacuuming, turn the machine off and unplug from power
supply. Empty the drum and clean and dry the inside and outside before storage.
WARNING! Not designed for liquid storage. Always empty liquids after use and before storing.
8. MAINTENANCE
8.1. GENERAL MAINTENANCE.
Warning! The plug must be removed from the socket before cleaning or maintaining the appliance.
8.1.1. Disconnect the hose from the drum.
8.1.2. Undo the clasps and remove motor head assembly from the drum.
8.1.3. Clear out any dirt or debris from the drum and hose.
8.1.4. Check that the suction tube operates smoothly and check the power cable to make sure it has not received any damage.
9. TROUBLESHOOTING
g.3
g.5
Original Language Version
© Jack Sealey Limited PC460.V2 Issue 1 14/11/23
Problem Cause Solution
Cleaner will not operate. 1. No power supply.
2. Faulty power cable, switch or motor.
3. Drum full of liquid.
1. Check supply.
2. Check and repair or replace faulty item.
3. Empty drum.
Dust comes from the
motor cover. 1. Cloth filter missing or
damaged. 1. Fit or replace cloth filter.
Reduced efficiency and
increased motor speed/
vibration.
1. Dust drum full.
2. Filter clogged.
3. Nozzle, hose or drum inlet blocked.
1. Empty drum.
2. Clean or replace cloth filter.
3. Check nozzle, hose and drum inlet for blockage/
clear blockage.
Sealey Group, Kempson Way, Suffolk Business Park, Bury St Edmunds, Suffolk. IP32 7AR
01284 757500 sales@sealey.co.uk www.sealey.co.uk
ENVIRONMENT PROTECTION
Recycle unwanted materials instead of disposing of them as waste.All tools, accessories and packaging should be sorted,
taken to a recycling centre and disposed of in a manner which is compatible with the environment. When the product
becomes completely unserviceable and requires disposal, drain any fluids (if applicable) into approved containers and
dispose of the product and fluids according to local regulations.
WEEE REGULATIONS
Dispose of this product at the end of its working life in compliance with the EU Directive on Waste Electrical and Electronic Equipment
(WEEE). When the product is no longer required, it must be disposed of in an environmentally protective way. Contact your local solid
waste authority for recycling information.
Original Language Version
© Jack Sealey Limited PC460.V2 Issue 1 14/11/23
Note: It is our policy to continually improve products and as such we reserve the right to alter data, specifications and component parts without prior
notice. Please note that other versions of this product are available. If you require documentation for alternative versions, please email or call
our technical team on technical@sealey.co.uk or 01284 757505.
Important: No Liability is accepted for incorrect use of this product.
Warranty: Guarantee is 12 months from purchase date, proof of which is required for any claim.
REGISTER YOUR
PURCHASE HERE

Other Sealey Vacuum Cleaner manuals

Sealey CPV72 User manual

Sealey

Sealey CPV72 User manual

Sealey Power Clean VMA92 User manual

Sealey

Sealey Power Clean VMA92 User manual

Sealey Quality MACHINERY SM46.V3 User manual

Sealey

Sealey Quality MACHINERY SM46.V3 User manual

Sealey CP20VWDV User manual

Sealey

Sealey CP20VWDV User manual

Sealey PC460 User manual

Sealey

Sealey PC460 User manual

Sealey PC150 User manual

Sealey

Sealey PC150 User manual

Sealey PC380M User manual

Sealey

Sealey PC380M User manual

Sealey PC200 User manual

Sealey

Sealey PC200 User manual

Sealey VALET MACHINE VMA915 User manual

Sealey

Sealey VALET MACHINE VMA915 User manual

Sealey PC477 User manual

Sealey

Sealey PC477 User manual

Sealey PC150A User manual

Sealey

Sealey PC150A User manual

Sealey PC100 User manual

Sealey

Sealey PC100 User manual

Sealey PC300SDAUTO.V3 User manual

Sealey

Sealey PC300SDAUTO.V3 User manual

Sealey PC300.V2 User manual

Sealey

Sealey PC300.V2 User manual

Sealey PC200SDAUTO.V3 User manual

Sealey

Sealey PC200SDAUTO.V3 User manual

Sealey PC200SDAUTO User manual

Sealey

Sealey PC200SDAUTO User manual

Sealey DDE01 User manual

Sealey

Sealey DDE01 User manual

Sealey SM48.V3 User manual

Sealey

Sealey SM48.V3 User manual

Sealey SM47.V3 User manual

Sealey

Sealey SM47.V3 User manual

Sealey SM47.V3 User manual

Sealey

Sealey SM47.V3 User manual

Sealey PC300SD.V3 User manual

Sealey

Sealey PC300SD.V3 User manual

Sealey PC200SD User manual

Sealey

Sealey PC200SD User manual

Sealey PC455 User manual

Sealey

Sealey PC455 User manual

Sealey PC320.V2 User manual

Sealey

Sealey PC320.V2 User manual

Popular Vacuum Cleaner manuals by other brands

Vax V-135 SERIES instruction manual

Vax

Vax V-135 SERIES instruction manual

dibea x500 user manual

dibea

dibea x500 user manual

CleanMax CMPS-1T operating instructions

CleanMax

CleanMax CMPS-1T operating instructions

Eureka 4870 Series quick start guide

Eureka

Eureka 4870 Series quick start guide

Haier HCJ-061 instruction manual

Haier

Haier HCJ-061 instruction manual

Stirling EE-9248 quick guide

Stirling

Stirling EE-9248 quick guide

Lindhaus LS 50 Hybrid Owners guide and parts manual

Lindhaus

Lindhaus LS 50 Hybrid Owners guide and parts manual

BETCO E85509-00 fiberpro Operator and parts manual

BETCO

BETCO E85509-00 fiberpro Operator and parts manual

Panasonic MC-CG381-AU21 Service manual

Panasonic

Panasonic MC-CG381-AU21 Service manual

Siemens VS Z4 Instructions for use

Siemens

Siemens VS Z4 Instructions for use

EINHELL BT-VC 1250 SA operating instructions

EINHELL

EINHELL BT-VC 1250 SA operating instructions

Sencor SRV 9550BK Translation of the original manual

Sencor

Sencor SRV 9550BK Translation of the original manual

Morphy Richards ESSENTIALS BAGLESS VACUUM CLEANER - REV 1 manual

Morphy Richards

Morphy Richards ESSENTIALS BAGLESS VACUUM CLEANER - REV 1 manual

cecotec CONGA 2290 instruction manual

cecotec

cecotec CONGA 2290 instruction manual

Makita DCL181F instruction manual

Makita

Makita DCL181F instruction manual

Shark duoclean POWERED LIFT-AWAY NV835 quick start guide

Shark

Shark duoclean POWERED LIFT-AWAY NV835 quick start guide

Sytech SY-AS110 user manual

Sytech

Sytech SY-AS110 user manual

Melissa 640-064 user guide

Melissa

Melissa 640-064 user guide

manuals.online logo
manuals.online logoBrands
  • About & Mission
  • Contact us
  • Privacy Policy
  • Terms and Conditions

Copyright 2025 Manuals.Online. All Rights Reserved.