manuals.online logo
Brands
  1. Home
  2. •
  3. Brands
  4. •
  5. SECO-LARM
  6. •
  7. Door Lock
  8. •
  9. SECO-LARM SD-993C-D3Q User manual

SECO-LARM SD-993C-D3Q User manual

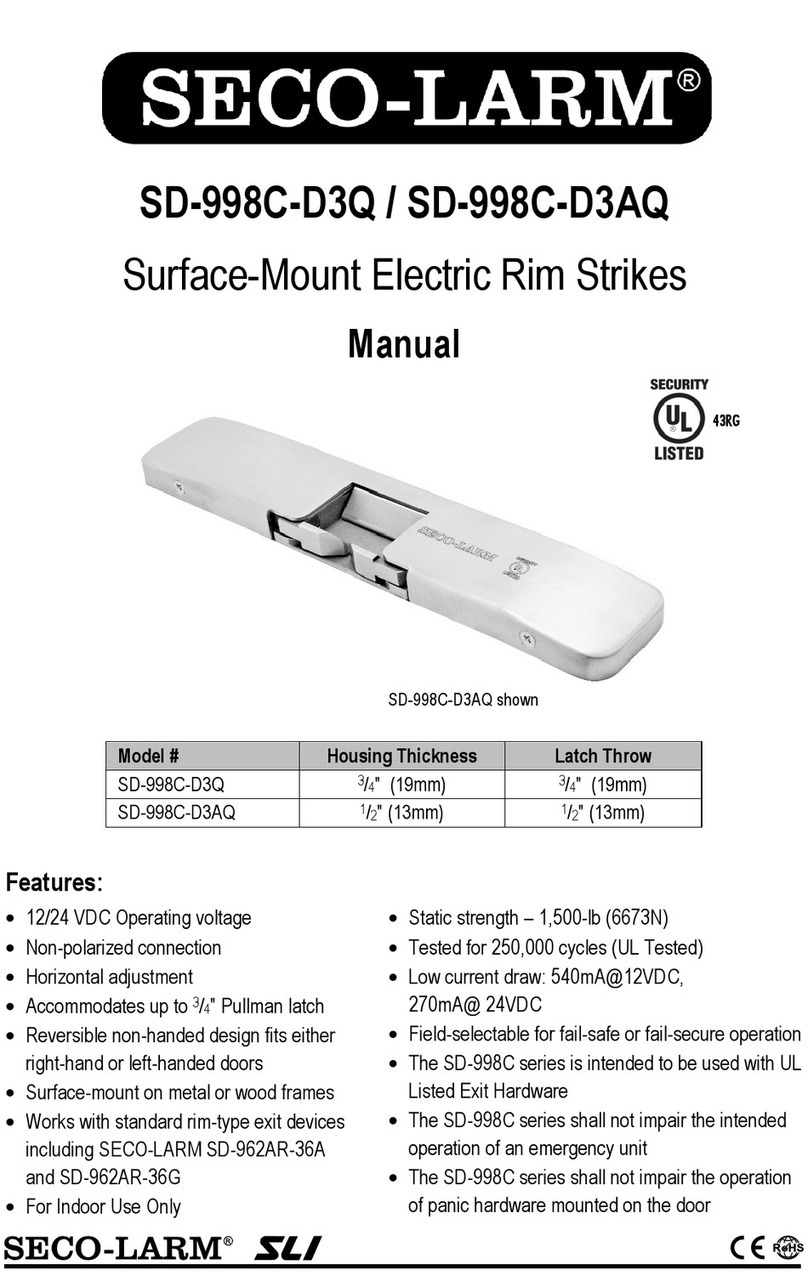
Manual
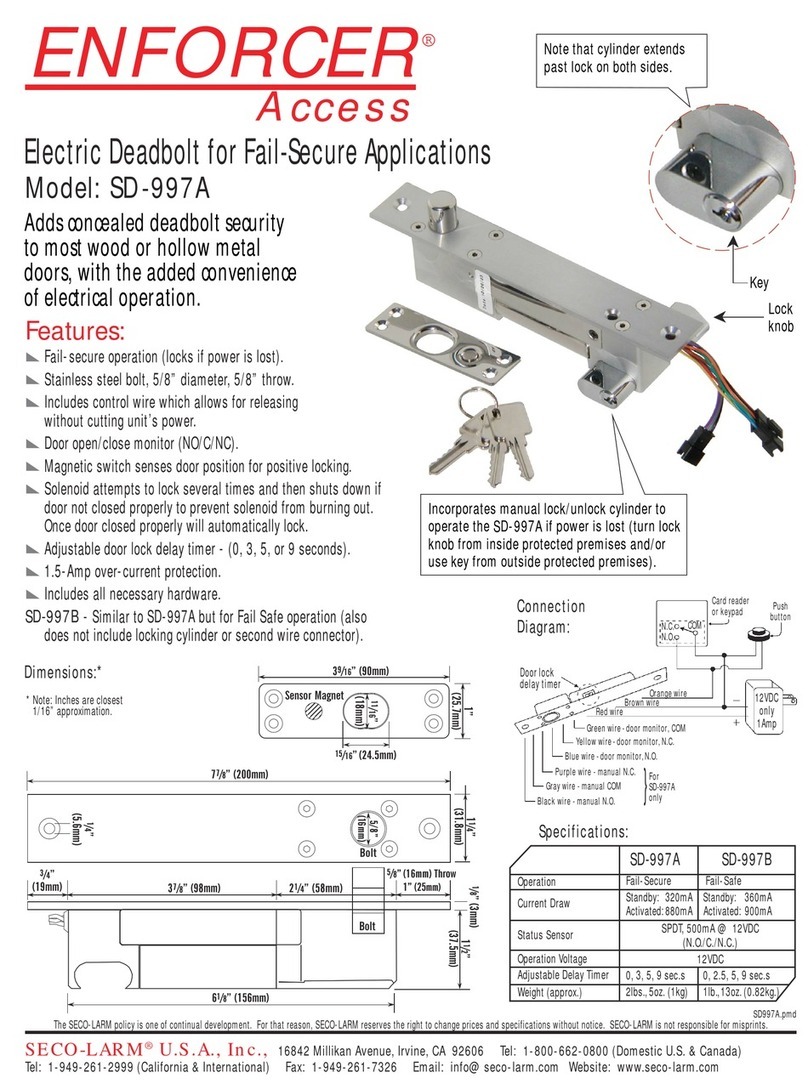
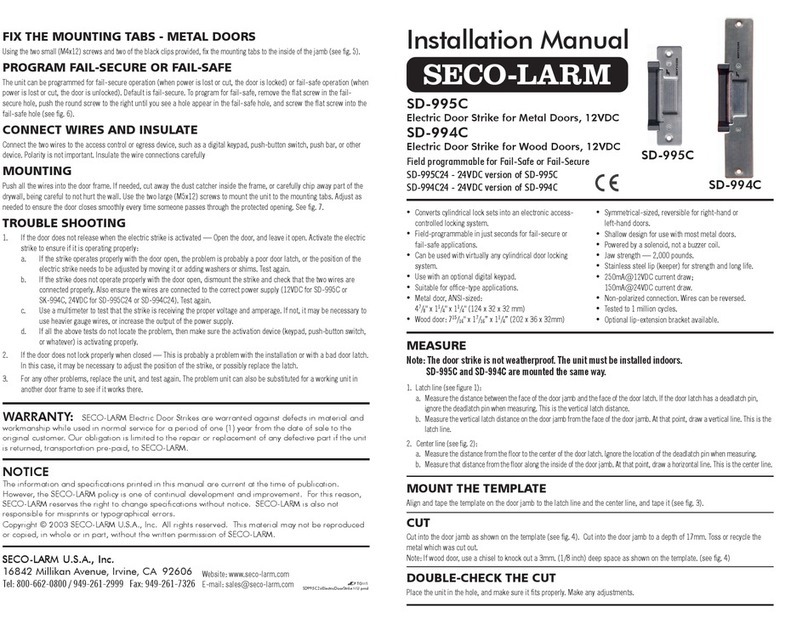
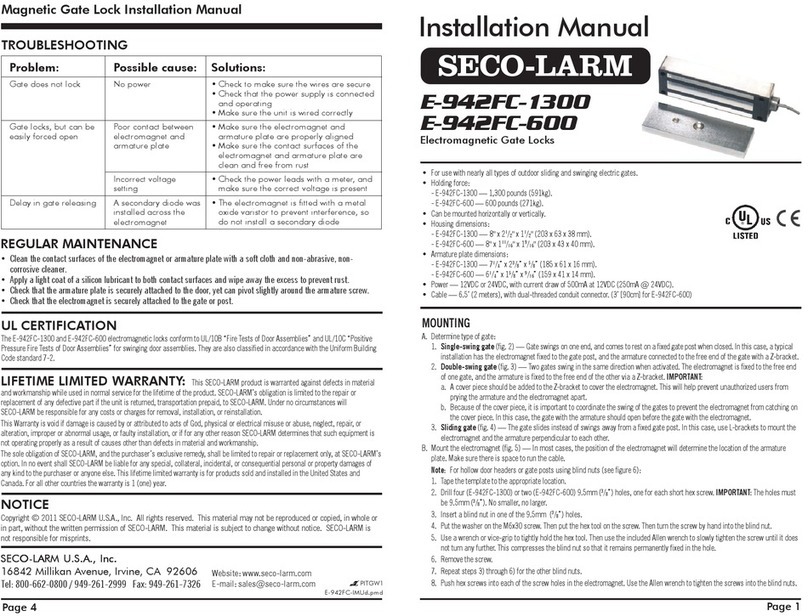
SD-993C-D3Q
No-Cut Door Strike
Features:
43RG
•Static strength – 1,500 lbs. (680kg)
•Dynamic strength – 70 ft-lbs. (9.68 m-kgs)
•12/24 VDC Operating voltage
•Tested to 100,000 cycles (UL Tested),
tested to 1,000,000 cycles (Factory Tested)
•Low current draw: 300mA@12VDC,
150mA@24VDC
•The SD-993C-D3Q is intended to be used with
UL Listed Exit Hardware
•The SD-993C-D3Q shall not impair the intended
operation of an emergency exit
•The SD-993C-D3Q shall not impair the operation
of panic hardware mounted on the door
•Horizontally adjustable keeper
accommodates latchbolt positioning
•Vertically adjustable ramp accommodates
nib positioning
•Low profile: Strike is only 11/16” deep for
use with aluminum frames
•Field selectable for fail-safe or
fail-secure operation
•Mounting tabs included for mounting to
hollow aluminum & metal doors
•Reversible non-handed design fits either
right-hand or left-hand doors
•For Indoor Use Only
SECO-LARM No-Cut Door Strike
2SECO-LARM U.S.A., Inc.
1x
Door Strike
2x
Electrical connectors
2x
Wiring connectors
2x
Mounting tabs
2x
Wood screws
4x
Machine screws
2x
Machine screws (narrow)
2x
Security screws
2x
Anchor nuts
1x
Manual
Model
SD-993C-D3Q
Operating voltage
12/24 VDC
Current draw
12VDC
300mA
24VDC
150mA
Latch throw
9/16" (15mm)
Keeper width
17/16" (36mm)
Static strength
1,500 lbs. (680kg)
Dynamic strength
70 ft-lbs. (9.68 m-kgs)
Endurance
100,000 cycles (UL Tested), 1,000,000 cycles (Factory Tested)
Operating temperature
32°~120° F (0°~49° C)
Operating humidity
0~85%
Dimensions
47/8"x11/4"x11/16" (124x32x27.5 mm)
Specifications:
Note: Not all parts will be used in every installation.
Parts List:
Dimensions:
1. Using a flathead screwdriver, unscrew and remove
the screw cap to access the field-selectable plug.
2.
For fail-safe operation, rotate the field-selectable plug
so that "1" is facing up.
3.
For fail-secure operation, rotate the field-selectable
plug so that "2" is facing up.
4.
Replace the field-selectable plug in the correct
orientation and screw the screw cap back into place.
Selecting Fail-Safe or Fail-Secure:
17/
16
"
(36mm)
11/4" (32mm)
47/
8
"
(124mm)
11/16" (27.5mm)
31/
8
"
(79mm)
33/
8
"
(85mm)
41/
8
"
(105mm)
Field-selectable Plug
Screw Cap
SECO-LARM No-Cut Door Strike
SECO-LARM U.S.A., Inc 3
1. Measure the latch line (see fig. 1).
a. Measure the distance between the face of the door
jamb and the face of the door latch. This is the
vertical latch distance.
b.
Measure the vertical latch distance on the door jamb
from the face of the door jamb.
At that point, draw a vertical line. This is
the latch line.
2.
Measure the center line (see fig. 2).
a. Measure the distance from the floor to the center of
the door latch. Ignore the location of the deadlatch
pin when taking measurements.
b. Measure the same distance as above along the
inside of the door jamb. This is the center line.
3.
Align the included mounting template to the latch and
center lines (see fig. 3).
4.
To mount the strike where the hollow door frame
material is unsuitable for mounting, install the provided
mounting tabs. (see fig. 4)
5.
Before installing the door strike, program for either fail-
secure or fail-safe operation. See
"Selecting Fail-Secure or Fail-Safe," page 2.
6.
Conceal all wires in the door frame. Use two of the
included machine screws to mount the unit to the
mounting tabs. Adjust as needed to ensure the door
closes smoothly (see fig. 5).
7.
Connect to power. See "Wiring Diagram,"
page 4.
Installation:
Fig.4
Fig.3
Fig.2
Fig.
1
Fig.5
For 24VDC operation:
Door latch
Deadlatch pin
Door jamb
X
Vertical latch
distance
Latch Line
For 12VDC operation:
12V
24V
Black Wire
Red Wire
White Wire
12VDC
24VDC
Wiring Diagram:
SECO-LARM No-Cut Door Strike
4SECO-LARM U.S.A., Inc.
Connect the strike to a DC power supply.
Troubleshooting:
Door does not open when the
electric strike is activated
Dismount the strike and check that the wiring connector is
connected properly.
Ensure the wiring connector is connected to a 12 or 24VDC source.
Use a multimeter to test that the strike is receiving the proper
voltage and amperage. If it is not, it may be necessary to use
heavier gauge wires, or increase the output of the power supply.
Make sure the activation device (keypad or push-button switch) is
working properly.
Electric strike does not activate
Check that the door latch is operating properly, and replace if
necessary.
The position of the electric strike may need to be adjusted by
moving it or adding washers or shims.
Strike makes a buzzing sound
NOTICE: The SECO-LARM policy is one of continual development and improvement. For that reason, SECO-LARM
reserves the right to change specifications w
ithout notice. SECO-LARM is also not responsible for misprints.
Copyright © 2016 SECO
-LARM U.S.A., Inc. All rights reserved. This material may not be reproduced or copied, in
whole or
in part, without the written permission of SECO
-LARM.
LIMITED WARRANTY:
This SECO-LARM product is warranted against defects in material and workmanship while
used in normal service
for three (3) years from the date of sale to the original customer. SECO-
LARM’s obligation is limited
to the repair or replacement of any defective part if the unit is returned, transportation prepaid, to SECO
-LARM.
This
Warranty is void if damage is caused by or attributed to acts of God, physical or electrical misuse or abuse, neglect, repair
or alteration, improper or abnormal usage, or faulty installation, or if for any other reason SECO
-
LARM determines that such
equipment is not operating properly as a result of causes other
than defects in material and workmanship.
The sole
obligation of SECO
-
LARM and the purchaser’s exclusive remedy, shall be limited to the replacement or repair only, at
SECO
-LARM’s option. In no event shall SECO-LARM be liable for any special, collateral, i
ncidental, or consequential
personal or property damage of any kind to the purchaser or anyone else.
SECO-LARM®U.S.A., Inc.
16842 Millikan Avenue, Irvine, CA 92606
Website: www.seco-larm.com
PITGW1
Phone: (949) 261-2999 | (800) 662-0800
Email: sales@seco-larm.com
MI_SD-993C-D3Q_160930.docx
Horizontal and Vertical Adjustment:
The keeper can be easily adjusted horizontally to account for various installation anomalies and
the vertically adjustable deadlatch ramp accommodates a wide range of lock types.
To adjust the keeper
and/or the deadlatch ramp:
1. Loosen the two keeper adjustment screws and/or the ramp adjustment screws.
2. Move the keeper horizontally and/or the deadlatch ramp vertically to the desired position.
3. Retighten the two keeper adjustment screws and/or the ramp adjustment screws.
Keeper Adjustment
Screws
Ramp Adjustment
Screws

Other SECO-LARM Door Lock manuals

SECO-LARM E-941D 600Q Series User manual

SECO-LARM

SECO-LARM E-941D 600Q Series User manual

SECO-LARM SD-996C-U1VQ User manual

SECO-LARM

SECO-LARM SD-996C-U1VQ User manual

SECO-LARM SD-995C-LE25 User manual

SECO-LARM

SECO-LARM SD-995C-LE25 User manual

SECO-LARM SLI SD-997B-1SQ User manual

SECO-LARM

SECO-LARM SLI SD-997B-1SQ User manual

SECO-LARM SD-997BQ User manual

SECO-LARM

SECO-LARM SD-997BQ User manual

SECO-LARM SD-997A-GBQ User manual

SECO-LARM

SECO-LARM SD-997A-GBQ User manual

SECO-LARM Enforcer Access SD-962AR-36A User manual

SECO-LARM

SECO-LARM Enforcer Access SD-962AR-36A User manual

SECO-LARM SD-998C-D3Q User manual

SECO-LARM

SECO-LARM SD-998C-D3Q User manual

SECO-LARM Enforcer SD-997A User manual

SECO-LARM

SECO-LARM Enforcer SD-997A User manual

SECO-LARM SD-997SMB-AQ User manual

SECO-LARM

SECO-LARM SD-997SMB-AQ User manual

SECO-LARM SD-997B-GBQ User manual

SECO-LARM

SECO-LARM SD-997B-GBQ User manual

SECO-LARM SD-995C User manual

SECO-LARM

SECO-LARM SD-995C User manual

SECO-LARM E-942FC-1300 User manual

SECO-LARM

SECO-LARM E-942FC-1300 User manual

SECO-LARM Enforcer SD-994C User manual

SECO-LARM

SECO-LARM Enforcer SD-994C User manual

SECO-LARM SD-996C-NUQ User manual

SECO-LARM

SECO-LARM SD-996C-NUQ User manual

Popular Door Lock manuals by other brands

DORTRONICS SYSTEMS 1107 D Series Mounting instructions

DORTRONICS SYSTEMS

DORTRONICS SYSTEMS 1107 D Series Mounting instructions

PDQ 5100 Series instruction sheet

PDQ

PDQ 5100 Series instruction sheet

Schlage Ease S2 quick start guide

Schlage

Schlage Ease S2 quick start guide

ANXELL ML-605M-30 Installation instruction

ANXELL

ANXELL ML-605M-30 Installation instruction

Anviz L100D II user manual

Anviz

Anviz L100D II user manual

ABH 6100EO Series Installation

ABH

ABH 6100EO Series Installation

FingerTec Keylock 8800 user guide

FingerTec

FingerTec Keylock 8800 user guide

DORIC DS2400 Assembly instructions

DORIC

DORIC DS2400 Assembly instructions

WOOX R7056 quick start guide

WOOX

WOOX R7056 quick start guide

Häfele Dialock DT 100 FH installation instructions

Häfele

Häfele Dialock DT 100 FH installation instructions

Stuv 3.31.270 Series Assembly instructions

Stuv

Stuv 3.31.270 Series Assembly instructions

Kaba Simplex 7104 Series installation instructions

Kaba

Kaba Simplex 7104 Series installation instructions

Iseo Zero1 Thesis 2.0 Standard instruction manual

Iseo

Iseo Zero1 Thesis 2.0 Standard instruction manual

Assa Abloy ENTR quick start guide

Assa Abloy

Assa Abloy ENTR quick start guide

Philips EasyKey 7100 user manual

Philips

Philips EasyKey 7100 user manual

Schlage B-Series installation instructions

Schlage

Schlage B-Series installation instructions

Assa Abloy Securitron DSB Series Installation and operation instructions

Assa Abloy

Assa Abloy Securitron DSB Series Installation and operation instructions

Abloy ML81APV instructions

Abloy

Abloy ML81APV instructions

manuals.online logo
manuals.online logoBrands
  • About & Mission
  • Contact us
  • Privacy Policy
  • Terms and Conditions

Copyright 2025 Manuals.Online. All Rights Reserved.