manuals.online logo
Brands
  1. Home
  2. •
  3. Brands
  4. •
  5. SelectBlinds
  6. •
  7. Window Blind
  8. •
  9. SelectBlinds Aluminum Blind User manual

SelectBlinds Aluminum Blind User manual

1” & 2” Aluminum Blind
Installaon Instrucons
Please follow these Installaon Instrucons
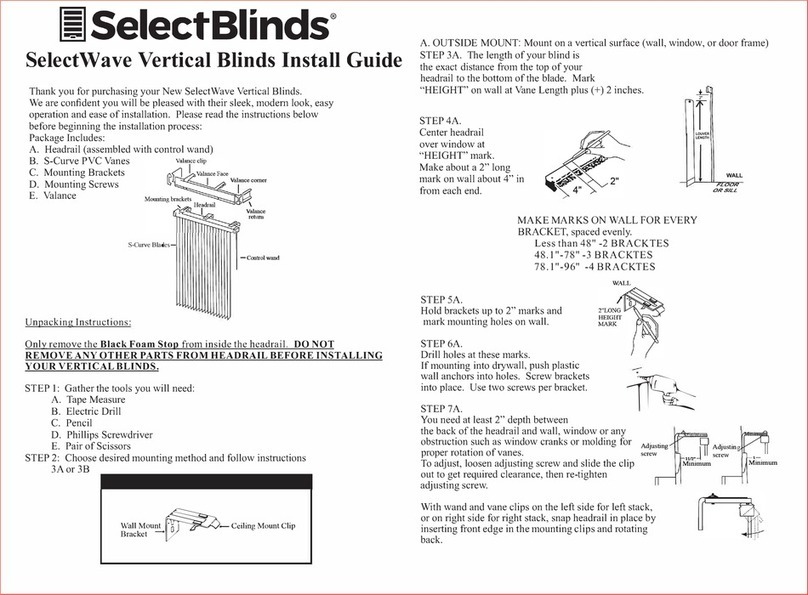
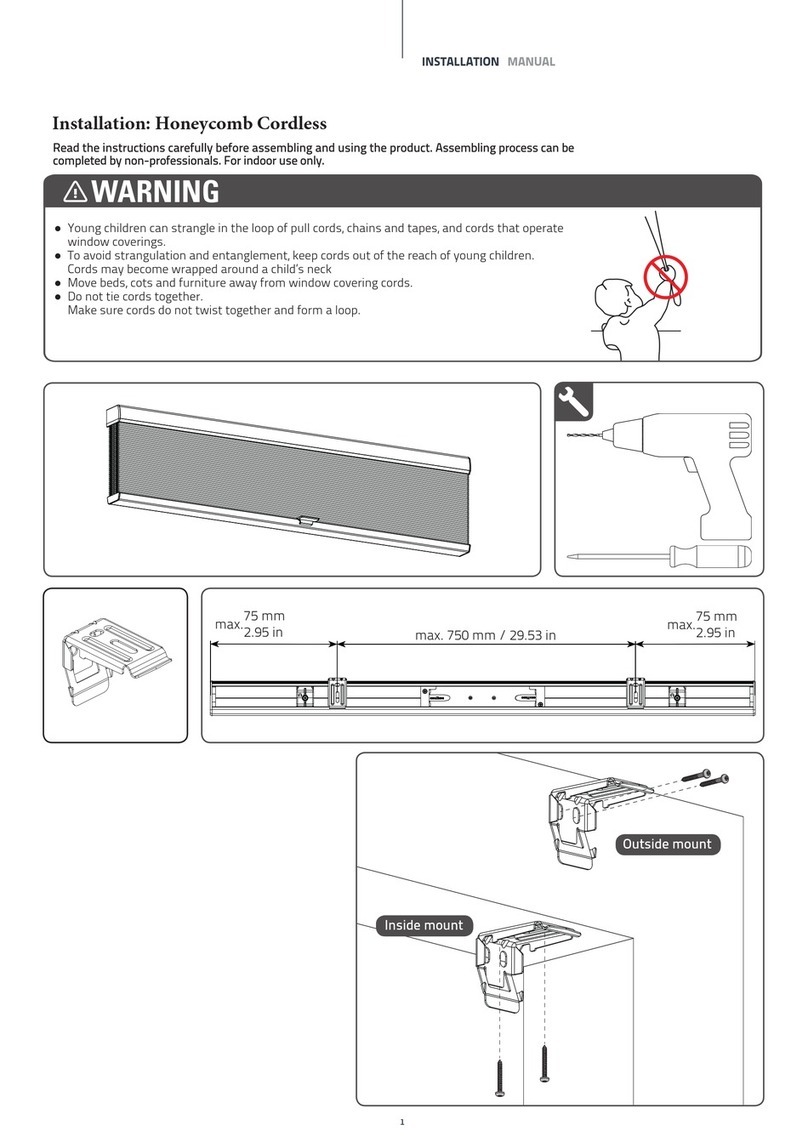
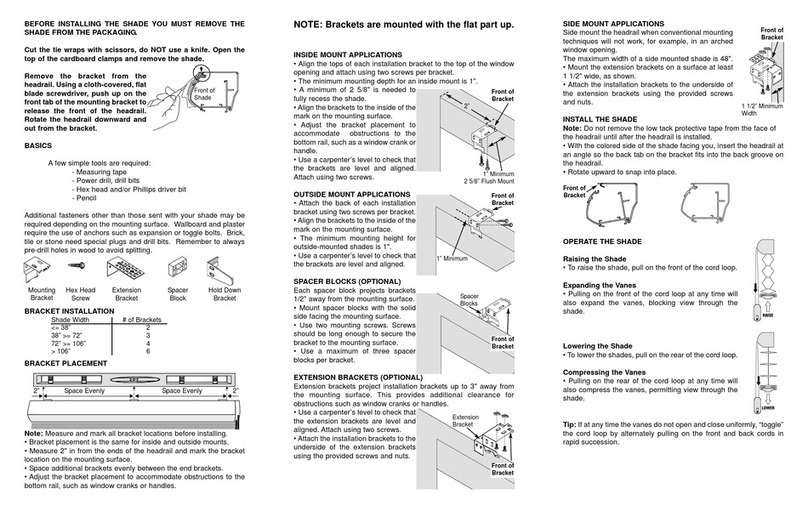
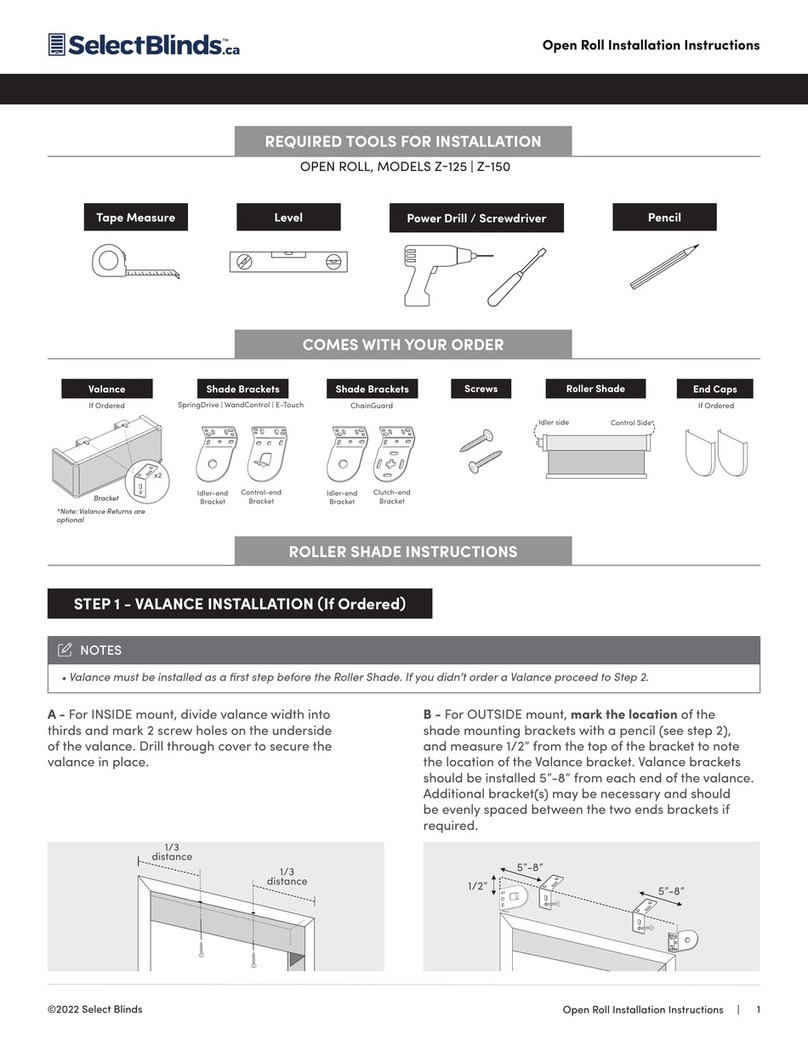
You will need a pencil, tape measure, drill, screwdriver, pliers, and appropriate fasteners.
Step 1: Choose the Correct Fastener
Step 2: Prepare Brackets
Step
3:
Mark
the
1 ½” #8 Hex Head
Wood Screws (Included)
Alternave fasteners should be used for aluminum or
concrete installaons
(Not Included with Blinds)
End Box
Installaon Brackets
Center Support
Bracket for
1 1/2” Headrail
(For Outside Mount Installaons)
Posion the box brackets at each end of the headrail. When using a
single center support bracket, center it between the box brackets. For
more than one center support bracket, space the support brackets
evenly, not more than 30” apart. Make sure the brackets will not
interfere with the cord mechanism or any other internal parts. Mark
the bracket for mounng hole locaons, making sure they are square
and equally spaced. For outside mount installaons, use a level to
check for levelness.
(For Inside Mount Installaons)
Posion the box brackets at each end of the headrail. Depending on
the installaon locaon, box brackets can be aached using the top,
back, or side holes. When using a single center support bracket, center
it between the box brackets. For more than one center support brack-
et, space the support brackets evenly, not more than 30” apart. Make
sure the brackets will not interfere with the cord mechanism or any
other parts. Mark the locaon of the desired bracket mounng holes,
making sure that they are square and equally spaced.
Prepare box brackets for installaon:
Open the front of the bracket by
pressing on the boom of the
bracket to release the locking tab
while liing the front gate.
Use the following # of Center Support Installaon Brackets based
on the Blind Width:
Up to 60” 60 ⅛” - 77 ¾” 77 ⅞” and
Greater
012
Valance Clips Needed
Up to 35.99” 36” - 59.99” 60” - 83.99” 84” - 131.99” 132” - 155.99” 156” and Greater
2 3 4 5 6 7
For your convenience, extra valance clips are
included.
Center Support
Bracket for
1” Headrail
1” & 2” Aluminum Blind
Installaon Instrucons
Step 4: Bracket Installaon
Valance Clips Needed
Up to 35.99” 36” - 59.99” 60” - 83.99” 84” - 131.99” 132” - 155.99” 156” and Greater
2 3 4 5 6 7
Step 6: Blind Installaon
Aach the plasc valance clips to the front of the headrail, one at each
end. Space any remaining clips evenly. Hold the valance into the clips.
Align the headrail with the center support and box brackets. The head-
rail should have the lt mechanism facing toward the room. Be careful
not to trap the top slat in the brackets and slide the headrail straight
back unl it is snug in the brackets. If the headrail can slide from side to
side in the box brackets, you can use a at head screwdriver to bend out
the tabs on the end of the unl it is snug.
Lower the front gate of each box brack-
et and press unl the locking tab clicks
into place.
(For Outside Mount Installaons)
Screw brackets into wall as shown.
(For Inside Mount Installaons)
Screw brackets in window frame as shown.
With the hold-down brackets aached to
the boom rail, lower the blind to the hold
down bracket mounng surface and mark
the bracket locaons. Aach the hold down
brackets at the boom of the window or
door with the included screws as shown. To
aach the boomrail, gently pull the brack-
ets out slightly, and insert the pins into the
holes on the boomrail of the blinds.
To lower the blind, pull the cord down and towards the center of the shade to unlock the cord. Then, slowly release the cord unl the shade reaches the
desired locaon. Move the cord past the outer edge of the shade and let go to lock the cord.
To raise the blind, pull the cord straight down unl the shade reaches the desired locaon. Move the cord past the outer edge of the shade and let go to
lock the cord.
Outside Mount Valances: For aluminum blinds
ordered as outside mount, the aluminum slats
used for the valance, will be made wider than
the headrail. Aach the slats to the plasc
valance clips, and then bend both the le and
right sides of the valance so that the aluminum
valance slats cover the box installaon brackets.

Other SelectBlinds Window Blind manuals
SelectBlinds Classic User manual

SelectBlinds

SelectBlinds Classic User manual

SelectBlinds Basswood Blind User manual

SelectBlinds

SelectBlinds Basswood Blind User manual

SelectBlinds Architect Roman Shades User manual

SelectBlinds

SelectBlinds Architect Roman Shades User manual

SelectBlinds Deluxe Aluminum Blinds User manual

SelectBlinds

SelectBlinds Deluxe Aluminum Blinds User manual

SelectBlinds Basswood Horizontal Blind User manual

SelectBlinds

SelectBlinds Basswood Horizontal Blind User manual

SelectBlinds Architect User manual

SelectBlinds

SelectBlinds Architect User manual

SelectBlinds Fashion Color Power Touch Series Installation guide

SelectBlinds

SelectBlinds Fashion Color Power Touch Series Installation guide

SelectBlinds CORDLESS Installation guide
SelectBlinds

SelectBlinds CORDLESS Installation guide

SelectBlinds Lift & Lock User manual

SelectBlinds

SelectBlinds Lift & Lock User manual

SelectBlinds SelectWave User manual

SelectBlinds

SelectBlinds SelectWave User manual

SelectBlinds Odysee User manual

SelectBlinds

SelectBlinds Odysee User manual

SelectBlinds Cordless Roller Shades User manual

SelectBlinds

SelectBlinds Cordless Roller Shades User manual

SelectBlinds Fauxwood Blind User manual

SelectBlinds

SelectBlinds Fauxwood Blind User manual

SelectBlinds Classic Grommet Custom Made Drapes User manual

SelectBlinds

SelectBlinds Classic Grommet Custom Made Drapes User manual

SelectBlinds Vertical Blinds User manual
SelectBlinds

SelectBlinds Vertical Blinds User manual

SelectBlinds Skylight Installation guide

SelectBlinds

SelectBlinds Skylight Installation guide

SelectBlinds Cordless Honeycomb Shades User manual
SelectBlinds

SelectBlinds Cordless Honeycomb Shades User manual

SelectBlinds OPEN ROLL Z-125 User manual

SelectBlinds

SelectBlinds OPEN ROLL Z-125 User manual

SelectBlinds CORDLESS FAUXWOOD BLIND User manual

SelectBlinds

SelectBlinds CORDLESS FAUXWOOD BLIND User manual

SelectBlinds S-300 User manual

SelectBlinds

SelectBlinds S-300 User manual

SelectBlinds Honeycomb Cordless User manual
SelectBlinds

SelectBlinds Honeycomb Cordless User manual

Popular Window Blind manuals by other brands
Corradi ERMETIKA  XL user manual

Corradi

Corradi ERMETIKA XL user manual

Hella TOP FOAM RvU Installation instructions and instructions for use

Hella

Hella TOP FOAM RvU Installation instructions and instructions for use

Style selections 75312 manual

Style selections

Style selections 75312 manual

Domondo PureNight Mounting guide

Domondo

Domondo PureNight Mounting guide

Betta VEUE installation manual

Betta

Betta VEUE installation manual

Betta VEUE installation manual

Betta

Betta VEUE installation manual

Creation Baumann PLITRIC PLE 30 Assembly instruction

Creation Baumann

Creation Baumann PLITRIC PLE 30 Assembly instruction

Comfort Blinds Cordless Roman installation instructions

Comfort Blinds

Comfort Blinds Cordless Roman installation instructions

Hella TOP MINI plus RvA Installation instructions and instructions for use

Hella

Hella TOP MINI plus RvA Installation instructions and instructions for use

Airolite AFG501 Installation, operation and maintenance manual

Airolite

Airolite AFG501 Installation, operation and maintenance manual

YewdaleDefiant C20s Fitting instructions

YewdaleDefiant

YewdaleDefiant C20s Fitting instructions

Horrex Duo Plisse manual

Horrex

Horrex Duo Plisse manual

MHZ s-enro SE 72/1 installation instructions

MHZ

MHZ s-enro SE 72/1 installation instructions

Cosiflor DF 10/30 instructions

Cosiflor

Cosiflor DF 10/30 instructions

Renson Slidefix user manual

Renson

Renson Slidefix user manual

SKILTEC 5A Product information manual

SKILTEC

SKILTEC 5A Product information manual

LuxaFlex M25T manual

LuxaFlex

LuxaFlex M25T manual

DecorQuip Dream Range 191713 quick start guide

DecorQuip

DecorQuip Dream Range 191713 quick start guide

manuals.online logo
manuals.online logoBrands
  • About & Mission
  • Contact us
  • Privacy Policy
  • Terms and Conditions

Copyright 2025 Manuals.Online. All Rights Reserved.