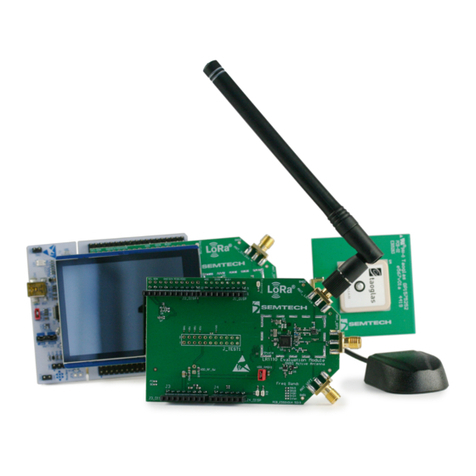
Semtech LoRa Edge LR1110 User manual

LR1110 Tracker Reference Design
Evaluation Kit
semtech.com/LoRa
Page 1 of 47
Quick Start Guide
Proprietary
October 2020
Semtech
LoRa Edge™ Tracker Reference Design
Evaluation Kit
(User Guide)
October 2020

LR1110 Tracker Reference Design
Evaluation Kit
semtech.com/LoRa
Page 2 of 47
Quick Start Guide
Proprietary
October 2020
Semtech
Welcome!
The LoRa Edge™ Tracker Evaluation Kit (“Kit”) is a portable reference kit designed to introduce LoRa Edge
tracking capabilities with LoRa Cloud™services, integrated with the Actility ThingPark Enterprise-based
Community Platform (Network Server) and Tago.io Application Service, and to showcase LoRaWAN®
network coverage around a building or site. It is also intended to accelerate solution development for a
wide range of stakeholders. The self-contained nature of this reference Kit makes it easy to set up, take
down and move a network in a matter of minutes.
Users can determine a gateway’s range of coverage by moving sensors to different places around a
coverage area. Furthermore, solution developers can focus on providing customer value through data
collection and analysis by using off-the-shelf hardware available from various ecosystem partners.
The GPS location data of each tracker is displayed on a dashboard that users access through a web browser.
The dashboard shows the type of displays that can be created with the data collected. The URL for the
dashboard and how to locate the login credentials for your Kit, are explained in the sections below.
What is in the Kit?
The Kit contains the following items:
Two LoRa Edge LR1110-based Tracking Devices
oTracker on/off magnets (2)
One gateway (base station) based on the LoRaWAN protocol with Ethernet or Wi-Fi backhaul
oPower adapter (region specific)
oLoRa® Gateway/Base Station antenna (only included with the U.S. model)
Figure 1: LR1110- Tracking Device

LR1110 Tracker Reference Design
Evaluation Kit
semtech.com/LoRa
Page 3 of 47
Quick Start Guide
Proprietary
October 2020
Semtech
Figure 2: LR1110 Tracker Kit Contents: LoRaWAN Gateway with Tracking Devices
Note: Within this document the term “gateway” and “base station” are used interchangeably; they are
meant to refer to the same physical device regardless of which term is used.
System Overview
The LoRa Edge Tracker Evaluation Kit demonstrates and highlights the various aspects of an asset tracking
system based on the LoRaWAN protocol. The elements used in this system are highlighted in the following
diagram.

LR1110 Tracker Reference Design
Evaluation Kit
semtech.com/LoRa
Page 4 of 47
Quick Start Guide
Proprietary
October 2020
Semtech
Figure 3: System Component Diagram
The data flow proceeds from the tracking devices through the gateway provided in the Kit to the ThingPark
Community Platform (the LoRaWAN Network Server). This network server will be configured to use the
LoRa Cloud Device Join service, which manages the LoRaWAN network join process. Once the devices have
joined the network, ThingPark Enterprise is the secure conduit for data to and from the Application Server,
which is hosted by Tago.IO. The Tago.IO service provides the interface to the position computation engine
(hosted on the LoRa Cloud portal). It also provides complete visualization of the tracking data for the
devices, which are available through a web browser. Each part of this system is independently scalable to
any size application that might be deployed. This demonstration is an example of an end-to-end
deployment of the latest LoRa Edge tracking solutions.
Not pictured is the LoRa Edge™ Config application, which is installed on smartphone devices, and talk
directly to the trackers to initialize and prepare them for operation. This functionality is discussed later in
this Users Guide.

LR1110 Tracker Reference Design
Evaluation Kit
semtech.com/LoRa
Page 5 of 47
Quick Start Guide
Proprietary
October 2020
Semtech
Getting the Kit Online
There are a few steps involved in getting your trackers online for the first time. The process of setting up
the devices is illustrative of the overall setup and system configuration. By following the steps outlined
below, you should be up-and-running quickly. Large-scale deployments can be automated by bulk import
utilities and APIs.
Creating a LoRa Cloud Portal Account
Before a LoRa Edge Tracker device can be claimed, you first must have an account on the LoRa Cloud portal.
To set up your account in a web browser, navigate to https://www.loracloud.com/.
1. Click Get Started.
Figure 4: Cloud Portal Welcome - Get Started
2. At the prompt, create an account. Use your email address and create a password.
Figure 5: LoRa Cloud Login

LR1110 Tracker Reference Design
Evaluation Kit
semtech.com/LoRa
Page 6 of 47
Quick Start Guide
Proprietary
October 2020
Semtech
3. You should receive a confirmation email for the account. Click on the confirmation link in the email.
Your browser should open and take you to the login page. After logging into your new account, you
will need to accept the Terms & Conditions of Use. Once you accept these, your account activation
will be complete.
Creating an Application Owner and Getting Your Free Claim Allowance
Before you can claim your devices, you will need create an Application Owner. (An application owner is
used to organize a group of devices.) To create an application owner, login to the LoRa Cloud portal and
then
1. Select the LoRa Cloud Device Join tile.
Figure 6: Selecting the LoRa Cloud Device Join Tile
2. In the side panel, click Application Owners. Enter a name and then click Create New Owner, as
illustrated in Figure 7

LR1110 Tracker Reference Design
Evaluation Kit
semtech.com/LoRa
Page 7 of 47
Quick Start Guide
Proprietary
October 2020
Semtech
Figure 7: Creating a New Application Owner
Every new account has an allowance of 100 devices that can be claimed for free. You can assign
one and only one of your application owners this allowance. On the Application Owners page, click
the Assign button. You will be prompted to accept the free claim allowance for the associated
Application Owner. Accepting the assignment will allow you to claim up to 100 devices without
charge. Press OK to accept.
Figure 8: Assign your Free Allowance of Claims to an Application Owner

LR1110 Tracker Reference Design
Evaluation Kit
semtech.com/LoRa
Page 8 of 47
Quick Start Guide
Proprietary
October 2020
Semtech
Claiming a Device
To claim a device, navigate to the Device Join service in the LoRa Cloud portal at
https://www.loracloud.com/portal/join_service. From there, select the Devices link in the left pane.
The Join Server page will display. Under the Devices header, you will be presented with two options: Claim
Individual Device and Bulk Upload (CSV). In your kit, you will be provided information regarding the EUI,
JoinEUI and PIN for your device. In the web interface, if you select the Claim Individual Device you will be
presented with a form that looks like this:
Figure 9: Claiming a Device
The LR1110 Tracker EUI, PIN, and JOIN EUI can be extracted via the BLE Application that is described in
Setting-up and Operating LoRa Edge Trackers
Note: The CHIP EUI can be left blank or you can enter the Tracker EUI. Leave the EXTRA field blank.
Enter the data and then click Claim Device. If the PIN corresponds to the device credentials, the interface
will confirm that the device has been successfully claimed.
On-boarding: Network Server Specific
For the LoRa Cloud Device Join service to handle joining the device to the network, the device must to be
associated with the network server that will route the traffic to it and from it. By default, all compatible

LR1110 Tracker Reference Design
Evaluation Kit
semtech.com/LoRa
Page 9 of 47
Quick Start Guide
Proprietary
October 2020
Semtech
network servers are enabled for use by your devices. You can skip ahead to the Using the LoRa Cloud
Device & Application Services, unless you only want to enable Join Services for a single network.
You may set up devices that will interact with more than one LoRaWAN network server. Figure 10 shows
two configuration setup examples. In the top example, a block of devices will be configured for LoRaWAN
Network Server 1 (Server 1) the join requests for devices received from that network server for a claimed
device will use the application configuration logic for appo-::a in the system. This is set on the Network
Servers configuration page of the LoRa Cloud Device Join service, or through the Application Owner API
documented here.
The second configuration example shows how the LoRa Cloud Device Join service can support integrations
with multiple network servers.
Figure 10: Relationship between LoRaWAN Network Servers and Applications in LoRa Cloud Applications IDs
The purpose of mapping the registered network server to a specific Application Owner is that specific
parameters can be set up for handling data when operating with each network server. There are three
common settings for each application definition:
name
wrapkey
nslist
The name is an arbitrary string to represent the application. The wrapkey is a specific token used for
encrypting the AppSKey, used during the transport of the AppSKey from the join server to the application
server by the network server. The nslist is a list of LoRaWAN network servers that will be associated with
this Application Owner configuration.

LR1110 Tracker Reference Design
Evaluation Kit
semtech.com/LoRa
Page 10 of 47
Quick Start Guide
Proprietary
October 2020
Semtech
Each LoRaWAN session derives a unique AppSKey which is used for encrypting the LoRaWAN payload data
between the device and the application server. The wrapkey can be null, indicating that the AppSKey will be
passed from the join server to the application server by the network server unencrypted. For more
information on working with the AppSKey, please see the documentation here.
https://www.loracloud.com/documentation/join_service?url=appskey.html.
Once the network servers are configured for a particular Application Owner via the LoRa Cloud Device Join
service, the device join process can be performed. The LoRaWAN network server that sees the join request
from the claimed device will forward this on to the LoRa Cloud Device Join service (which is operating as
the Join Server in this system). It will provide the session keys and return them, along with the join
response to the network server.
If a wrapkey is defined for the application associated with the network server, the AppSKey is returned
encrypted. Otherwise, the AppSKey will be returned in plain text by the join server. The LoRaWAN network
server will send the join response to the device. Once a data message is sent (following the join response)
to the LoRaWAN network server, the join process will be complete and the device will be configured for
operation on that network server.
Figure 11: Join Flow
Selecting ThingPark Enterprise on the LoRa Cloud Device Join Server
Once the Application Owner has been established, you must use the LoRa Cloud Device Join service to
select the network server.
1. Click NETWORK SERVERS link on the left
2. On the Network Servers page, select ThingPark Community Platform
3. Click ADD
Note: Currently the “Owner Context” for these devices is not defined.
LR1110 Tracker Reference Design
Evaluation Kit
semtech.com/LoRa
Page 11 of 47
Quick Start Guide
Proprietary
October 2020
Semtech
Figure 12: LoRa Cloud Server Selection Page (no selection enables ALL Network Servers)
Using the LoRa Cloud Device & Application Services
To use the LoRa Cloud Device & Application Services for your LoRa Edge Trackers, you must create an
Application Owner and then create a token that will be added to the transmission of the data between the
Device & Application Services provided by LoRa Cloud and your application server.
To create an owner that can use these services:
1. Login to your LoRa Cloud account (https://www.loracloud.com).
2. Select the LoRa Cloud Device and Application Services.
3. On the Device Owners page, accessible from the Device and Application Services landing page,
create an owner or owners.
4. Specify the currently-active owner.
5. On the Active Owner page, define tokens with the properties you need. A token must have at least
one, and may have all of the following permissions:
Add/Delete Devices
Deliver Uplinks
Access GNSS Data
Issue Device Requests
List/Read Device State
Add/Delete Tokens
List Tokens
When you add a token, you select its permissions. Once set, the permissions of the token cannot be
changed. However, a token can be renamed or deleted at any time. You will use a defined token to access
the various commands available in the Device & Application Services API to add new devices and list
current devices. You can even list and add new tokens if the token you use has sufficient permissions. One

LR1110 Tracker Reference Design
Evaluation Kit
semtech.com/LoRa
Page 12 of 47
Quick Start Guide
Proprietary
October 2020
Semtech
of the most important uses of the token will be to transmit and receive data to and from the Device &
Application Services. This token will be needed to provision the device on the Tago.IO account interface.
To create a LoRa Cloud™ Device & Applications Services owner (if it does not exist):
1. Login to your LoRa Cloud account
2. Select the LoRa Cloud™ Device & Application Services.
3. Click on Device Owners.
4. On the Manage Device Owners page (Figure 13), if an no owners are defined, click Create New
Owner.
Figure 13: Manage Device Owners—Create New Owner
5. On the Add a Device Owner page (Figure 14), enter a NAME, select a PLAN and then click SUBMIT.
Note: When selecting a PLAN, choose One Stop Shop unless you know you have some other need.
Figure 14: Add A Device Owner
Creating your LoRa Cloud Device & Application Token
To create your Device & Application Services token, follow these steps:
1. Select the Manage Tokens page from the LoRa Cloud Device & Application Services page:

LR1110 Tracker Reference Design
Evaluation Kit
semtech.com/LoRa
Page 13 of 47
Quick Start Guide
Proprietary
October 2020
Semtech
Figure 15: Select Manage Tokens
2. From the Manage Tokens page, select ADD NEW TOKEN, as illustrated in Figure 16:
Figure 16: Add New Token to Device & Applications Services
3. On the Add New Token page, name the token and select its Permissions. (Select ALL permissions):

LR1110 Tracker Reference Design
Evaluation Kit
semtech.com/LoRa
Page 14 of 47
Quick Start Guide
Proprietary
October 2020
Semtech
Figure 17: Add New Token Example
4. Click ADD NEW TOKEN
Back on the Manage Tokens page, you can view the token value by clicking View. You can also copy the
token value to the clipboard by clicking Copy. The copied token can then be included in external
applications that interface with the Devices & Applications Services.
Figure 18: View or Copy Token Value

LR1110 Tracker Reference Design
Evaluation Kit
semtech.com/LoRa
Page 15 of 47
Quick Start Guide
Proprietary
October 2020
Semtech
Adding Devices
Devices are managed either through the Device & Application Services API or directly from the LoRa Cloud
Device & Application Services web portal. The Manage Devices page is used to add devices for a specific
application owner. The only information necessary to add a device to the list of managed devices is the
device EUI (DevEUI); you can add the DevEUIs of the two LR1110 Trackers at the same time or one after the
other.
To add a device from the Device & Application Services web portal:
1. Click Manage Devices
Figure 19: Select MANAGE DEVICES
2. On the Manage Devices page, click ADD DEVICES:
Figure 20: Select ADD DEVICES
3. Add the device EUI in the box provided, then click ADD DEVICES.

LR1110 Tracker Reference Design
Evaluation Kit
semtech.com/LoRa
Page 16 of 47
Quick Start Guide
Proprietary
October 2020
Semtech
Figure 21: Add a Device via the LoRa Cloud Device & Application Services
Setting up your ThingPark Community Platform (Network Server)
Account
Create an Account on the ThingPark Community Platform
Actility’s ThingPark Community Portal (TPCP) provides access to its ThingPark Enterprise (TPE) platform,
which allows developers to experience the ThingPark platform which is already used by many networks
around the world, from large nationwide public networks to small private networks. Anyone can connect
up-to three gateways and 50 devices to TPCP free of charge for non-commercial use.
The platform is always kept up-to-date with the latest ThingPark release, as soon as automated QA testing
has been completed from R&D. It is used as a first field-test platform as part of the release cycle. Therefore,
it may be stopped or upgraded at any time, with a prior notification of 48 hours. There is no service level
agreement for this platform.
To create an account on the TPCP, please visit community.thingpark.org and click the Sign Up button. The
account you create can be used for accessing both the portal and the platform, which is accessible at
community.thingpark.io/tpe.

LR1110 Tracker Reference Design
Evaluation Kit
semtech.com/LoRa
Page 17 of 47
Quick Start Guide
Proprietary
October 2020
Semtech
Connect Your Gateway to the Internet
Execute the following steps so that your gateway can access the internet to reach the TPCP.
1. Plug in your gateway to a power source.
2. Connect your gateway to an Ethernet network where it can get an automatic IP address from a
DHCP server and access the Internet. If your gateway is behind a corporate firewall, make sure the
firewall does not block the following ports towards the Internet:
FTP (TCP port 21)
NTP (UDP port 123)
IPsec (UDP ports 4500 and 500)
All gateway connections are in the gateway-to-Cloud direction and support NAT traversal, and therefore no
port forwarding is required.
Create the Gateway on Your Account
Create your gateway on the TPCP so it can be recognized by the platform and associated with your account.
1. Go to TPCP UI
2. In the main menu (on the left), under Base Stations, select Create
3. Select the gateway vendor (e.g., “UfiSpace”)
4. Complete the form:

LR1110 Tracker Reference Design
Evaluation Kit
semtech.com/LoRa
Page 18 of 47
Quick Start Guide
Proprietary
October 2020
Semtech
Figure 22: Creating a Gateway: Form #1

LR1110 Tracker Reference Design
Evaluation Kit
semtech.com/LoRa
Page 19 of 47
Quick Start Guide
Proprietary
October 2020
Semtech
a. Select the Model (e.g., “Pico/Enterprise V1.5”).
Figure 23: Pico Gateway
Figure 24: Enterprise Gateway
b. Use the Name field to assign a name to your gateway.
c. Enter your gateway’s universally-unique ID in the LRR UUID field. Your gateway’s LRR UUID
(e.g. 001558-46584254C0001BF9) will have been emailed to you. You have received the
LRR UUID prior to continuing.
d. Select your RF Region. Also select the number of channels your gateway supports (e.g., “EU
863-870MHz (8 channels)”).
e. Select the Enabled option for IPsec (X.509) for base station to TPE connection.
f. Feel free to add any notes to the Additional Information field that you may want to
associate with your gateway.
g. Enter your gateway’s Public key (see example below). You must have received the public
key of your gateway in an email. Copy the public key from your email (with or without the
BEGIN/END lines) and paste into the Public key field on the TPCP UI.
Public Key Example:
h. For setting the gateway location, select Manual and enter the coordinates using latitude
(Lat) and longitude (Long) or by clicking on the map.
i. Click Save
—–BEGIN PUBLIC KEY—–
MIGfMA0GCSqGSib3DQEBAQUAA4GNADCBiQKBgQD1w1rNcTvFSgryEaIZ2egMLQ7ErAl
9JDPF1v0EnQ6Xluiz6Mc3hlsWzM303HQA3dAgRfSWDy7kHcAS8631uQIDAQAB—–END
PUBLIC KEY—–

LR1110 Tracker Reference Design
Evaluation Kit
semtech.com/LoRa
Page 20 of 47
Quick Start Guide
Proprietary
October 2020
Semtech
Wait for approximately five minutes for your gateway to complete the Initialization procedure and become
“Active”.
Note: If the gateway status shows Radio Error before becoming “Active”, ignore the error.
Figure 25: Gateway Status
Now your gateway is ready to send the uplink frames it demodulates to your TPCP account and to accept
the downlink frames sent from any application server or cloud via TPCP to be transmitted over the air. You
can see it listed when you click on List under Base Stations in the main menu.
Create the TagoIO Application
Execute the following steps to create the TagoIO application that can be used by the trackers.
1. At the main menu, under Applications, select Create
2. Select Generic Application
3. Complete the form:
Other manuals for LoRa Edge LR1110
2
Table of contents
Other Semtech Motherboard manuals

Semtech
Semtech EB-GS3471-00 User manual

Semtech
Semtech TSWITX-12V-EVM User manual

Semtech
Semtech SX1211SK915 User manual

Semtech
Semtech LoRa Edge Tracker Reference Design Evaluation... User manual

Semtech
Semtech SC202A EVB User manual

Semtech
Semtech SC120 User manual

Semtech
Semtech Lora Mote User manual

Semtech
Semtech SC21150 User manual

Semtech
Semtech GS3440 User manual

Semtech
Semtech SX1211-11SKA User manual