manuals.online logo
Brands
  1. Home
  2. •
  3. Brands
  4. •
  5. Sensitech
  6. •
  7. Measuring Instrument
  8. •
  9. Sensitech TempTale 4 User manual

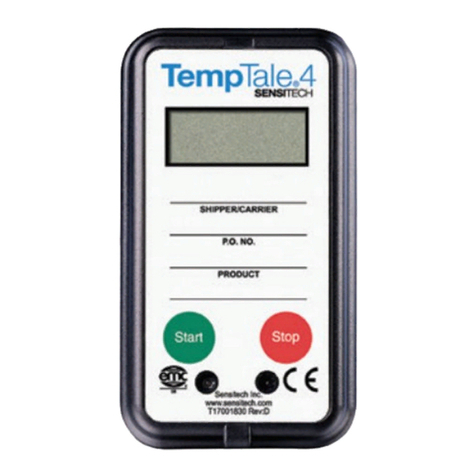
Sensitech TempTale 4 User manual

Sensitech Inc. Global Headquarters •800 Cummings Center, Suite 258X •Beverly, MA 01915
+1-800-843-8367 •+1-978-927-7033 •Fax +1-978-921-2112 •c[email protected]
© 2018 Sensitech Inc. All Rights Reserved.
sensitech.com
@sensitech
T83000670 Rev. D • 26 Jan 2018
TempTale®4
Humidity Monitor
Instructions for Use
Starting a TempTale®4 Humidity Monitor
• Press and release the START button. (1)
• The “Sunshine” icon appears in the upper left corner of the
display.
• The TempTale 4 will begin to record data after the start-up delay has
passed.
To Mark an Important Event (“Date Stamp”)
• TempTale 4 Humidity monitors provide an option to “Date Stamp” or
mark an important event at any time during the monitoring cycle that
will be visible when viewing the data. The mark is displayed as an
arrow when viewing the graph and shown in italics when viewing the tabular data.
• To mark a graph while the monitor is recording, press and release the START button.
• The “arrow” icon will appear temporarily in the lower left corner and the temperature
history will appear on the display. Data appears as follows:
1. Average temperature of Primary (Ambient) Sensor Readings
2. Highest temperature recorded at Primary Sensor
3. Total time above high temperature limit of Primary Sensor
4. Lowest temperature recorded at Primary Sensor
5. Total time below low temperature limit of Primary Sensor
6. Highest RH value recorded at Secondary (RH) Sensor
7. Lowest RH value recorded at Secondary (RH) Sensor
Alarm
When the TempTale 4 Humidity monitor is exposed to a temperature outside a pre-pro-
grammed limit and time threshold, an “Alarm bell” will appear in the lower right corner
of the LCD display.
Stopping a TempTale 4 Humidity Monitor
Press and hold (1 to 3 seconds) the STOP button until the “Stop sign” icon appears in
the upper right corner of the LCD display.
Iniciar el Monitor TempTale®4 Humidity
• Presione y suelte el botón “START”.(1)
• El icono de aparecerá a la izquierda en la parte superior de la
pantalla.
• El TempTale 4 comenzará a grabar una vez transcurrido el tiempo
de inicio programado.
Marcar fecha
• Los monitores TempTale 4 Humidity proporcionan la opción
“Registrar Fecha” o marcar un evento en cualquier momento del
ciclo de monitoreo que será visible cuando visualice la información.
La marca aparece como una echa al visualizar el gráco y será mostrada en letra
cursiva al visualizar la información.
• Para marcar el evento durante el envió, presione y suelte el botón de inicio “START”.
• Una echa aparecerá temporalmente en la esquina inferior izquierda y el registro
histórico aparecerá en la pantalla. La información aparecerá en el siguiente orden:
1. Temperatura promedio de los sensores primarios (ambiente) Lecturas de los sensores
2. Temperatura más alta registrada en el sensor primario
3. Tiempo total por encima del límite de la temperatura alta del sensor primario
4. Temperatura más baja registrada en el sensor primario
5. Tiempo total por debajo del límite de la temperatura baja del sensor primario
6. Mayor valor de humedad relativa registrada en el sensor secundario (RH)
7. Menor valor de humedad relativa registrada en el sensor secundario (RH)
Alarma
Cuando el monitor TempTale 4 Humidity se encuentre fuera de los límites de temperatura y
del umbral de tiempo pre-establecidos, un ícono en forma de campana aparecerá en
la esquina inferior derecha de la pantalla LCD.
Parar el Monitor TempTale 4 Humidity
Presione y suelte (1 a 3 segundos) el botón “STOP” hasta que el ícono aparezca en la
esquina superior derecha de la pantalla LCD.
All TempTale®4 Humidity monitors can be programmed with a custom Start-up
delay, measurement interval and alarm settings which have been pre-deter-
mined by the customer.
Los monitores TempTale®4 Humidity están programados con un tiempo de
inicio, intervalo de medición, límites de temperatura y de tiempo pre-determi-
nados por el cliente.
Displayed Information Pantalla del Monitor:
1 1
11
44
33
22
55
1. Recording
2. Marked point
3. Humidity/Temperature data
4. Stopped recording
5. Limits exceeded
1. Iniciado
2. Marca de evento
3. Información de humedad o
temperatura
4. Parado
5. Alarma
Other manuals for TempTale 4

8

Other Sensitech Measuring Instrument manuals

Sensitech ThermoAlert User manual

Sensitech

Sensitech ThermoAlert User manual

Sensitech TempTale RF User manual

Sensitech

Sensitech TempTale RF User manual

Sensitech TagAlert NFC Instruction Manual

Sensitech

Sensitech TagAlert NFC Instruction Manual

Sensitech TempTale Ultra User manual
Sensitech

Sensitech TempTale Ultra User manual

Sensitech TempTale Ultra User manual

Sensitech

Sensitech TempTale Ultra User manual

Sensitech TempTale Direct User manual

Sensitech

Sensitech TempTale Direct User manual

Sensitech TempTale 4 User manual

Sensitech

Sensitech TempTale 4 User manual

Sensitech VaxAlert USB User manual

Sensitech

Sensitech VaxAlert USB User manual

Sensitech TEMPTALE ULTRA BLE User manual

Sensitech

Sensitech TEMPTALE ULTRA BLE User manual

Sensitech FreezeAlert User manual

Sensitech

Sensitech FreezeAlert User manual

Sensitech TempTale GEO User manual

Sensitech

Sensitech TempTale GEO User manual

Sensitech TempTale GEO User manual

Sensitech

Sensitech TempTale GEO User manual

Sensitech TempTale 4 User manual

Sensitech

Sensitech TempTale 4 User manual

Sensitech TempTale 4 User manual

Sensitech

Sensitech TempTale 4 User manual

Sensitech TempTale 4 User manual

Sensitech

Sensitech TempTale 4 User manual

Sensitech TEMPTALE ULTRA BLE User manual

Sensitech

Sensitech TEMPTALE ULTRA BLE User manual

Sensitech TempTale 4 User manual

Sensitech

Sensitech TempTale 4 User manual

Sensitech TagAlert User manual

Sensitech

Sensitech TagAlert User manual

Sensitech TempTale GEO Eagle User manual

Sensitech

Sensitech TempTale GEO Eagle User manual

Popular Measuring Instrument manuals by other brands

Knauer K-7400S instructions

Knauer

Knauer K-7400S instructions

Kyoto DA-650 Operation manual

Kyoto

Kyoto DA-650 Operation manual

UE Systems UE ECM-586 instruction manual

UE Systems

UE Systems UE ECM-586 instruction manual

Seca 286 manual

Seca

Seca 286 manual

Gigahertz NFA 1000 operating manual

Gigahertz

Gigahertz NFA 1000 operating manual

ATAGO Pocket PAL-1 instruction manual

ATAGO

ATAGO Pocket PAL-1 instruction manual

Setra Systems Model 730 operating instructions

Setra Systems

Setra Systems Model 730 operating instructions

Hioki CM4141-50 instruction manual

Hioki

Hioki CM4141-50 instruction manual

SKF TKST 21 Instructions for use

SKF

SKF TKST 21 Instructions for use

ISOMAG MS 2500 Operating and maintenance manuall

ISOMAG

ISOMAG MS 2500 Operating and maintenance manuall

Apera Instruments SX721 user manual

Apera Instruments

Apera Instruments SX721 user manual

FMG FMT-L Installation and operation instructions

FMG

FMG FMT-L Installation and operation instructions

GW Instek GSP-9300B user manual

GW Instek

GW Instek GSP-9300B user manual

Tektronix 492, 492P Service manual

Tektronix

Tektronix 492, 492P Service manual

Tenmars ST-502 user manual

Tenmars

Tenmars ST-502 user manual

Trox Technik TNC-EASYCONTROL OPERATING AND INSTALLATION Manual

Trox Technik

Trox Technik TNC-EASYCONTROL OPERATING AND INSTALLATION Manual

Hanna Instruments HI96715 instruction manual

Hanna Instruments

Hanna Instruments HI96715 instruction manual

PCE Instruments PCE-T 260-ICA Operation manual

PCE Instruments

PCE Instruments PCE-T 260-ICA Operation manual

manuals.online logo
manuals.online logoBrands
  • About & Mission
  • Contact us
  • Privacy Policy
  • Terms and Conditions

Copyright 2025 Manuals.Online. All Rights Reserved.