manuals.online logo
Brands
  1. Home
  2. •
  3. Brands
  4. •
  5. Server
  6. •
  7. Dispenser
  8. •
  9. Server BP-1 User manual

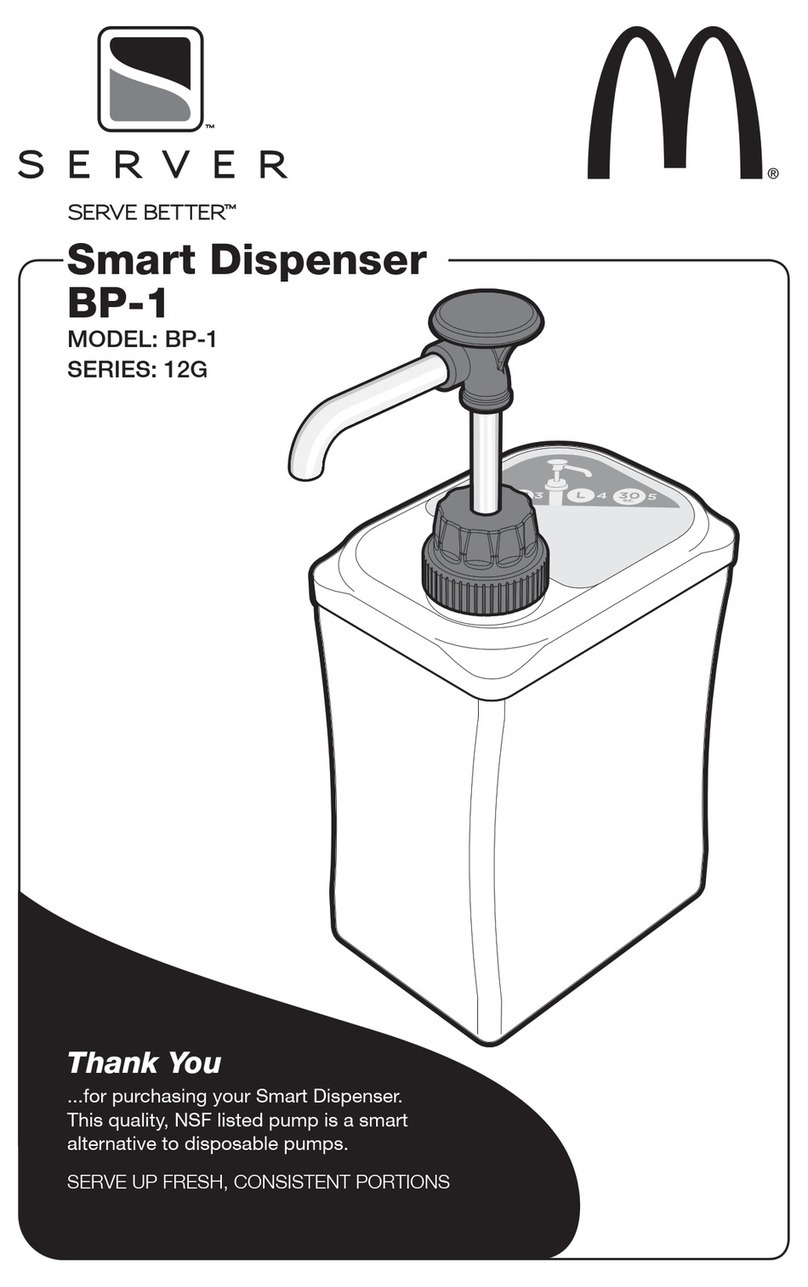
Server BP-1 User manual

KIT 81261
SMOOTHIE DISPENSER Part Qty. Description
81263 2 BP-1 (Bottle Pump), 38MM, 10” DEEP, .9 OZ
81288 1 BP-1 (Bottle Pump), 38MM, 10” DEEP, WATER
81289 1 BP-1 (Bottle Pump), 38MM, 10” DP, STRAWBERRY
81293 1 BP-1, 38MM, 10” DEEP, MANGO
83181 2 JAR, FOUNTAIN, PLSTC, 2/3, SHALLOW
83182 6 JAR, FOUNTAIN, PLSTC, 2/3, DEEP
83214 3 LID ASSEMBLY, PLASTIC, 2/3
01669-REVA�080414�ENGLISH
BK
PUMP CLEANING
BEFORE FIRST USE AND AFTER USE DAILY OR
REGULARLY, DISASSEMBLE AND CLEAN PARTS.
FOR SAFE AND PROPER CARE, AND TO PREVENT
CORROSION, OF PARTS, IT IS IMPORTANT TO
CLEAN, RINSE, SANITIZE, AND DRY PARTS DAILY OR
REGULARLY. FAILURE TO COMPLY WITH ANY OF THESE
INSTRUCTIONS MAY VOID UNIT WARRANTY.
1 SEE PUMP DISASSEMBLY.
2 WASH CLEAN ALL PARTS WITH DISHWASHING
DETERGENT AND HOT WATER.
• Wash small parts in a pan or other container to
prevent part loss.
• Scrub with supplied brushes to clean all
conned areas. Maintain a clean and efcient
pump by using the brushes supplied with
pump to prevent product build up inside pump.
• IMPORTANT PUMP AREAS TO CLEAN: Clean
inside cylinder thoroughly with brush 82049.
Clean inside discharge tube thoroughly with
brush 82526.
• Do not use scrapers, steel pads, steel wool, or other
cleaning tools that can scratch surfaces.
• Mildly abrasive NYLON or brass brush may be used
to remove any stubborn food or mineral deposits on
interior surfaces of unit.
• Do not use abrasive cleansers.
• Do not use caustic cleansers.
• Do not use cleansing agents with high concentrations
of acid, alkaline or chlorine.
• Do not use ammonia based cleansers.
3 FULLY RINSE ALL WASHED PARTS THOROUGHLY
WITH CLEAR WATER.
• To prevent corrosion on parts, it is important to
thoroughly and fully rinse washed parts.
4 DRY ALL PARTS WITH A CLEAN SOFT CLOTH.
• Various elements and minerals, such as chlorides in
tap water, can accumulate on stainless steel parts
and create corrosion.
• To prevent corrosion on stainless steel parts, it is
important to thoroughly and fully dry with a clean
soft cloth regularly.
5 SANITIZE ALL PARTS FOLLOWING LOCAL
SANITIZATION REQUIREMENTS. ALL PARTS IN
CONTACT WITH FOOD MUST BE SANITIZED.
• Allow parts to fully air dry after sanitization.
CLEAN AND FLUSH PUMP
WITH SOAP, SANITIZER, AND HOT WATER
CLEAN INSIDE
DISCHARGE TUBE
CLEAN INSIDE
TAPERED END
OF DISCHARGE TUBE
BRUSH 82049 (1 1/4” D)
FOOD EQUIPMENT
LUBRICANT 40179
BRUSH 82526 (21”)
PUMP DISASSEMBLY
BEFORE FIRST USE AND AFTER USE DAILY, DISASSEMBLE
AND CLEAN PUMP.
DURING DISASSEMBLY, USE A CONTAINER TO COLLECT
SMALL PARTS OF PUMP TO PREVENT ANY LOSS.
1LOOSEN PLASTIC CAP SECURING PUMP TO LID AND
REMOVE PUMP FROM LID.
2LOOSEN LOCKING COLLAR AND REMOVE CYLINDER
ASSEMBLY FROM HEAD ASSEMBLY.
3REMOVE SPRING FROM CYLINDER ASSEMBLY.
4REMOVE PINCH VALVE FROM HEAD ASSEMBLY
• Pinch and gently turn to pull valve out.
5REMOVE SEAL ASSEMBLY FROM HEAD ASSEMBLY BY
PRESSING DOWN AND OFF WITH THUMB.
• Do not use a sharp tool to remove seal, this may
damage seal.
• If seal is damaged, product will leak past seal.
6REMOVE O-RING FROM INSIDE SEAL.
• Do not use a sharp tool to remove o-ring, this may
damage o-ring.
• If o-ring is damaged, product will leak past seal.
7REMOVE GAGING COLLAR(S) FROM HEAD ASSEMBLY.
SPECIFIC PUMP CLEANING
BEFORE FIRST USE AND AFTER USE DAILY,
DISASSEMBLE AND CLEAN PUMP.
1 REMOVE PUMP FROM FOUNTAIN JAR.
2 SUBMERGE, FLUSH, RINSE, AND SANITIZE PUMP
THOROUGHLY USING THREE COMPARTMENT SINK.
OPERATE PUMP A MINIMUM OF 8 TIMES IN EACH
SINK.
CLEAN:
• Submerge pump into wash sink. Then place lower
end of pump into wash sink and operate pump,
to PUMP CLEANING solution through pump, at
least 8 times, until all (if any) remaining product is
expelled and only the wash water ows through.
RINSE:
• Submerge pump into rinse sink. Then place lower
end of pump into rinse sink and operate pump, at
least 8 times, to fully rinse inside of pump.
SANITIZE:
• Submerge pump into sanitizer sink. Then place
lower end of pump into sanitizer sink and operate
pump, at least 8 times, to fully sanitize inside of
pump.
• After submerging, ushing, rinsing, and sanitizing
pump, remove pump from sink to disassemble
pump.
PART PUMP DESCRIPTION
06022 ALL BALL, ½” DIAMETER STAINLESS STEEL
81262 ALL LID
81264 81263 GAGING COLLAR - .9 OZ
81267 81263 HEAD ASSEMBLY - .9 OZ
81286 81288 HEAD ASSEMBLY - WATER
81287 81288 GAGING COLLAR - WATER
81291 81289 HEAD ASSEMBLY - STRAWBERRY
81292 81289 GAGING COLLAR - STRAWBERRY
81294 81293 HEAD ASSEMBLY - MANGO
81295 81293 GAGING COLLAR - MANGO
82182 ALL O-RING, 13/16”, SILICONE
83003 ALL SEAL ASSEMBLY
83021 ALL SEAL, PISTON
88016 ALL CAP, PLASTIC, 38MM
88166 ALL SPRING ASSEMBLY
88202 ALL PINCH VALVE
88496 ALL CYLINDER ASSEMBLY
BOTTLE PUMP PARTS
GAGING COLLARS
(Portion Control)
HEAD
A
SSEMBLY
LOCKING COLLAR
KNOBS
DISCHARGE TUBE
PINCH VALVE
SEAL ASSEMBLY SEAL
SEAL O-RING
SPRING
CYLINDER
ASSEMBLY
(stainless steel ball
snaps inside cylinder,
and can always
remain installed)
LID
CYLINDER
CAP
GENERAL SERVICE, REPAIR, OR
RETURNS
Before sending any item to Server Products for service,
repair, or return, contact Server Products customer service
to request a Return Authorization Number.
Merchandise must be sent to Server Products with this
number.
Merchandise being returned for credit must be in new and
unused condition and not more than 90 days old and will
be subject to a 20% (percent) restocking charge.
Electrical parts (thermostats, heating elements etc.)
are not returnable.
Server Products maintains a fully staffed service
department with highly skilled factory trained personnel.
Service is extremely prompt. Under normal circumstances,
a repaired unit is shipped out the day after it is received.
Labor charges are reasonable.
SERVICE
Contact dealer or Server Products Inc.
customer service department for the following:
ORDERING REPLACEMENT PARTS
Be prepared to give this information:
• MODEL Letters/Name/Numbers
• Part Numbers- P/N
• Series Numbers/Letters
• Part Description
This information and other important data is stamped on
the lid or cylinder of pumps or on the bottom or back side
of every unit.
PUMP ASSEMBLY
ALWAYS CLEAN PUMP THOROUGHLY BEFORE EACH USE
AND AFTER USE DAILY. SEE PUMP DISASSEMBLY AND
PUMP CLEANING.
1INSTALL SEAL O-RING INSIDE SEAL.
• Apply food equipment lubricant on seal o-ring.
2INSTALL SEAL ASSEMBLY SECURELY ONTO HEAD
ASSEMBLY PISTON.
• Apply food equipment lubricant inside seal assembly.
• Flared end of seal assembly should be facing away
from piston head.
• If seal is installed incorrectly, product will leak past
seal.
3APPLY A SMALL AMOUNT OF FOOD EQUIPMENT
LUBRICANT INSIDE BOTTOM OF HEAD ASSEMBLY
PISTON. THEN INSTALL PINCH VALVE INTO BOTTOM
END OF HEAD ASSEMBLY PISTON.
• Rotate pinch valve inside head assembly piston
to spread lubricant evenly inside end of head
assembly piston. Then position pinch valve
securely into a sealed position on end of head
assembly piston.
4INSTALL GAGING COLLAR ONTO SIDE OF HEAD
ASSEMBLY PISTON.
5INSTALL SPRING INTO CYLINDER.
6INSTALL CAP BY SECURELY SNAPPING IT ONTO
CYLINDER, PAST THREADING.
7INSTALL LID BY SLIDING LID UP FROM BOTTOM OF
CYLINDER TO ALIGN WITH CAP. SECURE PUMP TO
LID BY TIGHTENING CAP TO LID THREADING.
8 APPLY A SMALL AMOUNT OF FOOD EQUIPMENT
LUBRICANT INSIDE TOP OF CYLINDER AND TO
OUTSIDE SURFACE OF SEAL.
9INSTALL HEAD ASSEMBLY PISTON INTO CYLINDER.
JSLIDE LOCKING COLLAR DOWN ONTO CYLINDER
THREADING AND TIGHTEN TO SECURE HEAD
ASSEMBLY TO CYLINDER.
KPREPARE PUMP FOR USE.
• Operate pump several times until only product,
without air bubbles, is delivered with each stroke
of pump.
TROUBLESHOOTING
FOR PUMP
Pump dispenses little or no product:
• Ensure pinch valve is properly installed into
bottom of head assembly.
• Ensure ball is snapped in place down inside
cylinder.
• Product may be too stiff or contain a solid that
will not pass through pinch valve.
Product oozes out around locking collar:
• Ensure seal is securely installed onto head
assembly piston. Ensure ared edge of seal is
facing down towards bottom of piston.
Pump head assembly does not return to top of stroke
after dispensing product:
• Inspect spring for any damage. If bent or
broken, spring may cause permanent damage
to cylinder. Replace spring if necessary.
Pump drips:
• Clean head assembly discharge tube with
smaller bristled brush.
• Ensure product is not being heated by any
external source(s) causing product to expand
and drip from pump.
Portion control is not consistent:
• Inspect gaging collar for any damage, verify
that it is the correct one, and is installed
properly onto head assembly piston.
• Inspect pinch valve for any damage. Replace if
necessary.
• Ensure ball is snapped in place down inside
cylinder.
Problems with pump operation and/or ow:
• Replace seal if necessary.
• Replace cylinder assembly if necessary.
• Clean pump.
SERVER PRODUCTS
LIMITED WARRANTY
All Server Products equipment is backed by a
two-year limited Warranty against defects in materials and
workmanship. For complete Warranty information go to:
www.server-products.com
 Server Products Inc.
3601 Pleasant Hill Road
Richfield, WI 53076 USA

262.628.5600

800.558.8722

262.628.5110

[email protected]

www.server-products.com
SAFETY GUIDELINES
According to food and safety regulations, most foods must
be stored and/or served at certain temperatures or they
could become hazardous. Check with local food and safety
regulators for specic guidelines.
Be aware of the product you are serving and the
temperature the product is required to maintain.
Server Products, Inc. can not be responsible for the
serving of potentially hazardous product.
NSF International
(National Sanitation Foundation)
lists this pump as: “Not acceptable for
dispensing potentially hazardous foods.”
Stainless steel is one of the best materials for food
serving and storage, but there are many products which
can corrode it. If you notice corrosion beginning on
any stainless steel surface, you may need to change
the cleansing agent, sanitizing agent, or the cleaning
procedures you are using.
• Products containing: acids, alkalines, chlorine,
or salt can corrode stainless steel.
• Sauerkraut and Au Jus sauces corrode stainless steel.
Server Products, Inc. regrets that we can not honor
Warranty claims on stainless steel parts that have
been affected by sauerkraut
or Aus Jus.
Other manuals for BP-1

4

This manual suits for next models

8

Other Server Dispenser manuals

Server Extreme ECD User manual

Server

Server Extreme ECD User manual

Server TOUCHLESS EXPRESS User manual

Server

Server TOUCHLESS EXPRESS User manual

Server EXTREME CARLS JR. 13G Series User manual
Server

Server EXTREME CARLS JR. 13G Series User manual

Server 85783 User manual

Server

Server 85783 User manual

Server EZ-Cream 06C Series User manual

Server

Server EZ-Cream 06C Series User manual

Server 05H Series User manual

Server

Server 05H Series User manual

Server BP-1 88574 User manual

Server

Server BP-1 88574 User manual

Server BP-1 User manual

Server

Server BP-1 User manual

Server Touchless Express SE-SS-TDP1.3 User manual

Server

Server Touchless Express SE-SS-TDP1.3 User manual

Server CerealServ DFD-C User manual

Server

Server CerealServ DFD-C User manual

Server SY User manual

Server

Server SY User manual

Server Mix-N-Serve 05550 User manual

Server

Server Mix-N-Serve 05550 User manual

Server InSweeten INS User manual

Server

Server InSweeten INS User manual

Server Server Express SE-SS 07952 User manual

Server

Server Server Express SE-SS 07952 User manual

Server EZT-S User manual

Server

Server EZT-S User manual

Server Express Direct-Pour SE-SS-DP User manual

Server

Server Express Direct-Pour SE-SS-DP User manual

Server INS Series User manual

Server

Server INS Series User manual

Server Express SEI-5 User manual

Server

Server Express SEI-5 User manual

Server Sir Kensington's ECD User manual

Server

Server Sir Kensington's ECD User manual

Server BP-1 User manual

Server

Server BP-1 User manual

Server Shake Shack 85751 User manual

Server

Server Shake Shack 85751 User manual

Server SlimLine DFD Operator's manual

Server

Server SlimLine DFD Operator's manual

Server SlimLine DFD User manual

Server

Server SlimLine DFD User manual

Server Express SE-3 User manual

Server

Server Express SE-3 User manual

Popular Dispenser manuals by other brands

Elkay EZ8WS Series Use and care guide

Elkay

Elkay EZ8WS Series Use and care guide

Tork Matic manual

Tork

Tork Matic manual

Cornelius Quest Bib Option Kit installation manual

Cornelius

Cornelius Quest Bib Option Kit installation manual

Tork 209303A Service and parts manual

Tork

Tork 209303A Service and parts manual

DEMA 302-2 Installation instruction

DEMA

DEMA 302-2 Installation instruction

Bras FBM Series Operator's manual

Bras

Bras FBM Series Operator's manual

Wayne 3/VISTA series Service manual

Wayne

Wayne 3/VISTA series Service manual

Dacor Discovery DYWS4 manual

Dacor

Dacor Discovery DYWS4 manual

Coca-Cola Freestyle 7100 user guide

Coca-Cola

Coca-Cola Freestyle 7100 user guide

EFD 2000XL operating guide

EFD

EFD 2000XL operating guide

Sanela SLZN 71ESB Instructions for use

Sanela

Sanela SLZN 71ESB Instructions for use

Hilti Nuron CD 4-22 Original operating instructions

Hilti

Hilti Nuron CD 4-22 Original operating instructions

Georgia Pacific enMotion 52052 Specification sheet

Georgia Pacific

Georgia Pacific enMotion 52052 Specification sheet

Moen INS154D instructions

Moen

Moen INS154D instructions

Delta Clean DZ6511 quick start guide

Delta Clean

Delta Clean DZ6511 quick start guide

Sanela SLU 45M2 Instructions for use

Sanela

Sanela SLU 45M2 Instructions for use

Miele DOS G 80 flex Fitting instructions

Miele

Miele DOS G 80 flex Fitting instructions

Air Wolf Lobo II Series manual

Air Wolf

Air Wolf Lobo II Series manual

manuals.online logo
manuals.online logoBrands
  • About & Mission
  • Contact us
  • Privacy Policy
  • Terms and Conditions

Copyright 2025 Manuals.Online. All Rights Reserved.