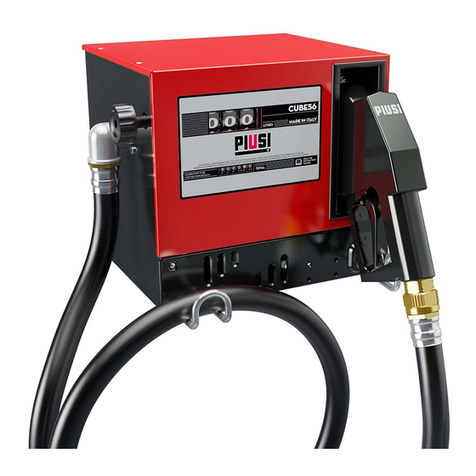
Piusi Cube 56/33 User manual

USE AND MAINTENANCE MANUAL ENGLISH
DISPENSERS
FOR PRIVATE USE
DISPENSERS
FOR PRIVATE USE
CUBE
CUBE
Bulletin M0097C EN - Rev.1

2
EN THE
PERSONNEL MUST BE FAMILIAR WITH THE FIRST AID AND SAFETY RULES
DESCRIBED IN THIS MANUAL.
PERSONNEL WHO USE THE DISPENSER AND THE TECHNICAL SUPPORT
Keep this technical manual in a place that is familiar and
accessible to all the personnel who have access to the dispenser.

3
EN
TABLE OF CONTENTS
EC Declaration of conformity .................
First aid rules ...........................................
Persons who have ingested toxic
liquids ..................................................
Persons who have suffered electric shock .
General .....................................................
Safety rules ..............................................
Protective gloves .................................
Permitted uses .....................................
Overheating .........................................
Smoking prohibited .............................
Electrical precautions ..........................
Service .................................................
Transport, handling and unpacking ......
Rules for demolition and disposal ........
Packing material disposal ...................
Metal parts disposal ............................
Miscellaneous parts disposal ..............
A) Using and looking after manuals .....
List of manuals provided ...................
B) General information ...........................
CUBE Dispenser ..................................
K33 meter ..........................................
Self-priming pump and motor ...........
Identification label .............................
Components of CUBE dispensers ......
Technical specifications .......................
CUBE dispensers ..............................
K33 meter ..........................................
Meter accuracy ..................................
Permitted uses ......................................
Uses not permitted ...............................
C) Installation ...........................................
Packaging content .............................
Opening .............................................
Reset knob .........................................
Pulling out the tube support hook .....
Installing the tube and nozzle ............
Installation general warnings .............
Mechanical installation .........................
Hydraulic connections .........................
Maximum length of suction tubing ....
Recommendations and warnings ......
Installation of the check valve
and filter .............................................
Connecting the tubing to CUBE ........
Electrical connections ..........................
Connecting the CUBE 230V ac
single-phase ......................................
Starting .................................................
Filling the pump .................................
Priming the pump ..............................
Calibrating the meter .........................
Turning on the Cube ..........................
D) Instructions for use ............................
How to dispense fuel .........................
E) Maintenance ........................................
Opening and closing the CUBE ...........
Periodic inspections .............................
Cleaning the pump filter .......................
Troubleshooting ...................................
Spare parts for the CUBE .....................
4
5
5
5
5
5
5
5
5
5
5
5
5
6
6
6
6
6
6
6
7
7
7
7
8
8
8
8
8
8
8
9
9
9
9
9
9
9
10
10
10
10
10
10
11
11
11
11
11
12
12
13
13
14
14
14
14
15
16
(Translated from Italian)
Rules for demolition and disposal
Packing material disposal ...................
Metal parts disposal ............................
Miscellaneous parts disposal ..............
A) Using and looking after manuals
Overheating .........................................
Smoking prohibited .............................
Electrical precautions ..........................
Service .................................................
Transport, handling and unpacking
......
Installation of the check valve
and filter
Connecting the tubing to CUBE
Electrical connections ..........................
5
5
5
5
5
6
6
List of manuals provided
...................
...........................
CUBE Dispenser ..................................
..........................................
...........
Turning on the Cube
D) Instructions for use
How to dispense fuel
E) Maintenance
6
6
6
7
7
7
7
8
Connecting the CUBE 230V ac
single-phase
......................................
Starting .................................................
Filling the pump
.................................
Priming the pump
Calibrating the meter
Connecting the CUBE 230V ac
single-phase
Starting .................................................
Filling the pump
Priming the pump
Calibrating the meter
Rules for demolition and disposal
Packing material disposal ...................
Metal parts disposal ............................
Miscellaneous parts disposal ..............
A) Using and looking after manuals
6
Rules for demolition and disposal
Packing material disposal ...................
Metal parts disposal ............................
Miscellaneous parts disposal ..............
A) Using and looking after manuals
Troubleshooting ...................................
Periodic inspections .............................
Cleaning the pump filter .......................
Opening and closing the CUBE ...........
Periodic inspections .............................
E) Maintenance
Opening and closing the CUBE ...........
How to dispense fuel
E) Maintenance
How to dispense fuel
D) Instructions for use
How to dispense fuel
Turning on the Cube
D) Instructions for use
Turning on the Cube
Calibrating the meter
Turning on the Cube
..............................
Calibrating the meter
.........................
Calibrating the meter .........................Calibrating the meter

4
EN (Translated from Italian)
- Machine Directive 2006/42/EC
- Low-Voltage Directive 2006/95/EC
- Electromagnetic Compatibility Directive 2004/108/EC
Description:
Model:
Serial number:
Year of manufacture:
DIESEL FUEL DISPENSER
CUBE 56 - CUBE 70
refer to Lot Number shown on CE plate affixed to the
product
refer to the year of production shown on the CE plate
affixed to the product
HEREBY STATES
The undersigned:
under its own responsibility, that the equipment described below:
PIUSI S.p.A
Via Pacinotti c.m. z.i.Rangavino
46029 Suzzara - Mantova - Italy
EC DECLARATION OF CONFORMITY
Suzzara 29/12/2009
is in conformity with the legal provisions indicated in the directives:
The documentation is at the disposal of the competent authority following motivated
request at Piusi S.p.A. or following request sent to the email address: [email protected]
The person authorised to compile the technical file and draw up the declaration is
Otto Varini as legal representative.
the legal representative
! Warning
The CUBE MC dispensing units described in this manual are for professional use only.
Year of manufacture:
is in conformity with the legal provisions indicated in the directives:
DIESEL FUEL DISPENSER
CUBE 56 - CUBE 70
refer to Lot Number shown on CE plate affixed to the
product
refer to the year of production shown on the CE plate
affixed to the product
- Machine Directive 2006/42/EC
- Low-Voltage Directive 2006/95/EC
- Electromagnetic Compatibility Directive 2004/108/EC
is in conformity with the legal provisions indicated in the directives:
refer to the year of production shown on the CE plate
is in conformity with the legal provisions indicated in the directives:
refer to the year of production shown on the CE plate
affixed to the product
is in conformity with the legal provisions indicated in the directives:
refer to the year of production shown on the CE plate
affixed to the product
is in conformity with the legal provisions indicated in the directives:
Year of manufacture:
is in conformity with the legal provisions indicated in the directives:
The documentation is at the disposal of the competent authority following motivated
- Electromagnetic Compatibility Directive 2004/108/EC
- Low-Voltage Directive 2006/95/EC
- Electromagnetic Compatibility Directive 2004/108/EC
- Low-Voltage Directive 2006/95/EC
is in conformity with the legal provisions indicated in the directives:

CUBE is shipped inside stackable cardboard packaging.
DIMENSIONS OF PACKAGING: h. = 480mm / w. = 380mm / d. = 380mm
TOTAL WEIGHT: Cube 56/33 = 21.3 Kg Cube DC 12V = 22 Kg PACKAGING WEIGHT: 1.8 Kg
Cube 70/33 = 24.0 Kg Cube DC 24V = 22 Kg 1.8 Kg
When the machine is not used, whether it is packed or unpacked, it must be stored in a place protected from the
weather (rain, damp, sun, etc.) and from dust.
To remove the cardboard packaging, use a pair of scissors or cutters, being careful not to damage the appliance.
Fully open the packaging and take out the CUBE so that it can be taken to the place of final installation.
Once the packaging has been removed, the station must always be kept in ver tical position.
Packaging par ts (cardboard, wood, cellophane, etc...) must be placed in specific containers and not left lying around
or within reach of children, as these represent a potential risk hazard. They must be disposed of according to the
regulations applicable in the country of use.
Check the integrity of the machine by making sure the shipped par ts are not damaged in any way that could affect
safey and operation. In case of any doubts, do not star t the appliance but contact the manufacturer's after-sales
service.
Protective gloves. Prolonged contact with hydrocarbons can cause skin irritation: when dispensing
fuel always use PVC gloves conforming to the standard EN 388 cat.2.
Permitted uses. The unit must always be used for the purpose intended. Follow the instructions
listed in the chapter Instructions for Use.
Overheating. To prevent overheating, make sure that the pump of the dispenser stops whenever fuel
has not been dispensed for more than 2 minutes.
Smoking prohibited. When operating the dispenser and in par ticular during refuelling, do not smoke
and do not use open flame.
Electrical precautions. There are dangerously high voltages inside the unit. Only qualified and
authorized technical personnel are allowed to open the dispenser.
Service. Service of the dispenser must be per formed by qualified personnel.
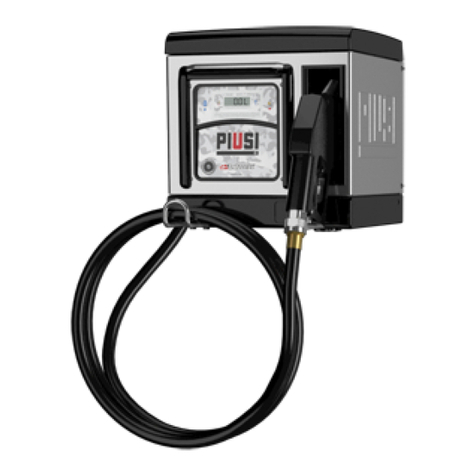
CUBE dispensers are appliances designed for the private distribution of diesel fuel for motor transport.
All the models of the series share the same sturdy metal structure and the self-priming type pumps, while they differ
in terms of the meter - mechanical or electronic - and in the fact that some models feature an electronic dispensing
Control System.
Reliability of pumping units, accurate measurement of dispensed product and high Control System performance are
CUBE's strong points.
5
FIRST AID RULES
GENERAL
SAFETY RULES
TRANSPORT, HANDLING AND UNPACKING
Persons who have ingested toxic liquids: whenever fuel has been swallowed, do not induce vomiting, but
have the injured person drink large quantities of milk or water.
Persons who have suffered electric shock: disconnect the power source, or use a dry insulator to protect
yourself while you move the injured person away from any electrical conductor.
Avoid touching the injured person with your bare hands until he is far away from any conductor
Immediately call for help from qualified and trained personnel.
IN ALL CASES, SEEK MEDICAL ATTENTION IMMEDIATELY
EN(Translated from Italian)
Protective gloves
. Prolonged contact with hydrocarbons can cause skin irritation: when dispensing
always use PVC gloves
Permitted uses
listed in the chapter Instructions for Use.
. To prevent overheating, make sure that the pump of the dispenser stops whenever fuel
All the models of the series share the same sturdy metal structure and the self-priming type pumps, while they differ
in terms of the meter - mechanical or electronic - and in the fact that some models feature an electronic dispensing
. Prolonged contact with hydrocarbons can cause skin irritation: when dispensing
conforming to the standard EN 388 cat.2.
Reliability of pumping units, accurate measurement of dispensed product and high Control System performance are
SAFETY RULES
. To prevent overheating, make sure that the pump of the dispenser stops whenever fuel
has not been dispensed for more than 2 minutes.
. When operating the dispenser and in par ticular during refuelling,
and do not use open flame.
. There are dangerously high voltages inside the unit. Only qualified and
authorized technical personnel are allowed to open the dispenser.
. Service of the dispenser must be per formed by qualified personnel.
. Prolonged contact with hydrocarbons can cause skin irritation: when dispensing
conforming to the standard EN 388 cat.2.
. The unit must always be used for the purpose intended. Follow the instructions
. To prevent overheating, make sure that the pump of the dispenser stops whenever fuel
. Prolonged contact with hydrocarbons can cause skin irritation: when dispensing
conforming to the standard EN 388 cat.2.
. The unit must always be used for the purpose intended. Follow the instructions
. To prevent overheating, make sure that the pump of the dispenser stops whenever fuel
. Prolonged contact with hydrocarbons can cause skin irritation: when dispensing
always use PVC gloves
conforming to the standard EN 388 cat.2.
. The unit must always be used for the purpose intended. Follow the instructions
listed in the chapter Instructions for Use.
. To prevent overheating, make sure that the pump of the dispenser stops whenever fuel
Protective gloves
. Prolonged contact with hydrocarbons can cause skin irritation: when dispensing
always use PVC gloves
Permitted uses
. The unit must always be used for the purpose intended. Follow the instructions
listed in the chapter Instructions for Use.
. To prevent overheating, make sure that the pump of the dispenser stops whenever fuel
TRANSPORT, HANDLING AND UNPACKING
. Service of the dispenser must be per formed by qualified personnel.
. There are dangerously high voltages inside the unit. Only qualified and
authorized technical personnel are allowed to open the dispenser.
. There are dangerously high voltages inside the unit. Only qualified and
. When operating the dispenser and in par ticular during refuelling,
. To prevent overheating, make sure that the pump of the dispenser stops whenever fuel

CUBE dispensers are designed for the transfer of diesel fuel for private use. Characterised by
maximum safety and simplicity of use, CUBE dispensers are dependable, high-performance
equipment that is quickly installed and ready for use.
This CUBE manual shows the main features
of the various models and provides details of:
• electrical and mechanical installation.
• first start up operations.
• daily use.
This collection of manuals represents an
integral and essential part of the product and,
according to the provisions of directive EEC
89/392, must be given to operators and
maintenance staff in order to comply with the
obligations relating to training/information
referred to in directive EEC 89/391. Carefully
read the instructions contained in these
manuals, as these are most important for
installation safety, operation and maintenance.
The manufacturer disclaims all liability for
injury to persons or damage to things, or the
machine, in the event of this being used in a
way different to that indicated in the
instructions.
DISPOSAL OF PACKAGING:
The packaging consists of biodegradable cardboard
which can be delivered to companies for normal
recycling of cellulose.
DISPOSAL OF METAL COMPONENTS:
The metal components, both painted and stainless
steel, are usually recycled by companies that are
specialised in the metal-scrapping industry.
DISPOSAL OF ELECTRIC AND ELECTRONIC COM-
PONENTS:
these have to be disposed by companies that are
specialised in the disposal of electronic components,
in accordance with the instructions of 2002/96/EC
(see text of Directive below).
DISPOSAL OF OTHER PARTS:
The disposal of other par ts such as pipes, rubber
seals, plastic components and cables should be
entrusted to companies that special in the disposal of
industrial waste.
ENVIRONMENTAL INFORMATION FOR CUSTOMERS
IN THE EUROPEAN UNION
European Directive 2002/96/EC requires
that the equipement bearing this symbol on
the product and/or its packaging must not
be disposed of with unsor ted municipal
waste. The symbol indicates that this product should
be disposed of separately from regular household
waste streams. It is your responsibility to dispose of
this and other electric and electronic equipment via
designated collection facilities appointed by the
government or local authorities.
6
RULES FOR DEMOLITION AND DISPOSAL
USING AND LOOKING AFTER MANUALSA
GENERAL INFORMATIONB
List of manuals provided
The components must be given to companies that specialise in the disposal and recycling of industrial waste
and, in par ticular, the
This manual DOES NOT cover other aspects
such as:
• calibration of the K33 meter.
For these aspects, refer to the specific manuals
which accompany each station model.
Look after this manual carefully in a place
protected from damp, heat, dust, oils, greases,
etc., as it will be useful for future reference and
consultation. Do not remove, tear or amend any
parts of the manual for any reason. In case of
loss or damage, ask the manufacturer for a
copy, quoting the manual code.
This manual must always remain with the
machine; in the event of the machine being
sold, it must be given to the new user.
The company reserves the right to change
CUBE features and specifications at any
time.
M0042 Panther 56 / 72 Manual
M0033 Meter K33 / K44 Manual
M0127 Panther DC Manual
EN (Translated from Italian)
This CUBE manual shows the main features
of the various models and provides details of:
• electrical and mechanical installation.
• first start up operations.
This CUBE manual shows the main features
specialised in the disposal of electronic components,
in accordance with the instructions of 2002/96/EC
this and other electric and electronic equipment via
designated collection facilities appointed by the
government or local authorities.
USING AND LOOKING AFTER MANUALS
This collection of manuals represents an
integral and essential part of the product and,
according to the provisions of directive EEC
must be given to operators and
in order to comply with the
obligations relating to training/information
Carefully
read the instructions contained in these
Look after this manual carefully
protected from damp, heat, dust, oils, greases,
etc., as it will be useful for future reference and
consultation. Do not remove, tear or amend any
parts of the manual for any reason. In case of
loss or damage, ask the manufacturer for a
This manual DOES NOT cover other aspects
• calibration of the K33 meter.
For these aspects, refer to the specific manuals
which accompany each station model.
This manual DOES NOT cover other aspects
such as:
• calibration of the K33 meter.
For these aspects, refer to the specific manuals
which accompany each station model.
This CUBE manual shows the main features
of the various models and provides details of:
• electrical and mechanical installation.
• first start up operations.
This CUBE manual shows the main features
of the various models and provides details of:
• electrical and mechanical installation.
• first start up operations.
This manual must always remain with the
machine
sold, it must be given to the new user.
This manual must always remain with the
copy, quoting the manual code.
loss or damage, ask the manufacturer for a
copy, quoting the manual code.
parts of the manual for any reason. In case of
loss or damage, ask the manufacturer for a
copy, quoting the manual code.
parts of the manual for any reason. In case of
loss or damage, ask the manufacturer for a
consultation. Do not remove, tear or amend any
parts of the manual for any reason. In case of
etc., as it will be useful for future reference and
consultation. Do not remove, tear or amend any
Look after this manual carefully
protected from damp, heat, dust, oils, greases,
etc., as it will be useful for future reference and
Look after this manual carefully
For these aspects, refer to the specific manuals
which accompany each station model.

The nozzle supplied with CUBE is of automatic type and fitted with a shut-off device for full tank.
CUBE dispensers are equipped with self-
priming, volumetric, electric rotary vane
pumps for the transfer of diesel fuel,
provided with a by-pass valve. Such a valve
allows functioning for brief periods of time
even with the dispensing nozzle closed. The
motor which is directly coupled to the pump
body is asynchronous, closed-type self-
ventilated, AC single-phase.
For additional information and technical
data, consult Technical Bulletin M0042
"PANTHER 56/72".
Series K meters are mechanical oscillating
disk meters designed to allow the precise
measurement of diesel fuel.
The meter is provided with a non-resettable
counter in litres and a partial resettable indicator:
• the partial indicator has three digits and
the total indicator has six digits.
For additional information, consult Technical
Bulletin M 0033 "Mechanical Meters, Use and
Maintenance.”
The CUBE dispenser is equipped with a Series K mechanical type meter.
Equipment and features are:
• Self-priming rotary vane pump with
incorporated by-pass valve.
• Motor with protection grade IP55 and
thermal protection, 230V AC single-phase.
• Brush motor powered by continuous current,
low voltage, with intermittent cycle, closed
type, IP55 protection class according to CEI
EN 60034-5, flange-mounted directly to the
pump body (version Panther Dc).
• Four meters of anti-static rubber tube for fuel.
• Automatic type dispensing nozzle with on-
off switch integrated into the nozzle rest.
• Steel body with anti-corrosion treatment
and paint finish.
• 110/120 V AC-60 Hz motor on request.
7
K33 meter
Self-priming pump and motor
Nozzle
Identification label
CUBE dispenser
MANUFACTURER
PRODUCT
NAME
PRODUCT
CODE
TECHNICAL
SPECIFICATIONS
PRODUCTION
YEAR
CE MARK
LOT NUMBER
The label is attached to the left side of the dispenser.
EN(Translated from Italian)
Before installing, always make sure the dispenser model is correct and suitable for the
available power supply (voltage/frequency)
! WARNING
CUBE dispensers are equipped with self-
priming, volumetric, electric rotary vane
pumps for the transfer of diesel fuel,
provided with a by-pass valve. Such a valve
allows functioning for brief periods of time
Series K meters are mechanical oscillating
disk meters designed to allow the precise
The meter is provided with a non-resettable
CUBE dispensers are equipped with self-
counter in litres and a partial resettable indicator:
For additional information, consult Technical
Bulletin M 0033 "Mechanical Meters, Use and
Maintenance.”
Self-priming pump and motor
provided with a by-pass valve. Such a valve
allows functioning for brief periods of time
even with the dispensing nozzle closed. The
"PANTHER 56/72".
The nozzle supplied with CUBE is of automatic type and fitted with a shut-off device for full tank.
motor which is directly coupled to the pump
body is asynchronous, closed-type self-
ventilated, AC single-phase.
For additional information and technical
data, consult Technical Bulletin M0042
motor which is directly coupled to the pump
body is asynchronous, closed-type self-
ventilated, AC single-phase.
For additional information and technical
data, consult Technical Bulletin M0042
CUBE dispensers are equipped with self-
priming, volumetric, electric rotary vane
pumps for the transfer of diesel fuel,
provided with a by-pass valve. Such a valve
allows functioning for brief periods of time
CUBE dispensers are equipped with self-
priming, volumetric, electric rotary vane
pumps for the transfer of diesel fuel,
provided with a by-pass valve. Such a valve
allows functioning for brief periods of time
The nozzle supplied with CUBE is of automatic type and fitted with a shut-off device for full tank.
data, consult Technical Bulletin M0042
For additional information and technical
data, consult Technical Bulletin M0042

The transfer of fluids with different characteristics than those indicated above is not
allowed. In particular:
Fluids not permitted Related danger:
Petrol .................................................................. Fire/explosion
Inflammable liquids with PM < 55°C ................. Fire/explosion
Water .................................................................. Pump oxidation
Food liquids ....................................................... Contamination of the same
Liquids with viscosity >20 cSt ........................... Motor overload
Corrosive chemical products ............................. Pump corrosion
Injury to persons
Solvents .............................................................. Fire/explosion
Damage to gasket seals
Transfer of diesel fuel with a viscosity from 2 to 5.35 cSt at 37.8°C and PM flash point >55°C.
The K 33-K44 meters, after correct calibration in the field, provide the following performances:
ACCURACY: +/- 1% (after calibration, for flow rates of over 10 l/min)
Partial meter indicator 3-digit resettable
Main total indicator 6-digit non-resettable
1 Pump-Motor Unit
2 Meter
The pictures aside show the CUBE
components. In particular, those
components that distinguish the
various models of the CUBE product
line are numbered and described.
8
Components of CUBE dispensers
Technical specifications
Permitted uses
Uses not permitted
Drawing Ref. Description
CUBE dispensers
MODEL Supply voltage
CUBE 56 / 33 > 230/50 230 V / 50 Hz - 1~ 2.4 370 55
CUBE 56 / 33 > 230/60 230 V / 60 Hz - 1~ 3.3 520 62
CUBE 56 / 33 > 110/60 110 V / 60 Hz - 1~ 8.25 250 62
CUBE 56 / 33 > 110/50 110 V / 50 Hz - 1~ 6 250 55
CUBE 70 / 33 > 230/50 230 V / 50 Hz - 1~ 3.3 500 72
Absorption
(A)
Power
(W)
Flow rate
(l/m)
K33 - K44 meter
Meter accuracy
EN (Translated from Italian)
Partial meter indicator
CUBE 70 / 33 > 230/50 230 V / 50 Hz - 1~ 3.3
K33 - K44 meter
Supply voltage
CUBE 56 / 33 > 230/50 230 V / 50 Hz - 1~ 2.4
CUBE 56 / 33 > 230/60 230 V / 60 Hz - 1~ 3.3
CUBE 56 / 33 > 110/60 110 V / 60 Hz - 1~ 8.25 250 62
CUBE 56 / 33 > 110/50 110 V / 50 Hz - 1~ 6
CUBE 70 / 33 > 230/50 230 V / 50 Hz - 1~ 3.3
6-digit non-resettable
The K 33-K44 meters, after correct calibration in the field, provide the following performances:
(after calibration, for flow rates of over 10 l/min)
3-digit resettable
3-digit resettable
CUBE 70 / 33 > 230/50 230 V / 50 Hz - 1~ 3.3
Partial meter indicator
CUBE 70 / 33 > 230/50 230 V / 50 Hz - 1~ 3.3
K33 - K44 meter
Transfer of diesel fuel with a viscosity from 2 to 5.35 cSt at 37.8°C and PM flash point >55°C.
(after calibration, for flow rates of over 10 l/min)
The K 33-K44 meters, after correct calibration in the field, provide the following performances:
(after calibration, for flow rates of over 10 l/min)
The K 33-K44 meters, after correct calibration in the field, provide the following performances:
6-digit non-resettable

Installation general warnings
The CUBE dispenser can be installed outside. Nevertheless, it is advisable to locate it under the shelter of
a roof to ensure the dispenser's longevity and provide greater comfort during refuelling in the event of bad
weather. The installation of the dispenser must be carried out by skilled personnel and performed according
to the instructions provided in this chapter.
INSTALLATIONC
Packaging content Opening Reset knob
Installing the tube and nozzlePulling out the tube support hook
not illustrated
*
1
2
Nozzle
Tube
1
2
3
*
Cube
Valve/filter kit
3
1 2
1
2
Screw off
the screws
Put the knob on the guide
and push thoroughly
use a suitable dope for the threads
The maximum length of the tubing must
conform to the "Recommendations and
Warnings" provided on the following
page.
Minimum tube diameter: 1”
(a)
(b)
The Ho difference in
height between the
fuel surface and the
pump in the dispenser
must not be higher
than 3 m!
The CUBE can be installed:
(a) above the tank
(b) on a level with the tank
Fuel surface
Tank
Fig. 2.1 - Dispensing system installation diagram
9
EN(Translated from Italian)
Installation general warnings
The CUBE dispenser can be installed outside. Nevertheless, it is advisable to locate it under the shelter of
a roof to ensure the dispenser's longevity and provide greater comfort during refuelling in the event of bad
weather. The installation of the dispenser must be carried out by skilled personnel and performed according
to the instructions provided in this chapter.
The maximum length of the tubing must
conform to the "Recommendations and
The CUBE dispenser can be installed outside. Nevertheless, it is advisable to locate it under the shelter of
a roof to ensure the dispenser's longevity and provide greater comfort during refuelling in the event of bad
The CUBE dispenser can be installed outside. Nevertheless, it is advisable to locate it under the shelter of
a roof to ensure the dispenser's longevity and provide greater comfort during refuelling in the event of bad
The CUBE dispenser can be installed outside. Nevertheless, it is advisable to locate it under the shelter of
a roof to ensure the dispenser's longevity and provide greater comfort during refuelling in the event of bad
Installation general warnings
The CUBE dispenser can be installed outside. Nevertheless, it is advisable to locate it under the shelter of
a roof to ensure the dispenser's longevity and provide greater comfort during refuelling in the event of bad
weather. The installation of the dispenser must be carried out by skilled personnel and performed according

47 - Check valve
filter inlet
48 - Suction filter
The check valve keeps the tubing
constantly filled with diesel fuel.
Screw the other end of the tubing to the pump filter.
At the intake end of the tube, a check valve and a
suction filter must be attached that must remain
immersed at the bottom of the tank. The check
valve and the filter are provided as part of the
equipment with the CUBE dispenser.
SUGGESTION: Before connecting the tubing to the pump
filter it is a good idea to fill the tubing with diesel fuel to facilitate
priming the pump during the phase of putting it into operation.
Fig. 2.2 - Check valve and filter installation
the Recommendations and Warnings below,
the length of the tubing decreases as the
difference in height that the diesel fuel must
overcome increases and vice versa: in fact,
the back pressure progressively increases
by 0.08 bar for every meter increase in the
static height of the pump with respect to the
level of the diesel fuel in the tank.
long as they are done by skilled personnel, in a
workmanlike manner, with respect for the
regulations in effect in the country of installation.
Before beginning the installation, verify that
no packing material has been trapped in the
tubing.
Prepare suitable stilts or fixing brackets
depending on the fixing position of the
CUBE. The tube coming from the tank must
be aligned to the threaded inlet of the pump
filter which is located under the CUBE.
10
Maximum length of suction tubing
Installation of the check valve and filter
Connecting the tubing to CUBE
Mechanical installation
Hydraulic connections
Warning. Remove the protective caps from the
threads. The hydraulic connections can be made
with flexible or rigid tubes with adequate joints, as
The maximum length of the tubing, the
diameter of the tubing, the difference in
height, are parameters that are tightly linked
to creating suction conditions. The latter
must not be such as to create backpressure
greater than 0.6 bar. It follows as a
consequence that, after respecting the
minimum diameter of the tubing specified in
EN (Translated from Italian)
• The suction tubing must resist a pressure of at least 10 bar and must be of a diameter NOT
LOWER than 1''.
• The tubing must be suitable to functioning under backpressure.
• Use tubing and accessories suitable for use with diesel fuel. Materials that are not suitable
for use with diesel fuel can cause damage to the pump, harm people and cause pollution!
• Any curves in the suction tubes must be of the widest radius possible to limit the loss of head.
• Make sure that the suction tubing is clean and free of scum.
! Recommendations and warnings
Do not use conical threaded connectors that could cause damage to the threaded
connector on the pump filter.
! WARNING
• The suction tubing must resist a pressure of at least 10 bar and must be of a diameter NOT
LOWER than 1''.
• The tubing must be suitable to functioning under backpressure.
• Use tubing and accessories suitable for use with diesel fuel. Materials that are not suitable
! Recommendations and warnings
the length of the tubing decreases as the
difference in height that the diesel fuel must
overcome increases and vice versa: in fact,
the back pressure progressively increases
by 0.08 bar for every meter increase in the
static height of the pump with respect to the
level of the diesel fuel in the tank.
The maximum length of the tubing, the
diameter of the tubing, the difference in
height, are parameters that are tightly linked
to creating suction conditions. The latter
must not be such as to create backpressure
greater than 0.6 bar. It follows as a
consequence that, after respecting the
minimum diameter of the tubing specified in
! Recommendations and warnings
• The tubing must be suitable to functioning under backpressure.
• Use tubing and accessories suitable for use with diesel fuel. Materials that are not suitable
for use with diesel fuel can cause damage to the pump, harm people and cause pollution!
• Any curves in the suction tubes must be of the widest radius possible to limit the loss of head.
At the intake end of the tube, a check valve and a
Installation of the check valve and filter
• Make sure that the suction tubing is clean and free of scum.
• The suction tubing must resist a pressure of at least 10 bar and must be of a diameter NOT
• The tubing must be suitable to functioning under backpressure.
• The suction tubing must resist a pressure of at least 10 bar and must be of a diameter NOT
• The tubing must be suitable to functioning under backpressure.
! Recommendations and warnings
• The suction tubing must resist a pressure of at least 10 bar and must be of a diameter NOT
• The tubing must be suitable to functioning under backpressure.
! Recommendations and warnings
• The suction tubing must resist a pressure of at least 10 bar and must be of a diameter NOT
LOWER than 1''.
• The tubing must be suitable to functioning under backpressure.
• Use tubing and accessories suitable for use with diesel fuel. Materials that are not suitable
! Recommendations and warnings
suction filter must be attached that must remain
immersed at the bottom of the tank. The check
valve and the filter are provided as part of the
At the intake end of the tube, a check valve and a
suction filter must be attached that must remain
• Make sure that the suction tubing is clean and free of scum.
• Any curves in the suction tubes must be of the widest radius possible to limit the loss of head.
• Make sure that the suction tubing is clean and free of scum.
for use with diesel fuel can cause damage to the pump, harm people and cause pollution!
• Any curves in the suction tubes must be of the widest radius possible to limit the loss of head.
for use with diesel fuel can cause damage to the pump, harm people and cause pollution!
• Use tubing and accessories suitable for use with diesel fuel. Materials that are not suitable
for use with diesel fuel can cause damage to the pump, harm people and cause pollution!
• Use tubing and accessories suitable for use with diesel fuel. Materials that are not suitable

priming tubes, the priming of the pump can
require from several seconds to several
minutes, as a function of the characteristics
of the system.
The pump provided with the CUBE is a
self-priming pump capable of suctioning an
empty tube, nevertheless, the pump should
be partially filled with diesel fuel before
turning it on for the first time.
It is left to the technician's experience to
determine the best way to fill the pump.
Simply introduce the cable with the Schuko plug into the
hole at the bottom of the CUBE (see picture aside) and
connect the plug to a grounded outlet of the household
type.
Connect the ground wire to a grounding connection
prepared according to the regulations.
The electrical connections must be performed
in a workmanlike manner by skilled personnel,
respecting the regulations in effect in the
country of installation.
11
Connecting the CUBE 230V ac single-phase
Connecting the c.c. DC CUBE
Filling the pump
Priming the pump
Electrical Connections
Starting
The maximum acceptable variations from the
electrical parameters are:
• voltage ± 5 %.
• frequency ± 2%
It is advisable to oversee the first priming
phase to make sure that it is happening in a
reasonable amount of time:
depending on the length and fill status of the
EN(Translated from Italian)
CUBE dispensers are not equipped with circuit breakers. It is therefore strongly recommended to
install on the plug a 30-mA residual current operated circuit breaker.
! WARNING
Connect the power cord
following the polarity:
blue = + / brown = -
and lock it as shown in the
drawing.
Refer to Panther DC
(M0127) manual for
information concerning the
fuses (30A for the 24V
version and 40A for the
12V version).
The direction of the
selector should be as
shown in the picture
! WARNING
Connecting the c.c. DC CUBE
CUBE dispensers are not equipped with circuit breakers. It is therefore strongly recommended to
install on the plug a 30-mA residual current operated circuit breaker.
Connect the power cord
following the polarity:
blue = + / brown = -
and lock it as shown in the
! WARNING
! WARNING
Refer to Panther DC
(M0127) manual for
information concerning the
Refer to Panther DC
drawing.
blue = + / brown = -
and lock it as shown in the
drawing.

For all CUBE versions it is sufficient to:
- take the dispensing nozzle away from the
rest;
- Lift the rest (ON)
(Fig. 2.5).
Fig. 2.5 - Turning on the Cube
If accuracy is NOT satisfactory, proceed to CALIBRATE THE METER according to the
instructions in the M0033 manual.
Before using the CUBE station, check the METER ACCURACY.
For this purpose, proceed as follows:
• Take out the nozzle and start the pump as described in the above paragraph.
• Run the fuel into a calibrated container.
Calibrating the meter
Turning on the Cube
12
EN (Translated from Italian)
If this phase is excessively prolonged, stop the pump and verify that:
- the pump is not running completely dry;
- the suction tubing is air-tight and completely immersed in the fluid to be pumped;
- the suction filter is not clogged;
- the difference in height for priming is not greater than 3 meters;
- the residual air in the tubes has been evacuated.
! Recommendations and warnings
• To correctly check accuracy, always keep to the following instructions:
• Use a precision sample container, featuring a graduated measuring scale, with a capacity
of at least 20 litres.
• Before making the check, always make sure you have eliminated all the air from the system
and then run the fuel until a full and regular flow is achieved.
• Dispense in a continuous way at maximum CUBE flow rate.
• Stop the flow by quickly closing the nozzle.
• Reach the graduated area of the container, avoiding prolonged dispensing at low flow
rates; prefer short dispensing operations at maximum flow rate.
• Compare the reading provided by the container, with that provided by CUBE, after waiting
for all the froth to disappear.
! Recommendations and warnings
Differences up to 0.2 litres out of every 20 litres fall within the guaranteed accuracy of +/- 1%.
! WARNING
• Stop the flow by quickly closing the nozzle.
• Reach the graduated area of the container, avoiding prolonged dispensing at low flow
rates; prefer short dispensing operations at maximum flow rate.
• Compare the reading provided by the container, with that provided by CUBE, after waiting
for all the froth to disappear.
• To correctly check accuracy, always keep to the following instructions:
• Use a precision sample container, featuring a graduated measuring scale, with a capacity
• Before making the check, always make sure you have eliminated all the air from the system
and then run the fuel until a full and regular flow is achieved.
• Dispense in a continuous way at maximum CUBE flow rate.
• Stop the flow by quickly closing the nozzle.
• Reach the graduated area of the container, avoiding prolonged dispensing at low flow
! Recommendations and warnings
If accuracy is NOT satisfactory, proceed to CALIBRATE THE METER according to the
instructions in the M0033 manual.
Differences up to 0.2 litres out of every 20 litres fall within the guaranteed accuracy of +/- 1%.
• Reach the graduated area of the container, avoiding prolonged dispensing at low flow
rates; prefer short dispensing operations at maximum flow rate.
• Compare the reading provided by the container, with that provided by CUBE, after waiting
• Reach the graduated area of the container, avoiding prolonged dispensing at low flow
rates; prefer short dispensing operations at maximum flow rate.
• Compare the reading provided by the container, with that provided by CUBE, after waiting
• Stop the flow by quickly closing the nozzle.
• Reach the graduated area of the container, avoiding prolonged dispensing at low flow
rates; prefer short dispensing operations at maximum flow rate.
• Compare the reading provided by the container, with that provided by CUBE, after waiting
for all the froth to disappear.
Differences up to 0.2 litres out of every 20 litres fall within the guaranteed accuracy of +/- 1%.
If accuracy is NOT satisfactory, proceed to CALIBRATE THE METER according to the

1) Rotate the reset knob in a counter-clockwise direction to completely zero-out the partial
indicator. The total indicator cannot be reset to zero.
2) Extract the dispensing nozzle (a) and insert it in the container to be filled.
3) Set the starting handle to position ON (b): the pump starts.
4) Press the nozzle lever and keep it pressed until you have dispensed the desired quantity.
5) When dispensing is finished, set the start handle to OFF (c): the pump stops. Replace the
nozzle (d).
6) Rehang the tube on the tube support hook, so that it will not be crushed by moving
vehicles.
How to dispense fuel
The functions and instructions for use of the
K33 mechanical meter are described in the
13
INSTRUCTIONS FOR USED
relative manual M 0033.
Tube support
hook
Reset knob
a b c d
EN(Translated from Italian)
• Transfer of fuel must always occur in the presence and under the control of the
Operator.
• Keep the dispensing nozzle closed until it is inserted in the container to be filled.
• If the nozzle lever is not completely pressed, the automatic release device will not work.
! Recommendations and warnings
Reset knob
1) Rotate the reset knob in a counter-clockwise direction to completely zero-out the partial
indicator. The total indicator cannot be reset to zero.
2) Extract the dispensing nozzle (a) and insert it in the container to be filled.
1) Rotate the reset knob in a counter-clockwise direction to completely zero-out the partial
indicator. The total indicator cannot be reset to zero.
1) Rotate the reset knob in a counter-clockwise direction to completely zero-out the partial

The pump filter must be cleaned weekly or more often whenever a
reduction in flow rate is noticed.
The frequency required depends most of all on the quantity of fuel
dispensed, but also on other causes as well, such as dispensing fuel
immediately after refilling the tank, which stirs up sediment which
normally lies at the bottom.
To gain access to the filter:
• Remove the upper part of the Cube (and the side part for the
version CUBE 70), by unscrewing the 6 side screws (see Opening
and Closing the Cube)
• Screw off the 2 screws on the filter cover.
• To clean it, it is sufficient to wash it and blow through it.
- Check weekly and keep the pump body, tubing
and flanges clean to promptly reveal any leaks.
- Keep the dispensing nozzle tube clean and
especially the hole for the excess pressure
probe at the end of the nozzle tube (Fig. 4.2).
- With equal frequency or at least every time the
tank is filled, clean the filter and check valve at
the bottom of the tank.
- Every three months (or more often in case of
doubt) verify the accuracy of the meter.
- Screw off and remove the three cross-head screws
on the left side of the CUBE (Fig. 4.1, screws A).
- Screw off and remove the three cross-head screws
on the right side of the CUBE (Fig. 4.1, screws B).
- Raise the CUBE higher part.
- To reclose it, perform these steps in reverse
order.
14
MAINTENANCEE
Cleaning the pump filter
Opening and Closing the CUBE
Periodic Inspections
Fig. 4.1 - Opening the CUBE
Fig. 4.2 - Nozzle tube and probe
B
A
Probe hole
EN (Translated from Italian)
- With equal frequency or at least every time the
tank is filled, clean the filter and check valve at
the bottom of the tank.
- Every three months (or more often in case of
doubt) verify the accuracy of the meter.
- Check weekly and keep the pump body, tubing
and flanges clean to promptly reveal any leaks.
- Keep the dispensing nozzle tube clean and
especially the hole for the excess pressure
probe at the end of the nozzle tube (Fig. 4.2).
- With equal frequency or at least every time the
The pump filter must be cleaned weekly or more often whenever a
reduction in flow rate is noticed.
The frequency required depends most of all on the quantity of fuel
dispensed, but also on other causes as well, such as dispensing fuel
- Every three months (or more often in case of
Cleaning the pump filter
Fig. 4.2 - Nozzle tube and probe
- With equal frequency or at least every time the
tank is filled, clean the filter and check valve at
- Every three months (or more often in case of
- With equal frequency or at least every time the
tank is filled, clean the filter and check valve at
- Every three months (or more often in case of
doubt) verify the accuracy of the meter.
- With equal frequency or at least every time the
tank is filled, clean the filter and check valve at
the bottom of the tank.
- Every three months (or more often in case of
doubt) verify the accuracy of the meter.
dispensed, but also on other causes as well, such as dispensing fuel
immediately after refilling the tank, which stirs up sediment which
normally lies at the bottom.
dispensed, but also on other causes as well, such as dispensing fuel
immediately after refilling the tank, which stirs up sediment which
The frequency required depends most of all on the quantity of fuel
dispensed, but also on other causes as well, such as dispensing fuel
reduction in flow rate is noticed.
The frequency required depends most of all on the quantity of fuel
dispensed, but also on other causes as well, such as dispensing fuel
The pump filter must be cleaned weekly or more often whenever a
reduction in flow rate is noticed.
The pump filter must be cleaned weekly or more often whenever a
Fig. 4.2 - Nozzle tube and probe

15
Troubleshooting
Set the starting handle to position ON.
Reset the external residual current
circuit-breaker.
Check the electrical connections.
Lack of electric power
Motor not turning
Low or no flow rate
Replace the fuses in the electric panelFuses burned out
Clean the meter measuring chamberMeasuring chamber dirty
Check the seals of the connectionsAir in the suction line
Clean the meter chamberMeter chamber obstructed
Clean the filterPump filter clogged
Clean the filterTank filter clogged
Clean or replaceCheck valve blocked
Check the voltage at the motor.
Adjust the voltage and/or use cables
of greater cross-section
Motor low rotation speed
Check the connections seal in the
tubing and the level of diesel fuel in
the tank
Air entering the suction tube
or in the pump
Lower the CUBE with respect to the
tank or increase the diameter of the
tubing
Excessive suction pressure
Check that the voltage is not more
than 5% below the nominal voltage
Electric voltage too low
Motor won't start with
nozzle closed
Problem Possible Causes Possible Solutions
If the rotor is jammed, dismount and
check for damage and obstructions,
then remount.
Contact the Service Department
Motor Problems
Change the switch
Faulty switch on the
electric panel
Check the seal of the connections
and the condition of the rubber tubes
Meter accuracy not
sufficient
Fluid leaking
Use shorter tubing or of greater
diameter
High loss of head
Raise the suction tube
Suction tube resting on the
bottom of the tank
Refill the tankLow level in the suction tank
EN(Translated from Italian)
Lower the CUBE with respect to the
tank or increase the diameter of the
Excessive suction pressure
Electric voltage too low
Motor low rotation speed
Check the connections seal in the
Air entering the suction tube
or in the pump
Refill the tank
Low level in the suction tank
Use shorter tubing or of greater
Raise the suction tube
tubing
Use shorter tubing or of greater
diameter
Raise the suction tube
Suction tube resting on the
High loss of head
Suction tube resting on the
bottom of the tank
Check the voltage at the motor.
tubing and the level of diesel fuel in
the tank
the tank
tubing and the level of diesel fuel in
the tank
Check the connections seal in the
tubing and the level of diesel fuel in
Check the connections seal in the
Refill the tank
Raise the suction tube

16
Spare parts for the CUBE
CUBE
70
CUBE
DC-56
EN (Translated from Italian)

The information contained in this manual is provided by the Manufacturer, who reserves the
right to make changes without prior notice.
MANUFACTURER:
DOCUMENT TYPE:
EDITION:
PRODUCT:
MODEL:
CONFORMITY:
TECHNICAL SUPPORT:
PIUSI S.p.A.
General description and instructions
for its installation, activation,
use and maintenance
Bullettin M0097C Rev.1
Diesel fuel dispenser for private use
with meter
All of the models of the CUBE product line,
with mechanical/electrical meters,
single-phase/three-phase in various
voltage/frequency combinations
CE Marked
(see Declaration of conformity, page 4)
Provided by the service departments
of our authorized resellers
17
EN(Translated from Italian)
TECHNICAL SUPPORT:
voltage/frequency combinations
CE Marked
(see Declaration of conformity, page 4)
Provided by the service departments
of our authorized resellers

18
NOTES
EN

19
NOTES
EN

Authorized reseller’s stamp
M0097C EN - Rev.1
Other manuals for Cube 56/33
1
This manual suits for next models
1
Table of contents
Other Piusi Dispenser manuals

Piusi
Piusi PW-LAN User manual

Piusi
Piusi SB325M Use and care manual

Piusi
Piusi CUBE 70 MC User manual

Piusi
Piusi Cube 56/33 Installation and operating instructions

Piusi
Piusi MC BOXdc B.SMART Quick start guide

Piusi
Piusi MC BOX B.SMART Specification sheet

Piusi
Piusi SUZZARABLUE PRO User manual

Piusi
Piusi MC BOX 1.5 ETL User manual

Piusi
Piusi SB325 User manual

Piusi
Piusi CUBE B.SMART Quick start guide