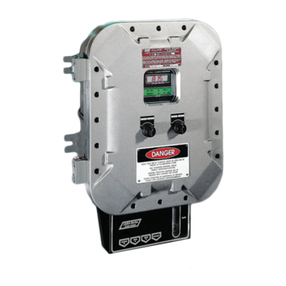
Servomex DF-310E User manual

Oxygen Analyzer
DF-310E
OPERATOR MANUAL

Copyright 2011 by Servomex Corporation
No part of this publication may be reproduced, stored in a retrieval system or transmitted in any
form, or by any means including electronic, mechanical, photocopying, recording or otherwise
without prior written permission of Servomex Corporation.
Stablex, Bi-Strataand are trademarks of Servomex Corporation. VCRis a registered
trademark of the Cajon Company.

DF-310E Operator Manual
Firmware v2.57
Manual Version 092211
Your Process Oxygen Analyzer has been designed, manufactured and is supported under ISO-
9001 controls, thus helping to insure the highest possible standards of quality.
Every analyzer that Servomex manufactures is tested and operated on a variety of gas
concentrations to insure that it functions properly when you receive it.
The certificate of calibration assures your analyzer has been calibrated on gases that are traceable
to NIST standards. With proper maintenance, your analyzer should remain calibrated for years.
For a fast and successful startup, please read this manual carefully. There are important cautions
and a number of helpful hints to help you to optimize the operation of your analyzer.
For more information or if you have questions, please do not hesitate to go to our website at
Servomex.com, or contact your local Servomex Business Center as found on the back cover of
this manual.

Read Me First…
Unpacking Procedure
Follow the procedure below to unpack your Process Oxygen Analyzer.
1. Examine the condition of the packaging and its contents. If any damage is apparent,
immediately notify the carrier and Servomex. Do not proceed with the installation.
2. Check the contents against the packing slip to make sure the shipment is complete.
Unattached equipment may be shipped with the analyzer in supplemental packaging.
Shortages should be reported to Servomex immediately.
3. All analyzers are shipped with the following:
Item Servomex Part
Number
One bottle of Hummingbird Brand Electrolyte Blue Electrolyte Blue
One bottle of Hummingbird Brand Replenishment
Solution
210515
Power Cord with 115VAC connector
NOTE -No power cord is supplied with 220 VAC or
DC powered units
210408
Instruction Manual 210450
4. Open the analyzer door, remove any shipping materials and verify that nothing has come
loose during transit.
5. Save the original container in the event you may need to ship the analyzer to another
location or back to the factory (see Shipping in the Service section).
Installation and Maintenance
The DF-310EProcess Oxygen Analyzer will provide years of accurate and dependable service if
it is set up, operated and maintained properly. It is essential to make a careful and complete
installation as outlined in the Installation and Setup section of this manual.
Thank You
Thank you for selecting the model DF-310EProcess Oxygen Analyzer. Servomex designs,
manufactures, exhaustively tests, and supports every analyzer under ISO-9001 control. You
should expect every Servomex analyzer to arrive in good working order and, with proper
maintenance, provide years of trouble-free service.

Index DF-310E 1
1Table of Contents
1Table of Contents..................................................................... 1
1.1 Table of Figures......................................................................................................4
2Cautions ................................................................................... 7
2.1 Symbols and Explanations.......................................................................................7
2.2 Important Warnings ................................................................................................7
3Specifications .......................................................................... 9
4 Installation and Setup............................................................ 13
4.1 Adding Electrolyte ................................................................................................14
4.2 Sample Gas Connections.......................................................................................15
4.2.1 Purging the Analyzer................................................................................15
4.3 Electrical Power Connections................................................................................16
4.3.1 AC Input Voltage (100-240 VAC)............................................................16
4.3.2 DC Input Voltage (24 VDC).....................................................................16
4.4 Power Control.......................................................................................................16
4.4.1 Startup Process.........................................................................................17
4.4.2 Powering Down .......................................................................................17
4.5 Standard Outputs...................................................................................................17
5Options ................................................................................... 19
5.1 Pump ....................................................................................................................19
5.1.1 Pump Control...........................................................................................19
5.2 Battery Power .......................................................................................................19
5.3 Low Flow Alarm...................................................................................................20
5.4 Flow Control Valve...............................................................................................21
5.5 Filter.....................................................................................................................21
5.6 Pressure Regulator ................................................................................................21
5.7 Combined Filter/Pressure Regulator ......................................................................23
5.8 Stainless Steel Outlet Tubing.................................................................................24
5.9 Key Lock ..............................................................................................................24
5.10 4-20mA Analog Output .......................................................................................25
5.10.1 2-20mA Analog Output ........................................................................25
5.11 Relays.................................................................................................................25
5.12 Communication Port –RS232/485.......................................................................26
5.13 Expanded Range Scale.........................................................................................26
5.14 Panel Mount........................................................................................................26
5.15 Rack Mount.........................................................................................................28
5.16 Dual Rack Mount ................................................................................................28
5.17 Remote Display...................................................................................................28
5.18 Case Purge ..........................................................................................................30
6Sample Gas Preparation and Delivery .................................33
6.1 The STAB-EL Acid Gas System ...........................................................................33
6.2 Sample Gas Scale Factor .......................................................................................34
6.3 Sample Flow Rate and Pressure.............................................................................35
6.3.1 Flow Rate Effects on Sensor Performance ................................................36
6.3.2 Checking for Plumbing Leaks using Flow Rate Effects .............................36
6.3.3 Background Gas Effects on Indicated Flow Rate.......................................36
6.3.4 Regulator Requirements ...........................................................................36

2 DF-310E Index
6.3.5 Pressure Regulator Purge..........................................................................37
6.3.6 Pressure Effects on Sensor Performance ...................................................37
6.3.7 Sample Outlet Backpressure Effects .........................................................38
6.4 Sample Gas Compatibility.....................................................................................38
6.4.1 Condensation ...........................................................................................38
6.4.2 Gas Solubility in Aqueous KOH Solution .................................................39
6.4.3 Reactivity with KOH Electrolyte ..............................................................39
6.4.4 Flammable Sample Gas............................................................................39
6.4.5 Trace acids in the sample gas....................................................................39
6.4.6 Sample Gas Temperature..........................................................................40
6.4.7 Protecting the Analyzer from Process Upsets ............................................40
6.5 Calibration Gas Considerations..............................................................................40
6.5.1 Calibration Standards ...............................................................................40
6.5.2 Calibration Cylinder Regulators................................................................41
6.5.3 Purge Procedure .......................................................................................41
6.5.4 Sample Gas Delivery and Vent Pressure during Calibration.......................41
6.5.5 Background Gas Effects on Calibration.....................................................42
7Connecting to External Devices............................................43
7.1 The Comm Port.....................................................................................................43
7.2 Relay Ports............................................................................................................44
7.3 Analog Outputs.....................................................................................................45
7.3.1 Analog Voltage Output.............................................................................45
7.3.2 4-20mA Output ........................................................................................46
7.3.3 Alignment Procedure for Analog Voltage and Current Loop Outputs.........47
7.4 Remote Controls ...................................................................................................47
7.4.1 Remote Sensor Control –J6 Connector.....................................................47
7.4.2 Remote Pump Control –J6 Connector ......................................................48
7.5 Remote Sensor Installations...................................................................................49
7.5.1 Sensor on Remote Bracket with Optional Pump ........................................50
7.5.2 Sensor in NEMA 4 Enclosure...................................................................51
7.5.3 Sensor in NEMA 7 Enclosure...................................................................52
7.5.4 Temperature Control in R4/R7 Enclosures................................................53
7.5.5 Remote Sensor Connections –Connector J7 .............................................54
7.5.6 Z-Purge Protection on R4 Enclosure.........................................................56
8User Interface..........................................................................59
8.1 The Data Display Screen .......................................................................................59
8.2 Main Menu ...........................................................................................................63
8.2.1 Keypad Operation ....................................................................................64
8.3 Controls Menu ......................................................................................................65
8.3.1 Pump .......................................................................................................65
8.3.2 Sensor Polarization...................................................................................66
8.3.3 SensOFF Relay ........................................................................................66
8.3.4 P(o)w(e)r UP............................................................................................67
8.3.5 ESC .........................................................................................................67
8.4 Set-Up Menu.........................................................................................................67
8.4.1 Alarms .....................................................................................................68
8.4.2 Analog Outputs ........................................................................................70
8.4.3 Comm Port...............................................................................................73
8.4.4 Gas Scale Factor.......................................................................................74
8.4.5 Display Setup...........................................................................................74
8.4.6 Clock .......................................................................................................75
8.5 The Password Menu ..............................................................................................76
8.6 Maintenance..........................................................................................................77
8.6.1 Replenish Solution Reminder ...................................................................78
8.6.2 Oxygen Calibration ..................................................................................79
8.6.3 Diagnostics ..............................................................................................86

Index DF-310E 3
9Troubleshooting and Calibration.......................................... 93
9.1 Return Material Authorization Number..................................................................93
9.2 Maintenance .........................................................................................................93
9.2.1 Calibration...............................................................................................93
9.2.2 Storage Conditions...................................................................................94
9.2.3 Sensor Maintenance .................................................................................94
9.2.4 Procedure for Adding Replenishment Solution to the Sensor.....................95
9.3 Replaceable Parts List ...........................................................................................96
9.4 Troubleshooting....................................................................................................97
9.4.1 Sample System Leak Test (Low Flow Sensitivity) ....................................97
9.4.2 Basic Troubleshooting..............................................................................98
9.4.3 Fuse Replacement .................................................................................. 100
9.5 Shipping ............................................................................................................. 103
10 Theory of Operation............................................................. 105
10.1 The Oxygen Sensor ........................................................................................... 105
10.2 The Electrolyte Conditioning System ................................................................. 106
11 Safety.................................................................................... 107
11.1 Electrolyte Solution MSDS................................................................................ 109
11.2 Replenishment Solution MSDS.......................................................................... 115
12 Warranty ............................................................................... 119
13 Index ..................................................................................... 121

4 DF-310E Index
1.1 Table of Figures
Figure 1: DF-310EOxygen Analyzer ................................................................................. 12
Figure 2: Major Internal Components................................................................................. 13
Figure 3: Quick Disconnect Fitting at Flowmeter................................................................ 15
Figure 4: DC Power Connector –J3 ................................................................................... 16
Figure 5: Data Display Screen ............................................................................................ 17
Figure 6: Rear Panel........................................................................................................... 18
Figure 7: Plumbing Configuration Options ......................................................................... 22
Figure 8: Filter Installation................................................................................................. 23
Figure 9: Regulator Installation .......................................................................................... 24
Figure 10: Combined Filter/Regulator Assembly ................................................................ 25
Figure 11: Panel Mount Configuration................................................................................ 27
Figure 12: Cutout Dimensions for Panel Mount .................................................................. 27
Figure 13: Rack Mount ...................................................................................................... 28
Figure 14: Dual Rack Mount .............................................................................................. 28
Figure 15: Remote Display................................................................................................. 29
Figure 16: Remote Display Wiring..................................................................................... 30
Figure 17: Case Purge Option............................................................................................. 31
Figure 18: J7/J8 Connector Wiring..................................................................................... 43
Figure 19: J1/J2 Connector Wiring..................................................................................... 44
Figure 20: J5/J6 Connector Wiring..................................................................................... 46
Figure 21: Analog Voltage Output and 4-20mA Adjustments.............................................. 47
Figure 22: J5/J6 Connector Wiring..................................................................................... 48
Figure 23: J3/J4 Connector Wiring..................................................................................... 49
Figure 24: Remote Sensor with Optional Pump .................................................................. 50
Figure 25: Remote Sensor Mounted in NEMA 4 Enclosure................................................. 51
Figure 26: Remote Sensor Mounted in NEMA 7 Enclosure................................................. 52
Figure 27: NEMA 7 Enclosure Mounting Dimensions ........................................................ 53
Figure 28: Temperature Control in R7 Enclosure................................................................ 54
Figure 29: Remote Sensor Connector –J7 .......................................................................... 55
Figure 30: Remote Sensor/Pump Wiring Diagram .............................................................. 55
Figure 31: Z-Purge Protection on R4 Sensor Enclosure....................................................... 56
Figure 32: Data Display and Keypad .................................................................................. 59
Figure 33: Main Menu ....................................................................................................... 63
Figure 34: Controls Menu .................................................................................................. 65
Figure 35: Sensor Shut-off Warning ................................................................................... 66
Figure 36: Setup Menu....................................................................................................... 67
Figure 37: Alarm Setup Menu ............................................................................................ 68
Figure 38: Oxygen Alarm Menu......................................................................................... 68
Figure 39: Oxygen Alarm Setup Screen (Alarm not used)................................................... 68
Figure 40: Oxygen Alarm Setup Screen (Alarm used)......................................................... 69
Figure 41: Recorder Output Setup Menu ............................................................................ 71
Figure 42: Recorder Output Setup Error ............................................................................. 72
Figure 43: Comm Port Setup Menu .................................................................................... 74
Figure 44: Display Setup.................................................................................................... 75
Figure 45: Clock Setup Screen ........................................................................................... 76
Figure 46: Password Menu................................................................................................. 76
Figure 47: Password Entry Screen ..................................................................................... 77
Figure 48: Maintenance Menu............................................................................................ 78
Figure 49: Replenishment Solution Reminder..................................................................... 78
Figure 50: Oxygen Calibration Menu ................................................................................. 79
Figure 51: Gas Scale Factor................................................................................................ 80
Figure 52: Gas Scale Factor Menu (Cont’d)........................................................................ 80
Figure 53: Span Check Menu ............................................................................................. 83
Figure 54: Calibration Convergence Screen ........................................................................ 84
Figure 55: Completed Oxygen Calibration Menu................................................................ 85
Figure 56: Diagnostics Menu.............................................................................................. 86

Index DF-310E 5
Figure 57: Sensor Zero Menu..............................................................................................87
Figure 58: Zero Cal Warning Screen ...................................................................................88
Figure 59: Zero Cal Screen .................................................................................................88
Figure 60: Zero Cal Not Stable............................................................................................89
Figure 61: Test Output Screen.............................................................................................89
Figure 62: Test Relay Screen ..............................................................................................90
Figure 63: Memory Test Screen ..........................................................................................90
Figure 64: EXT Functions...................................................................................................91
Figure 65: Fuse Locations for DC Power Supply and Battery Backup ................................102
Figure 66: Printed Circuit Board Assembly .......................................................................102
Figure 67: Schematic of Servomex Oxygen Sensor............................................................105


Cautions DF-310E 7
2Cautions
There are a number of warnings and cautions that must be observed to avoid
damage to the analyzer as well to insure the safety of its users. The analyzer
must be operated in a manner specified in this manual. Servomex cannot be
responsible for direct or consequential damages that result from installing or
operating the analyzer in a manner not described in this manual. Importantly,
the analyzer has been designed for use with inert, non-toxic, non-combustible
sample gases only. Servomex cannot be responsible for direct or
consequential damages that result from using the analyzer with these gases.
2.1 Symbols and Explanations
Following is a list of the various symbols used throughout this manual and
their definitions.
CAUTION
This symbol alerts the user to the presence of physically hazardous
conditions that may be dangerous to individuals or equipment.
NOTE
This symbol alerts the user to the presence of important operations
and/or maintenance information.
DANGER
This symbol alerts the user to the presence of caustic liquid. Refer
to the MSDS at the back of the manual for handling instructions.
2.2 Important Warnings
CAUTION
Do not setup or operate the Oxygen Analyzer without a complete
understanding of the instructions in this manual. Do not connect
this Analyzer to a power source until all signal and plumbing
connections are made.
CAUTION
This analyzer must be operated in a manner consistent with its
intended use and as specified in this manual.

8 DF-310E Cautions
DANGER
The electrolyte is a caustic solution. Review the Material
Safety Data Sheet (MSDS) before handling the
electrolyte solution.
The sensor is shipped dry and must be charged with
electrolyte before it is operated.
CAUTION
Over-pressurizing the sensor can result in permanent damage to the
sensor. Limit the backpressure to the analyzer to ±1 psig.
Be sure the downstream isolation valve (if so equipped) is toggled
open before gas flow is started.
CAUTION
DO NOT SHIP THE ANALYZER WITH
ELECTROLYTE –THOROUGHLY DRAIN AND
RINSE SENSOR BEFORE SHIPPING
EMI DISCLAIMER
This Analyzer generates and uses small amounts of radio frequency
energy. There is no guarantee that interference to radio or
television signals will not occur in a particular installation. If
interference is experienced, turn-off the analyzer. If the
interference disappears, try one or more of the following methods to
correct the problem:
Reorient the receiving antenna.
Move the instrument with respect to the receiver.
Place the analyzer and receiver on different AC circuits.
NOTE
For best performance at initial start or anytime the electrolyte is
changed, it is important to allow the sensor to sit with electrolyte
in it for 60 minutes before the gas is allowed to flow through the
sensor.

Specifications DF-310E 9
3Specifications
PERFORMANCE
ACCURACY
Standard Resolution: Greater of ± 3% of reading (not to exceed 1% of
range for % Analyzers) or 0.5% of range.
High Resolution: Greater of ±3% of reading (not to exceed 1% of
range for % range Analyzers) or ±0.02% of range (except ranges less than or
equal to100 ppm, ±3% of reading or ± 0.05% of range).
RESPONSE TIME
Typically less than 10 seconds to read 90% of a step change. Equilibrium
time depends on the specific conditions.
OXYGEN SENSITIVITY
3 ppb (310E-H0050M Model only)
LOW DETECTION LIMIT
3 ppb (310E-H0050M Model only)
RESOLUTION
Mo
del
Number
Range
Auto
Scale A*
Display
Auto
Scale B*
Display
S00050
0
-
50 ppm
0
-
50 ppm
XX.XX
S00100
0
-
100 ppm
0
-
100 ppm
XXX.X
S00500
0
-
500 ppm
0
-
500 ppm
XXX.X
S01000
0
-
1000 ppm
0
-
1000 ppm
XXXX.
S05000
0
-
5000 ppm
0
-
5000 ppm
XXXX.
S10000
0
-
100
00 ppm
0
-
10000 ppm
XXXXX
S000P5
0
-
5 %
0
-
5 %
X.XX
S00P10
0
-
10 %
0
-
10 %
XX.XX
S00P25
0
-
25 %
0
-
25 %
XX.X
H0050M
0
-
50 ppm
0
-
5
X.XXX
5
-
50
XX.XX
H00100
0
-
100 ppm
0
-
10
XX.XX
10
-
100
XXX.X
H00500
0
-
500 ppm
0
-
50
XX.X
50
-
500
XXX.
H01000
0
-
1
000 ppm
0
-
100
XXX.X
100
-
1000
XXXX.
H05000
0
-
5000 ppm
0
-
500
XXX.
500
-
5000
XXXX.
H10000
0
-
10000 ppm
0
-
1000
XXXX.
1000
-
10000
XXXXX
H000P5
0
-
5 %
0
-
0.5
.XXX%
0.5
-
5
X.XX
H00P10
0
-
10 %
0
-
1
X.XXX%
1
-
10
XX.XX
H00P25
0
-
25%
0
-
2.5
X.XX%
2.5
-
25
XX.X
*Scale A applies to High Resolution models only. Scale B extends down to 0
ppm or 0% on Standard Resolution models.

10 DF-310E Specifications
OVERALL OPERATING TEMPERATURE RANGE
Gas sample: 32°F to 122°F (0°C to 50°C)
Sensor Temperature: 32°F to 113°F (0°C to 45°C)
Electronics Temperature:
w/sensor in enclosure:32°F to 113°F (0°C to 45°C)
w/remote sensor: 32°F to 122°F (0°C to 50°C)
STORAGE TEMPERATURE
Not to exceed 122°F (50°C)
SENSOR TYPE
Non-depleting Coulometric
SENSOR WARRANTY
Five (5) years (limited)
ELECTRICAL, ALARMS & DISPLAY
ELECTRONICS
Microprocessor-based
DISPLAY
1.3 in (33mm) by 2.6 in (66mm) LCD graphics with backlighting
ALARMS
Audible and Displayed. Up to 7 optional alarms comprised of 4 oxygen,
temperature, low flow, and electrolyte condition.
STATUS CONDITIONS
Sensor Off, Check Fluid, Expanded Range (optional), In-Calibration status
conditions can be assigned to relays (optional).
OUTPUT
Software scalable, jumper selectable 0-5 or 0-10 VDC analog output.
Minimum load resistance is 1K.
Fully isolated 4-20 mA output. Maximum loop resistance is 1K Ohms. (29-
33 VDC loop compliance voltage provided)
ALARM RELAYS
Up to four, rated at 0.3 A, 30 VDC under resistive load. Set points
independently adjustable. Contacts failsafe to alarm condition upon loss of
power. Not designed to switch AC power.
POWER REQUIREMENTS
100 – 240 VAC (auto-switching), 1.3A, 50/60 Hz or
24 VDC (–2/+4VDC), 1A, 25 Watts; Optional Sample Pump 6W additional
EMI SENSITIVITY

Specifications DF-310E 11
Meets CISPR –11(90) Class B Group 1 Standard
CONSTRUCTION
WEIGHT
9.5 lbs. (4.3kg) Standard Model (no options)
DIMENSIONS -Overall
8.375"w x 8.0"h x 8.5"d (21.3 cm x 20.3 cm x 21.6 cm) (with handle and gas
fittings)
CE Approved
CSA Approved
GAS SAMPLE CONDITIONS
GAS CONNECTIONS
1/8" Compression inlet and outlet Standard
1/4" Metal-face-seal inlet (Optional)
SAMPLE INLET PRESSURE
0.2 psig to 1.0 psig; 5 -15 psig with VCR welded sample inlet (orifice
restricted)
SAMPLE FLOW RATE
1.0 to 2.0 scfh standard operating limits
GAS COMPATIBILITY
Standard Sensor: All inert and passive gases, including N2, H2, CO, Ar,
freons, hydrocarbons, etc.
STAB-EL Sensor: Limited tolerance to gas compositions containing "acid"
gases such as CO2, H2S, Cl2, NOx, SO2, HCl, etc.
GAS SAMPLE MOISTURE CONTENT
No limit (avoid condensation)
OIL/SOLVENT MIST
<0.03 mg/L Standard limit
>0.03 mg/L Use filter
SOLID PARTICLES
<0.01 mg/L Standard limit, Use filter if >0.01 mg/L

12 DF-310E Specifications
P
P
M
UNUSED
J5
UNUSED
UNUSED
24V RTN
UNUSED
+24V
A2-NC
J3
GND
J6
J4
A4-COM
UNUSED
A3-NC
A3-NO
A3-COM
A1-NC
UNUSED
A2-COM
A1-NO
A1-COM
J1 J2
1.17 [29.77]
232-GND
485-TX -
UNUSED
485-RX -
232-RX
232-TX
485-TX +
485-RX +
EXT-2 -
EXT+1 -
EXT-2 +
GND (H-)
SE -
SE+ (H+)
SNSR -
SNSR +
J7
UNUSED
TEMP -
TEMP +
UNUSED
UNUSED
LOOP -
J8
A4-NOA2-NO
EXT-1 +
FLOW-B
UNUSED
FLOW-A
UNUSED
PUMP +
PUMP -
A OUT -
A OUT +
GND
A4-NC
GND
UNUSED
LOOP +
1.06 [26.92] 1/8" COMPRESSION
SAMPLE INLET
(OPTIONAL 1/4" VCR COMPATABLE MALE)
1/8" COMPRESSION
SAMPLE OUTLET
7.75 [196.75]
8.33 [211.48]
7.84 [199.09]
7.59 [192.79]
4.21 [106.93]
2.05 [52.07]
9.26 [235.08]
7.89 [200.48]
Figure 1: DF-310EOxygen Analyzer

Installation and Setup DF-310E 13
4Installation and Setup
This procedure describes installation of the analyzer without options and with
the voltage output set to 0-10 VDC. Options may affect the setup procedure
described in this section. If your analyzer is equipped with options, refer to
the appropriate section to determine changes to the setup.
NOTE
The screens shown in this manual have values that may not match
the actual values displayed during your setup.
SENSOR MOUNTING
THUMB SCREWS
OXYGEN SENSOR
ROTOMETER
VALVE (optional)
POWER SWITCH
ELECTROLYTE RESERVOIR
WITH MIN-MAX LINES
Figure 2: Major Internal Components

14 DF-310E Installation and Setup
4.1 Adding Electrolyte
DANGER
The electrolyte is a caustic solution. Review the Material Safety
Data Sheet (MSDS) before handling the electrolyte solution.
NOTE
The sensor is shipped dry and must be charged with electrolyte
before it is operated.
NOTE
Use only Hummingbird
E
-lectrolyte Blue for the DF-310
E
Oxygen
Analyzer. Failure to do so will void warranty. Install one bottle.
NOTE
Do not apply power before adding electrolyte and thoroughly
purging sample line.
Remove the sensor as follows:
1) Using a ½ inch open-end wrench, remove the inlet bulkhead retainer nut
from the inlet bulkhead fitting at the back of the analyzer. Do not remove the
four small socket screws. (The VCR inlet option requires a ¾ inch wrench) If
equipped with the Stainless Steel Outlet Line option disconnect using a
wrench on the retaining nut on the rear of the cabinet.
2) Inside the enclosure, disconnect the 9-pin sensor connector located near the
front of the sensor.
3) Unscrew both sensor-mounting thumbscrews at the front of the sensor-
mounting bracket.
4) Pull the sensor assembly forward a few inches and disconnect the
"quick-disconnect" fitting at the top of the flowmeter (for standard
downstream sensor configuration) by pushing both halves of the fitting
together and rotating one to the release position. See Figure 3.
5) Remove the sensor assembly from the instrument.
6) Unscrew the cap from the electrolyte reservoir and add the entire contents
of one bottle of E-lectrolyte Blue to the sensor.
7) Replace the cap and hand-tighten securely.
8) Reinstall the sensor by repeating steps 1 through 4 in reverse order.
9) Allow the sensor to sit with electrolyte in it for approximately 60 minutes
before flowing gas through the analyzer.
NOTE
The flats on the inlet bulkhead fitting are oriented to seat in an
anti-torque plate on the inside back of the enclosure. When re-
installing the Sensor Assembly, be sure the flats on the bulkhead
fitting properly seat in the slot of the anti-torque plate before
replacing the retainer nut.

Installation and Setup DF-310E 15
NOTE
For best performance at initial start or anytime the electrolyte is
changed, it is important to allow the sensor to sit with electrolyte
in it for 60 minutes before the gas is allowed to flow through the
sensor.
PUSH
ROTATE
PULL
ROTATE
Figure 3: Quick Disconnect Fitting at Flowmeter
4.2 Sample Gas Connections
The sample gas inlet and outlet lines at the back of the instrument have
stainless steel 1/8th inch compression bulkhead fittings (unless equipped with
the optional ¼ inch VCR inlet). Before connecting any gas line to the
analyzer, fully install the supplied gas nut and compression ferrule on your
tubing. Connect the inlet and outlet lines to the bulkhead fittings at the back
of the analyzer. A backup wrench is not needed since anti-torque plates inside
the cabinet secure the bulkhead fittings. Do not over-tighten the fittings.
4.2.1 Purging the Analyzer
Supply the analyzer with an N2sample that is as low in O2as possible.
If the analyzer outlet is at atmospheric pressure, a regulator can be used to set
the flow rate to 1.0 standard cubic feet per hour (scfh) without danger of over-
pressurizing the sensor. The back-pressure on the instrument should not
exceed ±1.0 psig. If the installation requires long (> 6 feet) tubing runs (or
has many bends or fittings) downstream of the analyzer, the resulting back-
pressure may impose a pressure at the sensor that exceeds specifications. If
this is the case, use larger outlet tubing (1/4-inch) and/or reduce the
complexity of the outlet gas line. See page 30 for additional information on
gas sample delivery.
NOTE
Over-pressurizing the sensor can result in permanent damage to
the sensor. Limit the backpressure to the analyzer to ±1 psig.
NOTE
Allow gas with very little oxygen to flow through the analyzer for
approximately 60 minutes before powering up.

16 DF-310E Installation and Setup
4.3 Electrical Power Connections
4.3.1 AC Input Voltage (100-240 VAC)
Make sure the power switch is in the OFF position. Plug the supplied power
cord into the connector on the rear of the analyzer. See Figure 6. The power
supply is auto-switching which means it will run properly on an input voltage
between 100 VAC and 240 VAC.
4.3.2 DC Input Voltage (24 VDC)
Make sure the power switch is in the OFF position. Using 20 gauge wire,
attach the power supply leads to the power connector J3 on the rear of the
instrument. Pin 1 (top) is positive (+24V) and Pin 3 is negative (24V RTN).
See Figure 4below.
FLOW-B
UNUSED
FLOW-A
UNUSED
PUMP +
PUMP -
A OUT -
A OUT +
GND
UNUSED
UNUSED
UNUSED
UNUSED
24V RTN
UNUSED
+24V
J3 J4
Figure 4: DC Power Connector –J3
4.4 Power Control
AC Powered Units - Open the front door, locate the power switch and turn it
on. See Figure 2.
DC Powered Units - Turn on the remote 24 VDC power source, open the front
door, locate the power switch and turn it on. See Figure 2.
Table of contents
Other Servomex Analytical Instrument manuals
Servomex
Servomex DF-150E User manual
Servomex
Servomex SERVOPRO Chroma User manual
Servomex
Servomex SERVOTOUGH SpectraExact 2500 Instruction manual

Servomex
Servomex 700B User manual
Servomex
Servomex NanoTrace DF-760E User manual
Servomex
Servomex 2700 User manual
Servomex
Servomex xendos 1800 Series User manual
Servomex
Servomex SERVOPRO 4900 User manual
Servomex
Servomex SERVOPRO k2001 User manual

