9
8
Rigging process
Start the standard rigging process by blocking the lower working area, and make sure the work is performed from a stable platform.
1. Check that the clamp is undamaged and can bear at least 10 times the weight of the xture. Check that the structure can
bear at least 10 times the weight of all installed xtures, lamps, cables etc.
2. Bolt the clamp securely to the omega bracket with a M12/ ½ bolt (min. grade 8.8) and a lock nut.
3. Align the omega bracket with the two 1/4-turns in the base. Insert the fasteners into the base bracket, and turn both levers
a full 1/4-turn clockwise to lock.
4. Working from a stable platform, hang the xture on a truss or other structure. Tighten the clamp.
5. Install a safety wire that can bear at least 10 times the weight of the xture. The safety wire attachment point is designed to
t a carabiner.
6. Verify that there are no combustible materials, cables, or surfaces to be illuminated within 0.3 m (12 in.) of the xture.
7. Check that there is no risk of colliding between the head/ yoke and other xtures or structures.
Holes for omega bracket
Omega bracket
Figure 3: Base with omega bracket
WARNING! Always secure an elevated xture with a safety wire
Fasten a safety wire (not shown) between the load-bearing support structure and the safety wire attachment point on the device.
The safety cable (not included in the package) must:
• Bear at least 10 times the weight of the device (SWL).
• Have a minimum gauge of 5 mm.
• Have a maximum length (free fall) = 30 cm (12 in.).
CAUTION!!
• Always use a safety wire of a grade AISI 316 steel.
• Make sure the slack of the safety wire is at a minimum.
• Never use the handle for secondary attachment.
Figure 4: Safety wire attachment point
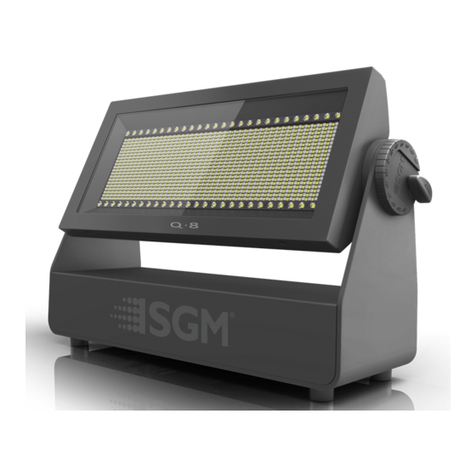
The P-10 can be tilted from 0° - 120°.
In standard versions, there is no need for any special tools to adjust the tilt angle.
Take the following steps for adjusting the tilt in standard P-10:
1. Loosen the two tilt knobs (one on each side) by turning them counter-clockwise.
2. Adjust the tilt to the desired angle and hold it.
3. Lock the position by re-tightening both tilt lock knobs clockwise.
If you feel resistance when tilting the xture, you might not have loosened the tilt lock knobs enough.
CAUTION!!
If the xture has been operating, always allow it to cool for 15 minutes before handling.
Exterior surface temperature after 5 min. operation = 49° C (120° F). Steady state = 59° C (138° F).
Tilt Lock
Pitch angle
indicator
Figure 5: Tilt lock
Conguring the device
The P-10 can be set up by using the control panel and OLED multi-line display on the xture’s head or through RDM.
Please note: In POI versions, there is no display mounted in the xture. The adjustments are made through RDM.
See “RDM” on page 15 for more information.
The OLED display is the human interface of the xture as it displays the current status and menu of the xture. The display panel
can be used to congure individual xture settings, check the xture’s wireless status, conrm the rmware version, and read error
messages. The complete list of the menu and all commands available are listed in “Control menu” on page 14.
Before turning on the P-10, make sure the power in cable is properly connected. To turn o the device, simply disconnect power in
cable. When the xture is powered on, it boots and resets before displaying the currently selected operating mode and the DMX start
address. Navigate through the menus and options using the arrow buttons, and select items using the ENTER button.
DMX
8
ESC ENTER
6CH MODE
(14)
Figure 8: OLED display and control panel
Connecting AC power
The P-10 Series can operate on any 100–277 V, 50/ 60 Hz AC mains power supply.
Connect a P-10 standard to AC power using the supplied power cable or similar with a maximum of 20
A to ensure the correct ingress protection (IP rating).
The xture must be grounded/ earthed and able to be isolated from AC power. The AC power supply
must incorporate a fuse or circuit breaker for fault protection.
The power cable color coding is given in gure 7:
• Connect the black wire to live.
• Connect the white wire to neutral.
• Connect the green/ yellow wire to ground (earth).
For a temporary outdoor installation, the mains cable must be
tted with a grounded connector intended for exterior use. For
permanent installations, have a qualied electrician to wire the mains cable directly to a suitable branch circuit. The junction’s ingress
protection (IP) rating must be suitable for the location. Always use a junction box with a proper IP class suitable for the environment.
When installing standard type C circuit breakers, there will be no limitations due to the xture’s in-rush current.
For assistance with alternative congurations, contact your SGM representative.
NOTE: In POI versions, SGM supplies a power cable with bare ends. Connect the xture to power by mounting a power con-
nector to the bare-ended mains cable. Please refer to “Connecting DMX and AC power in POI” on page 18 for connecting
AC power in POI xtures.
After connecting the P-10 to power, run the on-board test by selecting TEST → AUTOMATED TEST in the menu, to ensure that the
xture and each LED are functioning correctly. POI versions have to be tested through RDM.
PLEASE NOTE!
The protective caps must be securely mounted on any unused DMX connectors in order to maintain the ingress protection (IP-rating).
CAUTION!!
Do not connect the xture to an electrical dimmer system, as doing so may cause damage.
The fixture must be grounded/
earthed and be able to be isolated
from AC power. The AC power
supply must incorporate a fuse or
curcuit breaker for fault protection.
Color
Black
White
green/yellow
Conductor
live
neutral
ground (earth)
Symbol
or
L
N
Wire
Figure 6: P-10 Power cable
The fixture must be grounded/
earthed and be able to be isolated
from AC power. The AC power
supply must incorporate a fuse or
circuit breaker for fault protection.
Color
Black
White
green/yellow
Conductor
live
neutral
ground (earth)
Symbol
or
L
N
Wire
Figure 7: Connecting AC Power
Angle indicator
The P-10 comes with a scale function which eases the adjustment to the tilt desired.
The angle indicator in the wheel shows the current angle of inclination.
NOTE: In POI versions, SGM provides a POI Spanner with a pig-nose key for tilt adjustment. Either use the large or the small
pig-nose key, depending on the type of xture. See “POI Tilt lock” on page 17 to know more about the tilt lock in P-10 POI.


