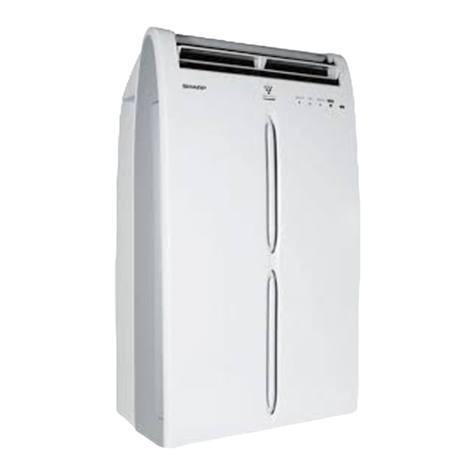
Sharp PJ-A36TV-B User manual

PJ-A36TV-B
PJ-A36TV-W
173309900214
The product is subject to change without notice.
The graphs in this instruction manual may be different
from the actual products; please refer to the actual products.
AIR COOLER

-2-
1.Product Function
-1-
3.Structure and Parts' Name
Handle
Operating console & display part
Air guide louver
Swing louver
Air inlet
Transparent window
of water tank
Water tank
Castor
-2-
If the parameters below have been changed, please refer to the nameplate on the product.
NoteWater consumption will be increased or decreased according to the ambient humidity.
Model
Rated
Power Noise Water Tank
Capacity Air Volume Type
Rated Power
Supply
Evaporation
Capacity
6.0/
ʇJ(A)
Cooling
32StN
=
900mLh
220-240V~ 50Hz
PJ-A36TV-W/B
Displayed icon illustration Accessories
Cooling
Timer
Timer ON
Swing
Sleeping wind
Natural wind
Standby:
Insert power plug into the power socket. All indicators light will turn on once the power is turned on.
After 1s later, all indicators will off and the product will turn to standby status.
ʒON/OFF button:
From standby status, this button is to switch ON or OFF the unit. The default working status
is level 1 normal wind;
ʓ
ʔFan speed button:
In working status, select fan speed by pressing this button. Fan speed changed by pressing the button
repeatingly as follow;
ʕWind Mode button:
In working status, the fan mode can be set by pressing this button. Mode button consists of 3 modes:
ɒnatural wind ɒsleeping wind ɒnormal wind.
ʖ
Cooling button:
Press the this button to achieve cooling function; the water pump starts working and the cooling
indicator will turn on. Press button again to turn off the cooling function,the water pump will
stop&cooling indicator will off.
Air Swing button:
Press this button to start left and right swing function; the swing louvers will swing in left and right
direction; press this button again to turn off the air swing function.
Timer button
TimerOFFfunction
InworkingstatustimefortimerOFFcanbeselectedbypressingthisbuttonByrepressingthis
buttonthetimecanbeselectedinturn ɒhrɒhrsɒhrsɒhrs
TimerONfunction
InstandbystatustimefortimerONcanbeselectedbypressingthisbuttonByrepressingthisbutton
thetimecanbeselectedinturn: ɒhrɒhrsɒhrs ɒhrs
Whenpresettimeisreachedpresetindicatorwillextinguishthefanwillbeturnedonautomatically
andthedefaultworkingstatuswill start at softspeednormalwindIRUhrstimerOFFandswing
ʗ
this
ྲྀLightbutton
Allindicatorsanddisplay icons willoff whenpressingthisbuttonforthefirsttime
Ifrepressingthisbuttonindicatoranddisplay icon light will turn on
Water level lowprotection
Whenthewaterlevelintankis lowwaterpumpwillstoppumpingandthebuzzerwillbuzzthree
timesWater level lowLQGLFDWRUorcoolingindicatorwillblinksimultaneously
2.Specications
ྲྀ
ཱ
ཱ
ི
ི
ཱི
ཱི
ུ
ུ
ཱུ
ཱུ
ɒYULZɒRU]ɒSOJJRKɒNOMN
Sleeping wind; 2hours on level 2, 6hours on level 1, off
Natural wind; 40sec on level 1, 20sec on level 2, repeat
Remote control x1
(batteries included)
Ice pack x4

-4-
4.Operation Instruction
-3-
1.Please use the normal power supply voltage 220-240V~ 50Hz and the independent 2.5A standard
socket complied with national standard to guarantee the safety(See Fig.4).
2.After the unit is filled with water, do not tilt or crash it when placing or moving the unit. If moving the
unit is necessary, please push it slowly to avoid overflowing. Tilting the unit during operation is
prohibited(See Fig.5).
5.Safety Notice
220-240V~ 50Hz
Fig.4 Fig.5
(Note: Never move the unit when there’s water in water tank for fear of water
overflowing.)
10.Please make sure the unit is turned off before removing the evaporator, otherwise,
it may lead to water overflowing.
Max. water level
Min. water level
Fig. 1
supporting rod
of pump
Fig2
pump falls down
Fig3
1.Open the packing container and take out the unit. Check whether there are an
instruction manual, a remote controller and four ice packs.
2.Do not tilt the unit during operation. Check whether the socket power meets the
parameters on the nameplate of the unit.
3.Filling water: Draw out the water tank(See Fig.1).
Note: Before filling the water tank with water, please take out the pearl wool.
When using a new unit or a unit that hasn’t been used for a long time, please use
clean tap water. Before filling water, please unplug the power plug to prevent potential
damage to the unit and electrical shock hazard.
Just fill the water to the max. water line, otherwise the water will overflow.
4.Note: For placing water tank:
After removing the water tank, the normal status of pump shall be as shown in fig. 2:
the pump shall be propped up by the supporting rod; when placing the water tank, the
supporting rod shall incline inwards naturally and then the pump will dip into the water
tank.
After removing the water tank, if the pump falls down due to vibration or inclination (as
shown in fig. 3), you cannot place the water tank in this case. Please lift the pump
manually and then place the water tank when the pump is in the position as shown in
fig. 2.
5.Remote Controller Operation: the functions of some buttons on the remote controller
are the same as those on the control panel. Point the infrared transmitting tube at the
main body when operating. There should be no obstruction between the remote
controller and the main body.
6.Storage: if the unit is to be stored for a long time, make sure the water tank is empty.
Blow air in normal temperature for a while. Make sure the evaporator in the unit is
completely dry before the unit is put into plastic bag. Store the unit in the box for future
use.
7.Cleaning: When the unit has been operated for a period of time (approx, 2 weeks, depending
on the water cleaness), much dust and sundries will be accumulated on the water tank, filter
of water tank, evaporator and filter of evaporator, which will affect the air volume and
cooling effect. For the optimal operation status of the unit and prolonging the lifespan of unit,
please contact an authourised SHARP after-sales service personnel to clean the unit periodically.
Note: please pull out the power plug before cleaning.
8.Please put the evaporator at the appointed position in unit during operation, otherwise,
it will affect the unit’s operation and service life.(or it may lead the motor to burn out)
9.Please check whether there’s water in water tank when moving. If there’s water in water
tank, please drain the water.

6.Operation Instruction for Ice Pack
-5- -6-
Troubleshooting
1.There are sediments inside the
unit
2.The air guide louver is loosened
3.Malfunction of motor
Cause
Malfunction of sync motor
1.Filter of water inlet is blocked
2.Water pump is broken
The unit is broken
1.The switch is broken
2.The internal connection wire
is loosened
1.No water in water tank or water
level of water tank is lower than
the min. water level
2.Water pump is damaged
1.No power supply
2.The unit hasn't been turned on
3.The body is damaged
Send it to the maintenance center for repairing
1.Take down the filter and remove the sediments
2.Send it to the maintenance center for repairing
1. Clean the water tank and water pump sub-assy
by rinsing with clean water.
2. Send it to the maintenance center for repairing
Send it to the maintenance center for repairing
1.Turn off the unit and then add water until it
reaches above min. water level.
2.Send it to the maintenance center for repairing
Solution
1.Insert the power cord correctly
2.Start the unit by pressing ON/OFF button
3.Send it to the maintenance center for repairing
Abnormal sound in
water pump
Malfunction
No wind
The unit can’t be
turned off
Abnormal sound
in unit
Humidifying and
cooling failure
Air swing not
working
The unit can’t be
energized
,IWKHXQLWLVQRWWREHXVHGIRUDORQJWLPHSOHDVHSXOORXWWKHSRZHUSOXJWRDYRLGGDPDJLQJWKH
XQLW
,IWKHVXSSO\FRUGLVGDPDJHGLWPXVWEHUHSODFHGE\WKHPDQXIDFWXUHULWVVHUYLFHDJHQWRU
VLPLODUO\TXDOLILHGSHUVRQVLQRUGHUWRDYRLGDKD]DUG
7KLVXQLWLVZLWKVWURQJKXPLGLI\LQJHIIHFWGRQRWXVHLWLQDFORVHGHQYLURQPHQW,IWKLVHQYLURQPHQW
LVXQFKDQJHDEOHSOHDVHWXUQRIIWKHKXPLGLI\LQJDQGFRROLQJIXQFWLRQ
)LOOZDWHUEHIRUHWKHZDWHUOHYHOGURSVWRWKHPLQZDWHUOHYHO
7KLVDSSOLDQFHLVQRWLQWHQGHGIRUXVHE\SHUVRQVLQFOXGLQJFKLOGUHQZLWKUHGXFHGSK\VLFDO
VHQVRU\RUPHQWDOFDSDELOLWLHVRUODFNRIH[SHULHQFHDQGNQRZOHGJHXQOHVVWKH\KDYHEHHQJLYHQ
VXSHUYLVLRQRULQVWUXFWLRQFRQFHUQLQJXVHRIWKHDSSOLDQFHE\DSHUVRQUHVSRQVLEOHIRUWKHLUVDIHW\
&KLOGUHQVKRXOGEHVXSHUYLVHGWRHQVXUHWKDWWKH\GRQRWSOD\ZLWKWKHDSSOLDQFH
1RWH(QVXUHWKDWWKHIDQLVVZLWFKHGRIIDQGSRZHUSOXJLVUHPRYHGIURPWKHVXSSO\PDLQVEHIRUH
UHPRYLQJWKHJXDUG
Fig.6 Fig.7
Air inlet
Air outlet
3.Do not put heavy objects on top of the unit. Prohibit covering the air outlet and air inlet at both
sides(See Fig.6). Do not block the unit by placing other objects in front of the unit or 1m from the
air inlet at left and right sides.
4.This product is not buit for usage under high temperature approx. 40°C. Water in the tank goes
bad in hot summer and shall be renewed regularly.
5.Wet cleaning cloth is allowed for exterior cleaning. Do not use scouring agent or dissolvant with
corrosive characteristics. Never flush the unit!(See Fig.7)
6.If the unit is to be packed or transported, drain the water out and operate the unit under normal
wind mode for some time. Make sure the evaporator is completely dried before packing to avoid
off-flavor.
5.Safety Notice
1.During operation, opening the ice pack cover or
consuming the gel in ice pack is strictly prohibited.
2.Put the ice pack in the freezer to freeze for about 4h,
and then put 2 packs into the water tank (add water inside
water tank before putting the ice box in water tank).
3.The ice pack will reduce the water temperature and
produce cool air flow.
4.The equipped ice packs can be used repeatedly by rotating
2 packs in use and 2 packs standby in frozen condition.
5.Position for the ice box:
Please put the ice pack at the correct position as shown in fig.8 to prevent damage to the water
pump.
Fig.8
Ice pack
This manual suits for next models
1
Other Sharp Air Conditioner manuals

Sharp
Sharp AF-S80CX User manual

Sharp
Sharp AE-X9USR User manual

Sharp
Sharp AH-AP9MMV User manual

Sharp
Sharp AY-XP07ER User manual

Sharp
Sharp AE-X2M14LR User manual

Sharp
Sharp UHL Series User manual

Sharp
Sharp AE-A184J User manual

Sharp
Sharp AH-MP20 User manual

Sharp
Sharp AE-X26FR-N User manual

Sharp
Sharp AY-XM28MCJ User manual

Sharp
Sharp AH-S22AW2 User manual

Sharp
Sharp AF-R100FX User manual

Sharp
Sharp AF-Q100RX User manual

Sharp
Sharp AY-XP12GH User manual

Sharp
Sharp AY-AP9LW User manual

Sharp
Sharp AH-X108E User manual

Sharp
Sharp CV-P10LC User manual

Sharp
Sharp AY-XP26FR-N User manual

Sharp
Sharp AY-X08BE User manual

Sharp
Sharp AH-A129E User manual