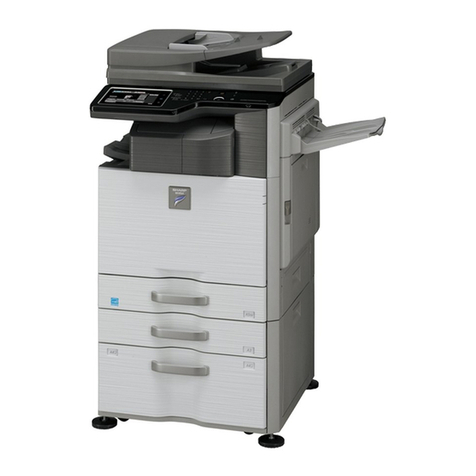
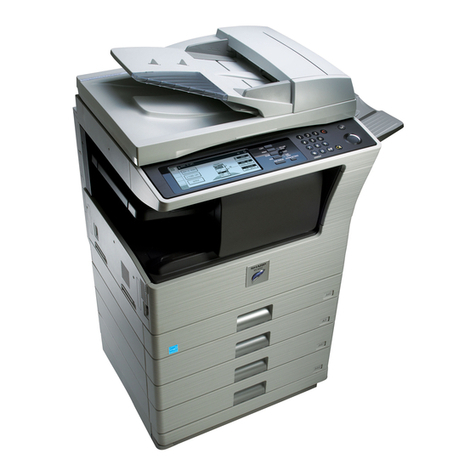
Sharp AJ-6020 User manual

AJ-6020
MODEL
COLOUR INKJET MULTIFUNCTION
SETUP GUIDE AND
OPERATION MANUAL
Page
INTRODUCTION
SETTING UP THE UNIT
LOADING PAPER
OPERATION PANEL
MAKING COPIES
FUNCTIONS SET BY
THE USER
USER MAINTENANCE
TROUBLESHOOTING
APPENDIX
4
6
20
46
49
63
71
78
84
INSTALLING THE
SOFTWARE
25
69
USING THIS UNIT WITH
YOUR COMPUTER

This equipment complies with the requirements of Directives 89/336/EEC and 73/23/EEC as amended by
93/68/EEC.
Dieses Gerät entspricht den Anforderungen der EG-Richtlinien 89/336/EWG und 73/23/EWG mit Änderung
93/68/EWG.
Ce matériel répond aux exigences contenues dans les directives 89/336/CEE et 73/23/CEE modefiées par la
directive 93/68/CEE.
Dit apparaat voldoet aan de eisen van de richtlijnen 89/336/EEG en 73/23/EEG, gewijzigd door 93/68/EEG.
Dette udstyr overholder kravene i direktiv nr. 89/336/EEC og 73/23/EEC med tillæg nr. 93/68/EEC.
Quest’ apparecchio è conforme ai requisiti delle direttive 89/336/EEC e 73/23/EEC, come emendata dalla
direttiva 93/68/EEC.
Este equipamento obedece às exigências das directivas 89/336/CEE e 73/23/CEE, na sua versão corrigida
pela directiva 93/68/CEE.
Este aparato satisface las exigencias de las Directivas 89/336/CEE y 73/23/CEE, modificadas por medio de
la 93/68/CEE.
Denna utrustning uppfyller kraven enligt riktlinjerna 89/336/EEC och 73/23/EEC så som kompletteras av
93/68/EEC.
Dette produktet oppfyller betingelsene i derektivene 89/336/EEC og 73/23/EEC i endringen 93/68/EEC.
Tämä laite täyttää direktiivien 89/336/EEC ja 73/23/EEC vaatimukset, joita on muutettu direktiivillä
93/68/EEC.
The CE mark logo label is affixed on an equipment in case that the directives
described in the above sentence are applicable to the product. (This sentence is not
applicable in any country where the above directives are not required.)

Cautions
Follow the cautions below when using this unit.
!The unit is affected by the environment in which it is installed. Do not install your unit
in the following area.
−Dusty areas
If dust enters the interior of the unit, damage or poor-quality output can result.
−Areas in direct sunlight
Prolonged exposure to direct sunlight can cause distortion to some parts which
may result in poor quality output.
−Excessively hot, cold, humid, or dry areas (for example, near heaters, humidifiers,
or air conditioners) may result in damp paper, or condensation within the internal
mechanisms causing misfeeds, or dirty output.
!Operating Conditions
Temperature : 10-35 degrees Celsius (50-95 degrees Fahrenheit)
Relative humidity : 20%-85%
Note : When the temperature reaches 30 degrees Celsius (86 degrees Fahrenheit),
the relative humidity must be 60% or less.
!The power outlet should be near the equipment, and should be easily accessible.
!When moving the unit, be sure to first turn the power switch off, and then remove the
power cord from the outlet.
!Place the unit on a firm, level surface.
!Be sure to use genuine SHARP ink tanks.
!If you get ink spots on your skin, wash with water as soon as possible.
!Store spare ink tanks out of the reach of children.
!For the disposal of the spent ink tank, pack it in a plastic bag.

2
CONTENTS
INTRODUCTION
MAIN FEATURES............................................................................................ 4
USING THE MANUALS................................................................................... 5
SETTING UP THE UNIT
CONFIRMING THE CONTENTS..................................................................... 6
PART NAMES AND FUNCTIONS................................................................... 7
UNPACKING.................................................................................................... 9
ATTACHING THE TRAYS............................................................................. 10
CONNECTING THE INTERFACE CABLE .................................................... 11
CONNECTING THE POWER CORD ............................................................ 12
INSTALLING THE PRINT HEADS AND THE INK TANKS............................ 13
ALIGNING THE PRINT HEADS .................................................................... 17
LOADING PAPER
LOADING PAPER INTO THE PAPER TRAY................................................ 20
LOADING THE BYPASS TRAY WITH PAPER............................................. 23
INSTALLING THE SOFTWARE
SOFTWARE FOR THE AJ-6000 SERIES ..................................................... 25
HARDWARE AND SOFTWARE REQUIREMENTS...................................... 26
BEFORE INSTALLATION.............................................................................. 26
INSTALLING THE "AJ-6000 SERIES DRIVER"............................................ 27
INSTALLING THE "AJ-6000 SERIES SOFTWARE" ..................................... 37
INSTALLING THE PRINTER DRIVER .......................................................... 39
HOW TO USE THE ONLINE MANUAL ......................................................... 44
HOW TO PRINT ............................................................................................ 45
BONUS SOFTWARE..................................................................................... 45
OPERATION PANEL
PART NAMES AND FUNCTIONS................................................................. 46
BASIC FUNCTIONS AND DISPLAY PANEL................................................. 47
HOW TO CHANGE SETTINGS FROM THE OPERATION PANEL.............. 48
MAKING COPIES
NORMAL COPYING...................................................................................... 49
ORIGINAL PLACEMENT............................................................................... 50
MAKING SELECTIONS FOR COPYING....................................................... 53
REDUCING/ENLARGING THE IMAGE SIZE FOR COPYING...................... 56
BRIGHTNESS AND INTENSITY SELECTIONS ........................................... 59
ADDING ANNOTATION TO COPIES............................................................ 60

INTRODUCTION
APPENDIX
TROUBLESHOOTING
USER MAINTENANCE
FUNCTIONS SET
BY THE USER
MAKING COPIES
USING THIS UNIT WITH
YOUR COMPUTER
OPERATION PANEL
LOADING PAPER
SETTING UP THE UNIT
INSTALLING
THE SOFTWARE
3
FUNCTIONS SET BY THE USER
SAVING THE USER DEFAULT SETTINGS.................................................. 63
RESETTING THE USER DEFAULT SETTINGS........................................... 64
PROGRAM TIMEOUT ................................................................................... 64
SLEEP MODE................................................................................................ 65
CHANGING THE PAPER DEFAULT SETTING ............................................ 65
CHANGING THE LANGUAGE SETTING...................................................... 66
RESETTING ALL SETTING VALUES TO THE FACTORY DEFAULT VALUES
....... 67
HOW TO USE THE "CLEAR/STOP" BUTTON.............................................. 68
USING THIS UNIT WITH YOUR COMPUTER
USING THE SCANNER MODE..................................................................... 69
USING THE PRINTER MODE....................................................................... 70
RESERVING COPY AND SCAN JOBS......................................................... 70
USER MAINTENANCE
THE INK TANK .............................................................................................. 71
THE PRINT HEAD......................................................................................... 73
PRINTING A TEST PAGE ............................................................................. 76
CLEANING AND STORING THE UNIT......................................................... 77
TROUBLESHOOTING
CANCELLING AN ERROR MESSAGE ......................................................... 78
IDENTIFYING UNIT PROBLEMS.................................................................. 80
APPENDIX
SPECIFICATIONS......................................................................................... 84
SUPPLIES ..................................................................................................... 86
PAPER TYPE ................................................................................................ 86
INTERFACE CABLE...................................................................................... 86
INDEX............................................................................................................ 87
SOFTWARE LICENSE .................................................................................. 89

4
INTRODUCTION
This unit is a full colour multifunctional peripheral, providing you with copier, printer, and
scanner functions.
MAIN FEATURES
Copier features
!High-speed copying at 12cpm (monochrome), or 7cpm (colour).*1
!A scan once print many (SOPM) feature*2 provides high productivity.
!A variety of functions including posters and reversing scanned images enable you to
use this unit for various purposes.
Printer features
!High-speed printing at 12ppm (monochrome), or 7ppm (colour).*1
!1200dpi printing with smoothing produces outstanding quality images (Standard
resolution is 600dpi).
!A variety of editing functions such as adding watermarks or multiple printing onto one
page.
Scanner features
!High quality scanning at 600dpi with a broad range of colour reproduction.
!Easy operation with just pressing the scan button on the unit.
!This unit supports TWAIN, making it compatible with a variety of TWAIN-compliant
applications.
General features
!For black output, carbon black ink provides clear copying/printing quality comparable
to laser copier/printer level.
!Each ink tank is independent, they can be used until completely spent, ensuring
minimum waste of ink. The print head is also fully detachable, requiring no special
tools for replacement.
!The unit is equipped with a 150 sheet capacity paper tray, allowing the user to copy/
print big jobs without constantly refilling the tray.
!USB interface*3 enables you to make simple Hotplug*4 connections. Parallel interface
is also equipped as standard.
!The SPF (Single Pass Feeder) can hold up to 20 originals, eliminating your bothering
to feed your original one by one.
!
The output tray is located inside the unit, making this unit compact to save office space.
!Designed to save energy with low power consumption.
!This unit can be used with Windows 95, Windows 98, Windows Me, Windows NT 4.0
and Windows 2000.
*1 When using SHARP original data with A4/8.5"x11" paper in the fastest mode
(copying from the original table) or draft mode (printer).
*2 By storing the scanned data in memory, this unit can make multiple copies with
only scanning once.
*3 USB can only be used with computers which have a USB interface and have
Windows 98, Windows Me or Windows 2000 preinstalled.
*4 Peripherals can be plugged or unplugged while the computer and they are
connected to a power source.
5
USING THE MANUALS
In addition to this printed manual an Online Manual is also provided.
To get full use of all features and functions of this product, be sure to familiarise yourself
with both manuals. This printed manual provides all installation and setup instructions as
well as instructions in the use of all copier functions.
The Online Manual contains the following information.
Online Manual
Provides you with information on how to specify preferences and troubleshooting. Check the
Online Manual when you use this unit after all the initial setup is completed.
How to Use the Online Manual
Explains how to use the Online Manual.
Print
Provides information on how to print a document.
Scanning
Explains how to scan using a TWAIN driver.
Utility Software
Provides information on Copy JX2 and Button Manager.
Maintenance
Provides information on how to change and align the unit's supplies. Instructions for
maintaining the unit are also provided.
Troubleshooting
Provides instructions on how to solve machine problems.
Conventions used in this manual and Online Manual
In this manual, the following icons are used to provide the user with information pertinent to
the use of the unit.
Trademark acknowledgements
Microsoft and Windows are trademarks of Microsoft Corporation in the U.S.A. and other countries.
IBM and PC/AT are trademarks of International Business Machines Corporation.
Adobe and Acrobat are trademarks of Adobe Systems Incorporated.
All other trademarks and copyrights are the property of their respective owners.
Copyright (c) 1997-1998 Parallel Technologies, Inc.
PTI and PPIT are trademarks of Parallel Technologies, Inc.
PC multi-channel MFP high performance drivers by Parallel Technologies, Inc.
"The Parallel Port Experts"
WWW.LPT.COM
Warns the user that injury may result if the contents of the warning are
not properly followed.
Cautions the user that damage to the machine or one of its
components may result if the contents of the caution are not properly
followed.
Notes provide information relevant to the machine regarding
specifications, functions, performance, operation and such, that may
be useful to the user.

6
SETTING UP THE UNIT
CONFIRMING THE CONTENTS
The following items are packed with the unit in the box.
If any of the items are missing, please contact your point of purchase.
!Interface cables for connecting the unit to your computer are not included.
Please purchase the appropriate cable for your computer.
!Do not unpack the print heads and the ink tanks until ready to install them in the
unit.
!The box and protective materials will be needed for future transportation. Do not
throw them away.
Power cord
Colour print head
Colour ink tanks
(magenta, yellow, cyan)
Paper tray
Output tray
Black ink tank
Black print head
Operation Manual
(this manual)
AJ-6020 Software
CD-ROM
Printer Driver
TWAIN Driver
Utility Software
Sharpdesk
Online Manual
MGI PhotoSuite III SE *
* For the information about
these programs, refer to
their instructions.

7
PART NAMES AND FUNCTIONS
The following illustrations show the names and locations of the main machine parts.
Operation panel
Use this panel to specify
your preferences for
copying and for setting
up the unit.
Output tray
The document is
deposited onto the tray
after copying or printing.
Pull out the output tray
extension when using
paper longer than the
output tray.
Paper tray
Holds up to 150 sheets of
paper. Adjustable to suit
a variety of paper sizes.
Load the paper so that
the side to be printed or
copied onto is face down.
SPF
(Single pass feeder)
Refer to the next page
for the SPF.
Display panel
Displays the status of
the unit, copier settings
and the number of
copies.
ERROR indicator
Lights up when an error
occurs.
Power button
Press to turn the power
on or off.
Front cover
Open this cover to
change the ink tanks or
print heads.
Scan head locking switch
Lock the scan head
when moving this unit.
Front Side
Paper knob
When copying or printing onto thick
paper or printing onto an envelope
adjust the knob to the setting.
(Return the knob to its original
setting after copying or printing.)
Handles
Front cover locking knob
Turn this knob to the
right to open the front
cover.
Maintenance cover
Open this cover to
change the ink tanks or
print heads.
Released
Locked

8
PART NAMES AND FUNCTIONS
Print head latch
Use this to remove or install
the print heads.
Black ink tank
Cyan ink tank
Yellow ink tank
Magenta ink tank
Carriage
Black print head
Applies ink onto the
paper.
Print heads and Ink tanks
Bypass tray
Use this tray to copy or print on a single page.
Insert paper into the tray copy or print side up.
When copying or printing onto thick paper,
open the tray until it reaches position 2.
(The tray has two stop positions.)
Power socket
Plug the power cord into the
socket.
Jam cover
Open this cover to remove
jammed paper.
Rear Side
Parallel interface
connector (36pin)
Use if you will be using a parallel interface
cable (IEEE1284) to connect the unit to your
computer.
USB interface connector (B type)
Use if you will be using a USB cable
to connect the unit to your computer.
It is possible to insert the cable after
the unit has been switched on.
Colour print head
Applies ink onto the
paper.
SPF (Single pass feeder)
SPF output tray
When using the SPF,
the original exits here
after being copied or
scanned.
SPF output tray extension
Open the SPF output tray
extension by pressing the edge
to place a large sized original in
the SPF.
Original guide
Align the original guide to the
placed original.
SPF input tray
Place originals to be copied or
scanned face down here.
Original release button
Depress this button to remove
the jammed original.
SPF connection
cable
Position 1
Position 2

9
UNPACKING
1Remove tapes to shown in the illustrations.
2Open the front cover, and remove the protective material
shown in the illustration.
Refer to step 4 of "INSTALLING THE PRINT HEADS AND THE INK TANKS" for
details on how to open the front cover. (See page 13)
3Release the scan head locking switch.
4Close the front cover.
Refer to step 13 of "INSTALLING THE PRINT HEADS AND THE INK TANKS" for
details on how to close the front cover. (See page 16)
Remove the protective
material.
Released

10
ATTACHING THE TRAYS
Attach the paper tray and the output tray to the front of the unit.
Follow the steps shown below.
1Attach the paper tray by firmly pushing down both edges.
2Attach the output tray as shown in the illustration.
Refer to "LOADING PAPER" for more information. (See page 20)
Make sure that the paper tray has been
securely attached to the body.
Place this projection
toward the unit.

11
CONNECTING THE INTERFACE CABLE
This unit includes both USB and parallel interface connectors.
Interface cables for connecting the unit to your computer are not included with this unit.
Please purchase the appropriate cable for your computer.
Connecting the parallel interface cable
1Obtain an IEEE1284 shielded parallel interface cable.
2Ensure that your computer and unit are turned off.
3Insert the cable into the parallel interface connector located on
the rear of the unit, and fasten with clasps.
4Insert the other end of the cable into the interface connector of
your computer.
Connecting the USB interface cable
1Obtain a shielded USB interface cable.
2Insert the cable into the USB interface connector located on the
rear of the unit.
3Insert the other end of the cable into the interface connector of
your computer, or the USB hub connected to your computer.
Do not connect both the USB interface cable and the parallel interface cable to this
unit at the same time.
USB is available with a PC/AT compatible computer that was originally equipped
with USB and had Windows 98, Windows Me or Windows 2000 preinstalled.

12
CONNECTING THE POWER CORD
1Insert the power cord into the socket on the rear of the unit.
2Connect the other end of the power cord to an outlet.
The unit will be turned on automatically.
How to deal with error messages during the initial setup
The following messages may appear on the display panel when you turn on the unit for the
first time after purchasing.
These error messages will remain until the setup process is complete.
If any other messages appear, refer to "CANCELLING AN ERROR MESSAGE" (See page
78).
Auto Shut Off
The unit automatically turns off the power when 60 minutes have elapsed after the last
operation. Press the "POWER" button ( ) to turn on the unit again.
Do not connect the unit to other than a local voltage outlet. Plugging the unit into
an incompatible power supply may cause irreparable damage.
!Be sure that the plug in the outlet is readily accessible to all persons. Power is
present in the product even if the "POWER" button ( ) is off in order to
maintain good copy or print quality.
!To completely shut off the power, first turn off the power using the "POWER"
button ( ). Then unplug the power cord.
Unable to Copy,
Missing print head Shipping Lock is on;
Unlock to operate

13
INSTALLING THE PRINT HEADS AND THE INK
TANKS
1Make sure that the scan head locking switch is released.
Refer to step 3 of "UNPACKING". (See page 9)
2Make sure that the power is on.
For the location of the "POWER" button ( ). (See page 46)
3Load paper following the steps shown in "LOADING PAPER".
(See page 20)
4Turn the front cover locking knob with one hand and lift the
front cover with the other hand, while keeping the knob in the
unlocked position.
This section describes how to install the print heads and ink tanks when you install
them for the first time after purchasing this unit. Refer to "THE INK TANK" (See
page 71) or "THE PRINT HEAD" (See page 73) when they need to be changed.
Keep the front cover open securely while installing print heads and ink tanks. You may
get your hand caught between the body and the front cover of the unit if you install
them with the front cover half open as shown in the illustration marked with an "X".
Do not move the
carriage manually by
force.

14
INSTALLING THE PRINT HEADS AND THE INK TANKS
5Open the maintenance cover.
6Raise the print head latch.
Raise the latch until it comes to a complete halt.
7Remove the print heads from their protective cases.
8Insert the print heads.
Insert the black print head into the left carriage opening, and the colour print head
into the right carriage opening.
Do not touch the metal portion of the print
head. Doing so may make the head
inoperable.
Black print head Colour print head

15
INSTALLING THE PRINT HEADS AND THE INK TANKS
9Lower the print head latch.
Lower the latch until it clicks into the latched position.
10 Unpack the ink tanks from their protective wrapping and slowly
remove the tape.
11 Turn the ink tanks upside down, and then immediately insert
each of them to the print head of the corresponding number.
!Hold the ink tank upright when removing the tape. Do not touch the uncovered
opening on the ink tank, as ink will get on your hands.
!Ensure that there are no pieces of tape remaining on the ink tank.
Ensure the number on each print head corresponds to the number on each ink
tank.
Make sure that each tab
securely locks the ink tank
by pressing here.
Properly align the tab
when inserting the ink tank.
Match the ink tank number
to the print head number.
Do not touch this area.
The unit may not copy
if it is dirty.

16
INSTALLING THE PRINT HEADS AND THE INK TANKS
12 Close the maintenance cover.
13 Close the front cover.
Press both edges of the front cover with both of your hands until it locks.
14 The unit will automatically start a sequence to clean the print
heads and the following message will appear.
15 After the cleaning sequence is complete, the machine will
automatically print the alignment patterns while the following
message appears.
16 Align the print heads following the procedure "ALIGNING THE
PRINT HEAD". Since the patterns have been already printed,
start with step 5 on page 18.
To ensure that the ink heads do not become dry, always leave the ink tanks
installed. If not, poor output will result.
During ink tank replacement, if the cover is left open for more than 8 minutes, the
carriage will automatically return to its home position.
Cleaning the Print
Head
...
Printing
...
Alignment Patterns

17
ALIGNING THE PRINT HEADS
The print heads must be aligned after being installed into the unit, or if lines are printed
unevenly. (See the illustration on page 19) Follow the steps listed below to align the print
heads.
1Insert paper into the unit
Refer to "LOADING PAPER" for more information (See page 20).
2Press the "MENU" button and then repeatedly press the or
"ARROW" buttons until "Maintenance" is displayed on the first
line of the display panel.
3Repeatedly press the or "ARROW" buttons until "Align
Print Head" appears on the second line of the display panel.
4Press the "ENTER" button.
The message shown below will appear on the display panel and alignment patterns will
be automatically printed.
3.Maintenance
1.Clean PrintHead1
3.Maintenance
6.Align Print Head
Printing
...
Alignment Patterns

18
ALIGNING THE PRINT HEADS
5
After printing of the alignment patterns is complete, the following
messages will appear.
Seventeen block figures with a vertical line on each vertical side ( ) are printed in
pattern A. Of the seventeen figures determine which block is most nearly centred
between the vertical lines and note the corresponding number.
Enter the number by repeatedly pressing the or "ARROW" buttons until the
selected number is shown on the lower line of the display panel.
6After selecting "A pattern", select the best number for "B
pattern" in the same way.
Seventeen block figures with a horizontal line on each horizontal side ( ) are
printed in pattern B. Of the seventeen figures determine which block is most nearly
centred between the horizontal lines and note the corresponding number.
Select A pattern
0 - +
-8 -7 -6 -5 -4 -3 -2 -1 0 +1 +2 +3 +4 +5 +6 +7 +8
-8 +8
Example
In the example shown above, "-8" shows the most appropriate
selection. Therefore, select "-8" to show on the display panel, and
then press the ENTER button.
Select A pattern
-8 - +
A
Example
-8 -7 -6 -5 -4 -3 -2 -1 0 +1 +2 +3 +4 +5 +6 +7 +8
-6 +8
In the example shown above, "-6" shows the most appropriate
selection. Therefore, select "-6" to show on the display panel, and
then press the ENTER button.
Select B pattern
-6 - +
B
Table of contents
Other Sharp All In One Printer manuals

Sharp
Sharp MX-2300N Guide User manual

Sharp
Sharp MX-C250 User manual

Sharp
Sharp MX-7081 Instruction manual

Sharp
Sharp MX-2640N User manual

Sharp
Sharp MX-M363F Manual

Sharp
Sharp MX-B402 Guide

Sharp
Sharp AR-122E N User manual

Sharp
Sharp AJ-5030 User manual

Sharp
Sharp MX 5500N - Color Laser - Copier User manual

Sharp
Sharp AR-5520N User manual

Sharp
Sharp AL-1661CS User manual

Sharp
Sharp MX-2610N User manual

Sharp
Sharp MX-5000N User manual

Sharp
Sharp FO-3800M User manual

Sharp
Sharp AR-6020 User manual

Sharp
Sharp MX-3050N Assembly instructions

Sharp
Sharp MX4111N User manual

Sharp
Sharp MX-C380P User manual

Sharp
Sharp MX-3610N User manual

Sharp
Sharp MX-2314N User manual