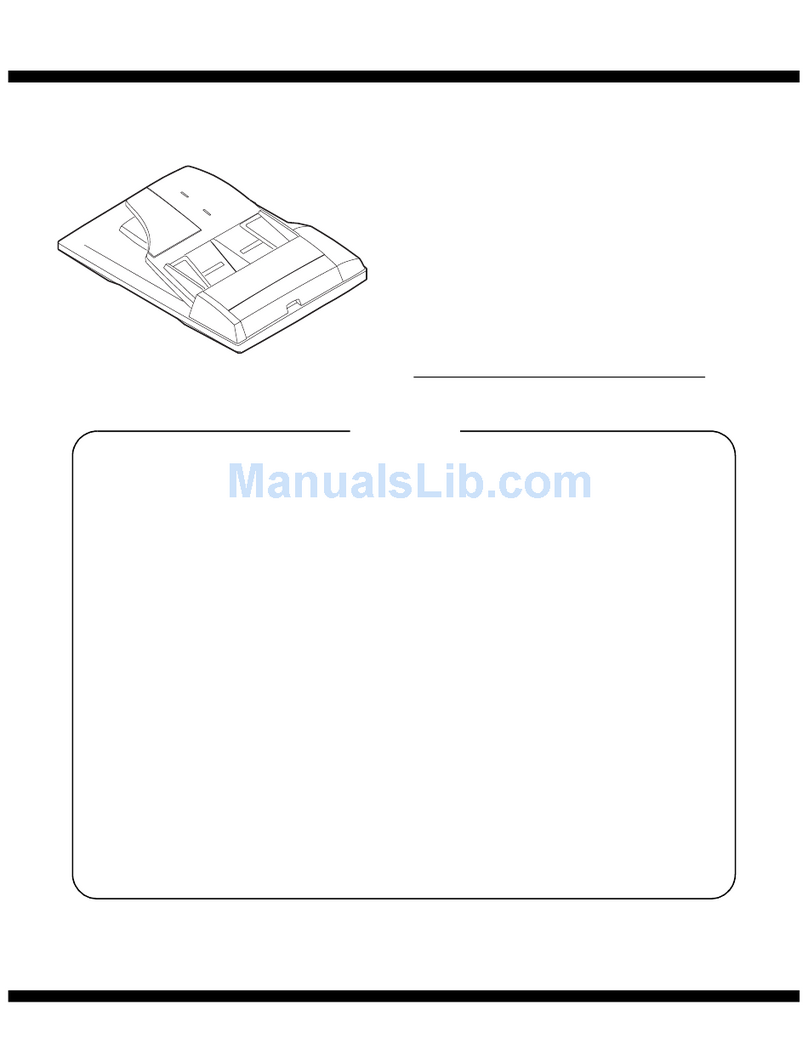
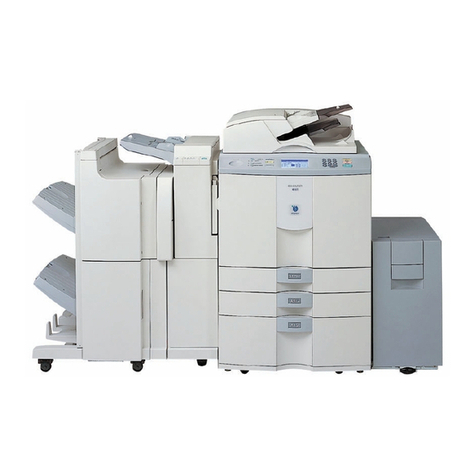
Sharp MX 5500N - Color Laser - Copier User manual

Document Filing Guide
MX-5500N
MX-6200N
MX-7000N
MODEL:

2
TABLE OF CONTENTS
ABOUT THIS MANUAL . . . . . . . . . . . . . . . . . . . . . . . . 3
• MANUALS PROVIDED WITH THE MACHINE . . . 4
1DOCUMENT FILING
OVERVIEW . . . . . . . . . . . . . . . . . . . . . . . . . . . . . . . . . . 5
• TYPES OF DOCUMENT FILING . . . . . . . . . . . . . . 5
• USES OF DOCUMENT FILING . . . . . . . . . . . . . . . 6
• BEFORE USING DOCUMENT FILING . . . . . . . . . 7
• IMPORTANT POINTS WHEN USING
DOCUMENT FILING . . . . . . . . . . . . . . . . . . . . . . . 9
• USING DOCUMENT FILING IN EACH MODE . . 10
BASE SCREEN OF DOCUMENT FILING MODE . . . 12
2SAVING FILES WITH DOCUMENT
FILING
SAVING A FILE WITH "Quick File" . . . . . . . . . . . . . 13
SAVING A FILE WITH "File" . . . . . . . . . . . . . . . . . . . 15
• FILE INFORMATION . . . . . . . . . . . . . . . . . . . . . . 17
SAVING A DOCUMENT FILE ONLY (Scan to
HDD) . . . . . . . . . . . . . . . . . . . . . . . . . . . . . . . . . . . . . . 20
• "Scan to HDD" SCREEN . . . . . . . . . . . . . . . . . . . 20
• PERFORMING "Scan to HDD". . . . . . . . . . . . . . . 24
3USING STORED FILES
SEQUENCE FOR USING A STORED FILE. . . . . . . . 25
FOLDER AND FILE SELECTION SCREENS . . . . . . 27
• FOLDER SELECTION SCREEN . . . . . . . . . . . . . 27
• FILE SELECTION SCREEN. . . . . . . . . . . . . . . . . 28
SELECTING A FILE . . . . . . . . . . . . . . . . . . . . . . . . . . 29
• JOB SETTINGS SCREEN . . . . . . . . . . . . . . . . . . 30
PRINTING A STORED FILE. . . . . . . . . . . . . . . . . . . . 31
• PRINT SETTINGS SCREEN . . . . . . . . . . . . . . . . 32
• BATCH PRINTING . . . . . . . . . . . . . . . . . . . . . . . . 33
SENDING A STORED FILE . . . . . . . . . . . . . . . . . . . . 35
• SEND SETTINGS SCREEN. . . . . . . . . . . . . . . . . 36
PROPERTIES OF STORED FILES . . . . . . . . . . . . . . 37
• FILE PROPERTIES . . . . . . . . . . . . . . . . . . . . . . . 37
• CHANGING THE PROPERTY . . . . . . . . . . . . . . . 37
MOVING A STORED FILE . . . . . . . . . . . . . . . . . . . . . 39
DELETING A STORED FILE . . . . . . . . . . . . . . . . . . . 41
RETRIEVING AND USING A FILE FROM THE
JOB STATUS SCREEN . . . . . . . . . . . . . . . . . . . . . . . 42
SEARCHING FOR A STORED FILE . . . . . . . . . . . . . 43

3
ABOUT THIS MANUAL
Please note
• This manual contains references to the fax function. However, please note that the fax function is not available in some
countries and regions.
• Considerable care has been taken in preparing this manual. If you have any comments or concerns about the manual, please
contact your dealer or nearest authorised service representative.
• This product has undergone strict quality control and inspection procedures. In the unlikely event that a defect or other problem
is discovered, please contact your dealer or nearest authorised service representative.
• Aside from instances provided for by law, SHARP is not responsible for failures occurring during the use of the product or its
options, or failures due to incorrect operation of the product and its options, or other failures, or for any damage that occurs due
to use of the product.
Warning
• Reproduction, adaptation or translation of the contents of the manual without prior written permission is prohibited, except as
allowed under copyright laws.
• All information in this manual is subject to change without notice.
Illustrations and the operation panel and touch panel shown in this manual
The peripheral devices are generally optional, however, some models include certain peripheral devices as standard equipment.
The explanations in this manual assume that a saddle stitch finisher, punch module, and inserter are installed on the machine.
For some functions and procedures, the explanations assume that devices other than the above are installed.
Scope of the explanations in this manual
• The explanations of the document filing function assume that the user is already familiar with copy mode, and the other modes
of the machine.
This manual does not contain detailed explanations of the other modes that are used in conjunction with the document filing function.
If you have any questions regarding one of the other modes, see the manual for that mode.
• To further explain certain functions and uses, some explanations assume that additional peripheral devices (Internet fax
expansion kit etc.) are installed.
• The function that cannot be used according to the state of the installation of the peripheral devices is provided.
• Some peripheral devices may not be available in some countries and regions.
The display screens, messages, and key names shown in the manual may differ from those on the actual machine
due to product improvements and modifications.

4
MANUALS PROVIDED WITH THE MACHINE
Printed manuals and manuals stored in PDF format on the machine's hard drive are provided with the machine. When
using the machine, read the appropriate manual for the feature you are using.
Printed manuals
Operation manuals in PDF format
The manuals in PDF format provide detailed explanations of the procedures for using the machine in each mode. To
view the PDF manuals, download them from the hard drive in the machine. The procedure for downloading the manuals
is explained in "How to download the manuals in PDF format" in the Quick Start Guide.
Icons used in the manuals
The icons in the manuals indicate the following types of information:
Manual name Contents
Safety Guide This manual contains instructions for using the machine safely and lists the specifications of the machine
and its peripheral devices.
Software Setup
Guide
This manual explains how to install the software and configure settings to use the machine as a printer
or scanner.
Quick Start Guide This manual provides easy-to-understand explanations of all the functions of the machine in a single
volume.
Detailed explanations of each of the functions can be found in the manuals in PDF format.
Troubleshooting This manual explains how to remove paper misfeeds and provides answers to frequently asked
questions regarding the operation of the machine in each mode. Refer to this manual when you have
difficulty using the machine.
Manual name Contents
User's Guide This manual provides information, such as basic operation procedures, how to load paper, and machine
maintenance.
Copier Guide This manual provides detailed explanations of the procedures for using the copy function.
Printer Guide This manual provides detailed explanations of the procedures for using the printer function.
Facsimile Guide This manual provides detailed explanations of the procedures for using the fax function.
Scanner Guide This manual provides detailed explanations of the procedures for using the scanner function and the
Internet fax function.
Document Filing
Guide (this
manual)
This manual provides detailed explanations of the procedures for using the document filing function. The
document filing function allows you to save the document data of a copy or fax job, or the data of a print
job, as a file on the machine's hard drive. The file can be called up as needed.
System Settings
Guide
This manual explains the "System Settings", which are used to configure a variety of parameters to suit
the aims and the needs of your workplace. Current settings can be displayed or printed out from the
"System Settings".
This alerts you to a situation where there is a
risk of machine damage or failure.
This indicates the name of a system setting and provides a
brief explanation of the setting.
For detailed information on each system setting, see the
System Settings Guide.
When "System Settings:" appears:
A general setting is explained.
When "System Settings (Administrator):" appears:
A setting that can only be configured by an administrator is
explained.
This provides a supplemental explanation of a
function or procedure.
This explains how to cancel or correct an
operation.
5
This chapter provides information that you should know before using the document filing function, including an overview
of document filing, the features and functions of document filing, and points to keep in mind when using document filing.
OVERVIEW
The document filing function allows you to save the document image of a copy or image send job, or the data of a print
job, as a file on the machine's hard drive.
The stored file can be retrieved and printed or transmitted as needed.
TYPES OF DOCUMENT FILING
There are three ways to save a file using document filing: "Quick File", "File", and "Scan to HDD".
1DOCUMENT FILING
Quick File
As a copy, scan send, or other job is performed, this function saves the document data to the hard
drive. Use this function when you want to quickly and easily store document data without specifying a
file name or other information.
The stored file can also be used by other people. Do not use this method to save files that you do not
want others to use, such as files containing sensitive or confidential information.
File
As a copy, scan send, or other job is performed, this function saves the document data to the hard
drive. Unlike Quick File, various types of information can be appended to the file when the file is saved
to enable efficient file management.
A password can also be established to prevent the file from being retrieved up by others.
Scan to HDD This function scans a document and stores it as a file. Like File, various types of information can be
appended to the file when it is stored.
Print
Hard drive
Int
e
rn
e
t F
ax
F
ax
S
can to HD
D
Send
Cop
y
Prin
t
S
ca
n
Hard drive
Saving a file Retrieving and using a stored file
A stored file can be printed. A stored file can also be
sent as a fax or sent to another computer over a
network. A stored file can also be kept for archive
purposes.
Document information used in any of the modes
is saved to the hard drive as a file.

6
USES OF DOCUMENT FILING
Quickly using a file
Example: You prepared handouts consisting of numerous pages for a meeting, however, another handout is
needed for a newly added participant.
As shown in the example, storing a job with the document filing function frees you of the need to rescan the original and
select settings, saving considerable time.
Convenient for managing frequently used documents
Example: Managing a large number of business forms
Application forms, report forms, and other business forms can be stored on the hard drive for easy retrieval, letting you
print the number of copies you need when you need them.
The handout was not saved using document filing The handout was saved using document filing
Not likely to be completed in time for the meeting... Printing is accomplished quickly and the handout is ready in
time for the meeting!
Copy settings must be reselected and the original must be
rescanned.
As indicated above, to obtain another set of output, the
settings must be selected all over again. If you don't remember
the settings, much effort may be expended to get the same
output result as the previous time.
By retrieving a job stored using document filing, there is no
need to reselect copy settings or rescan the original.
The job can be retrieved and printed using the same settings
quickly and easily.
Ratio, colour mode, and special mode
settings must be reselected.
The numerous original pages must all be
rescanned.
The stored file is simply retrieved and
printed.
Paid holiday forms?
Daily report forms?
Business trip forms?
Main Folder
File Name
Paid holiday forms Name 1 01/04/2006
Daily report forms Name 1 01/04/2006
Business trip forms Name 1 01/04/2006
Daily report forms Name 1 01/04/2006
User Name Date
All Files Filter by Job
1
2
BackSearch
Batch Print
File Retrieve Scan to HDD HDD Status Ex Data Access
Not using document filing
It takes time to find the form you need.
Using document filing
The required form can be easily retrieved from the
document filing list,
and document management is much more efficient.

7
BEFORE USING DOCUMENT FILING
This section provides information that you should know before using the document filing function.
Folders
Three types of folders are used to store files by document filing.
Quick File Folder
Documents scanned using the [Quick File] key are stored in this folder. A user name and file name are automatically
assigned to each job.
Main Folder
Documents scanned using the [File] key are stored in this folder.
When you store a job in the Main folder, you can specify a previously stored user name and assign a file name.
A password can also be set when storing a file ([Confidential] save).
Custom Folder
Folders with custom names can be created inside this folder.
When a document is scanned using the [File] key and a folder is selected, the document is stored in the specified folder.
Like the Main folder, a custom folder allows you to specify a previously stored user name and assign a file name when storing a job.
Passwords can be established for custom folders and for files saved in custom folders.
Items convenient to store
When storing a job using "File" or "Scan to HDD", it is convenient to store the items below. These settings are not
needed when storing a job using "Quick File".
A maximum of 500 custom folders can be created on the hard drive.
User Name
This is necessary if you will be assigning a user name to stored files. User names are stored in "User List" in
the system settings (administrator). A user name is also used as a search condition when searching for a file.
Custom Folder
The Main folder is initially available as a location for storing files by "File" and "Scan to HDD". When
custom folders have been created using "Document Filing Control" in the system settings
(administrator), a custom folder can be specified as a location for storing files. A password can also be
established for a custom folder to restrict access to the folder.
My Folder
"My Folder" is specified using "User List" in the system settings (administrator). A previously created
custom folder can be selected as "My Folder", or a new folder created as "My Folder". When "My
Folder" has been configured and user authentication is used, "My Folder" will always be selected as
the destination of "File" and "Scan to HDD".
System Settings (Administrator): User List
This is used to store a user name and specify a folder as "My Folder".
System Settings: Document Filing Control
This is used to create custom folders for document filing. A password can also be established for a custom folder.
Folders on the hard drive
Quick File
Folder
Main Folder
Custom Folder

8
Approximate number of pages and files that can be stored by document
filing
Combined total number of pages and total number of files that can be stored in custom
folders and in the Main folder
Number of pages and number of files that can be stored in the Quick File folder
* The indicated numbers are guidelines for the number of pages that can be stored when all pages are full colour, and
when all pages are black & white.
Copying in electrical sort mode uses the same memory area as the Quick File folder. For this reason, when too much
data has been stored in the Quick File folder, it may not be possible to perform a large copy job using electrical sort
mode. Delete unneeded files.
The original types above are examples to make the explanation easier to understand. The actual number of pages and
number of files that can be stored will vary depending on the contents of the original images.
Examples of original types Number of pages* Number of files
Full colour
original
(Text and photo
example) Size:
A4 (8-1/2" x 11")
Max. 1200
Max. 3000
Black & white
original
(Text) Size:
A4 (8-1/2" x 11")
Max. 4200
Examples of original types Number of pages* Number of files
Full colour
original
(Text and photo
example) Size:
A4 (8-1/2" x 11")
Max. 400
Max. 1000
Black & white
original
(Text) Size:
A4 (8-1/2" x 11")
Max. 1400

9
Files
When a file is saved using "File", the following information can be appended.
Saving a file with this information allows you to distinguish it from other files.
User name: Use this to specify the owner of the file. The user name must first be stored in "User List" in the system
settings.
File Name: A file name can be entered.
Folder: Select which folder the file will be saved in.
Confidential: A password (5 to 8 digits) can be established to prevent others from using the file.
IMPORTANT POINTS WHEN USING DOCUMENT FILING
Note the following when using document filing:
• Files saved using "Quick File" are assigned the "Sharing" property. "Sharing" files can be retrieved and printed or
transmitted by anyone, and thus Quick File should not be used to save sensitive or confidential documents that you do
not wish others to use.
• When saving a file with "File", use the "Confidential" property. A password can be set for a "Confidential" file to
prevent the file from being used by other people. Take care to keep the password of a stored "Confidential" file secret.
• The property of a stored "Confidential" file can be changed to "Sharing" by "Property Change" when the file is used.
Do not store sensitive documents or documents that you do not want to be used by others.
• Except in cases provided for by law, SHARP Corporation bears no responsibility for any damages that result from the
leaking of sensitive information due to manipulation by a third party of any data saved using the Quick File function or
File function, or incorrect operation of the Quick File function or File function by the operator that saves the data.
The above information cannot be specified when a file is saved with Quick File.
System Settings (Administrator): User List
This is used to store user names.
"Meeting minutes" folder
User Name: Name 1
File Name: Meeting handout
Password: 12345678

10
USING DOCUMENT FILING IN EACH MODE
In copy or image send mode, the original can be saved as a file on the hard drive at the same time it is copied or
transmitted. In addition, Scan to HDD can be used to save the scanned data of an original to the hard drive without
copying or transmitting the data.
Copy mode
The original is saved as an image file at the same time it is copied.
Image Send mode
Example: Base screen of scan mode
The original is saved as an image file at the same time it is scanned and transmitted.
(1) Touch the [COPY] key.
(2) Touch the [File] key or the [Quick File]
key.
(1) Touch the [IMAGE SEND] key.
(2) Touch the [Scan] tab.
(3) Touch the [File] key or the [Quick File]
key.
IMAGE SEND DOCUMENT
FILING
COPY
Colour Mode Special Modes
Plain
2-Sided Copy
Output
File
Quick File
Ready to scan for copy.
Copy Ratio
100%
0
A3
3.
1. 2.
A4A4
Original Paper Select
Auto
A4
Plain
Auto
A4
Full Colour
Exposure
Auto
B4
4.
A4
(1) (2)
Auto Auto
Auto
File
Quick File
Address Review
Send Settings
Address Entry
Address Book
USB Mem. ScanFaxInternet Fax PC Scan
Resend
Special Modes
Colour Mode
File Format
Resolution
Exposure
Original Scan:
Scan
Send:
Text
200X200dpi
PDF
Auto/Greyscale Mono2
PDF
Ready to send.
IMAGE SEND DOCUMENT
FILING
COPY
(3)
(1)(2)

11
Scan to HDD mode
The scanned original is saved as an image file. Neither printing nor transmission are performed when Scan to HDD is
used.
(1) Touch the [DOCUMENT FILING] key.
(2) Touch the [Scan to HDD] tab.
[File] key and [Quick File] key
The "File" key and/or "Quick File" key will not appear in the base screen of copy mode or image send mode if one or both of
the keys has been changed to a different function using "Customize Key Setting" in the Web page menu. In this case, touch
the [Special Modes] key in the base screen of either mode. Document filing can be performed by touching the [Quick File]
key or [File] key in the special modes menu.
Using document filing in print mode
To use document filing in print mode, select document filing in the printer driver. For more information on using document
filing in print mode, see "CONVENIENT PRINTER FUNCTIONS" in the Printer Guide.
Using document filing in PC-Fax/PC-I-Fax mode
To use document filing in PC-Fax or PC-I-Fax mode, select document filing settings in the PC-Fax driver. For more
information, see Help in the PC-Fax driver.
System Settings (Administrator): Customize Key Setting
Registration is performed in [System Settings] - [Operation Settings] - "Customize Key Setting" in the Web page menu.
File Retrieve Scan to HDD HDD Status Ex Data Access
File
Information Original
Exposure
Resolution
Comp. Ratio
Colour Mode
Special Modes
200X200dpi
Medium
Auto Auto
Auto
Auto Mono2
Ready to scan to HDD.
Press [Start] to scan original.
Scan: Store:
IMAGE SEND DOCUMENT
FILING
COPY
Text
(1)(2)

12
BASE SCREEN OF DOCUMENT FILING
MODE
Touch the [DOCUMENT FILING] key in the touch panel to open the base screen of document filing mode.
Files stored on the hard drive in the machine can be retrieved from this screen.
When user authentication is used and My Folder is configured, the file selection screen of My Folder will appear.
If the user that logged in does not have My Folder configured, the folder selection screen will appear.
☞FOLDER SELECTION SCREEN (page 27)
FILE SELECTION SCREEN (page 28)
(1) Mode switch keys
Use these keys to switch between copy, image send, and
document filing modes.
To switch to document filing mode, touch the
[DOCUMENT FILING] key.
(2) [File Retrieve] tab
Touch this tab to retrieve a file stored by document filing.
The folder selection screen will appear.
☞FOLDER SELECTION SCREEN (page 27)
(3) [Scan to HDD] tab
Touch this key to select Scan to HDD. Neither printing
nor transmission are performed.
The file will be stored in the Main folder or a custom
folder.
☞SAVING A DOCUMENT FILE ONLY (Scan to HDD)
(page 20)
(4) [HDD Status] tab
Touch this key to check how much of the machine's hard
drive is being used.
The amount used is shown as a percentage.
(5) [External Data Access] tab
This can be selected when an FTP server is stored or a
USB memory device is connected to the machine.
☞"DIRECTLY PRINTING FROM THE MACHINE" in
the Printer Guide
(6) [Search] key
Touch this key to search for a file stored in a folder.
You can search using the user name, file name, or folder
name.
☞SEARCHING FOR A STORED FILE (page 43)
(7) When retrieving a stored file, use this to select the
folder where the file is stored.
☞FOLDER SELECTION SCREEN (page 27)
File Retrieve Scan to HDD HDD Status Ex Data Access
Main Folder
User 1
User 3
User 5
User 7
User 9
User 2
User 4
User 6
User 8
User 10
Quick File Folder
Search
Folder Select
1
2
All Folders ABCD EFGHI JKLMN OPQRST UVWXYZ
IMAGE SEND DOCUMENT
FILING
COPY
(1)
(3)
(4)
(5)
(6)
(7)
(2)
HDD Status
Main Folder:10%
Custom Folder:40%
Quick File Folder:20%
Free Space:50%
Free Space:80%
0 25 50 75 100%
0 25 50 75 100%

13
This chapter explains how to save an original as an image file using the Quick File, File, and Scan to HDD functions of
document filing mode.
SAVING A FILE WITH "Quick File"
When copying, printing or transmitting a document in copy mode, print mode, or image send mode (excluding USB
memory scan mode), "Quick File" can be selected to save an image of the document to the Quick File folder.
The image can retrieved at a later time, allowing you to print or transmit the document without having to locate the
original.
As an example, the procedure for storing a document in the Quick File folder while copying is explained below.
2SAVING FILES WITH DOCUMENT
FILING
1
Place the original.
Place the original face up in the document feeder tray, or face
down on the document glass.
2
Touch the [Quick File] key.
3
Touch the [OK] key.
You will return to the base screen of copy mode and the [Quick
File] key will be highlighted.
To cancel Quick File...
Touch the [Quick File] key in the screen of step 2 so that it is not highlighted after you touch the [OK] key.
Colour Mode Special Modes
Plain
2-Sided Copy
Output
File
Quick File
Copy Ratio
100%
A3
3.
1. 2.
A4A4
Original Paper Select
Auto
A4
Plain
Auto
A4
Full Colour
Exposure
Auto
B4
4.
A4
OK
Scanned data is automatically stored
in the quick file folder. Do not store
confidential data to the folder.

14
4
Select copy settings and then press the
[COLOUR START] key ( ) or the
[BLACK & WHITE START] key ( ).
• Copying begins and the scanned document image is saved
to the hard drive.
The selected copy settings are also saved.
• To prevent accidental saving of the document, the message
"The scanned data is stored in the quick file folder." appears
for 6 seconds (default setting) after the [START] key is
pressed.
The message display time can be changed using "Message
Time Setting" in the system settings (administrator).
• If you inserted the original pages in the document feeder
tray, all pages are scanned.
• If you placed the original on the document glass, scan each
page one page at a time.
When scanning of one page finishes, replace it with the next
page and press the same [START] key that you pressed
initially.
Repeat until all pages have been scanned and then press
the [Read-End] key.
To cancel scanning...
Press the [STOP] key ( ).
When a file is stored using Quick File, the following user name and file name are automatically assigned to the file.
User Name: User Unknown
File Name: Mode_Day-Month-Year_Hour-Minute-Second
(Example: Copy_01042006_112030)
Stored to: Quick File Folder
When user authentication is used, the user name that was used for login is automatically selected.
Only the file name and location of a file stored in the Quick File Folder can be changed.
To cancel Quick File...
Touch the [Quick File] key in the screen of step 2 so that it is no longer highlighted.
or

15
SAVING A FILE WITH "File"
When copying, printing or transmitting a document in copy mode, print mode, or image send mode (excluding USB
memory scan mode), "File" can be selected to save an image of the document to the Main folder or a previously created
custom folder. The image can retrieved at a later time, allowing you to print or transmit the document without having to
locate the original.
As an example, the procedure for using "File" while copying is explained below.
1
Place the original.
Place the original face up in the document feeder tray, or face
down on the document glass.
2
Touch the [File] key.
3
Select the "File" settings.
(1) Select file information settings.
To select the user name, file name, folder, and
confidential setting, see "FILE INFORMATION" (page 17).
•Specifying a user name: (page 17)
•Assigning a file name: (page 18)
•Specifying the folder: (page 18)
•Storing a file as a confidential file: (page 19)
After configuring the above settings, you will return to this
screen. Go to the next step.
If you do not wish to assign a user name or other
information to the file, go to the next step.
(2) Touch the [OK] key.
You will return to the base screen of copy mode and the
[File] key will be highlighted.
Colour Mode Special Modes
Plain
2-Sided Copy
Output
File
Quick File
Copy Ratio
100%
A3
3.
1. 2.
A4A4
Original Paper Select
Auto
A4
Plain
Auto
A4
Full Colour
Exposure
Auto
B4
4.
A4
File Information OKCancel
Confidential
User Name User Unknown
Copy_01042006_112030
Main Folder
File Name
Stored to:
Password
(1) (2)

16
4
Select copy settings and then press the
[COLOUR START] key ( ) or the
[BLACK & WHITE START] key ( ).
• Copying begins and the scanned document image is saved
to the hard drive.
The selected copy settings are also saved.
• For the procedure for placing the original, see step 4 of
"SAVING A FILE WITH "Quick File"" (page 13).
To cancel scanning...
Press the [STOP] key ( ).
When a file is stored using File without appending file information, the following user name and file name are automatically
assigned to the file.
User Name: User Unknown
File Name: Mode_Day-Month-Year_Hour-Minute-Second
(Example: Copy_01042006_112030)
Stored to: Main Folder
When user authentication is used, the user name that was used for login is automatically selected.
To cancel the File operation...
Touch the [Cancel] key in the screen of step 3.
or

17
FILE INFORMATION
This section explains the settings that are configured in step 3 of "SAVING A FILE WITH "File"" (page 15). Specifying a
user name, file name, folder, and confidential setting makes it easier to manage and search for a file. In addition, when
confidential is selected and a password is established, other people will not be able to view the file without permission.
Specifying a user name
1
Touch the [User Name] key.
When user authentication is used, the user name that was used
for login is automatically selected. In this case, this step is not
needed.
The user name must be previously stored in "User List" in the system settings (administrator).
2
Touch the desired user name in the list
of user names that is displayed.
(1) Select the user name.
There are two ways to select the user name:
(A) Touch the key of the user name.
The touched user name is highlighted.
If you accidentally select the wrong user name, touch
the key of the correct name.
(B) Touch the key.
An area for entering the "Registration No." [---]
appears in the message display. Enter the
"Registration No." set during user registration. This
will allow you to select the user name.
(2) Touch the [OK] key.
The user name that you touched is selected and you
return to the screen of step 1. The selected user name
appears.
File Information OKCancel
Confidential
User Name User Unknown
Copy_01042006_112030
Main Folder
File Name
Stored to:
Password
User Name Cancel OK
618
ABC
User
Name 1
Name 3
Name 5
Name 7
Name 9
Name 11
Name 2
Name 4
Name 6
Name 8
Name 10
Name 12
1
2
All Users ABCD EFGHI JKLMN OPQRST UVWXYZ
12
(A) (2)
(B)

18
Assigning a file name
A file name can be assigned to the file.
Specifying the folder
Touch the [File Name] key.
A text entry screen will appear. Enter the file name and touch
the [OK] key.
A maximum of 30 characters can be entered.
For the procedure for entering text, see "6. ENTERING TEXT"
in the User's Guide.
1
Touch the [Stored to:] key.
When user authentication is used, "My Folder" of the user that logged in is automatically selected. If the user that
logged in does not have "My Folder" configured, the Main folder will appear.
2
Select the folder in which you want to
store the file.
(1) Touch the key of the folder where you want
to store the file.
If a password has been set for the folder, a password
entry screen appears. Enter the password of the touched
folder with the numeric keys (5 to 8 digits) and touch the
[OK] key.
(2) Touch the [OK] key.
File Information OKCancel
Confidential
User Name User Unknown
Copy_01042006_112030
Main Folder
File Name
Stored to:
Password
File Information OKCancel
Confidential
User Name Name 1
file-01
Main Folder
File Name
Stored to:
Password
Main Folder
User 1
User 3
User 5
User 7
User 9
User 2
User 4
User 6
User 8
User 10
OK
Stored to:
1
2
All Folders ABCD EFGHI JKLMN OPQRST UVWXYZ
(1) (2)

19
Storing a file as a confidential file
A password can be set for the file to prevent others from viewing it. Set a password (5 to 8 digits) with the numeric keys.
1
Enable the confidential property.
(1) Select the [Confidential] checkbox so that a
checkmark appears.
Confidential mode is enabled and a password can be
entered.
(2) Touch the [Password] key.
2
Enter a password (5 to 8 digits) with the
numeric keys and touch the [OK] key.
As each digit is entered, "-" changes to " ".
File Information OKCancel
Confidential
User Name
Password
Name 1
file-01
User 1
File Name
Stored to:
(1) (2)
Password
Enter password via the 10-Key pad.
OKCancel

20
SAVING A DOCUMENT FILE ONLY (Scan to
HDD)
Scan to HDD is used to store a scanned document in the Main folder or a custom folder. Neither printing nor
transmission are performed.
"Scan to HDD" SCREEN
The following screen appears when the [Scan to HDD] tab is touched in document filing mode. Touch the keys below to
select Scan to HDD settings.
The current setting of each key appears to the right of the key.
(1) [File Information] key
Information can be appended to a file stored by Scan to
HDD. The settings are configured in the same way as file
information for "File".
☞FILE INFORMATION (page 17)
(2) [Original] key
Touch this key to set the scanning size, storing size and
orientation of the original, and select 2-sided scanning
settings.
☞[Original] key (page 21)
(3) [Exposure] key
Touch this key to select the exposure for scanning.
(4) [Resolution] key*
Use this to select the resolution that will be used when
the file is transmitted.
When "Long Size" is specified, only resolution settings of
300 X 300 dpi and under can be selected.
(5) [Comp. Ratio] key*
Use this to select the colour compression ratio that will be
used when the file is transmitted in colour.
(6) [Colour Mode] key
Use this key to select the colour mode when storing a
document.
☞[Colour Mode] key (page 22)
(7) [Special Modes] key
Use this key to select special modes for Scan to HDD.
☞Special modes screen for Scan to HDD (page 23)
(8) key
This key appears when a special mode or 2-sided
scanning is selected. Touch the key to display the
selected special modes.
* This specifies a default setting for transmission of a stored file. It is not a setting that affects the stored file itself.
File Retrieve Scan to HDD HDD Status Ex Data Access
File
Information Original
Exposure
Resolution
Comp. Ratio
Colour Mode
Special Modes
Scan:
200X200dpi
Medium
Auto Store: Auto
Auto
Auto Mono2
Ready to scan to HDD.
Press [Start] to scan original.
A4
IMAGE SEND DOCUMENT
FILING
COPY
Text
(1)
(7)
(2)
(3)
(4)
(5)
(6)
(8)
Other manuals for MX 5500N - Color Laser - Copier
11
This manual suits for next models
2
Table of contents
Other Sharp Copier manuals

Sharp
Sharp AR-EB7 User manual

Sharp
Sharp AL-1220 User manual

Sharp
Sharp AR-280 User manual

Sharp
Sharp SF-2030 User manual

Sharp
Sharp SF-825 User manual

Sharp
Sharp AL-1550 User manual

Sharp
Sharp Z-810 Assembly instructions

Sharp
Sharp SF-2216 User manual

Sharp
Sharp SF-2025 User manual

Sharp
Sharp AR-164 User manual

Sharp
Sharp MX-M283 User manual

Sharp
Sharp AR-5316E Setup guide

Sharp
Sharp AR-M256 User manual

Sharp
Sharp SF-820 User manual

Sharp
Sharp AR-C160 User manual

Sharp
Sharp MX-2300N Guide User instructions

Sharp
Sharp AR-162 User manual

Sharp
Sharp AR-162 User manual

Sharp
Sharp AR-151 User manual

Sharp
Sharp AR-206 User manual