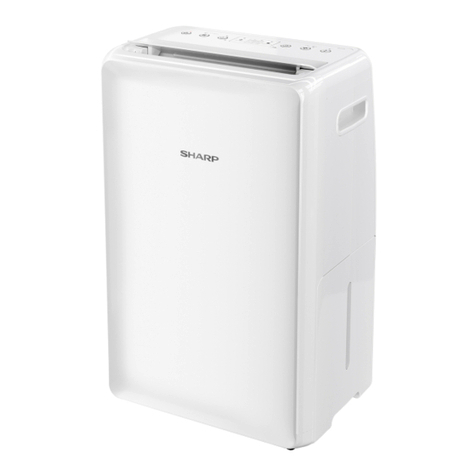
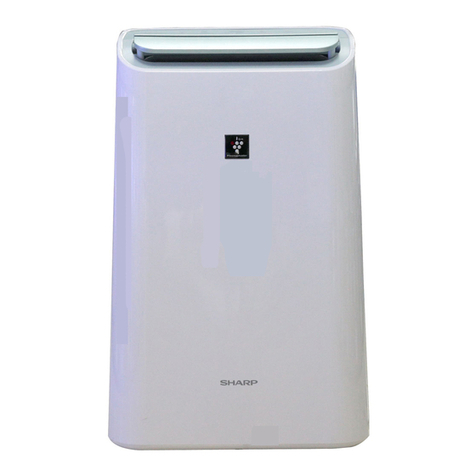
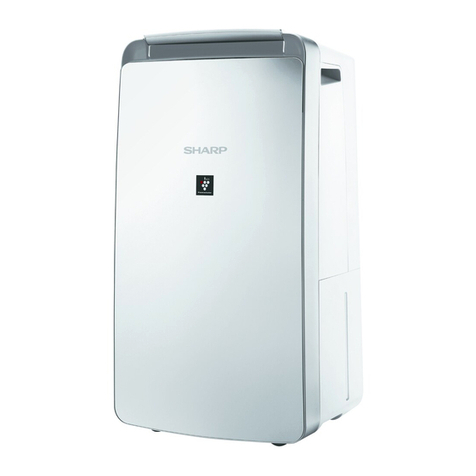
Sharp DW-J27A User manual

Device of this mark is a trademark of Sharp Corporation.
“Plasmacluster” and “Device of a cluster of grapes” are
trademarks of Sharp Corporation.
DEHUMIDIFIER
OPERATION MANUAL
ENGLISH
* The number in this technology mark indicates an
approximate number of ions supplied into air of 1 cm3, which
is measured around the center of a room with the “high-
density plasmacluster 7000” applicable floor area (at 1.2
m height above the floor) when the product is placed close
to a wall at the LAUNDRY Operation “DEODORIZE” mode
setting.
抽濕機
使用說明書
中文
DW-J27A

CONTENTS
IMPORTANT SAFETY INSTRUCTIONS .........................................................2
PART NAMES..................................................................................................4
PREPARATION................................................................................................6
OPERATION
START/STOP...............................................................................................6
DEHUMIDIFY OPERATION.........................................................................7
HUMIDITY SELECTION OPERATION.........................................................7
LAUNDRY OPERATION.............................................................................7
MOLD CONTROL OPERATION ..................................................................8
TIMER OPERATION....................................................................................8
SWING LOUVER.........................................................................................9
INTERNAL DRY OPERATION.....................................................................9
CHILD LOCK................................................................................................9
HOW TO CHANGE VARIOUS SETTING....................................................10
HOW TO DRAIN .............................................................................................11
CARE AND MAINTENANCE..........................................................................12
TROUBLESHOOTING....................................................................................14
SPECIFICATIONS...........................................................................................15
Thank you for purchasing this SHARP Dehumidifier.
Please read this manual carefully before using the product.
This manual should be kept in a safe place for handy reference.
ENGLISH
①
④
②
③
Dry air
Damp air
Water Tank
Evaporator
Condenser
Dehumidify
In accordance with the principle of generating water droplets
when warm air with much moisture gets contact with cold
items, wet air is blown in a evaporator to remove moisture.
In the following cases, the compressor will stop and will not
dehumidify.
• When the room temperature is lower than 4°C or higher than 38°C.
• The 3 minutes when the Main Unit operated again in the following
to protect the Main Unit.
* Immediately after the power plug is inserted.
* Immediately after the Laundry Drying/
Dehumidifying operation is stopped.
• When the room temperature falls below 18°C, the compressor will
stop and “HIGH” air flow mode will operate for about 12 minutes once every 45 minutes to prevent frost
damage inside the Main Unit. (DEFROST mode / The DEFROST Indicator Light is turned on. )

EN-1
ENGLISH
A powerful dehumidifier with a high concentration of
Plasmacluster ions for cleaning, quick drying, and
deodorizing room-dried laundry
MOLD CONTROL OPERATION
It prevents the propagation of the mold by releasing Plasmacluster and dehumidified air into the room.
LAUNDRY Drying
Wide angle louver swings to both top and bottom / left and right wards and provides wide-area air flow.
MOLD Filter
It collects airborne mold through Mold filter and Pre-filter.
Large Tank 4.6L
It realizes continuous dehumidification.
(more than approximate 6 hours. )
prevents
the
propagation
of
the
m
12 3
Circulate Room Air
With High Air Volume Dehumidification Air Purification
Air Purify in
fewer than 50%
of humidity
Dehumidify in
more than 60%

EN-2
IMPORTANT SAFETY INSTRUCTIONS
Always follow basic safety precautions
when using electrical appliances, including
the following:
WARNING – Always observe the following
to reduce the risk of electrical shock, fire, or
injury:
• Read all instructions before using the Main
Unit.
• Use only a 220-240 volt outlet.
• This appliance is not intended for use
by persons (including children) with
reduced physical, sensory or mental
capabilities, or lack of experience and
knowledge, unless they have been given
supervision or instruction concerning
use of the appliance by a person
responsible for their safety. Children
should be supervised to ensure they do
not play with the appliance.
• If the power cord is damaged, it must be
replaced by the manufacturer, its service
agent, a Sharp authorized Service
Center or similarly qualified persons in
order to avoid a hazard.
• Be sure to remove the power plug when
draining the water, before performing
maintenance, when removing and
attaching and replacing the filter and
when not using for a long time. Failure
to do so can cause a short circuit
resulting in electrical shock or fire.
• Do not use the Main Unit if the power cord
or plug is damaged or if the connection to
the wall outlet is loose.
• Periodically remove dust from the plug.
• Do not insert fingers or foreign objects into
the air intake or air outlet.
• When removing the power plug, always
hold the plug and never pull on the cord.
Failure to do so can cause a short circuit
resulting in electrical shock or fire.
• When removing the Main Unit, do not
damage the power cord with the casters.
Failure to do so can cause electric shock,
heat generation, or fire.
• Be careful not to damage the power cord,
it may cause electric shock, excess heat or
fires.
• Do not remove the plug when your hands
are wet.
• Do not place the Main Unit near gas
appliances or fireplaces.
• Only a Sharp Authorized Service Center
should service this dehumidifier. Contact
the nearest Service Center for any
problems, adjustments, or repairs.
• Do not operate the Main Unit in rooms
where aerosol insecticides are present. Do
not operate the Main Unit in rooms where
there is oily residue, incense, sparks from
lit cigarettes, or chemical fumes in the air.
Do not operate the Main Unit in places
where it may get wet, such as a bathroom.
• Be cautious when cleaning the Main Unit.
Strong corrosive cleansers can damage the
exterior.
• When carrying the Main Unit, first remove
the Water Tank, and then hold the Main
Unit by the handles on both sides.
• Do not drink the water in the Water Tank.
• Do not expose the Main Unit to water.
Doing so can cause a short circuit or
electrical shock.
• Clean the Water Tank regularly. When the
Main Unit is not in use, dispose of the water
in the Water Tank. Leaving water in the
Water Tank can cause mold, bacteria, and
bad odors. In rare cases, such bacteria can
be a health hazard.
• Check for bent hose/falling height when
you want to drain continuous, and place the
hose where it will securely drain.
• Keep the temperature around the hose
above freezing point when using the hose.
Inner water may leak in the room and
dampen the furniture or may cause electric
shock/leakage, fire.
NOTE - What to do if the Main Unit interferes
with radio or TV reception.
If the Dehumidifier interferes with radio or
television reception, try one or more of the
following measures:
• Adjust or reposition the receiving antenna.
• Increase the distance between the Main
Unit and the radio or TV.
• Connect the equipment into an outlet on a
circuit different from that of the radio or TV
receiver.
• Consult the dealer or a qualified radio or
TV technician.
EN-3
ENGLISH
CAUTIONS CONCERNING
OPERATION
• Do not block the air intake or air outlet.
• Do not place the Main Unit near or on
hot objects, such as stoves or heaters, or
where it may come into contact with steam.
• Always operate the Main Unit in an upright
position.
• When moving the Main Unit, use the
handles on both sides. Do not move the
Main Unit when it is in operation.
• If the Main Unit is on easily damaged
flooring, an uneven surface, or thick-piled
carpet, lift it up when moving.
• When moving the Main Unit by its casters,
move it slowly and in a horizontal direction.
• Turn the Main Unit off and remove the
Water Tank before moving, take care not to
catch your fingers.
• Do not operate the Main Unit without the
Water Tank properly installed.
• Clean the exterior with a soft cloth only.
Do not use volatile fluids or detergents.
The Main Unit surface may be damaged
or cracked with Benzene paint thinner or
polishing powder. In addition, the sensors
may malfunction as a result.
• Keep the Main Unit away from water.
• Be sure to wipe off any excess water on the
outside of the Water Tank.
• Do not shake the Water Tank with holding
the carrying handle.
• Avoid spilling water when removing or
cleaning the Water Tank.
• Do not remove the Float.
• Do not use the detergents for maintenance
of the Water Tank and Tank Cover. If cause
deformation, tarnishing, cracking (water
leakage).
• Do not scrub the Back Panel hard during its
maintenance.
INSTALLATION GUIDELINES
• Avoid locations where the sensors are
exposed to direct wind. Doing so can cause
the Main Unit to malfunction.
• Avoid locations where furniture, fabrics, or
other objects can come in contact with the
Main Unit and interfere with the intake and
outtake of air.
• Avoid locations where the Main Unit
is exposed to condensation or drastic
changes in temperature. Appropriate room
temperature is between 4 - 38°C.
• Place the Main Unit on a level and stable
surface with sufficient air circulation. When
placed on heavy carpet, the Main Unit may
vibrate slightly. Place the Main Unit on a
level surface to avoid water leakage from
the Water Tank.
• Avoid locations that generate grease or
oily smoke. Doing so can cause the Main
Unit exterior to crack and the sensors to
malfunction.

EN-4
PART NAMES
1
3
4
5
6
7
16
15
17 18
21
19
20
2
8
9
10
11
MAIN UNIT
(FRONT)
(BACK)
12
13
14
1Operation Panel 12 Tank Cover
2Air Outlet 13 Water Level Window
3Vertical Louver 14 Tank Knob
4Horizontal Louver 15 Mold Filter
5Main Unit 16 Back Panel (Pre-Filter)
6Handle (2 Locations) 17 Air Inlet
7Front Display 18 Temperature/Humidity Sensor
8Water Tank 19 Drainage Hole, Rubber Cap
9Drain Outlet 20 Caster (4 Locations)
10 Float 21 Power Cord, Plug
11 Tank Handle

EN-5
ENGLISH
OPERATION PANEL
FRONT DISPLAY
1
Humidity Monitor
Indicates the approximate humidity level in the
room.
Timer Monitor
Indicates setting time or remaining time of ON/
OFF timer.
HUMIDITY SELECT Monitor
Indicates setting humidity of HUMIDITY
SELECT mode.
2Plasmacluster Ion Indicator Light (Blue)
3OFF Timer Indicator Light
4ON Timer Indicator Light
5Tank FULL Indicator Light (Red)
Blinking when the Water Tank is Full.
6DEFROST Indicator Light
Indicates the Main Unit operates the
DEFROST mode.
7MOLD CONTROL Sign
Indicates the operation mode of the MOLD
CONTROL operation.
16
910
23457
11
8
12345
67
Humidity 20% to 90% is displayed.
20%
or less 90%
or more
Press the button with " " to start.
1Power ON/OFF Button 7H.SWING Button, Indicator Light
2MOLD CONTROL Button, Indicator Light 8ON/OFF TIMER Button
3LAUNDRY Button, Indicator Light 9INTERNAL DRY Indicator Light
4DEHUMIDIFY Button, Indicator Light 10 Child-Lock Indicator Light
5HUMIDITY SELECT Button 11 Light Sensor
6V.SWING Button, Indicator Light

EN-6
FILTER INSTALLATION
PREPARATION OPERATION
START / STOP
♪♪〜
START STOP
AUTO OFF Function
The operation will stop automatically after 12
hours in case the Main Unit has been forgotten
to be turned off.
When you want to run the Main Unit for more
than 12 hours continuously or drain water
continuously, turn off the Auto Off function.
(Page 10)
The operation is not stopped while operating with
"Deodorization operation".
1. Remove the Back Panel.
Back Panel
2. Remove the plastic bag from the
Mold filter.
Mold Filter
3. Install the Mold filter in the correct.
Mold Filter
4. Install the Back Panel.
Click

EN-7
ENGLISH
AUTO :
The humidity and the fan speed are automatically
controlled by the "temperature and humidity
sensor".
SELECT :
You can select your favorite humidity. (See below)
DEHUMIDIFY OPERATION
♪
♪
♪
♪♪
Temperature 4-26oC 26-38oC
Humidity 60% 55%
♪♪ ♪ ♪
♪♪
DRY(AUTO) :
When you want to dry with less power
consumption, the Main Unit will repeat the
Dehumidifying operation and the Air Flow mode
to dry the laundry.
DEODORIZE :
When you want to deodorize your laundry, the
Main Unit operates at "HIGH" fan speed.
Make sure the air blowing out from air outlet is
directed to your laundry.
You cannot select the Plasmacluster Ion "OFF".
LAUNDRY OPERATION
♪
♪
♪
♪♪
HUMIDITY SELECT
When you press the DEFUMIDIFY button to set
SELECT mode, target humidity level can be
changed to cycle among 60%, 70%, 80%, 40% and
50%RH in seguence.
* HUMIDITY SELECT can be works only when in
SELECT mode.

EN-8
OPERATION TIMER OPERATION
The Main Unit automatically starts once the
selected time passes.
The Main Unit automatically stops once the
selected time comes.
ON TIMER
OFF TIMER
(with the Main Unit OFF)
(with the Main Unit ON)
Front Display
Front Display
MOLD CONTROL OPERATION
……
♪ ♪ ♪ ♪ ♪♪
1hour 2hour 3hour 12hour Cancel
……
♪ ♪ ♪ ♪ ♪♪
1hour 2hour 3hour 12hour Cancel
【for about 80 minutes】
(Cleanliness Monitor: blinking with Purple)
※Operating time depends on the room environment,
usage conditions, and location of the Main Unit.
NOTE
• When the air in the room is purified and the humidity
becomes low, the main unit operates with “Low” air
flow. (
Cleanliness Monitor :
lighting in Blue)
If the humidity becomes high again, it will switch to
the above operation under the condition of “in a high
humidity”.
In a low humidity
In a high humidity
It operates in “HIGH” mode of dehumidification
until the humidity of the room decreases to
the level which the mold less likely appears.
Once the humidity in room becomes low, the
model switches the operation with maximum
airflow.
This mode is used to suppress the mold through
strong air flow with Plasmacluster Ion.
When turned ON, it firstly starts ventilation for 10
minutes with maximum air flow, and then repeats
following operation.
(Cleanliness monitor shows actual operating mode.
Purple: high air volume, Blue: low air volume.)
It operates automatically the Plasmacluster Ion
“ON”.
After 8 seconds, the beep sounds.

EN-9
ENGLISH
CHILD LOCK
SWING LOUVER
INTERNAL DRY OPERATION
When you set the Internal Dry operation, the Main
Unit automatically operate the Air Flow mode it
after stopping.
The operation of the operation panel will be locked.
more 3 sec.
more 3 sec. more 3 sec.
VERTICAL SWING
DRY, DEODORIZE DEHUMIDIFY
WIDE
UP
DOWN
♪
♪
♪
♪♪
♪
♪
♪
♪♪
DRY, DEODORIZE DEHUMIDIFY
ROUND
WIDE
SPOT
♪♪〜
ON CANCELLATION
CANCEL(OFF)
CANCEL(OFF)
HORIZONTAL SWING
(with the Main Unit ON)

EN-10
OPERATION
HOW TO CHANGE VARIOUS SETTING
Type of setting
Function Setting
Auto Restart
If the Main Unit is
unplugged or if there is a
power failure, the Main Unit
will resume operation with
the previous settings after
power is restored.
Cancellation
ON (default)
Sound Indicator Setting
You can turn off the beeping
sound when the Main Unit
stops perating as follows.
When the Main Unit stops
operating as the following
situation, you can turn off
the beeping sound.
Cancellation
ON(default)
Light Control
You can select the
brightness of the Front
Display.
Turn off
When set to “Turn off”, the
“Darker” light illuminates for 8
seconds after operation starts
and then the light turns off.
The FULL Light flashes darker
only when the Water Tank is
full.
Darker
Auto (default)
Light automatically switches
based on room brightness.
Room
Front Display
bright brighter
dark darker
* When "SLEEP" mode operate;
Room is bright : light is darker
Room is dark : light is OFF
PLASMACLUSTER ION
ON/OFF
OFF
ON (default)
Auto Off
The operation will stop
automatically after 12 hours
in case the Main Unit has
been forgotten to be turned
off.
Cancellation
ON (default)
Adjusting Sensor
Sensitivity
Light Sensor
Low
Standard (default)
High
You can change the functions in the table "Type of setting".
1. Turn off the Main Unit power.
2.
more 3 sec.
♪
3. Select "Function number".
Forward Reverse
or
・・・・
Set ♪
4. Select "Setting number".
Forward Reverse
or
Set ♪
5. Press Power ON/OFF Button to
finish the setting mode.
♪〜
Turn off
♪
♪
♪
♪

EN-11
ENGLISH
HOW TO DRAIN
1. Remove the Plug.
2. Remove the Water Tank and the
Rubber Cap.
Rubber Cap
3. Set the hose in the Back Hole.
Back Hole
Commercial hose :
inner diameter 15mm
(outer diameter up to
21mm)
4. Insert the hose firmly to bottom in the
Drain Hole.
HoseDrain OutletDrain Stopper
Back Hole
5. Install the Water Tank.
When you want to drain continuous
How to pipe the hose
♪♪・・・
When the Water Tank
is Full, the TANK FULL
Indicator Light is blinking.
Always have the tip slanted.
Do not bend.
Under cold weather,
do not put the hose
into the water.
1. Remove the Water Tank.
Tank knob
Water Tank
2. Dispose the water of the Water Tank.
▶
Drain Outlet
3. Install the Water Tank.
Drain Outlet
NOTE
• Clean the Water Tank about once a week. If you
do not clean the Water Tank, it can cause mold,
bacteria, and bad odors.

EN-12
Water Tank (About once a week) BACK PANEL / SENSOR
(About once every 2 weeks)
MAIN UNIT (About once a month)
CARE AND MAINTENANCE
Remove the dust
gently with a
cleaning tool such
as a vacuum cleaner.
Wipe with a dry, soft cloth.
Do not wash with water.
1. Remove the Tank Cover, and dispose
of the water.
▶
Tank Cover
2. Wash the inside of the Water Tank.
NOTE
• If the dirt is heavy, please dissolve neutral
detergent in lukewarm water and wash.
3. Dry the tank with a soft cloth.
Check the float.
4. Install the Tank Cover.
NOTE How to clean and remove a heavy dirt.
Back Panel 1.Add a small amount of neutral
detergent to water and soak for
about 10 minutes.
CAUTION
Do not give excessive pressure to
the back panel when scrubbing it.
2.Rinse off the neutral detergent with
clean water.
3.Completely dry the filter in a well-
ventilated area.

EN-13
ENGLISH
The filter is fragile, so be
careful not to give too much
pressure.
Remove the dust on the Mold Filter.
CAUTION
Do not wash the filter. Do not expose to sunlight.
(Otherwise the filter may lose efficacy.)
MOLD FILTER
(About once a month)
MOLD FILTER
LIFE OF FILTERS
Filter life varies depending on the room environment,
usage conditions, and location of the Main Unit.
We recommend replacing the filter more frequently if
the Main Unit is used in conditions significantly more
severe than a normal household.
•Mold Filter About 1 years after opening
Replacement Filter Model
Consult your dealer when purchasing a replacement
filter.
Mold Filter(1 unit)
FZ-J27KFE
Disposing of filter
Dispose of used filter according to local laws and
regulations.
Mold Filter material:
• Polypropylene
• Polyethylene
FILTER REPLACEMENT
When storing for a long
period (not in use)
1. Operate the INTERNAL DRY
OPERATION.
①Start operation.
②Select the Internal
Dry Operation.
③Stop Operation.
*Start the Internal Dry Operation, and
stop automatically after approximate 90
minutes.
2. Dispose tank water and care the Main
Unit.
3. Store in a dry place away from direct
sunlight.
Plastic bag
♪
more 3 sec.
♪〜

EN-14
ERROR DISPLAY
TROUBLESHOOTING
Before contact for service, check the following points to make sure that the problem is not a Main Unit malfunction.
If error occurs repeatedly, contact the Sharp Service
Center.
The room becomes hot.
• The Main Unit generates heat during LAUNDRY DRY
operation and DEHUMIDIFY operation and the room
temperature will rise. Warm air will be come out from
the air outlet, but this is normal and does not indicate
a problem with the Main Unit.
The Main Unit does not dehumidify.
• The dehumidification level varies with the size,
structure, temperature and humidity level of the room.
When room temperature or humidity level is low, the
dehumidification level will be low in general.
• Check whether the Back Panel is clean.
• Check whether the air outlet or air inlet is not
blocked.
Sounds
• The Main Unit may make clicking or ticking sounds
when it is generating ions.
• The Main Unit may seem rather loud for the first 2 to
3 minutes when the Main Unit is turned on. This is the
sound of the compressor starting-up and is perfectly
normal.
• A soft, swishing noise can be heard immediately after
the Main Unit is turned on or off, and also during
operation. This is the sound of the refrigerant flowing
inside the Main Unit.
The sound is too loud.
• The Main Unit will sound loudly for the first few
seconds upon power-on when the room temperature
is low.
• Check whether the Main Unit is placed on a stable
and level floor.
• Check whether the Back Panel is not clogged.
There is a discrepancy between the
Main Unit’s Humidity Monitor and
another hygrometer in the room.
• There is a difference in the humidity level within the
same room.
• The sensor have different measurement parameters.
The water leaks.
• Check whether the main unit is placed horizontally.
• When draining continuous, check whether the hose is
inserted all the way seated.
• If the Water Tank is full, drain
the water.
• If the Water Tank is not
properly placed, place the
Water Tank correctly.
• The Main Unit is operating
with the DEFROST mode.
• Laundry DRY (Auto)
operation has completed, and
the operation has stopped.
• The operation has stopped
with the Auto Off function.
• Unplug the Main Unit, wait
one minute, and then plug
the Main Unit in again.

EN-15
ENGLISH
SPECIFICATIONS
Model DW-J27A
Power Supply 220V-240V/50Hz
Dehumidifying Capacity※130°C/80%RH 27 L/day
26.7°C/60%RH 17 L/day
Power Consumption※230°C/80%RH 420 W
26.7°C/60%RH 345 W
Standby Power※30.7 W
Recommended Room Size for Dehumidifying※435-71 m2
Recommended Room Size for High density Plasmacluster ion※533 m2
Water Tank Capacity Approx. 4.6 L
Cord Length Approx. 2 m
Dimensions 359 mm(W) × 248 mm(D) × 665 mm(H)
Weight 16.6 kg
※1 The amount of humidity that a dehumidifier removes from the air in a day when room temperature and relative humidity are
kept at 30°C/80%RH and 26.7°C/60%RH respectively.
※2 The consumption value when fan speed reaches the highest.
※3 When the Main Unit’s power plug is inserted in a wall outlet it consumes the standby power in order to operate electrical
circuits.
※4 Based on standards of JEMA.
※5 Recommended Room Size for High density Plasmacluster ion in which approximately 7000 ions per cubic centimeter can
be measured in the center of the room when the Main Unit is placed next to a wall, is running at LAUNDRY Operation “DE-
ODORIZE” mode settings, and is at a height of approximately 1.2 meters from the floor.

感謝購買 SHARP 抽濕機。
在使用本產品之前,請先詳細閱讀本使用說明書。
在閱讀後,請妥善保存本使用說明書,以便於日後有需要時查閱。
目錄
安全注意事項....................................................................................................
2
各部分名稱........................................................................................................
4
使用前...............................................................................................................
6
操作方法
運行開始 /停止.............................................................................................
6
除濕模式.......................................................................................................
7
濕度設定.......................................................................................................
7
乾衣除濕模式................................................................................................
7
抑菌防霉模式................................................................................................
8
定時開 /關機 ................................................................................................
8
搖擺送風.......................................................................................................
9
內部除濕模式................................................................................................
9
兒童安全鎖 ...................................................................................................
9
各種功能的變更設定.....................................................................................
10
排水方法 ...........................................................................................................
11
保養與清潔........................................................................................................
12
故障時的檢查事項.............................................................................................
14
規格 ..................................................................................................................
16
除濕
根據高濕度的溫暖空氣接觸冰冷物品時會產生水滴的原理,
將潮濕空氣吸入蒸發器中,去除水分。
在下列情況中,壓縮機可能會停止,進行除霜模式,且不會除濕。
• 室溫低於 4°C 或高於 38°C。
• 在下列情況中,主機會再次運行 3 分鐘,以保護主機。
*插上電源插頭後立即運行。
*在乾衣除濕/除濕模式停止後立即進行。
• 當室溫低於 18°C 時,壓縮機會停止,且每 45 分鐘,會運行約
12 分鐘「強」風量模式,以避免主機內部受到結霜的傷害(除
霜模式/除霜指示燈亮起)。
①
④
②
③
乾空氣
潮濕空氣
儲水箱
蒸發器
冷凝器
中文

ZH-1
中文
此款高效能的抽濕機配備高濃度PCI,可淨化空氣、快速乾燥以
及為室內晾乾之衣物除臭。
抑菌防霉模式
在房間釋放PCI及除濕空氣,以防止霉菌擴散。
12 3
強風量送風 除濕 空氣淨化
濕度低於 50%RH,
啟動空氣淨化功能
濕度高於 60%RH,
啟動除濕功能
廣域送風
廣角導風板可以上下左右擺動,促使大面積的空氣流動。
霉菌過濾網
透過霉菌過濾網和前置過濾網收集空氣中的霉菌
4.6L 大容量儲水箱
可持續除濕。(超過大約 6 小時。)
* 請參考封面的注釋。

ZH-2
安全注意事項
使用電器時,務必遵守以下各方面的基本安全
預防措施,包括:
警告 -請務必遵守下列事項,以降低觸電、
火災或受傷風險:
• 在使用主機之前,請先閱讀所有注意事項。
• 僅能使用 220-240V 插座。
• 除在監護人或負責其安全人士的適當監督或
指導下使用外,主機不適合身體機能或心智
能力退化者,或缺乏操作經驗和知識的人士
(包括兒童)使用。應適當監管兒童,確保
不會將此機器做為玩具。
• 如果電源線損壞時,必須由製造商或其代
理、SHARP 公司特約服務中心,或具有同
等資格的人員負責更換,以免發生危險。
• 在進行排水、維護、拆卸、安裝及更換過濾
網之前,以及長時間不使用時,請務必拔掉
電源插頭,以避免可能會因為短路而導致觸
電或引起火災。
• 如果電源線或插頭已損壞,或牆上的電源插
座已鬆脫,請勿使用主機。
• 定期清除電源插頭上的灰塵。
• 請勿將手指或異物插入吸氣或吹出口。
• 在拔掉電源插頭時,請務必緊握插頭拔出,
絕不可拉扯電線,以避免可能會因短路而導
致觸電或引起火災。
• 在移動主機時,請小心腳輪,勿損壞電源
線,以避免可能會導致觸電、發熱或火災。
• 請小心不要損壞電源線,以免導致觸電、過
熱或發生火災。
• 請勿以潮濕的手拔除電源插頭。
• 請勿在氣體設備或壁爐附近使用主機。
• 此款抽濕機僅可由 SHARP 公司授權之服務
中心進行維修。 若主機出現任何問題、需要
調校或修理,請聯絡客戶服務中心。
• 請勿在噴灑噴霧殺蟲劑後使用主機。請勿在
有油性殘餘物、焚香、點燃香菸的火花、空
氣中有化學煙霧的空間中使用主機。
請勿在潮濕的環境(例如浴室) 中使用主
機。
• 在清潔主機時請注意。具強力腐蝕性的清潔
劑可能會損壞外殼。
• 在搬運主機時,請先取出儲水箱,並握住主
機兩側的把手搬運。
• 切勿飲用儲水箱內的水。
• 切勿使主機接觸水源,以免可能會導致短路
或觸電。
• 定期清潔儲水箱。在不使用主機時,請倒空
儲水箱中的水,若不倒空可能會發霉、滋生
細菌及產生惡臭,在少數情況下,此類細菌
可能會損害健康。
• 在想要連續排水時,請先檢查彎曲軟管/排
水的高度,並將軟管設置在安全排放位置。
• 在使用軟管時,請使軟管周圍的溫度保持在
冰點以上。內部的水可能會洩漏至室內及弄
濕家具,或導致觸電及火災。
注意 - 主機干擾收音機或電視接收時的相關
措施。
如果本抽濕機對收音機或電視接收造成干擾時,
請嘗試採取下列一項或多項措施修正干擾:
• 調整或重新放置接收天線。
• 增加主機與收音機或電視之間的距離。
• 將主機與收音機或電視接收器連接至不同電
路的電源插座。
• 若需要協助,請諮詢經銷商或合格的收音機
或電視技術人員。
Table of contents
Other Sharp Dehumidifier manuals

Sharp
Sharp DW-J27FA User manual

Sharp
Sharp DW-E16FA-W User manual

Sharp
Sharp DW-D20A User manual

Sharp
Sharp UD-P16E-W User manual

Sharp
Sharp DW-E16FA User manual

Sharp
Sharp DW-D12A User manual

Sharp
Sharp Plasmacluster DW-J27FV User manual

Sharp
Sharp DW-71-H User manual

Sharp
Sharp DW-209EX User manual

Sharp
Sharp DW-RN23A-W User manual