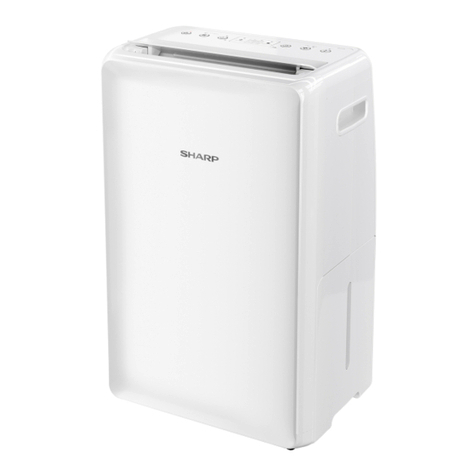
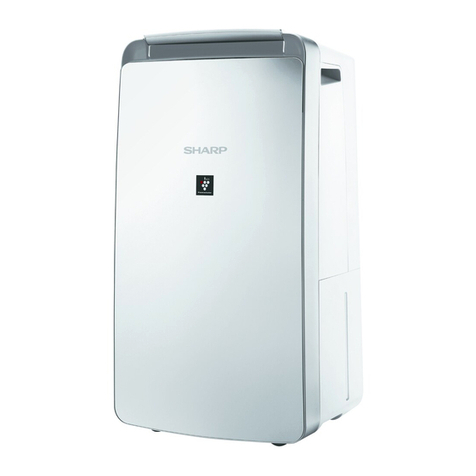
Sharp DW-RN23A-W User manual

中文
ENGLISH
DW-RN23A-W
DEHUMIDIFIER
OPERATION MANUAL
抽濕機 使用說明書

ENGLISH
Thank you for purchasing this SHARP Dehumidifier.
Please read this manual carefully before using the product.
This manual should be kept in a safe place for handy reference.
CONTENTS
IMPORTANT SAFETY INSTRUCTIONS ..................................... EN-1
INSTALLATION........................................................................... EN-4
OPERATING ENVIRONMENT.................................................... EN-5
PART NAMES.............................................................................. EN-5
OPERATING INTRODUCTION – HOW TO OPERATE.............. EN-6
OPERATING INTRODUCTION.................................................... EN-7
AUTO RESTART FUNCTION...................................................... EN-8
WATER TANK FULL AUTO-STOP FUNCTION ......................... EN-8
AUTO-DEFROST FUNCTION..................................................... EN-8
COMPRESSOR PROTECTION FUNCTION............................... EN-8
TEMPERATURE PROTECTION FUNCTION.............................. EN-9
HUMIDITY PROTECTION FUNCTION ....................................... EN-9
HIGH TEMPERATURE FAN SPEED SWITCH FUNCTION ....... EN-9
ERROR CODES........................................................................... EN-9
CONTINUOUS DRAINAGE FUNCTION..................................... EN-9
MAINTENANCE.......................................................................... EN-10
TROUBLESHOOTING................................................................ EN-10
TECHNICAL SPECIFICATION................................................... EN-11

EN-1
ENGLISH
IMPORTANT SAFETY INSTRUCTIONS
Always follow basic safety precautions when using
electrical appliances, including the following:
WARNING – Always observe the following to reduce the
risk of electrical shock, fire, or injury:
• Read all instructions before using the Main Unit.
• Use only a 220-240 volt outlet.
• This appliance can be used by children aged from 8 years and
above and persons with reduced physical, sensory or mental
capabilities or lack of experience and knowledge if they have been
given supervision or instruction concerning use of the appliance in
a safe way and understand the hazards involved. Children shall not
play with the appliance. Cleaning and user maintenance shall not
be made by children without supervision.
• The appliance shall be installed in accordance with national wiring
regulations.
• If the Power cord is damaged, it must be replaced by the
manufacturer, its service agent, a Sharp Authorized Service Center
or similarly qualified persons in order to avoid a hazard.
• Be sure to remove the Power plug when draining the water, before
performing maintenance and when not using for a long time.
Failure to do so can cause a short circuit resulting in electrical
shock or fire.
• Do not use the Main Unit if the Power cord or plug is damaged or if
the connection to the wall outlet is loose.
• Periodically remove dust from the plug.
• Do not insert fingers or foreign objects into the air intake or air
outlet.
• When removing the Power plug, always hold the plug and never
pull on the cord.
• Failure to do so can cause a short circuit resulting in electrical
shock or fire.
• When removing the Main Unit, do not damage the Power cord with
the casters.
• Failure to do so can cause electric shock, heat generation, or fire.
• Be careful not to damage the Power cord, it may cause electric
shock, excess heat or fires.
• Do not remove the plug when your hands are wet.
• Do not place the Main Unit near gas appliances or fireplaces.

EN-2
• Only a Sharp Authorized Service Center should service this
dehumidifier. Contact the nearest Service Center for any problems,
adjustments, or repairs.
• Do not operate the Main Unit in rooms where aerosol insecticides
are present. Do not operate the Main Unit in rooms where there is
oily residue, incense, sparks from lit cigarettes, or chemical fumes
in the air. Do not operate the Main Unit in places where it may get
wet, such as a bathroom.
• Be cautions when cleaning the Main Unit. Strong corrosive
cleansers can damage the exterior.
• When carrying the Main Unit, first remove the Water Tank, and then
hold the Main Unit by the handles on both sides.
• Do not drink the water in the Water Tank.
• Do not expose the Main Unit to water. Doing so can cause a short
circuit or electrical shock.
• Clean the Water Tank regularly. When the Main Unit is not in use,
dispose of the water in the Water Tank. Leaving water in the Water
Tank can cause mold, bacteria, and bad odors. In rare cases, such
bacteria can be a health hazard.
• Check for bent hose/falling height when you want to drain
continuous, and place the hose where it will securely drain.
• Keep the temperature around the hose above freezing point when
using the hose. Inner water may leak in the room and dampen the
furniture or may cause electric shock/leakage, fire.
NOTE –What to do if the Main Unit interferes with radio or
TV reception.
If the Dehumidifier interferes with radio or television
reception, try one or more of the following measures:
• Adjust or reposition the receiving antenna.
• Increase the distance between the Main Unit and the radio or TV.
• Connect the equipment into an outlet on a circuit different from that
of the radio or TV receiver.
• Consult the dealer or a qualified radio or TV technician.
CAUTIONS CONCERNING OPERATION
• Do not block the air intake or air outlet.
• Do not place the Main Unit near or on hot objects, such as stoves
or heaters, or where it may come into contact with steam.
• Always operate the Main Unit in an upright position.
• When moving the Main Unit, use the handles on both sides. Do not
move the Main Unit when it is in operation.

EN-3
ENGLISH
• If the Main Unit is on easily damaged flooring, an uneven surface,
or thick-piled carpet, lift it up when moving.
• When moving the Main Unit by its casters, move it slowly and in a
horizontal direction.
• Turn the Main Unit off and remove the Water Tank before moving,
take care not to catch your fingers.
• Do not operate the Main Unit without the Water Tank properly
installed.
• Clean the exterior with a soft cloth only.
• Do not use volatile fluids or detergents.
• The Main Unit surface may be damaged or cracked with Benzene
paint thinner or polishing powder. In addition, the sensors may
malfunction as a result.
• Keep the Main Unit away from water.
• Be sure to wipe off any excess water on the outside of the Water
Tank.
• Do not shake the Water Tank with holding the carrying handle.
• Avoid spilling water when removing or cleaning the Water Tank.
• Do not use the detergents for maintenance of the Water Tank.
It cause deformation, tarnishing, cracking (water leakage).
• Do not scrub the dust filter hard during its maintenance.
INSTALLATION GUIDELINES
• Avoid locations where the sensors are exposed to direct wind.
Doing so can cause the Main Unit to malfunction.
• Avoid locations where furniture, fabrics, or other objects can come
in contact with the Main Unit and interfere with the intake and
outtake of air.
• Avoid locations where the Main Unit is exposed to condensation or
drastic changes in temperature. Appropriate room temperature is
between 5 - 35°C.
• Place the Main Unit on a level and stable surface with sufficient air
circulation. When placed on heavy carpet, the Main Unit may
vibrate slightly. Place the Main Unit on a level surface to avoid
water leakage from the Water Tank.
• Avoid locations that generate grease or oily smoke. Doing so can
cause the Main Unit exterior to crack and the sensors to
malfunction.
• Always store the Main Unit in an upright position.
• Do not tilt the Main Unit horizontally or turn upside down.

EN-4
INSTALLATION
BEFORE FIRST USE Let the Main Unit stand for 4 hours as this will allow the
refrigerant to settle.
1. Your dehumidifier must be operated in an enclosed area to be most effective.
2. Close all doors, windows, and other outside openings to the room. The
effectiveness of the dehumidifier depends on the rate at which new moisture-
laden air enters the room.
3. Place dehumidifier in a location that does not restrict airflow through the front of
the Main Unit.
4. A dehumidifier operating in a room will have little or no effect in drying an
adjacent enclosed storage area, such as a closet, unless there is adequate
circulation of air in and out of the area. Let may be necessary to install a second
dehumidifier in the enclosed area for satisfactory drying.
5. Ensure that the Main Unit is placed on a stable and flat surface. If the surface is
not stable there is a risk that the Main Unit may be unstable and cause
excessive vibration and that water will be released.
6. The dehumidifier must have at least 20 cm free space around it.
20cm
20cm
20cm 20cm

EN-5
ENGLISH
OPERATING ENVIRONMENT
• Working temperature: 5 °C to 35 °C.
• This Main Unit is suitable for indoors, e.g. Living room, study, office room,
warehouse, basement, underground garage.
• Make sure the door and window are closed before turning on the Main Unit to get
the best result.
• Ensure that the Main Unit is placed on a stable and flat floor surface. If the floor’s
surface is not even, there is a risk that the Main Unit may be unstable and topple
over. Also excessive vibration and noise may be result.
PART NAMES
1. Handle
2. Control panel
3. Louver (air outlet)
4. Power cord and plug
5. Caster
6. Water tank
7. Drain pipe (not supplied)
8. Air intake and dust filter
1
2
3
4
5
67
8

EN-6
OPERATING INTRODUCTION – HOW TO OPERATE
Control panel
The name and function of control panel
1. POWER – Press this button to switch the power on and off.
2. MODE – Press this button to set the Laundry mode and Dehumidify mode.
3. HUMIDITY – Press this button to set the desired humidity.
4. OFF TIMER/CHILD LOCK – Press this button to set the Main Unit shutdown
time. The display will show the shutdown time accordingly. Press this button for
3 seconds, could turn on or off the Child lock function, the CHILD LOCK
Indicator will light up or off.
5. FAN SPEED – Press this button to adjust the fan speed (there are 2 fan speeds).
6. SWING LOUVER – Press this button to turn on or off the Swing function.
7. ON/OFF Indicator – Lights up when the Main Unit is on, turns off when Main
Unit is off.
8. LAUNDRY Indicator – Turns on during the LAUNDRY mode.
9. DEHUMIDIFY Indicator – Turns on during the DEHUMIDIFY mode.
10. DEFROST Indicator – Lights up when the Main Unit is in the defrost cycle.
11. DISPLAY – Shows the current humidity and the current status of each functions.
12. FULL Indicator – Lights up when the water tank is full.
13. CHILD LOCK Indicator – When the child lock is active, this indicator lights up.
14. TIMER Indicator – When the Off Timer is active, this indicator lights up.
15. FAN SPEED Indicator – When the speed of the fan is high or low the
respective indicator illuminates.
16. SWING Indicator – When the louver is in operation, this indicator turns on.
123 456
16151413121110978

EN-7
ENGLISH
OPERATING INTRODUCTION
Power On
Plug in the Main Unit to the main power supply and press the POWER button, it will
start and the air outlet louver will open. When powered on, the Main Unit will start to
dehumidify with the fan set to high. The compressor will activate after three minutes.
If the Main Unit is turned off via the POWER button and not unplugged from the
main power supply, it will start up again in the same mode.
Power Off
While the Main Unit is operating, press the POWER button to turn it off.
Mode setting
You can change the function of dry clothes and dehumidify. To do this press the
MODE button.
1. LAUNDRY mode: When the LAUNDRY Indicator is illuminated, the Main Unit
will continually dehumidify whatever the ambient humidity is. The fan speed will
be locked in the LAUNDRY mode and can not be changed.
2. DEHUMIDIFY mode: When the DEHUMIDIFY Indicator is illuminated, the Main
Unit will dehumidify the air. While in this mode, the fan speed can be set and the
humidity setting can be controlled.
Humidity setting
To change the humidity level, press the HUMIDITY button, each time the button is
pressed, the display will change as follows CO ~40%~45%~50%~55%~60%~65%~
70%~CO. After setting the humidity level, the display will revert to the current
moisture level detected by the internal sensor.
When the Main Unit detects that the ambient humidity is 2 % lower than the set
humidity, the Main Unit will stop dehumidifying, the fan will keep working in low
speed. When the Main Unit detects that the ambient humidity is 2 % higher than the
set humidity, the Main Unit will start dehumidifying and the fan come back to work
at set speed. When the ambient humidity is ≤30 %, the LO icon will be displayed;
When the ambient humidity is ≥80 %, the HI icon will be displayed.
When the Main Unit is in the CO status it will dehumidify until the humidity is 30%,
at which point it will stop. Should the humidity level rise above 30%, then the
dehumidifier will turn back on. The Main Unit default setting is CO when switch on
the Main Unit in the beginning.
When operating in the LAUNDRY mode, the Main Unit is running in CO status.
Off Timer
To start the Off timer function, press the TIMER button; the TIMER Indicator will
illuminate. On each press of the TIMER button, the display will change from 1 to 8
hours in 1 hour steps. 0H means that the Off Timer mode is canceled.
While in the Off Timer mode, if the water tank is full or if it enters the Auto-defrost
mode, the Main Unit will stop.
EN-8
Fan Speed setting
To control the speed of the fan, press the FAN SPEED button. There are two fan
speeds which are low or high; each time the FAN SPEED button is pressed, the
speed of the fan toggles between these two speeds. Note that the fan speed can
not be set while in the LAUNDRY mode.
Swing Louver
To make the air outlet louver open and close continually, press the SWING button.
Pressing the SWING button again disables this function.
Child Lock function
To prevent accidental operation of the Main Unit, the control panel can be locked.
AUTO RESTART FUNCTION
If the Main Unit is unplugged or if there is a power failure, the Main Unit will resume
operation with the previous settings after power is restored.
WATER TANK FULL AUTO-STOP FUNCTION
When the water tank is full, the Main Unit will stop operation, the air outlet louver
will close and a buzzer will sound. To reset, remove the water tank, empty and
replace. When the empty water tank is put back into the Main Unit, it will restart.
Note that the compressor will take about 3 minutes to operate.
AUTO-DEFROST FUNCTION
If the Main Unit is used in a low temperature environment, the internal evaporator
may be covered by frost. In order to make sure the Main Unit operates normally, the
Main Unit has Auto-defrost function. Should the internal sensor detect a
temperature of ≤-1 °C the Main Unit will enter Auto-defrost function. That means it
will run continuously in the DEHUMIDIFY mode for 30 minutes, then the Main Unit
will start the defrost cycle, the DEFROST Indicator will illuminate, the compressor
will stop and that fan will operate at high speed.
When temperature of evaporator is ≥2 °C and the Main Unit has been in the defrost
cycle for 10 minutes, the Auto-defrost function will turn off and the compressor
turns on. At this point the Main Unit will start to dehumidify and the DEFROST
Indicator will turn off.
While in the defrost cycle and the temperature of the evaporator is ≥0 °C for two
minutes, the Auto-defrost function is canceled.
COMPRESSOR PROTECTION FUNCTION
Should there be a problem with the Main Unit causing the compressor to stop, the
compressor will turn off for 3 minutes. Normally the compressor will restart after 3
minutes, if it does not unplug the Main Unit for an hour and try again. If it still does
not start, call for service.

EN-9
ENGLISH
TEMPERATURE PROTECTION FUNCTION
If the Main Unit detects that the ambient temperature is outside of the normal
operating range of 5 °C to 35 °C, it will shut down. When the normal operating
range is reached, the compressor will start. Note that it will take the compressor 3
minutes to start working once the normal temperature range is met.
HUMIDITY PROTECTION FUNCTION
If the Main Unit detects low humidity of <30 % the display will indicate LO and it will
stop any dehumidifying action and the fan will operate at the lowest speed.
If the humidity is over 80 %, the display will indicate HI and keep dehumidifying.
HIGH TEMPERATURE FAN SPEED SWITCH FUNCTION
When the Main Unit is dehumidifying in a high temperature environment and the fan
speed is set to low, it will switch automatically to the high speed.
This is to prevent excessive load on the compressor. When the ambient air
temperature reduces, the fan speed will return to the low setting.
ERROR CODES
There are number of error codes which may appear in the display, these are as
below. When the error code is displayed, it will flash. If any of these error codes are
experienced, call for service.
C1 – Indicates that there is a fault with the evaporator temperature sensor. In this
condition, the Main Unit will stop working.
C2 – Indicates that there is a fault with the ambient air temperature sensor. In this
condition, the Main Unit will stop working.
C8 – The temperature of the evaporator checked every 8 minutes, if this is within
≤3 °C of the ambient air temperature for 5 consecutive checks, the Main Unit
will shut down and the error code C8 is displayed.
CONTINUOUS DRAINAGE FUNCTION
Should it be necessary to provide continuous drainage, this can be achieved by
fitting a 15 mm inner diameter pipe to the Drain hole on the rear of the Main Unit.
When installed, water will drain through the pipe and not into the water tank.
Ensure that the Drain pipe runs in a downwards direction, and it is not bent or
damaged in any way so that the water runs freely out of the Main Unit.
When fitting the Drain pipe, make sure that it is pushed all the way into the Drain
hole so that it pushed over the drain outlet which is located about 70mm inside the
Main Unit from the rear cover of the Main Unit.
Refer to page 5 for the location of the Drain pipe connection port.

EN-10
MAINTENANCE
When cleaning your dehumidifier:
• Use a soft clean cloth.
• Do not use the alcohol, gasoline, and other benzene chemical solvents.
• To clean the filter, remove it, then use a vacuum cleaner to clear any dust which
may have built up. If necessary, use water to clean, then place it in ventilated area
until dry.
• Unplug the Main Unit from the main power supply before cleaning.
Other advice:
• Before moving the Main Unit, unplug the main power supply and empty the water
tank.
• If not using the Main Unit for a long time, unplug the Main Unit from the main
power supply, empty the water tank, wait for 2 days to make sure the Main Unit
inside completely dry before packing.
TROUBLESHOOTING
Dehumidifier does not work.
Does not dehumidify.
• Check that the Main Unit is plugged into the main power supply and turned on.
• Check that the water tank is not full. If it is full, empty the tank.
• Check that the water tank is installed correctly.
• Clean the dust filter.
• Ensure that the air flow through the Main Unit is not obstructed.
Does not remove enough moisture from the air.
• Reduce ventilation (closed doors and windows).
• Ensure that there are not too many sources of humidity.
• Ensure that the Main Unit is not being used to dehumidify a room in excess of
the size noted in the specifications.
Main Unit does not run smoothly on the casters.
• Ensure that the casters are clean and not clogged with debris.

EN-11
ENGLISH
TECHNICAL SPECIFICATION
Power Supply 220–240 V / 50 Hz
Dehumidifying Capacity (L/day) 30 °C, 80% RH 23
26.7 °C, 60% RH 13
Power Consumption (W)
35 °C, 90% RH 310
30 °C, 80% RH 265
26.7 °C, 60% RH 230
Recommended Room Size for Dehumidifying (m²) 27 - 54
Refrigerant R134a
Refrigerant volume (g) 150
Water Tank Capacity (L) Approx. 3.8
Dimensions (W x H x D) (mm) 355 x 567 x 259
Weight (kg) 14.9
Cord Length (m) Approx. 2.1
Standby Power (W) 0.23
Fuse for PCB 2010 T2A/250V;
2010 T5A/250V or 2010 T6.3A/250V
- RH - Relative Humidity
- Room size based on JEMA (Japan Electrical Manufacturers’ Association) standard.

中 文
感謝購買 SHARP 抽濕機。
使用本產品前,請先詳細閱讀本使用說明書。
閱讀後,請妥善保存本使用說明書,以便於日後有需要時查閱。
目錄
安全注意事項 ...................................................................... ZH-1
安裝 ...................................................................................... ZH-3
操作環境 .............................................................................. ZH-3
部件名稱 ............................................................................. ZH-4
操作介紹 – 操作方法 .......................................................... ZH-5
操作簡介 ............................................................................. ZH-6
自動記憶功能 ...................................................................... ZH-7
儲水箱滿水自動停止功能 ................................................... ZH-7
自動除霜功能 ...................................................................... ZH-7
壓縮機保護功能 .................................................................. ZH-7
溫度保護功能 ...................................................................... ZH-7
濕度保護功能 ..................................................................... ZH-8
高溫風速切換功能 .............................................................. ZH-8
錯誤代碼 ............................................................................. ZH-8
連續排水功能 ..................................................................... ZH-8
保養 ..................................................................................... ZH-8
故障時的檢查事項.............................................................. ZH-9
規格 ..................................................................................... ZH-9

中文
ZH-1
安全注意事項
使用電器時,務必遵守以下各方面的基本安全預防措施,包括:
警告 – 請務必遵守下列事項,以降低觸電、火災或受傷風險:
• 使用主機前,請先閱讀所有注意事項。
• 僅能使用 220-240V 插座。
• 8歲以上兒童以及身體機能或心智能力退化者,或缺乏操作經驗和知識
的人士可在他們接受了相關安全使用本主機的監督或指導以及充分理
解所涉及的危險的前提下使用本主機。
兒童不得玩弄此機器,兒童不得在無人看管的前提下對本主機進行清潔
以及維護。
• 本主機的安裝需遵循國家的接線規定。
• 如果電源線損壞時,必須由製造商或其代理、SHARP公司特約服務中
心,或 具 有 同 等 資 格 的 人 員 負 責 更 換,以 免 發 生 危 險。
• 在 進 行 排 水 時、清 潔 前,以 及 長 時 間 不 使 用 時,請 務 必 拔 掉 電 源 插 頭,以
避免可能會因為短路而導致觸電或引起火災。
• 如果電源線或插頭已損壞,或牆上的電源插座已鬆脫,請勿使用主機。
• 定期清除電源插頭上的灰塵。
• 請勿將手指或異物插入吸氣口或吹出口。
• 在拔掉電源插頭時,請務必緊握插頭拔出,絕不可拉扯電線,以避免可
能會因短路而導致觸電或引起火災。
• 在移動主機時,請小心腳輪,勿損壞電源線,以避免可能會導致觸電、發
熱或火災。
• 請小心不要損壞電源線,以免導致觸電、過熱或發生火災。
• 請勿以濕手拔除電源插頭。
• 請勿在氣體設備或壁爐附近使用主機。
• 此款抽濕機僅可由 SHARP 公司授權之服務中心進行維修。 若主機出
現任何問題、需要調校或修理,請聯絡客戶服務中心。
• 請勿在噴灑噴霧殺蟲劑後使用主機。請勿在有油性殘餘物、焚香、點燃
香煙的火花、空氣中有化學煙霧的空間內使用主機。請勿在潮濕的環境
(例如浴室) 使用主機。
• 請注意在清潔主機時,具強力腐蝕性的清潔劑可能會損壞外殼。
• 在搬運主機時,請先取出儲水箱,並握住主機兩側的把手搬運。
• 切勿飲用儲水箱內的水。
• 切勿使主機接觸水源,以免可能會導致短路或觸電。
• 定期清潔儲水箱。在不使用主機時,請倒空儲水箱中的水,若 不 倒 空 可
能會發霉、滋生細菌及產生惡臭,在少數情況下,此類細菌可能會損害
健康。

ZH-2
• 如想要連續排水時,請先檢查彎曲軟管/排水的高度,並 將 軟 管 設 置 在
安全排放位置。
• 在使用軟管時,請使軟管周圍的溫度保持在冰點以上。內部的水可能會
流出至室內及弄濕家具,或導致觸電及火災。
注意 –主機干擾收音機或電視接收時的相關措施。
如果本抽濕機對收音機或電視接收造成干擾時,請嘗試採取下列一
項或多項措施修正干擾:
• 調整或重新放置接收天線。
• 增加主機與收音機或電視之間的距離。
• 將主機與收音機或電視接收器連接至不同電路的電源插座。
• 若需要協助,請諮詢經銷商或合格的收音機或電視技術人員。
操作注意事項
• 請勿堵塞吸氣口或吹出口。
• 請勿在熱源物體附近或在熱源物體上(例如爐灶或暖爐,或可能會接觸
到蒸汽的場所)使用主機。
• 主機僅能直立使用,切勿平放。
• 在移動主機時,請緊握兩側的把手。切勿移動正在運行中的主機。
• 在易損、不平坦的地面及較厚的地毯上,應 將 主 機 抬 起 移 動。
• 此機帶有腳輪,移動時,請在水平方向緩慢移動。
• 在移動前,應先關閉主機及拆除儲水箱,請小心不要夾傷手指。
• 在正確安裝儲水箱之前,切勿運行主機。
• 僅可使用軟布清潔主機外部。
• 切勿使用揮發性液體或清潔劑。
• 苯塗料稀釋劑或拋光粉可能會損壞主機表面或使表面裂開,此外,亦可
能會導致感測器發生故障。
• 請使主機保持遠離水源。
• 請務必徹底抹掉儲水箱外面多餘的水。
• 請勿握住把手搖晃儲水箱。
• 在拆卸或清潔儲水箱時,應避免水溢出。
• 請勿使用清潔劑清洗儲水箱,以免導致變形、變色、龜裂(漏水)。
• 在保養時,請勿用力擦洗背板。
安裝指南
• 請勿將主機(感測器)安裝在直接面對出風口的位置,以免可能會影響主
機正常工作。
• 請避免在可能會與傢俱、織物或其他物品接觸的位置使用主機,以免可
能無法確保吸氣口或吹出口暢通。

中文
ZH-3
• 請勿在溫差極大,或 會 導 致 主 機 直 接 暴 露 於 冷 凝 環 境 的 位 置 使 用。主 機
僅適合在 5 -35°C 之間的室溫下使用。
• 安裝時必須穩固,且通風良好。將主機放置於鋪設厚地毯的位置,可能
會導致主機微微震動。請將主機置於平整的表面,以避免儲水箱漏水。
• 請避免在會產生油脂或油煙的場所使用主機,以免可能會導致主機表
面裂開以及感測器發生故障。
• 主機僅能直立存放。
• 切勿水平地傾側主機,或將主機上下倒置。
安裝
首次使用前 請先讓主機閒置 4 小時,以讓製冷劑沉澱。
1. 此抽濕機必須在密閉區域下操作,才能發揮最佳效能。
2. 請關閉房間內的所有門窗及其他通往外面的開口。抽濕機的效能,會受到潮
濕空氣進入房間的速度所影響。
3. 請將抽濕機放置在不會妨礙空氣流通主機前方的位置。
4. 在房間內操作的抽濕機,只能略微地甚至完全不能對鄰近的密閉儲存區域
(例 如 儲 藏 櫃)進 行 抽 濕,除 非 出 入 該 區 域 的 空 氣 能 夠 充 分 流 通。您 可 能 需
要在密閉區域中安裝第二部抽濕機,以達到所需的抽濕效果。
5. 請確保主機放置在穩固平坦的表面上。如果表面不穩固,則主機可能會不穩
定,並 導 致 過 度 振 動 及 漏 水 風 險。
6. 抽濕機四周必須至少預留 20 厘米
的閒置空間。
操作環境
• 操作溫度:5 °C 至 35 °C.
• 此主機適合於室內環境中使用,例如客廳、書房、辦公室、倉庫、地下室和地下
停車庫。
• 啟動主機前,請先確保關閉門窗以獲得最佳的抽濕效果。
• 請確保主機放置在穩固平坦的地面上。如果地面不平整,則主機可能會不穩定
並且有翻倒風險。此外,亦可能會導致過度振動和發出噪音。
20cm
20cm
20cm 20cm

ZH-4
部件名稱
1. 把手
2. 控制面板
3. 導風板 (吹出口)
4. 電源線、電源插頭
5. 腳輪
6. 儲水箱
7. 排水管(未提供)
8. 吸氣口和過濾網
1
2
3
4
5
67
8

中文
ZH-5
操作介紹 – 操作方法
操作面板
操作面板名稱及功能
1. 電源按鍵 – 按下此按鍵可啟動和關閉電源。
2. 模式按鍵– 按下此按鍵可設置乾衣除濕模式和除濕模式。
3. 濕度設定按鍵 – 按下此按鍵可設定所需的濕度。
4. 定時關機功能/兒童安全鎖按鍵 – 按下此按鍵可設置主機的關機時間。顯示
屏將會顯示關機時間。長按此鍵 3 秒,便可開啟或關閉兒童安全鎖功能,兒
童安全鎖指示燈將會亮起或熄滅。
5. 風速按鍵 – 按下此按鍵可調校風速(有 2 種風速可選)。
6. 搖擺送風按鍵 – 按下此按鍵可開啟或關閉搖擺送風功能。
7. 開/關指示燈 – 主機啟動時,此指示燈會亮起,關閉時便會熄滅。
8. 乾衣除濕指示燈 – 當處於乾衣除濕模式時,此指示燈便會亮起。
9. 除濕指示燈 – 當處於除濕模式時,此指示燈便會亮起。
10. 除霜指示燈 – 當主機處於除霜循環時,此指示燈便會亮起。
11. 顯示屏 – 顯示目前濕度及每項功能的目前狀態。
12. 水滿指示燈 – 儲水箱滿水時,此指示燈便會亮起。
13. 兒童安全鎖指示燈 – 當兒童安全鎖啟動時,此指示燈便會亮起。
14. 定時器指示燈 – 當關機定時器啟動時,此指示燈便會亮起。
15. 風速指示燈 – 當風速高或低時,相應的指示燈便會亮起。
16. 搖擺送風指示燈 – 當導風板操作時,此指示燈便會亮起。
123 456
16151413121110978

ZH-6
操作簡介
開啟電源
將主機連接電源,然後按下電源按鍵,主機便會啟動,吹出口導風板會打開。啟
動後,主機便會以高風速開始抽濕。壓縮機將在三分鐘後啟動。
如果您使用電源按鍵關閉主機,並且沒有拔出插頭,再次啟動時主機將會處於
相同的模式。
關閉電源
主機操作時,按下電源按鍵可將其關閉。
模式設置
您可以變更乾衣和除濕功能。如需變更,請按下模式按鍵。
1. 乾衣除濕模式:當乾衣除濕指示燈亮起時,不論環境濕度如何,主機都會持
續除濕。在乾衣除濕模式下,風速將被鎖定,無法變更。
2. 除濕模式:當除濕指示燈亮起時,主機將會進行抽濕。在此模式下,您可以設
置風速及濕度。
濕度設置
如要變更濕度等級,請按下濕度按鍵,每按下按鍵一次,顯示屏將會依照 CO ~
40% ~ 45% ~ 50% ~ 55% ~ 60% ~ 65% ~ 70% ~ CO 的次序變更。設置濕
度等級後,顯示屏將會恢復顯示內置感測器所檢測的目前濕度等級。
當主機檢測到環境濕度比設定的濕度低 2% 時,主機便會停止除濕,風扇將會
繼續以低速運作。當主機檢測環境濕度比設定的濕度高 2% 時,主機便會開始
除濕,風扇會以設定的速度重新運作。當環境濕度 ≤30% 時,便會顯示 LO 圖
示;當環境濕度 ≥80% 時,則會顯示 HI 圖示。
當主機處於 CO 狀態時,便會一直除濕,直至濕度為 30% 時才停止。如果濕度
等級上升至超過 30%,抽濕機將會重新啟動。剛啟動主機時,主機的預設設置
為 CO。
當在乾衣除濕模式下操作時,主機便會在 CO 狀態下運作。
定時關機功能
如要啟動定時關機功能,請按下此鍵;該指示燈便會亮起。每按一次,顯示將以 1
小時為間距從 1 小時增加至 8 小時。0H 表示定時關機模式已取消。
在定時關機模式下,如果儲水箱滿水或進入自動除霜模式,則主機將會停止。
風速設置
如要控制風速,請按下風速按鍵。此抽濕機有兩種風速可供選擇,分別是低速或
高速; 每次按下風速按鍵時,風速都會在這兩種速度之間切換。請注意,在乾衣
除濕模式下,將不能設置風速。
Table of contents
Other Sharp Dehumidifier manuals

Sharp
Sharp DW-E16FA-W User manual

Sharp
Sharp DW-J27A User manual

Sharp
Sharp DW-P22A User manual

Sharp
Sharp DW-D12A User manual

Sharp
Sharp DW-208EX User manual

Sharp
Sharp UD-P16E-W User manual

Sharp
Sharp Plasmacluster DW-J27FV User manual

Sharp
Sharp DW-209EX User manual

Sharp
Sharp DW-E16FA User manual

Sharp
Sharp DW-71-H User manual