Sharp UX-40 User manual

OPERATION MANUAL
FACSIMILE
MODEL
UX-40
UX-60
1. Installation
2. Sending Documents
3. Receiving Documents
4. Making Copies
5. Making Telephone Calls
6. Answering Machine Connection
7. Special Functions
8. Printing Reports and Lists
9. Maintenance
10. Troubleshooting
UX-40 / UX-60 FACSIMILE
Downloaded from: http://www.usersmanualguide.com/

9
1. Installation
1. Installation
Unpacking Checklist
If any are missing,
contact your dealer or
retailer.
Before setting up,
make sure you have
all of the following
items.
Original document
support
Handset
Handset lead
Fax paper
(Sample roll)
Emergency labels
Operation
manual
Telephone
line cord
Extension
telephone socket
adapter
al l - ux40. book Page 9 Thur sday, November 18, 1999 2: 35 PM
Downloaded from: http://www.usersmanualguide.com/

33
2. Sending
Documents
140 mm
148 mm
216 mm
600 mm
52 g/m²
157 g/m²
297 mm
216 mm
80 g/m²
2. Sending Documents
Transmittable Documents
Size and weight
The size and weight of documents that you can load in the document
feeder depend on whether you load one page at a time or several pages
at once.
Loading one page at a time:
Loading everal page at once:
Minimum
size Maximum
size
Minimum
weight Maximum
weight
Minimum
size Maximum
size
Minimum
weight Maximum
weight
140 mm
148 mm
52 g/m²
al l - ux40. book Page 33 Thur sday, November 18, 1999 2: 35 PM
Downloaded from: http://www.usersmanualguide.com/

54
3. Receiving Documents
Using TEL/FAX Mode
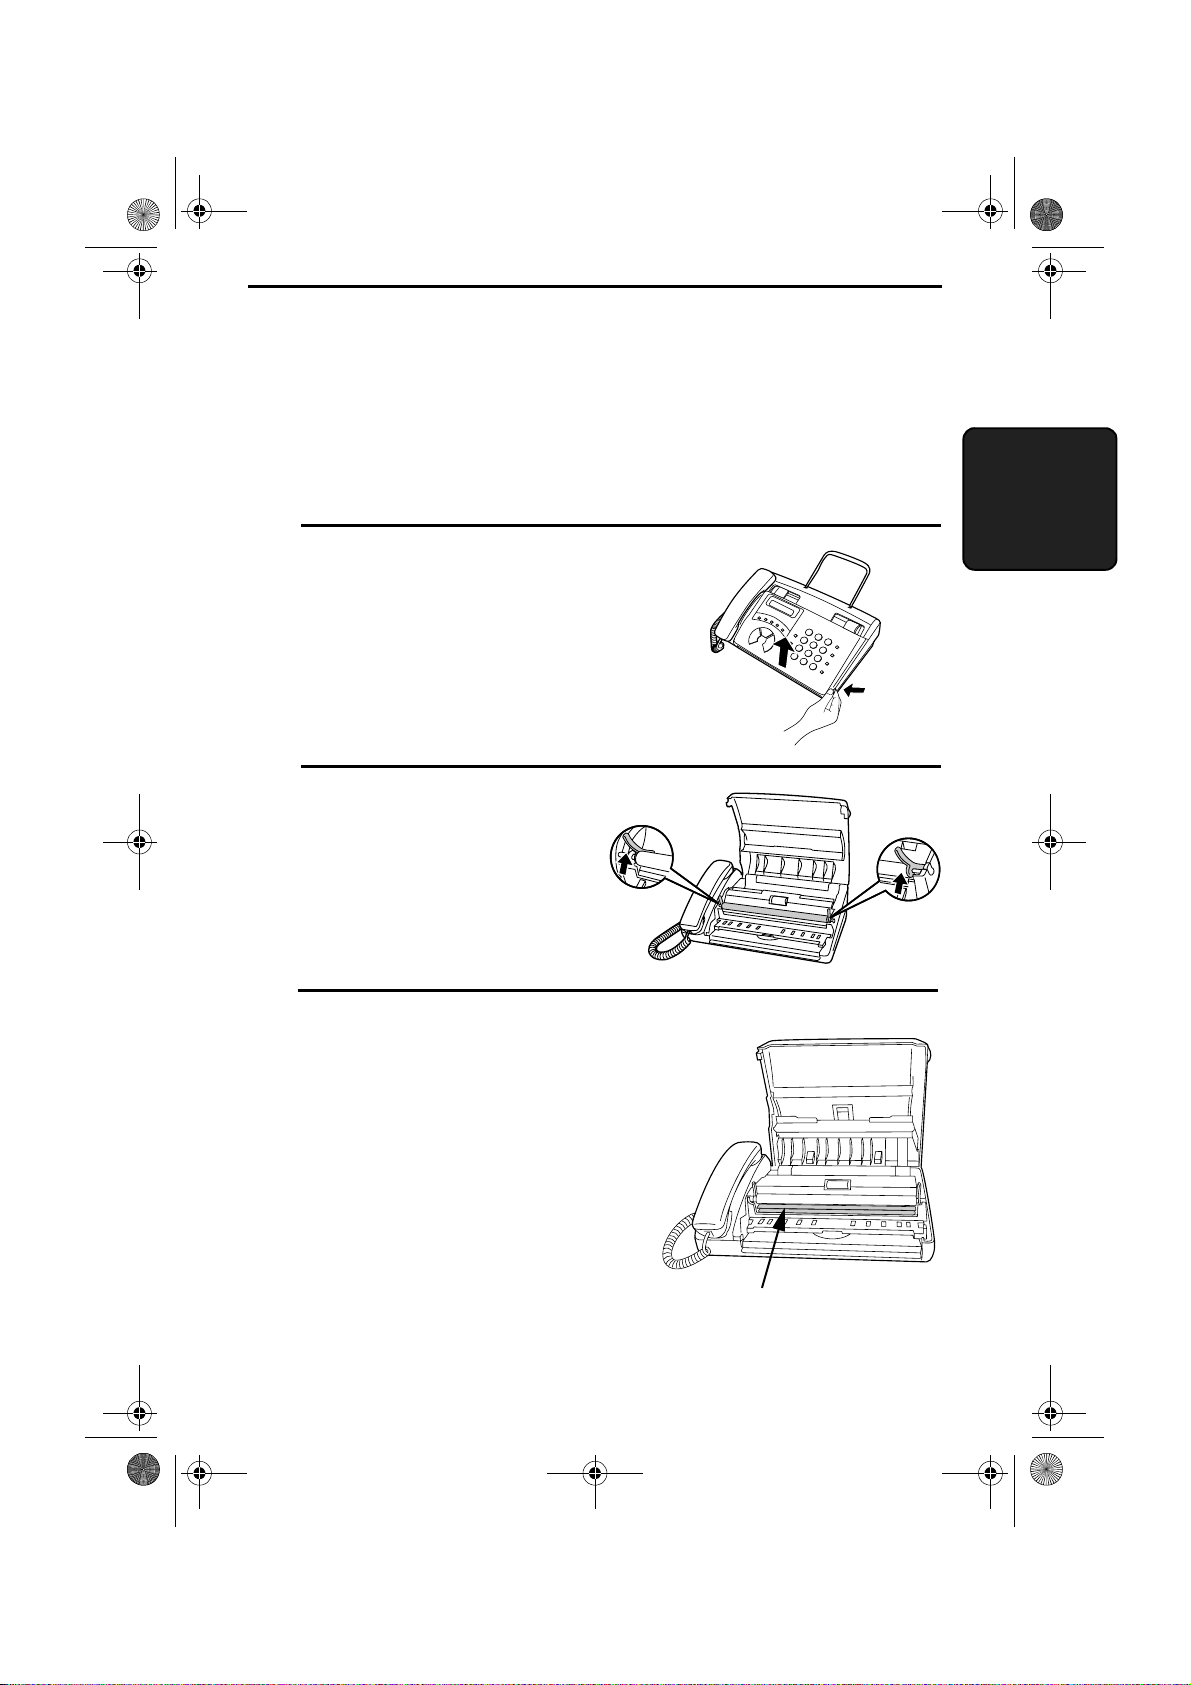
Press the RESOLUTION/
RECEPTION MODE key
until the arrow in the
display points to TEL/FAX.
RESOLUTION
RECEPTION MODE
FAX
TEL
A.M.
TEL/FAX
When the reception mode is set to TEL/FAX, your fax machine
automatically answers all calls on two rings. After answering, your
fax monitors the line for about five seconds to see if a fax tone is
being sent.
♦If your fax machine detects a fax tone (this means that the call is an
automatically dialled fax), it will automatically begin reception of
the incoming document.
♦If your fax machine doesn’t detect a fax tone (this means that the
call is a voice call or manually dialled fax), it will make a ringing
sound (called pseudo ringing) for 3 seconds to alert you to answer.
If you don’t answer within this time, your fax will send a fax tone to
the other machine to allow the calling party to send a fax manually
if they desire.
Note: Only the fax will alert you to voice calls or manually dialled faxes
by pseudo ringing. An extension phone connected to the same line will
not ring after the connection has been made. The handset of a parallel
extension telephone can, however, be picked up to answer the call. If
pseudo ringing does not stop when the handset is lifted, press "#" key on
the dial pad of the phone (this is only possible from a tone dial phone). If
pseudo ringing is not cancelled in this way, the fax machine will send fax
tones down the line, rendering conversation impossible.
al l - ux40. book Page 54 Thur sday, November 18, 1999 2: 35 PM
Downloaded from: http://www.usersmanualguide.com/

61
4. Making
Copies
4. Making Copies
Your fax machine can also be used to make copies.
♦You can use this function to make a sample copy of a document
before faxing to see if the resolution or contrast needs adjustment.
1Load the document.
The display will show:
•If desired, adjust the resolution and/
or contrast.
READY TO SEND
RESOLUTION
RECEPTION MODE
2Press the COPY/HELP key. COPY/
HELP
al l - ux40. book Page 61 Thur sday, November 18, 1999 2: 35 PM
Downloaded from: http://www.usersmanualguide.com/

62
5. Making Telephone Calls
Your fax machine can be used like a regular telephone to make and
receive voice calls.
♦This equipment is not designed for making emergency telephony
calls when the power fails. Alternative arrangements should be
made for access to emergency service.
1Pick up the handset or press the
SPEAKER key. Listen for the dial
tone.
2Dial the number using one of the
following methods:
•Normal Dialling: Enter the full
telephone number with the numeric
keys.
•Rapid Key Dialling: Press the
appropriate Rapid Key.
•Speed Dialling: Press the SPEED
DIAL key, and enter the 2-digit
Speed Dial number with the
numeric keys.
3Speak with the other party when they
answer.
•If you pressed the SPEAKER key,
pick up the handset to talk.
or
SPEAKER
A
Example: Press
Rapid Key A
al l - ux40. book Page 62 Thur sday, November 18, 1999 2: 35 PM
Downloaded from: http://www.usersmanualguide.com/

66
6. Answering Machine Connection
Connecting an Answering Machine
If desired, you can connect an answering machine to your fax
machine's TEL. SET socket. This will allow you to receive both
voice messages and faxes when you are out.
1Remove the seal covering the TEL.
SET socket.
TEL.
SET TEL.
LINE
Make sure the
TEL.LINEsocket
is connected to
the wall socket.
To answering machine's
telephone line socket.
If desired, you can
connect an
extension phone to
your answering
machine's extension
phone socket.
2Connect the answering machine's
telephone line plug to the TEL. SET
socket using the extension telephone
socket adaptor provided.
•For Eire: Insert the plug of the
answering machine line directly
into the TEL. SET socket.
al l - ux40. book Page 66 Thur sday, November 18, 1999 2: 35 PM
Downloaded from: http://www.usersmanualguide.com/

73
7. Special
Functions
7. Special Functions
Caller ID (Requires Subscription to Service)
If you subscribe to a caller identification service from your telephone
company, you can set your fax machine to display the name and/or the
number of the caller while the fax rings. Caller-ID may not function if
the machine is connected to a PBX.
Important:
♦To use this function, you must subscribe to a caller identification
service from your telephone company.
♦Your fax may not be compatible with some caller identification ser-
vices.
.1Press these keys:
The display will show:
2Press the *
**
* key once.
The display will show:
4
FUNCTION
CALLER-ID
1=YES,2=NO
OPTION SETTING
PRESS *OR #
al l - ux40. book Page 73 Thur sday, November 18, 1999 2: 35 PM
Downloaded from: http://www.usersmanualguide.com/

85
8. Printing
Lists
8. Printing Lists
You can print the Telephone Number List showing the fax/telephone
numbers you have stored for automatic dialling, and the Anti Junk
Number List showing the numbers you are blocking.
To print a list, follow the steps below.
1Press the FUNCTION key and 2.
The display will show:
2Press the * key or # key until the
desired list appears in the display.
FUNCTION
2
LISTING MODE
3Press the START key to print the list.
or
START
Telephone Number List
This list shows the fax numbers that have been programmed for
automatic dialling.
al l - ux40. book Page 85 Thur sday, November 18, 1999 2: 35 PM
Downloaded from: http://www.usersmanualguide.com/

87
9. Maintenance
9. Maintenance
Cleaning the scanning glass and rollers
Clean the scanning glass and rollers frequently to ensure the quality of
your transmitted images and copies.
1Grasp the finger hold and pull up to
open the operation panel.
3Wipe the scanning glass and rollers
with a cotton pad.
•Make sure that all dirt and stains
(such as correcting fluid) are
removed, as dirt will cause vertical
lines on transmitted images and
copies.
Scanning
glass
2Flip up the green levers on each side
of the white roller.
al l - ux40. book Page 87 Thur sday, November 18, 1999 2: 35 PM
Downloaded from: http://www.usersmanualguide.com/

89
10. Trouble-
shotting
10. Troubleshooting
Problems and Solutions
Line error
Problem Solution
LINE ERROR appears in
the display. Try the transaction again. If the error persists, check
the following:
•Check the connection. The cord from the TEL.
LINE socket to the wall socket should be the
correct type for the fax machine.
•Make sure there are no modem devices sharing the
same telephone line.
•Check with the other party to make sure their fax
machine is functioning properly.
•Have your telephone line checked for line noise.
•Try connecting the fax machine to a different
telephone line.
•If the problem still occurs, your fax machine may
need service.
al l - ux40. book Page 89 Thur sday, November 18, 1999 2: 35 PM
Downloaded from: http://www.usersmanualguide.com/

Problems and Solutions
90
Dialling and transmission problems
Problem Solution
No dial tone when you
pick up the handset. •Make sure the handset cord is connected to the
correct socket. See Connecting the handset in
Connections in Chapter 1.
Dialling is not possible. •Make sure the power cord is properly plugged into
a power outlet.
•Make sure that the telephone line is properly
connected to both the TEL. LINE socket and the
wall socket.
•Make sure that the correct line cord for the fax
machine is used.
The power is on, but no
transmission takes place. •Make sure that the receiving machine has paper.
•Make sure that the telephone line cord is plugged
into the TEL. LINE socket, and not the TEL. SET
socket.
•If the receiving machine is in manual mode with no
attendant, reception will not be possible.
•Check the display for error messages.
•Pick up the handset and check for a dial tone.
Nothing is printed at the
receiving end. •Make sure that the document for transmission is
placed face down in the feeder.
A distorted image is
received at the other end. •Noise on the telephone line may cause distortion.
Try sending the document again.
•Make a copy of the document on your fax machine.
If the copy is also distorted, your fax machine may
need service.
al l - ux40. book Page 90 Thur sday, November 18, 1999 2: 35 PM
Downloaded from: http://www.usersmanualguide.com/

Problems and Solutions
91
10. Trouble-
shooting
Reception and copying problems
Problem Solution
The power is on, but no
reception takes place. •Make sure that the telephone line cord is plugged
into the TEL. LINE socket, and not the TEL. SET
socket. Make sure the correct line cord is used.
The printing paper comes
out blank when you try to
receive a document.
•Make sure that the document is loaded properly in
the feeder of the transmitting machine. Make a
copy or print a report to confirm the printing ability
of your machine.
•Make sure that the thermal paper is properly
loaded in your fax machine. (If the roll has been
loaded incorrectly, nothing will be printed.)
The received document is
faint. •Ask the other party to send higher contrast
documents. If the contrast is still too low, your fax
machine may need service. Make a copy or print a
report to check your machine’s printing ability.
•Make sure you are using the recommended
thermal paper. See Loading the Thermal Paper in
Chapter 1.
Received images are
distorted. •Noise on the telephone line may cause distortion.
Have the other party try sending the document
again.
•Make a copy or print a report on your fax machine.
If the copy or report is also distorted, your fax
machine may need service.
A received document or
copy prints out in strips. •Make sure theoperation panel is completely closed
(press down on both sides of the panel).
The quality of copies is
poor and/or black spots
appear.
•Any dirt or material on the scanning glass will
cause spots to appear on copies and transmitted
faxes. Clean the scanning glass as explained in
Chapter 9.
al l - ux40. book Page 91 Thur sday, November 18, 1999 2: 35 PM
Downloaded from: http://www.usersmanualguide.com/

Problems and Solutions
92
Reception/copying is
interrupted. •If reception or copying takes place continuously for
a long time, the print head may overheat. Turn off
the power and let it cool down.
Answering machine connection
Problem Solution
The answering machine
connection does not
operate properly.
•Make sure your fax machine's reception mode is
set to A.M.
•Make sure your fax machine's TEL. LINE socket is
connected to the wall socket. Make sure your fax
machine's TEL. SET socket is connected to your
answering machine's telephone line socket (not the
answering machine's extension phone socket).
•Try reducing the length of the OGM (preferably to
10 seconds).
•Make sure that the Quiet Detect Time setting is set
to three or four seconds (see Chapter 6).
al l - ux40. book Page 92 Thur sday, November 18, 1999 2: 35 PM
Downloaded from: http://www.usersmanualguide.com/

Problems and Solutions
93
10. Trouble-
shooting
General problems
Problem Solution
Nothing appears in the
display. •Make sure the power cord is properly plugged into
a power outlet.
•Connect another electrical appliance to the outlet to
see if it has power.
The machine does not
respond when you press
any of its keys.
•If a beep sound is not made when you press the
keys, unplug the power cord and then plug it in
again several seconds later.
Automatic document
feeding does not work for
transmission or copying.
•Check the size and weight of the document (see
Transmittable Documents in Chapter 2).
Voice calls taken on an
extension phone are
interrupted by the fax.
•The fax may interrupt during a voice call if the
reception mode is set to A.M. To prevent
interruption on a tone dial extension phone, press
any three keys on the extension phone after
answering. (Note: Do not enter the code to activate
fax reception.)
No reception occurs when
polling is attempted. •Make sure you have not run out of paper.
•Make sure the transmitting machine is in automatic
reception mode.
•If the transmitting machine has polling security,
make sure that your fax number has been entered
both in your machine and in the transmitting
machine.
al l - ux40. book Page 93 Thur sday, November 18, 1999 2: 35 PM
Downloaded from: http://www.usersmanualguide.com/

Messages and Signals
94
Messages and Signals
Display messages
Note: If you have turned on the Caller ID function, see Caller ID in Chapter 7
for display messages related to Caller ID.
COVER OPEN The operation panel is open. Close it.
DOCUMENT JAMMED The original document is jammed. See the following
section, Clearing Paper Jams.
FUNCTION MODE The FUNCTION key has been pressed.
LINE BUSY This appears if you attempt to send a fax by
automatic dialing and the line is busy or the receiving
fax machine doesn’t answer (even after automatic
redialing). Press the STOP key to clear the message.
LINE ERROR Transmission or reception was not successful. Press
the STOP key to clear the message and then try
again. If the error persists, see Line Error in Problems
and Solutions in this chapter.
NO DATA This appears if you attempt to search for an
automatic dialling number when none have been
stored.
NO # STORED You have tried to dial or clear a Rapid Key or Speed
Dial number that hasn’t been programmed (a full
number hasn’t been assigned to it).
OFF HOOK This appears if you forgot to replace the handset after
usingit to dialand send a fax. Replace the handset or
press the STOP key to clear the message.
ON HOOK DIAL The SPEAKER key has been pressed and the fax
machine is waiting for you to dial.
OUT OF PAPER You have run out of thermal paper. Load a new roll of
thermal paper as explained in Loading the Thermal
Paper in Chapter 1.
al l - ux40. book Page 94 Thur sday, November 18, 1999 2: 35 PM
Downloaded from: http://www.usersmanualguide.com/

Messages and Signals
95
10. Trouble-
shooting
OVER HEAT The print head has overheated. Operation can be
continued after it cools.
PAPER JAMMED The printing paper is jammed. See the following
section, Clearing Paper Jams.
Ensure that there is sufficient space in front of the
machine for recording paper to exit correctly.
READY TO SEND A document has been loaded and the fax machine is
waiting for you to begin faxing or copying.
RECALLING This appears if you attempt to send a fax by
automatic dialling and the line is busy or the receiving
fax machine does not answer. Your fax machine will
automatically reattempt the call. (See Automatic
Redialling in Sending a Fax by Automatic Dialling in
Chapter 2.)
SEARCH DIAL The SEARCH/R key has been pressed. Press # or *
to search for an automatic dialling number, or press
the STOP key to return to the date and time display.
(See Searching for an auto-dial number in Sending a
Fax by Automatic Dialling in Chapter 2.)
TOTAL PAGE(S) 01 Number of pages transmitted, received, or copied.
Audible signals
Continuous tone 3 seconds Indicates the end of transmission,
reception, or copying.
Intermittent tone
(3 beeps) 5 seconds
(1 second on, 1
second off)
Indicates incomplete transmission,
reception, or copying.
Rapid intermittent
tone Continuous
(0.7 seconds on,
0.3 seconds off)
Indicates that the handset is off hook.
al l - ux40. book Page 95 Thur sday, November 18, 1999 2: 35 PM
Downloaded from: http://www.usersmanualguide.com/

Clearing Paper Jams
96
Clearing Paper Jams
Clearing a jammed document
If the original document doesn’t feed properly during transmission or
copying, or DOCUMENT JAMMED appears in the display, first try
pressing the START key. If the document doesn’t feed out, open the
operation panel and remove it.
Important:
Do not try to remove a document without first releasing it as
explained below. This may damage the feeder mechanism.
1Grasp the finger hold and pull up to
open the operation panel.
.3Remove the document.
2Flip up the green levers on each side
of the white roller.
al l - ux40. book Page 96 Thur sday, November 18, 1999 2: 35 PM
Downloaded from: http://www.usersmanualguide.com/

Clearing Paper Jams
97
10. Trouble-
shooting
5Close the operation panel, making
sure it clicks into place.
•Press down on both front corners of
the panel to make sure it clicks into
place.
Clearing jammed paper
1Unplug the fax machine. Grasp the
finger hold and pull up to open the
operation panel.
4Flip down the green levers on each
side of the white roller.
al l - ux40. book Page 97 Thur sday, November 18, 1999 2: 35 PM
Downloaded from: http://www.usersmanualguide.com/

Clearing Paper Jams
98
5Reload the paper.
•Jammed paper is often caused by
improper loading. Be sure to care-
fully follow the instructions for
paper loading given in Loading the
Thermal aper in Chapter 1.
•Make sure that there is sufficient
space in front of the machine for
the paper to exit correctly.
.3Remove the paper roll.
•UX-60: Remove any cut pieces of
paper from the paper compartment.
UX-40
4Cut off the wrinkled part of the paper.
2Flip up the front paper guide.
UX-60
Press the knob to make sure the
front side of the metal guide is down.
al l - ux40. book Page 98 Thur sday, November 18, 1999 2: 35 PM
Downloaded from: http://www.usersmanualguide.com/
Other manuals for UX-40
2
This manual suits for next models
1
Table of contents
Other Sharp Fax Machine manuals

Sharp
Sharp UX-385 User manual

Sharp
Sharp FO-IS115N User manual

Sharp
Sharp UX-CL 220 User manual

Sharp
Sharp FO-3150 User manual

Sharp
Sharp FO-165 User manual

Sharp
Sharp UX-108 User manual

Sharp
Sharp UX-68 User manual

Sharp
Sharp UX-CL 220 User manual

Sharp
Sharp UX-470 User manual

Sharp
Sharp FO-5800 User manual