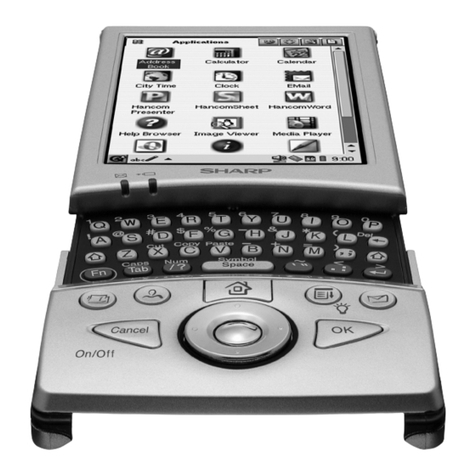
Sharp Zaurus SL-5500 Quick start guide

OPERATION MANUAL
Intellisync®for SL

Copyright Notice
All copyrights and other intellectual property rights relating to this software
(hereinafter referred to as “the Software”) and this document (“Operation Manual”)
are owned by Pumatech, Inc. exclusively. Sharp Corporation has a license to
distribute the Software and the Operation Manual and is authorized to grant
sublicenses to end users.
No part of this publication may be reproduced, transmitted, transcribed, stored in a
retrieval system, or translated into any computer language, in any form or by any
means, without the express written permission of Pumatech, Inc.
Pumatech, Intellisync and the Intellisync logo are trademarks of Pumatech, Inc. that
may be registered in some jurisdictions.
Sharp is a trademark of Sharp Corporation.
Microsoft Outlook is a registered trademark of Microsoft Corporation.
All other company and product names are trademarks of their respective owners.
Copyright © 2002 Pumatech, Inc. All rights reserved.
Pumatech, Inc., 2550 North First Street, Suite 500, San Jose, California 95131, USA
CAUTION
•The manufacturer is not responsible and provides no warranty for any
malfunction, problems, or other damage caused by misuse of this product and its
accessories by you or a third party.
•This product and its accessories are subject to change without notice for reasons
of product improvement.
•Some of the accessories and optional parts described in this manual may not be
available at the time you purchase this product.
•Some of the accessories and optional parts described in this manual may be
unavailable in some countries.
•Screens and icons in this manual may differ from the actual ones displayed on the
PC.
•This manual uses the following substitute expressions:
“SL-5500” →“device”;
“Intellisync icon for SL” →“Intellisync icon”;
“Intellisync menu for SL” →“Intellisync menu”.
i
Important:
• Please install either Intellisync for SL or Qtopia Desktop on your PC.
• If the device has been removed from the Docking Station, make sure to
wait for 30 seconds before replacing it on the Docking Station.
• Modifying the PIM data using an application such as Text Editor may cause
synchronization failure.
• When starting synchronization, close all applications on a device.
• The fields that can be synchronized by this application are limited. The default
setting preset for field mapping is recommended.
• This application does not support synchronizing with multiple devices at the
same time. One PC can synchronize with a single device. If a program folder
of a PC is shared with multiple users, only users who have installed this
application can use it.
• Private data settings in Microsoft Outlook and Palm Desktop will not be
transferred to the devise during synchronization. The devise does not have
private setting capabilities.
• Some characters (symbols, European-language characters, special
characters, etc.) may be affected by synchronization and may become
garbled.
• Only entries with date information from January 1, 1970 to December 31, 2037
will be supported for synchronization.
• Updates for Microsoft Outlook are available on the Internet for the purpose of
protecting the data, such as contacts or email, from being overwritten, etc. If
you use Intellisync for SL with the updated software, the function of Intellisync
for SL may be restricted.
• Reinstallation of Intellisync for SL is necessary when the date and time
settings (Date/Time Properties) of your PC are changed.
• When performing synchronization with the Palm Desktop, close it before
starting synchronization.
• If Intellisync for SL operates improperly or unstably, remove the anti virus or
firewall software from the running program at the startup of your PC.
• Sometimes synchronization may not perform properly with non-English based
operating systems.

ii
Microsoft Windows 2000 Users
• When you have your device in the Docking Station attached to your PC and
you remove the device from the Docking Station or turn off the device you may
receive an error that says “Unsafe Removal of Device”. Click on the OK button
and this message will go away. This will not damage your PC or the
connection to the Docking Station. To avoid this message, click on the task bar
icon to “Stop SL Series (NDIS 5)” before you turn off your device or remove it
from the Docking Station.
Server PC’s with Personal Firewalls
• If you are using your computer as your server and have a personal firewall
installed on your computer, you may need to disable this firewall in order to
complete the synchronization process. You can refer back to your firewall
instruction manual on how to disable this function.
®®

iii
Table of Contents
CHAPTER 1: BEFORE YOU BEGIN ................................. 1
Introduction to Intellisync for SL ................................................................ 1
Minimum System Requirements....................................................................... 2
Connecting the Device to Your PC and Installing the USB Drivers.................. 2
Installing the Intellisync Software ..................................................................... 3
The Intellisync Icons ......................................................................................... 4
Intellisync for SL Launcher ............................................................................... 4
Intellisync Menu................................................................................................ 5
Communication Options ................................................................................... 5
Using the Help effectively ................................................................................. 5
CHAPTER 2: QUICK START............................................6
Using Intellisync: A Tutorial....................................................................... 6
Synchronizing Data .......................................................................................... 6
Re-running the Operation ............................................................................... 10
CHAPTER 3: SPECIAL TOPICS .....................................12
Email Synchronization............................................................................. 12
Configuring an Email Synchronization............................................................ 12
The Field Mapping Dialog ....................................................................... 13
File Transfer ............................................................................................ 15
Preparing for Documents Management.......................................................... 15
File Transfer Operations................................................................................. 16
APPENDIX...........................................................................18
Frequently Asked Questions ................................................................... 18
Glossary .................................................................................................. 19


BEFORE YOU BEGIN 1
CHAPTER 1:
BEFORE YOU BEGIN
This chapter introduces Intellisync®for SL software and instructs you on how to get
started using the software.
Topics include:
•Introduction to Intellisync for SL
•Minimum System Requirements
•Connecting the Device to Your PC and installing the USB Drivers
•Installing the Intellisync Software
•The Intellisync Icons
•Intellisync for SL Launcher
•Intellisync Menu
•Communication Options
•Using the Help effectively
Introduction to Intellisync for SL
Intellisync for SL software enables you to synchronize your SL-5500 (device) with
Windows applications. This means that if you want to maintain the same data in your
device and on your PC, there is an easy way to ensure that each system contains
the same up-to-date information.
•Intellisync can transfer data of different formats between your device and your
PC. But it does more than simply translate data and transfer it between your two
systems. Intellisync compares the records on your device with the records on your
PC. It then makes whatever changes are necessary in each system to keep them
both up-to-date and “in sync.”
•The main features of Intellisync are listed as follows.
•Synchronization with Microsoft Outlook
The applications Intellisync can manage are Contacts (Address Book),
Calendar, Email (Inbox and Outbox), and Tasks (Todo List).
•File Transfer function
You can transfer Documents files (image files, movie files, text files, etc.)
between the device and your PC.
Note: Intellisync can also perform one-way imports and exports of data
between your device and supported PC applications.

2BEFORE YOU BEGIN
Minimum System Requirements
•100% IBM Compatible PC
•MicrosoftWindows98/98 Second Edition/2000 Professional/Me/XP,
MicrosoftWindows NT4.0 Workstation with SP6*
•Pentium150MHz or higher for MicrosoftWindows98/98 Second Edition
Pentium200MHz or higher for MicrosoftWindows NT4.0 Workstation with
SP6
Pentium200MHz or higher for MicrosoftWindows2000 Professional
Pentium200MHz or higher for MicrosoftWindowsMe
Pentium/Celeron Family 300MHz or higher for MicrosoftWindowsXP
•30MB Available Hard Disk Space
•64MB RAM for MicrosoftWindows98/98 Second Edition/NT 4.0 Workstation
with SP6/2000 Professional/Me
128MB RAM for MicrosoftWindowsXP
•CD-ROM Drive
•1 Available USB Port or Serial Port with Optional Serial Cable CE-170TS
•Mouse or Compatible Pointing Device
•Microsoft Outlook 97/98/2000/XP or Palm Desktop must be installed on your PC
to perform synchronization between the device and your PC
* Optional Serial Cable CE-170TS is necessary with Windows NT4.0 Workstation with SP6 to use this
software.
Connecting the Device to Your PC and Installing the USB
Drivers
To transfer data between the device and your PC using the Docking Station (USB
cable), install the USB drivers found in the CD-ROM supplied.
Check the Drivers installation manual (“USB DRIVER INSTALLATION GUIDE”).
Note: Refer to the device Start-up Guide (booklet) for connection details.
About the USB port
•If the USB port on your PC or the USB hub connected to the device does not
operate properly, perform the following steps.
•When your PC comes equipped with several USB ports, connect the device to
another USB port.
•When other USB devices are connected to your PC and used simultaneously,
disconnect them from your PC.
•Operation on a PC that is upgraded from Windows 95 may not be possible.
•A PC whose USB port is added by the user because the PC is not equipped with
a USB port at the time it leaves the factory may not operate properly.

BEFORE YOU BEGIN 3
•Activating the power saving mode (suspend, resume, or sleep function etc.) of
some PCs may result in the USB port not functioning properly. In this case,
disable the power saving mode.
•If the USB driver does not operate properly when you connect the device to your
PC via the USB hub, connect it directly to the USB port on your PC. Using the
USB extension cable may result in the USB driver not operating properly.
•If you are using Windows 2000/XP and remove the device from the Docking
Station or turn the device off while it is placed on the Docking Station, a warning
dialog box will be displayed on the screen of your PC (depending on the settings
for Windows XP). In this case, close the warning dialog box.
Installing the Intellisync Software
Follow these steps to install Intellisync on your PC:
1.
Make sure that the USB drivers are installed on your PC.
2.
Close all applications on your PC. If you are using anti virus or firewall software,
close them (or disable their function).
3.
Insert the CD-ROM supplied into your CD-ROM drive.
4.
Open D: Index.htm (use your CD-ROM drive letter).
5.
Check the installation procedure and follow the on-screen instructions.
When installation is complete, the Intellisync icon will appear on the Windows
system tray (in the bottom-right corner of the task bar). In addition, a set of
Intellisync icons will have been created. To access the icons, select Start →
→ →
→
Programs →
→→
→Sharp →
→ →
→ Intellisync for SL.
The Intellisync Accessfolder shortcut icon will also appear on your desktop.
For detailed information, see page 15.
Notes for Windows NT 4.0 Workstation with SP6/2000 Professional/XP users:
This application does not support use by multiple users. It can only be used by the
installer. For example, if an administrator logs in to a PC and installs this application,
then only that administrator is able to use it. Therefore, when other users want to use
this application, they must log in to a PC (with authorization as an administrator) and
install it before use.

4BEFORE YOU BEGIN
The Intellisync Icons
These are the icons as they appear in the Intellisync Program Group:
Intellisync for SL Launcher
By clicking icons on the Intellisync for SL launcher, you can perform the main
operations of the Intellisync, such as synchronization instead of using the Intellisync
menu. To display the launcher, select Start →
→ →
→ Programs →
→→
→Sharp →
→ →
→ Intellisync
for SL →
→ →
→ Intellisync for SL Launcher.
If the launcher is not necessary, close the launcher by clicking the close button in
the upper right corner of it.
Whether the launcher is displayed or not when the PC is turned on is determined by
whether the launcher is displayed or not when the PC is shut down. If you want the
launcher to be displayed automatically when the PC is turned on, make sure that the
launcher is displayed when the PC is shut down.
The Intellisync for SL icon starts the Intellisync for SL, and Intellisync
icon appears on the Windows system tray.
The Online Manual icon accesses On-line Help for Intellisync.
The Uninstall Intellisync for SL icon can be used to remove
Intellisync from your system.
The Intellisync for SL Launcher icon can be used to open the
launcher for performing the main operations of the Intellisync.

BEFORE YOU BEGIN 5
Intellisync Menu
When installation of Intellisync for SL is complete, the Intellisync icon will appear on
the Windows system tray.
By clicking (or right-clicking) on the icon, the Intellisync menu will be displayed. This
menu allows you to select the main operations.
Communication Options
This sets the way the Intellisync communicates with the device.
Using the Help effectively
You can see the Help button on the screens displayed inside the Intellisync
application.
Menu items Functions
Synchronize Starts synchronization.
Synchronization Options Opens a dialog box to configure the synchronization
options.
File Transfer Opens the File Transfer dialog box.
Communication Options Opens a dialog box to configure the communication
method between the Intellisync and the device. (USB
or serial connection.)
Help Accesses On-line Help for Intellisync.
About Opens a dialog box listing the version and copyright
information.
Exit Exits the Intellisync application.
USB Select “USB” to set the communication to the USB connection.
Serial Select “Serial” to set the communication to the serial connection.
(Optional Serial Cable CE-170TS is required.)
PDA IP
Address
Displays the IP address of the device for the USB or serial
connection. Normally, no change is necessary for the default setting.
If the IP address of the device has been changed, the same address
must be entered. Tap the Network & Sync icon for the Setting tab
and use the Sync tab to set the IP address of the device.
By default:
“192.168.129.201” for USB connection.
“192.168.130.101” for serial connection.

6QUICK START
CHAPTER 2: QUICK START
This chapter is a tutorial that guides you through the process of setting up and
performing your first synchronization.
Using Intellisync: A Tutorial
This “Quick Start” tutorial is for users who want to start synchronizing immediately.
For more complete information on synchronization — including details on all the
Intellisync settings and processes that affect synchronization — refer to the On-line
Help.
Synchronizing Data
How does Intellisync know what to synchronize? That information is stored in a set
of Intellisync dialog boxes. These dialog boxes specify the data you want to
synchronize, and contain special settings affecting the operation.
Once you have made the desired settings in these dialog boxes, you need never
access them again unless you want to change the specifications.
Note: For simplicity, this tutorial guides you through the process of configuring
and running synchronization. However, these instructions apply to
importing and exporting as well. The only difference between configuring
synchronization and setting up a one-way transfer of data is in the
selection of the operation in the Choose Translator dialog box. For
information specific to one-way data transfers, see the On-line Help.

QUICK START 7
Follow these steps to configure and perform your first
synchronization:
1.
Click the Intellisync icon on the Windows system tray and then select
Synchronization Options from the Intellisync menu.
The Intellisync Configuration dialog box will appear.
2.
In the Configuration dialog box that appears, click the device application you
want to synchronize. Then click the Choose button to enter the Choose
Translator dialog box.
3.
In the Choose Translator dialog box that appears, specify the PC application
you want to synchronize. If a File Name or Folder text box is present, use the
Browse capability to select the file or folder you want to synchronize.

8QUICK START
Note:
• If you check Apply to all applications, the application and file (or folder) you
specify will be assigned for synchronization with all applicable device
applications.
• Some PC applications do not require you to specify a filename. If this is the
case, the “active” or last-used file is used by default, and the File Name text
box is not present in the Choose Translator dialog box.
4.
If the Options button is enabled, click it and make sure the “system options” are
set appropriately for the application you’ve selected. Then click the OK button
to return to the Choose Translator dialog box.
5.
Click the OK button to return to the Configuration dialog box.
Now the PC application you selected appears next to the device application
name, and a two-sided arrow appears between the device and PC application
names.
Note the check box adjacent to the device application name. By default, this
check box is checked, indicating that the data is activated for synchronization.
(If you clear this box, the application data will not be synchronized.)
6.
To review or alter settings affecting synchronization, select the Advanced
button to access the Advanced Settings dialog box. (Intellisync provides default
values for all settings.)
For detailed information on Intellisync Advanced settings, refer to the On-line
Help.

QUICK START 9
7.
When the desired settings are made, click the OK button to return to the
Configuration dialog box.
8.
If necessary, repeat the above procedure for each of the device applications you
want to synchronize. Then click the OK button to save the specifications and
exit the Configuration dialog box.
Now the configuration of the synchronization option is completed. Perform the
following steps to carry out the synchronization.
9.
Turn the device power on.
10.
Place your device on the Docking Station connected to your PC.
11.
Click the Intellisync icon and then select Synchronize from the Intellisync
menu.
12.
Click the OK button.
The synchronization process begins, and the progress dialog box appears.
Note:
• Synchronization process can also be carried out by pressing the SYNC button
on the Docking Station or clicking the Synchronize icon on the Intellisync
launcher in step 11.
• If you connect the device to your PC via the optional Serial Cable and perform
synchronization by pressing the SYNC button on the Docking Station, make
sure to turn the device on before pressing the SYNC button on the Docking
Station.
• Tapping the Cancel button on the device’s screen does not stop the
synchronization. To stop the synchronization, click the Cancel button on the
progress dialog box on your PC. Clicking the Cancel button on the progress
dialog box does not stop the synchronization until the section being
synchronized has been completed.
• Do not operate the device during synchronization.
• Do not press the SYNC button on the Docking Station during synchronization.
• Perform the following if your PC does not recognize the device placed on the
Docking Station.
• Remove the device from the Docking Station and place it on the Docking
Station again.
• With your PC disconnected from the network, restart it and then check that
the connection is established between the device on the Docking Station and
a PC. If the problem remains, contact your network administrator. Check also
that the PDA IP Address set on the Communication Options screen is the
same as the IP address of the device.

10 QUICK START
13.
If a Conflict Resolution dialog box appears, resolve “data conflicts” (see note
below).
Note:
• For each set of data you synchronize, a history file is used to determine the
changes that must be made in each of your systems to achieve
synchronization. This file is created by the first synchronization of the data.
Therefore, a “first run” synchronization is different from (and may take longer
than) subsequent synchronization.
• “First run” synchronization simply merges your device and PC data, and a
Conflict Resolution setting is used to resolve data conflicts. For more
information, refer to the On-line Help.
Before the synchronization process starts, one or more confirmation dialog box
may be displayed asking you to accept the operation.
14.
If a confirmation prompt is displayed, click Accept to proceed with the
operation, or Cancel to cancel.
When the operation is complete, the data communication will be automatically
terminated.
Re-running the Operation
Turn the device power on, place it on the Docking Station connected to your PC, and
then perform any of the following to carry out the synchronization process.
•Click the Synchronize icon on the Intellisync launcher. And then click the OK
button.
•Click the Intellisync icon and select Synchronize from the Intellisync menu. And
then click the OK button.
•Press the SYNC button on the Docking Station.
You’ll only need to access the Intellisync dialog box again if you want to change the
nature of the operation.
Note:
• Data can be transferred between records in your device and PC applications
because fields in the two systems are “mapped” (linked). Intellisync provides
default “field mapping,” but you can alter mapping to re-direct (or prevent) the
flow of data during data transfers. For detailed information, see page 13 and
On-line Help.
• The communication (the synchronization process, etc.) will not be carried out
when the device detects a low battery level or insufficient memory.

QUICK START 11
• The following events will terminate the communication:
• Turning the device off
• Disconnecting the communication signal by removing the cable, etc.
• Shutting down the PC or logging off
• When removing the device from the Docking Station connected via a USB
cable, follow the procedure of removing the USB cable according to your PC
requirements.
• If something such as a communication error during synchronization occurs,
the next synchronization may simply merge your device and PC data.
You can avoid merging your device and PC, which is caused by performing
synchronization after a communication error, by selecting Import or Export in
the Operation box on the Choose Translator dialog box. For example,
selecting Import allows you to transfer data one-way from your PC to the
devide.
• Communication is not possible when the device is protected with a passcode
or the Welcome screen appears on the device’s display. Clear the passcode
or exit the Welcome screen and then replace the device on the Docking
Station to carry out communication.

12 SPECIAL TOPICS
CHAPTER 3:
SPECIAL TOPICS
Email Synchronization
Important:
• The following table shows the correspondence between the device and
Microsoft Outlook application in Email synchronization.
• By default setting, “Sent” of the device is not mapped to “Sent Items” of
Microsoft Outlook application. You can map them on the dialog box (Map
Sharp SL EMail Folder(s) dialog box). For more information, refer to the note
described in step 2 in “Configuring an Email Synchronization”.
• The settings of the sub folder for the mapped folder will not be synchronized.
• Email attachment files will not be synchronized.
• If you delete the unread messages on the device and perform Email
synchronization, they will not be deleted from Microsoft Outlook application.
• If you perform Email synchronization and modify the unsent messages in the
Outbox on the device, they will not be synchronized in the next
synchronization.
• For Inbox messages, Email synchronization may not perform correctly
depending on the Email software that has sent those messages.
Configuring an Email Synchronization
Follow these steps to configure email synchronization:
1.
In the Configuration dialog box, highlight EMail and click the Choose button.
This displays the Choose Translator dialog box.
2.
Highlight the email application you use. Then click OK to return to the
Configuration dialog box.
Device Microsoft Outlook 97/98/2000/XP
Inbox ÙInbox
Outbox ÙOutbox

SPECIAL TOPICS 13
Note: When Microsoft Outlook 97/98/2000/XP is highlighted on the Choose
Translator dialog box, the Browse button will appear on the lower area
of the dialog box. In the dialog box (Map Sharp SL EMail Folder(s) dialog
box) that appears by clicking this button, you can change the folder
mapping.
3.
Click the Advanced button. This opens the Advanced Settings dialog box.
Review and, if necessary, change the default settings.
4.
When you have finished, click OK to return to the Configuration dialog box.
You are now ready to synchronize your device mail folders.
The Field Mapping Dialog
In order for data to be transferred between your device and your PC application file,
corresponding fields in each application must be linked to one another, or
“mapped.” Intellisync provides default “field mapping,” which links equivalent fields
in your two systems. But you can edit mapping to re-direct (or prevent) the flow of
data as needed.
•To access field mapping for selected applications, click the Field Mapping button
at the bottom of the Advanced Settings dialog box. This displays the Intellisync
Field Mapping dialog box.
As you can see, the Field Mapping dialog box lists device fields on the left (Sharp
SL), and PC fields on the right. Two-way arrows appear between fields that are
“mapped,” or linked, for synchronization.
• To un-map mapped fields: Click on the arrow (or highlight the PC application
field name and double-click or press the Spacebar).
• To map adjacent fields: Click between the fields (or highlight the PC application
field name and double-click or press the Spacebar). An arrow will appear to
indicate that the fields are mapped.

14 SPECIAL TOPICS
• To map non-adjacent fields: Drag the field in the right-hand column and drop it
next to the field in the left-hand column.
• To reinstate default field mapping: Select the Reset button.
Field Mapping Notes:
• Before you edit field mapping, scroll up and down the field list to see the
available fields. They may not be organized as you’d expect.
• If you change the field mapping after data has been synchronized, the next
synchronization will be, in effect, a first run synchronization.
• When data is transferred between fields in your device and your PC
application, data may be shortened in the target field if the source data is too
lengthy to be accommodated. It is not wise to edit shortened data. If you do,
the data in the other system will be shortened after the next synchronization.
Refer to APPENDIX, “Frequently Asked Questions,” for a workaround that
allows you to edit shortened text.
• Intellisync enforces certain field mapping rules. For example, you cannot map
date fields to time fields. If you attempt to map incompatible field types, an
error message will be displayed.
• Field names marked with asterisks in the Field Mapping dialog box must be
mapped. If marked fields are not mapped, an error message will appear when
you try to exit the Field Mapping dialog box.
• When the Field Mapping button does not appear on the Advanced Settings
dialog box, field mapping is fixed.
• Todo List field mapping, mapping field, “Very High” and “Very Low” for Priority
for the device will be mapped to “High” and “Low” of Microsoft Outlook.
• For the Calendar application, the settings or data that can be synchronized are
limited.
• The Silent/Loud settings of the device will not be synchronized.
• The Recurrence data on Microsoft Outlook, which is set as “Yearly” for the
specified week (for example, the third week of December), will not be
synchronized.
• Monthly Recurrence data on Microsoft Outlook, which is set as “last xxday”
in the month (for example, the last Monday of a month), will not be
synchronized properly.
• For alarm settings on Microsoft Outlook, the settings exceeding 180 minutes
will be synchronized as settings of 180 minutes on the device.
• All alarm settings of the All Day schedule entries on the device will be
synchronized as 15 minutes on Microsoft Outlook.
• For the Address Book (Contacts) application, the “Birthday” and “Anniversary”
fields will be transferred only from Microsoft Outlook to the device. Any data
that has been modified just in the “Birthday” or “Anniversary” fields will not be
transferred.
Other manuals for Zaurus SL-5500
9
Table of contents
Other Sharp PDA manuals

Sharp
Sharp PC-1246S; PC-1248 User manual

Sharp
Sharp Zaurus SL-5500 Quick start guide

Sharp
Sharp PC-1360 User manual

Sharp
Sharp Zaurus SL-5500 User guide

Sharp
Sharp TM-20 Quick start guide

Sharp
Sharp Zaurus SL-5500 User manual

Sharp
Sharp EL-6890 User manual

Sharp
Sharp PC-1403 User manual

Sharp
Sharp SL-6000L User manual

Sharp
Sharp Zaurus SL-5500 User manual

Sharp
Sharp PC-E500S User manual

Sharp
Sharp Zaurus SL-5500 Manual

Sharp
Sharp TM-20 User manual

Sharp
Sharp Zaurus SL-C3000 User manual

Sharp
Sharp SL-C1000 User manual

Sharp
Sharp PC-1460 User manual

Sharp
Sharp YO-P20 User manual

Sharp
Sharp PC-1403 User manual

Sharp
Sharp PC-E500 User manual

Sharp
Sharp PC-1251 User manual