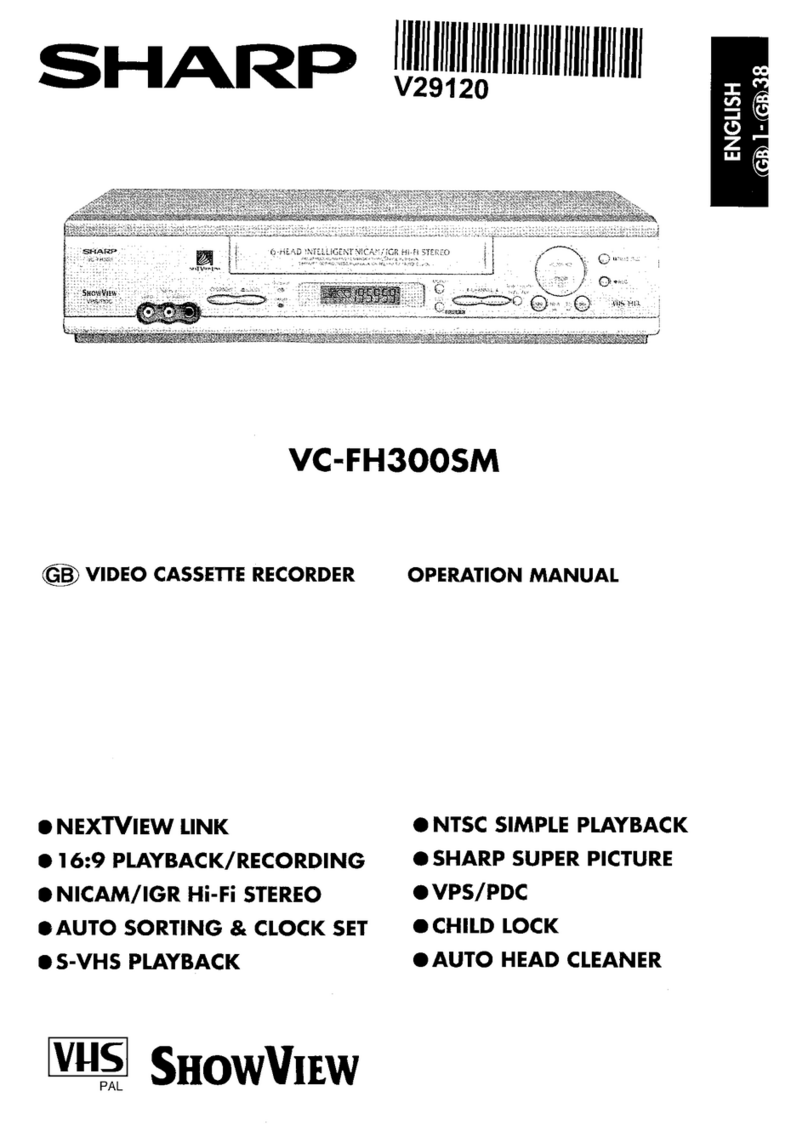
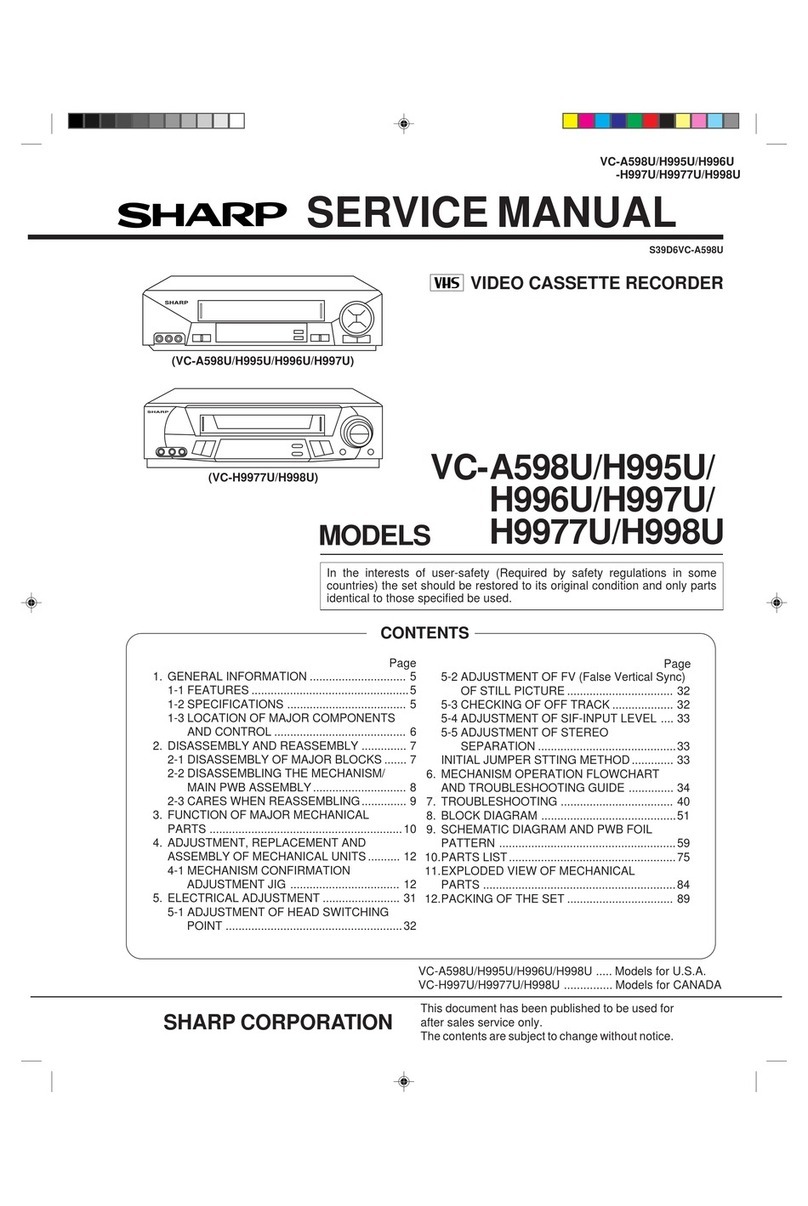
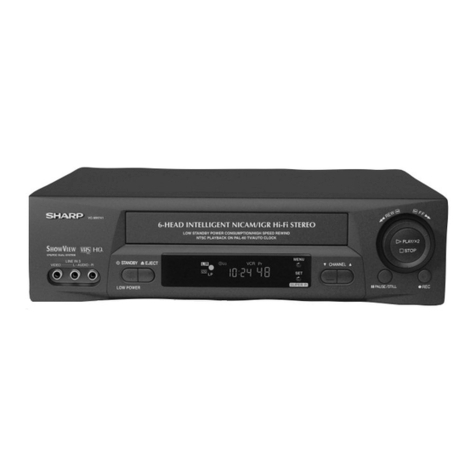
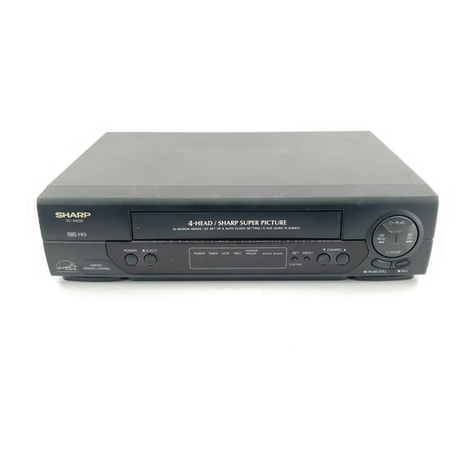
Sharp VC-M36GM Quick start guide

●S-VHS PLAYBACK (VC-MH76GM)
●IGR (VC-MH76GM)
●4 HEAD LONG PLAY (VC-MH76GM)
●SHARP SUPER PICTURE
VC-M36GM
VC-MH76GM
DEUTSCH
1- 37
TÜRKCE
1- 36
D D
TR TR
ITALIANO
1- 37
II
˘
VC-M36GM
VC-MH76GM
VIDEOCASSETTENRECORDER BEDIENUNGSANLEITUNG
VIDEOREGISTRATORE A CASSETTE MANUALE DI ISTRUZIONI
VİDEO KASET CİHAZI (VCR) ÇALIŞMA KILAVUZU
D
I
TR
●AUTO CLOCK
●AUTO TUNING
●VPS/PDC
FINAL COVER 15/3/00 9:17 am Page 1

(i)
Sevgili SHARP Kullani isi, SHARP VCR aldığını` için teşekkür ediyoruz.
Gerekli özen gö terildiğinde, bu video bütün aileniz için yıllarca bir eğlence kaynağı olacaktır. Lütfen
video cihazınızı kullanmaya başlamadan önce bu kullanım kılavuzunu dikkatle okuyunuz.
Yayın Hakkı
●Yayın hakkı aklı olan e ve görüntü içeren e erler, yayın hakkı ahibinin izni olmadan
kaydedilmemelidir. Lütfen ülkenizin bu konudaki kanunlarına uyunuz.
●Bu kitapçığın hiç bir bölümü, SHARP Electronic (Europe) GmbH’den önceden izin alınmadan
herhangi bir biçim altında kopyalanamaz, aklanamaz veya dağıtılamaz.
® Gem tar Development Corporation’unte cilli marka ıdır.
i temi Gem tar Development Corporation li an i altında üretilmektedir
BU KILAVUZ ÇEŞITLI MODELLERI KAPSAMAKTADIR.
SÖZÜ EDILEN TÜM ÖZELLIKLER SIZIN VCR’INIZDA BULUNMAYABILIR
TR
IGentile Cliente SHARP Grazie per avere scelto un videoregistratore SHARP.
Se utillzzato con cura, fornirà per anni intrattenimento a tutta la famiglia. Si raccomanda di leggere
attentamente questo manuale operativo prima di utillizzare il videoregistratore.
Copyright
●Il materiale audiovisivo può essere costituito di opere coperte da copyright, che non possono essere
registrate senza il consenso del proprietario del copyright. Al riguardo, attenersi alla legislazione in
vigore nel proprio paese.
●Nessuna parte di questa pubblicazione può essere riprodotta, memorizzata o trasmessa in
qualsiasi forma, senza il permesso della SHARP ELECTRONICS (EUROPE) GmbH.
® è n marchio registrato della Gemstar Development Corporation.
ll sistema è costruito dietro licenza della Gemstar Development Corporation.
QUESTO MANUALE COPRE UNA GAMMA DI MODELLI.
IL VIDEOREGISTRATORE ACQUISTATO POTREBBE NON ESSERE DOTATO DI TUTTE LE FUNZIONI
ILLUSTRATE.
Sehr geehrter SHARP-Kunde Vielen Dank daß Sie diesen Videorecorder von SHARPgekauft
haben.
Bei sorgfältiger Pflege ist für die gesamte Familie über Jahre hinweg Videospaß gewährleistet. Lesen
Sie bitte dieses Betriebshandbuch sorgfältig durch, bevor Sie den Videorecorder in Betrieb nehmen.
Urheberrecht
●Audiovisuelles Material kann urheberrechtlich geschützte Werke enthalten, die nicht ohne
Zustimmung des Copyright-Inhabers nicht aufgezeichnet werden dürfen. Richten Sie sich nach den
geltenden Gesetzen Ihres Landes.
●Dieses Handbuch darf weder ganz noch teilweise reproduziert, gespeichert oder in anderer Form
übertragen werden, wenn nicht die vorherige Zustimmung von SHARP ELECTRONICS (EUROPA)
GmbH vorliegt.
® ist ein eingetragenes Warenzeichen der Gemstar Development Corporation.
Das -System wurde hergestellt unter der Lizenze der Gemstar Development Corporation
gefertigt.
DIESES HANDBUCH GILT FÜR VERSCHIEDENE MODELLE.
DIE ERWÄHNTEN FUNKTIONEN MÜSSEN NICHT UNBEDINGT AUCH BEI IHREM GERÄT
VORHANDEN SEIN.
D
FINAL COVER 15/3/00 9:17 am Page 2

(ii)
MENU SET
CLEARSHOWVIEW
DISPLAY
STANDBY
DPSS
INPUT SELECT CHANNEL
VIDEO CASSETTE RECORDER
SLOW
MODE OSD
INPUT
SELECT
CH
CH
OPERATE VOL
VOL
TV
TIMER
ON/OFF
AUDIO
OUT
SKIP
SEARCH
ZERO
BACK
TAPE
SPEED
TV/VCR
+
REC PAUSE/STILL
REW FF
PLAY / X2
STOP
231
4
7
5
8
0
6
9
AM/PM
FERNBEDIENUNG
D
3. KINDERSICHERUNG
15. LAUTSTÄRKE
21. BILDSCHIRMANZEIGE
23. KANAL
/
19. MENÜAUSWAHL
///
27. PAUSE/STANDBILD
8. AM/PM oder
26. WIEDERGABE/X2
22. DISPLAY
16. RÜCKLAUF AUF NULL
5. TONWIEDERGABE
(Diese Taste ist beim VC-M36GM
ohne Funktion)
9. RÜCKLAUF 25. VORLAUF
11. STOP
12. BANDMODUS
(Diese Taste ist beim VC-M36GM
ohne Funktion)
13. ZEITLUPE
28. DPSS [ ] /
NIEDRIGE GESCHWINDIGKEIT
2. TV-EINGABEAUSWAHL
6. MENÜ
18. EINSTELLEN
20. LÖSCHEN
10. AUFNAHME
17. SKIPSUCHLAUF
14. TV-BEDIENUNG
(NUR FÜR TV-GERÄT
VON SHARP)
1. STANDBY
4. TIMER EIN/AUS
7. SHOWVIEW
24. EINGABEAUSWAHL
29. TV/VCR
/
+
/
/
+
Übereinstimmende Funktionen der Tasten der Fernbedienung und der Bedienungstafel auf
der Vorderseite des Videorecorders
Falls Sie es wünschen oder falls die Batterien der Fernbedienung leer sind, können Sie die Bedienungstafel auf
der Vorderseite des Videorecorders benutzen. Dabei sind folgende Unterschiede zu beachten:
FUNKTION
BILDSCHIRMANZEIGE
Im Menü AB/AUF bewegen
Im Menü LINKS/RECHTS
bewegen
FERNBEDIENUNG
[]-Tasten
[ ] -Tasten
BEDIENUNGSTAFEL AUF DER
VORDERSEITE DES
VIDEORECORDERS
CHANNEL Tasten.
Shuttle-Ring LINKS/RECHT drehen.
/
/
/
FINAL COVER 15/3/00 9:17 am Page 3

NL
P
DK
E
This equipment complies with the requirements of Directives 89/336/EEC
and 73/23/EEC as amended by 93/68/EEC.
Dieses Gerät entspricht den Anforderungen der EG-Richtlinien 89/336/EWG
und 73/23/EWG mit Änderung 93/68/EWG.
Ce matériel répond aux exigences contenues dans les directives
89/336/CEE et 73/23/CEE modifiées par la directive 93/68/CEE.
Dit apparaat voldoet aan de eisen van de richtlijnen 89/336/EEG en
73/23/EEG, gewijzigd door 93/68/EEG.
Dette udstyr overholder kravene i direktiv nr. 89/336/EEC og 73/23/EEC med
tillæg nr.93/68/EEC.
Quest’ apparecchio è conforme ai requisiti delle direttive 89/336/EEC e
73/23/EEC, come emendata dalla direttiva 93/68/EEC.
Este equipamento obedece às exigências das directivas 89/336/CEE e
73/23/CEE, na sua versão corrigida pela directiva 93/68/CEE.
Este aparato satisface las exigencias de las Directivas 89/336/CEE y
73/23/CEE modificadas por medio de la 93/68/CEE.
Denna utrustning uppfyller kraven enligt riktlinjerna 89/336/EEC och
73/23/EEC med ändringar i 93/68/EEC.
Detta produktet oppfyller betingelsene i direktivene 89/336/EEC og
73/23/EEC i endringen 93/68/EEC.
Tämä laite täyttää direktiivien 89/336/EEC ja 73/23/EEC vaatimukset, joita on
muutettu direktiivillä 93/68/EEC.
GB
D
F
I
GR
S
N
FIN
FINAL COVER 15/3/00 9:18 am Page 4

TINS-3775UMZZPrinted in U.K.
SHARP ELECTRONICS (EUROPE) GmbH
Sonninstraße 3, 20097 Hamburg, Germany
SHARP CORPORATION
FINAL COVER 15/3/00 9:18 am Page 5

TELECOMANDO
Funzioni del videoregistratore attivabili dal pannello frontale o dal
telecomando.
Quando non si desidera o non è possibile utilizzare il telecomando, è possibile comandare
il videoregistratore agendo sui tasti del pannello frontale. La tabella riportata di seguito
illustra le differenze nelle modalità operative:
FUNZIONE
Spostamento SU/GIÙ
tra le voci di menu
Spostamento DESTRA/SINISTRA
tra le voci di menu
CON IL TELECOMANDO
Tasti []
Tasti []
/
/
DAL PANNELLO FRONTALE
Tasti CHANNEL
Ruotare la manopola verso
SINISTRA/DESTRA.
/
1. SPEGNIMENTO
2. SEGNALE INVIATO AL TV
3. BLOCCO BAMBINI
4. TIMER ATTIVO/ INATTIVO
5. CANALI AUDIO (Sul modello VC-M36GM
questo tasto non funziona)
6. MENU
7. SHOWVIEW
8. AM/PM
9. RIAVVOLGIMENTO
10. REGISTRAZIONE
11. STOP
12. VELOCITÀ DI REGISTRAZIONE (Sul
modello VC-M36GM questo tasto non funziona)
13. RALLENTATORE
14. COMANDI TV
(SOLO TELEVISORE SHARP)
15. VOLUME /
16. RITORNO AL RIFERIMENTO
17. RICERCA A SALTO
18. CONFERMA
19. SELEZIONE MENU
20. ANNULLA
21. OSD (VISUALIZZAZIONE DELLE
MODALITÀ OPERATIVE)
22. DISPLAY
23. CANALE
24. SEGNALE INVIATO
25. AVANZAMENTO VELOCE
26. RIPRODUZIONE/VELOCITÀ DOPPIA
27. PAUSA/FERMO IMMAGINE
28. DPSS [ ] /
VELOCITÀ RIDOTTA /
29. TV/VCR
+
/
///
+
I
Dichiarazione di conformità
La società SHARP ELECTRONICS (EUROPE) GmbH dichiara che il prodotto videoregistratore SHARP
VC-M36GM/VC-MH76GM è costruito in conformità alle prescrizioni del D.M.n° 548 del 28/8/95, pubblicato
sulla G.U.n° 301 del 28/12/95 ed in particolare è conforme a quanto indicato nell art.2,comma 1 dello stesso
decreto.
/
(ii)
FINAL COVER 15/3/00 9:18 am Page 6

(ii)
VİDEO UZAKTAN KUMANDA
1. HAZIR BEKLEME
2. GİRİŞ SEÇİM
3. ÇOCUK KİLİDİ
4. ZAMANLAYICI AÇIK/KAPALI
5. SES ÇIKIŞ (Bu tuş VC-M36GM’de bir işleve
ahip değildir)
6. MENÜ
7. SHOWVIEW
8. ÖĞLEDEN EVVEL/ÖĞLEDEN
SONRA veya
9. GERİ
10. KAYIT
11. STOP
12. KASET HIZI (Bu tuş VC-M36GM’de bir
işleve ahip değildir)
13. YAVAŞ
14. TEMEL TV KONTROLLERİ
(SADECE SHARP TV)
15. SES DÜZEYİ /
16. GERİ SIFIRLAMA
17. ATLAMA ARAMA
18. DÜZENLEME
19. MENÜ SEÇİM
20. SİLME
21. EKRAN GÖRÜNTÜLÜ MODLAR
22. GÖRÜNTÜLEME
23. KANALI
24. GİRİŞ SEÇİM
25. HIZLI İLERİ
26. PLAY/X2
27. ARA/SABİTLEME
28. DPSS [ ] /YAVAŞ ÇEKIM /
29. TV/VCR
+
/
///
+
TR
VİDEO ön panel/uzaktan kumanda eş fonksiyonlar.
Tercih ettiğinizde veya uzaktan kumanda pillerinin tükenme inde, VİDEO ön panel
kontrollerini kullanabilir iniz. Fonk iyondaki tek farklılık aşağıda gö terilmiştir:
/
VİDEO ÖN PANEL İLE
ÇALIŞTIRMA
CHANNEL tuşları.
Düğmeyi SOL/SAG’a dönder.
FONKSİYON
OSD
Menüde
AŞAĞI/YUKARIUP hareket
Menüde
SOL/SAĞ hareket
UZAKTAN KUMANDA İLE
ÇALIŞTIRMA
[ ] tuşları
[ ] tuşları
/
/
/
FINAL COVER 15/3/00 9:18 am Page 7

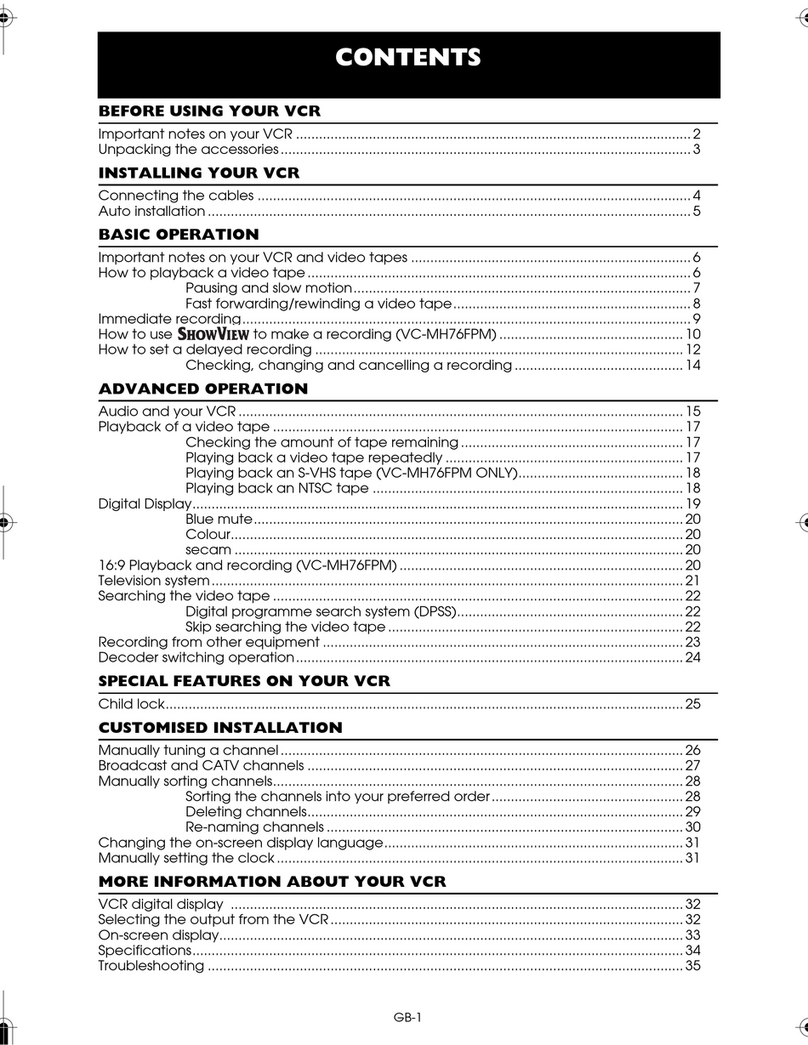
GB-1
CONTENTS
BEFORE USING YOUR VCR
Important notes on your VCR ....................................................................................................... 2
Unpacking the accessories ........................................................................................................... 3
INSTALLING YOUR VCR
Connecting the cables ................................................................................................................. 4
Tuning the TV into the VCR............................................................................................................ 5
Auto installation .............................................................................................................................. 6
BASIC OPERATION
Important notes on your VCR and video tapes .........................................................................7
How to playback a video tape ....................................................................................................7
Pausing and slow motion........................................................................................ 8
Fast forwarding/rewinding a video tape.............................................................. 9
Immediate recording................................................................................................................... 10
How to use to make a recording............................................................................ 11
How to set a delayed recording ................................................................................................ 13
Checking, changing and cancelling a recording ............................................ 15
ADVANCED OPERATION
Audio and your VCR (Hi-Fi VCR’S only)...................................................................................... 16
Playback of a video tape ........................................................................................................... 18
Checking the amount of tape remaining .......................................................... 18
Playing back a video tape repeatedly .............................................................. 18
Playing back an S-VHS tape (VC-MH76GM only).............................................. 19
Playing back an NTSC tape .................................................................................19
Digital Display................................................................................................................................ 20
Blue mute ...................................................................................................................................... 21
Colour ............................................................................................................................................ 21
Searching the video tape ........................................................................................................... 22
Skip searching the video tape ............................................................................. 22
Digital programme search system (DPSS)........................................................... 22
Recording from other equipment .............................................................................................. 23
Decoder switching operation.....................................................................................................24
SPECIAL FEATURES ON YOUR VCR
Powersave mode ......................................................................................................................... 25
Child lock....................................................................................................................................... 26
CUSTOMISED INSTALLATION
Manually tuning a channel ......................................................................................................... 27
Broadcast and CATV channels .................................................................................................. 28
Manually sorting channels........................................................................................................... 29
Sorting the channels into your preferred order.................................................. 29
Deleting channels.................................................................................................. 30
Re-naming channels ............................................................................................. 31
Changing the on-screen display language.............................................................................. 32
Manually setting the clock .......................................................................................................... 32
MORE INFORMATION ABOUT YOUR VCR
VCR digital display ...................................................................................................................... 33
Selecting the output from the VCR ............................................................................................ 33
On-screen display......................................................................................................................... 34
Specifications................................................................................................................................ 35
Troubleshooting ............................................................................................................................ 36
TINS-3775UMZZ ENGLISH.book Page 1 Monday, March 13, 2000 11:31 AM
GB-2
BEFORE USING YOUR VCR
IMPORTANT NOTES ON YOUR VCR
IDEAL VCR LOCATION
PLACE THE VCR..
• ... on a flat level surface away from radiators
or other heat sources and out of direct
sunlight.
• ... and video tapes away from magnetic
sources such as speakers or microwave ovens.
• ... at least 8” (20cm) away from the TV.
• ... away from curtains, carpets or other
materials and allow ventilation space around
the VCR.
DO NOT...
• ... block the air-vent openings.
• ... expose the VCR to excessive dust,
mechanical vibration or shock.
• ... place any heavy object or liquid on top of
the VCR. If liquid drops inside the VCR unplug
immediately and contact your SHARP dealer.
Do not use the VCR.
• ... insert or drop anything into the tape
compartment or through the
air-vents, as this could result in serious
damage, fire or an electric shock.
POWER SOCKETS
• To avoid overheating or even fire, insert the
plug correctly into the socket.
DO NOT...
• ... overload power sockets, this may cause a
fire or electric shock.
• ... pull the power cord to disconnect the plug
from the mains.
• ... bind the power cords together.
• This VCR is not equipped with a mains power
switch. Accordingly, nominal current to drive
the clock is drawn at all times when the AC
power cord is plugged into a wall socket. If
the VCR is not to be used for an extended
period be sure to unplug the cord.
TINS-3775UMZZ ENGLISH.book Page 2 Monday, March 13, 2000 11:31 AM

GB-3
BEFORE USING YOUR VCR
UNPACKING THE ACCESSORIES
To fit the batteries into the remote control
Remove the battery cover on the back of the remote control.
Fit the batteries: to and to . terminals. Place the
battery cover back into position.
CHECK ALL THESE ACCESSORIES ARE SUPPLIED WITH YOUR VCR. CONTACT YOUR DEALER IF
ANY ARE MISSING.
(TYPE AA/R6/UM3)
BATTERIES (X2)
for the remote control unit.
RF CONNECTION CABLE
connects the VCR to the TV.
Remote Control
• Remote Control must be pointed towards the VCR to operate.
• Do not expose to liquid or shock.
• May not function if the VCR is in direct sunlight or any other strong light.
• Replace both alkaline batteries (type AA/R6/UM3) if the remote control
fails.
• Remove the batteries and keep in a safe place if you do not plan to use
the VCR for several months.
• Remove and dispose of flat batteries safely and promptly.
• Incorrect use of batteries may cause them to leak or burst.
VIDEO CASSETTE RECORDER
REMOTE
CONTROL
For a more
detailed
picture of
your remote
control refer
to page (ii).
Battery cover
TINS-3775UMZZ ENGLISH.book Page 3 Monday, March 13, 2000 11:31 AM

GB-4
INSTALLING YOUR VCR
CONNECTING THE CABLES
✔
The VCR is correctly connected.
Connect your existing aerial
cable to the
ANTENNA IN
socket on your VCR.
Optional:
Connect your
Satellite receiver or decoder to
the VCR using a scart lead to
LINE 2 IN/DECODER
socket on the VCR.
Connect the VCR to the
mains
Optional
SCART (not supplied). If you
have a scart lead connect it to your TV and
LINE 1 IN/OUT
socket on the VCR.
Connect your TV
to the VCR using
the supplied rf
connection cable,
i.e. connect the
VCR
RF OUT
socket to the TV
AERIAL IN
socket.
AERIAL OR
CATV CABLE
DECODER UNIT
OR SATELLITE SYSTEM
BACK OF
TELEVISION
(
Model shown is
VC-MH76GM
)
TINS-3775UMZZ ENGLISH.book Page 4 Monday, March 13, 2000 11:31 AM

GB-5
INSTALLING YOUR VCR
TUNING THE TV INTO THE VCR
1.
Press
STANDBY
to ensure your
VCR is still in the STANDBY mode.
2.
Switch on the TV. Select an unused
channel on your TV for your VCR (there
may be a dedicated video channel refer
to your TV operation manual).
3.
Press and hold the
MENU
button for 3
seconds. The VCR will search and display
the ideal RF channel.
CAUTION:
If the clear button is pressed at this point it will not allow the TV to be tuned to the VCR. Refer
to RF through ON/OFF.
4.
Tune the selected channel on your TV
(refer to your TV manual) until the menu
screen appears.
5.
Press
SET
to store the RF channel and to
place the VCR back into STANDBY.
NOTE:
✔
The TV is tuned to the VCR.
• If you have a preferred channel, the RF channel can be set manually (21-69) after
Step 3 using [ / ] keys.
RF THROUGH ON/OFF:
• If you wish to connect your VCR to the TV with only a scart lead, the RF Output on your
VCR can be turned OFF and ON by pressing the
CLEAR
button then
SET
to return to
STANDBY at point 2. This will help minimise interference.
VCR
Example:
MENU SCREEN
SHOWV IEW
TIMER
MODE
GRUNDE I NSTELLUNG
:WÄHLEN
SET : E I NGABE MENU : ENDE
TINS-3775UMZZ ENGLISH.book Page 5 Monday, March 13, 2000 11:31 AM

GB-6
INSTALLING YOUR VCR
AUTO INSTALLATION
Press
STOP
to switch on your VCR.
This model will automatically tune in the TV channels in your area, sort them into a standard
order and set the clock.
The screen opposite should be showing on your TV.
Follow the instructions from the screens.
(Auto sort will take a few minutes to complete)
On completion, the MOVE MENU will appear
showing the present channel order. Press
MENU
to
exit.
If the clock is NOT automatically set, the clock
screen will appear., refer to
MANUALLY
SETTING THE CLOCK
. To check the clock has
been set correctly, press DISPLAY until the time
appears on the display.
If you wish to customise the channel order refer to
MANUALLY SORTING CHANNELS
.
VCR RESET
1.
Press
STOP
to switch on the VCR.
2.
Press and hold
MENU
and
CHANNEL
buttons together on the front of the VCR
for 10 seconds.
3.
The AUTO INSTALLATION screen should now be showing on your TV.
4.
Follow the on-screen display to proceed with auto installation.
✔
All the programmes should now be correctly tuned in and the clock set.
Refer to the
CUSTOMISED INSTALLATION
chapter if
• Your VCR could not tune automatically - due to for example poor reception.
• You wish to re-arrange the channel order.
• You wish to change the time on the clock or if the VCR could not set the time.
• If the screen above does not
appear, follow the procedure
VCR RESET below.
AUTO I NSTALLAT I ON
PRESS SET KEY TO START
AUTOMAT I SCHE E INSTELLUNG
ZUM BEGINN,DIE SET-TASTE
DRÜCKEN .
SET : E I NGABE MENU : ENDE
TINS-3775UMZZ ENGLISH.book Page 6 Monday, March 13, 2000 11:31 AM

GB-7
BASIC OPERATION
IMPORTANT NOTES ON YOUR VCR AND VIDEO
TAPES
VIDEO TAPES
• If you use only good quality video tapes, generally it will not be necessary to clean the
video heads.
• If poor quality tapes are used, or if a tape is loaded after changing VCR location, oxide
from the tape may "clog" the video heads. This will cause the playback picture to be
"snowy", or even disappear.
• To remove minor contamination run a video tape in visual search mode. If this fails, you
will need to have the heads cleaned by a SHARP Service Facility. Please note, if cleaning
is necessary it is not covered by the guarantee.
• Use video tapes which carry the mark.
HOW TO PLAYBACK A VIDEO TAPE
PLAYBACK
1.
Switch on your TV and select the video channel.
2.
Carefully push a pre-recorded video
tape into the tape compartment.
This will switch the VCR on.
• If the record-protection tab has
been removed, the VCR will start
playback as soon as the video tape
has been loaded.
3.
To start playback, press
PLAY/X2
().
BEFORE YOU PLAYBACK A VIDEO TAPE
Condensation forms in the VCR when it is moved out of or into a warm place.
If you try to playback or record, the video tape and VCR may be damaged.
Turn the VCR on and wait for about two hours until the VCR reaches room
temperature before operating.
SECAMPAL
Record protection tab
TINS-3775UMZZ ENGLISH.book Page 7 Monday, March 13, 2000 11:31 AM

GB-8
BASIC OPERATION
HOW TO PLAYBACK A VIDEO TAPE
SHARP SUPER PICTURE
should enhance the picture quality during playback. It is
normally set to ON. To turn
SHARP SUPER PICTURE
on or off press
SUPER P.
on the
VCR front panel.
• For double speed playback (without sound), press
PLAY/X2
( ) again.
• To revert to normal playback, press
PLAY/X2
( ) again.
• To stop the video tape, press
STOP
().
• To eject the tape press
EJECT
on the VCR.
PICTURE DISTURBANCE DURING PLAYBACK
This VCR has an automatic tracking system which reduces picture disturbance when you start
to playback a video tape. When auto-tracking is in operation flashes on the on-screen
display. If the picture still has disturbance you may need to manually track the video tape:
During PLAYBACK of a video tape.
• Press
CHANNEL
or to position picture interference off the TV screen. (Manual
Tracking)
• Press
CHANNEL
and buttons together to start Auto Tracking.
PAUSING AND SLOW MOTION
1.
Press
PLAY/X2
( ) to start the video tape playing.
2.
To pause the video tape, press
PAUSE/STILL
()
.
• To minimise jitter whilst in pause mode press
CHANNEL
or .
• Press
PLAY/X2
( ) to resume playback.
3.
To playback in slow motion (without sound) press
SLOW
on the remote control. Slow
motion speed can be adjusted using the or buttons next to the slow button.
Picture disturbance can be improved by using the
CHANNEL
or during slow
motion playback.
• Press
PLAY/X2
( )to resume playback.
NOTES:
• There will be picture interference and possibly a change to black and white picture
using Pause and Slow functions.
• PAUSE mode will disengage after about 5 minutes.
TINS-3775UMZZ ENGLISH.book Page 8 Monday, March 13, 2000 11:31 AM

GB-9
BASIC OPERATION
HOW TO PLAYBACK A VIDEO TAPE
FAST FORWARDING/REWINDING A VIDEO TAPE
1.
Press
STOP
( ) to stop the video tape.
2. Press FAST FORWARD ()/REWIND ( ) on the remote control or turn the
shuttle ring on the VCR to the Right/Left and release.
3. To stop fast forward/rewind, press STOP ().
FORWARD/REVERSE VISUAL SEARCH
1. During playback, press FAST FORWARD ()/REWIND ( ) on the remote
control, or turn the shuttle ring fully to the Right/Left.
2. To lock search mode turn the shuttle far Right/Left and release.
3. To decrease the speed, press FAST FORWARD ()/REWIND ( ) again, or
turn the shuttle to the halfway position.
4. Press PLAY/X2 ( ) to resume playback.
NOTE:
• There will be picture interference and possibly a change to black and white picture
using Visual Fast Forward/Rewind functions.
TINS-3775UMZZ ENGLISH.book Page 9 Monday, March 13, 2000 11:31 AM

GB-10
BASIC OPERATION
IMMEDIATE RECORDING
SELECTION OF A CHANNEL
Select the channel by using the number buttons on the remote control, or select the
next/previous channel by pressing CHANNEL [or].
To change between single digit and 2-digit channel numbers, press AM/PM .
For example, for channel 24, press AM/PM then press 24.
You can record the channel you are watching or a different channel.
1. Insert a video tape into your VCR.
2. Select the channel you wish to record on the VCR.
3. To start recording, press REC ().
4. To pause during recording, press PAUSE/STILL ().
5. To continue recording, press REC ().
6. To stop recording, press STOP ( ) once.
SIMPLE TIMED RECORDING:
1. To specify a stop time, press REC ().
2. Each additional press of REC ( ) will delay
the stop time by 10 minutes.
3. To stop recording at any time, press
STOP ( ) once.
NOTES:
• If the tape ends before the recording is complete the VCR will stop recording and
rewind, or eject if the VCR is in timer record mode.
• If the VCR ejects the video tape when you press REC ( ) the tape is record
protected. i.e. record protection tab has been removed.
STOP 15:30
TINS-3775UMZZ ENGLISH.book Page 10 Monday, March 13, 2000 11:31 AM

GB-11
BASIC OPERATION
HOW TO USE TO MAKE A RECORDING
• If appears on the VCR display, press TIMER ON/OFF before starting.
• Check that the clock is displaying the correct time.
SHOWVIEW allows you to program the VCR to
record up to eight programmes using the
SHOWVIEW numbers published in TV listings...
1. Press SHOWVIEW on the remote control
2. Enter the SHOWVIEW number from the TV
listing using the NUMBER BUTTONS.
NOTE:
3. Press [ / ] to select ONCE, WEEKLY, DAILY
4. If you want to make additional recordings at the same time each day or week, then use
[ / ] to select the WEEKLY, or DAILY option as appropriate.
5. Press SET to confirm..
NOTE:
The first time that you use SHOWVIEW to make a
recording on each channel Preset, (PR) may be
highlighted on the menu.
6. Enter the channel you wish to record using
the NUMBER BUTTONS, for example if
you wish to record channel 2 press 0 2. The
VCR will remember this for the future.
NOTES:
• An ERROR message will appear if you have entered a number that is not a current
SHOWVIEW number. If this happens press CLEAR to delete the numbers as required
and enter the correct SHOWVIEW number
• Check that the menu list agrees with the times shown in the TV listing. If it does not press
CLEAR to return to the SHOWVIEW menu, and re-enter the correct SHOWVIEW number
You may also access the SHOWVIEW menu by the following procedure:
i. Press MENU.
ii. The SHOWVIEW option will be highlighted. Press SET to confirm.
Continue from step 2 above.
→SHOWVIEW NO. -
ONCE WE EK L Y D A I L Y
1/2
DATE PR START STOP
21/06 02 12:00 13:00 SP*
--/-- -- -:-- -:-- ---
--/-- -- -:-- -:-- ---
--/-- -- -:-- -:-- ---
PR : ZDF
:SELECT : CHANGE
SET : ENTER MENU : EX I T
TINS-3775UMZZ ENGLISH.book Page 11 Monday, March 13, 2000 11:31 AM
GB-12
BASIC OPERATION
HOW TO USE TO MAKE A RECORDING
7. If your VCR has long play facility and you wish
to change the RECORDING SPEED, use
the [ / ] to highlight SP. Press [ / ]
to select standard play (SP) or long play (LP)
as required.
8. [See NOTE below]. For VPS/PDC setting use
[ / ] to highlight the final column. Using
the [ / ] will select VPS/PDC ON or OFF
(✱= ON -= OFF).
9. Press SET to confirm the programme. The
SHOWVIEW menu will reappear. If you wish to
enter further SHOWVIEW recordings repeat
this procedure.
10. When you have completed entering timer
settings, press MENU to remove the menu
from the TV screen.
11. Press TIMER ON/OFF once to place the VCR
in TIMER POWERSAVE OR TIMER STAND-BY
mode. will be shown on the display.
NOTES:
• VPS/PDC is a signal broadcast by some TV stations which adjusts the start and stop time
of your VCR recording. This ensures that if there is a change in broadcast time for your
programme the VCR will still record the whole programme. It is essential that the start
time as it appears in the TV listing is used to program the VCR, as this information is used
to identify the VPS/PDC signal corresponding to your programme.
• If flashes a video tape has not been inserted into the VCR.
• If the video tape is ejected when the VCR tries to record the record protection tab has
been removed.
• During recording, press STOP ( ) to cancel the recording. If there are further
recordings to be made, the VCR will return to TIMER POWERSAVE OR TIMER STAND-BY.
1/2
DATE PR START STOP
21/060212:0013:00SP *
--/-- -- -:-- -:-- ---
--/-- -- -:-- -:-- ---
--/-- -- -:-- -:-- ---
TAPE SPEED :SP / LP
:SELECT : CHANGE
SET : ENTER MENU : EX I T
1/2
DATE PR START STOP
21/060212:0013:00SP-
--/-- -- -:-- -:-- ---
--/-- -- -:-- -:-- ---
--/-- -- -:-- -:-- ---
VPS/PDC ✱:ON - :OFF
:SELECT : CHANGE
SET : ENTER MENU : EX I T
TINS-3775UMZZ ENGLISH.book Page 12 Monday, March 13, 2000 11:31 AM
GB-13
BASIC OPERATION
HOW TO SET A DELAYED RECORDING
You can make a maximum of eight delayed recordings up to a year in advance.
The example shown is for 24-hour clock operation. 12-hour clock operation can be selected
from the manual clock setting menu.
12-hour clock am/pm can be selected using the AM/PM button on the remote control.
• If appears on the VCR display, press TIMER ON/OFF before starting.
• Check that the clock is displaying the correct time.
SETTING A RECORDING
For example: Recording a programme on channel 3 from 21:05 to 22:30 on July 9th.
1. Press STOP ( ) to switch on the VCR.
2. Press MENU .
3. Press [ / ] to select TIMER. Press SET to
confirm.
4. The position which is initially highlighted is the
next available timer record entry. Press SET to
confirm this.
• The display will automatically show today's
date.
Either: If this is the date you wish to make the
recording on, press SET to confirm this.
Or: enter the recording date using the
[ / ] or the NUMBER BUTTONS.
Enter two digits for the day, then two for the
month. For example for July 9th, press 0 9 (9th),
then 0 7 (July).
5. Then press SET to confirm.
6. If you want to make additional recordings at
the same time each day or week, use
[ / ] or select D (daily) or W (weekly).
Then press SET to confirm.
7. Enter the channel using the [ / ] or the
NUMBER BUTTONS. For example to
record a programme on channel 3, press 0 3.
Then press SET to confirm.
MENU SCREEN
TIMER
MODE
SET UP
:SELECT
SET : ENTER MENU : EX I T
1/2
DATE PR START STOP
21/060212:0013:00SP*
9/07 -- -:-- -:-- ---
--/-- -- -:-- -:-- ---
--/-- -- -:-- -:-- ---
1/2
DATE PR START STOP
21/060212:0013:00SP*
9/07D-- -:-- -:-- ---
--/-- -- -:-- -:-- ---
--/-- -- -:-- -:-- ---
TINS-3775UMZZ ENGLISH.book Page 13 Monday, March 13, 2000 11:31 AM
This manual suits for next models
1
Table of contents
Other Sharp VCR System manuals

Sharp
Sharp VC-D810S User manual

Sharp
Sharp VC-H900X User manual

Sharp
Sharp VC-H85X User manual

Sharp
Sharp vc-a260x User manual

Sharp
Sharp VC-MH741SM User manual

Sharp
Sharp VC-A411M User manual

Sharp
Sharp VC-A560U User manual

Sharp
Sharp VC-MH75FPM User manual

Sharp
Sharp VC-S2000HM Quick start guide

Sharp
Sharp VC-FH30SM User manual

Sharp
Sharp VC-90ET User manual

Sharp
Sharp VC-FH30FPM User manual

Sharp
Sharp VC-MH80 User manual

Sharp
Sharp VC-H680X User manual

Sharp
Sharp VC-A136X User manual

Sharp
Sharp VC-A410U User manual

Sharp
Sharp VC-H992U User manual

Sharp
Sharp XA-920 User manual

Sharp
Sharp VC-V50S User manual

Sharp
Sharp VC-A230X User manual