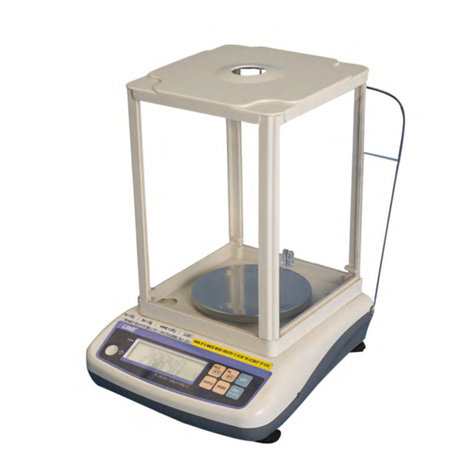
Shimadzu AUW220D User manual

321-56861-21D
MAR. 2013
For Basic Operation
Shimadzu Analytical Balance
Instruction Manual
AUW-D series AUW220D, AUW120D
AUW series AUW320, AUW220, AUW120
AUX series AUX320, AUX220, AUX120
AUY series AUY220, AUY120
O/T 1d/10d
UNITPRINT
POWER
BR K
C A L
MENU
Read the instruction manual thoroughly before you use the product.
Keep this instruction manual for future reference.


- I -
For Basic Operation
Requests
• Provide this manual to the next user in the event that the instrument is transferred.
• To ensure safe operation, contact your Shimadzu Balance representative for installation,
adjustment, or reinstallation after moving the instrument to a different site.
Notices
• The content of this manual is subject, without notice, to modifications for the sake of improve-
ment.
• Every effort has been made to ensure that the content of this manual was correct at the time
of creation. However, in the event that any mistakes or omissions are discovered, it may not
be possible to correct them immediately.
• The copyright of this manual is owned by Shimadzu Corporation. Reproduction and duplica-
tion of whole or part of the content without permission of the company are strictly prohibited.
• "Microsoft", "Windows", and "Excel" are registered trademarks of Microsoft Corporation of the
U.S.A. in the United States and other countries. All other company names and product names
that appear in this manual are trademarks or registered trademarks of the companies con-
cerned. Note that ™ and ®indications are not used.
• The company names, organization names and product names in this manual are trademarks
or registered trademarks of the companies and organizations concerned.
• Shimadzu does not guarantee that the WindowsDirect communication function will operate
without problems on all PCs. Shimadzu will accept no responsibility for any trouble that arises
as a result of using this function. You are recommended to back up all important data and pro-
grams in advance.
© 2003-2013 Shimadzu Corporation. All rights reserved.

- II -
For Basic Operation
Other conventions used in this manual include:
Note
This instruction manual uses the following notation conventions to indicate
Safety Precautions and additional information.
Caution Indicates a potentially hazardous situation that may
result in injury to personnel or equipment damage.
Note Provides additional information needed to properly
use the balance.
Item Description
1, 2, 3 .... Indicates the step number in a procedure or a sequence of changes in the balance display.
[ ] key Indicates the operation key on the balance. See 2.2.
“ ” Indicates the message appearing in the balance display.
mass display Indicates that the balance is in the weighing mode and mass is displayed in one of the weigh-
ing units.
Notation Conventions

- III -
For Basic Operation
To ensure that you use the balance safely and correctly, read the following precautions carefully and
observe them.
WARNING
Never disassemble, modify or attempt to repair this product or any
accessory.
You could sustain an electric shock or the product could operate abnormally.
If you believe that the balance has failed, contact your Shimadzu representative.
Use the balance with correct power supply and voltage.
Use the balance with the attached AC adapter.
Using the balance with an incorrect power supply or voltage will lead to fire or trouble
with the balance.
Note also that if the power supply or voltage is unstable or if the power supply capacity
is insufficient, it will not be possible to obtain satisfactory performance from the balance.
Use the correct weighing units.
Using incorrect weighing units can lead to accidents as a result of weighing errors.
Check that the weighing units are correct before starting weighing.
Do not use the balance outdoors or anywhere where it will be exposed to
water.
You could sustain an electric shock or the product could operate abnormally.
The levels of danger and damage that will arise if the balance is used incorrectly are classified and
indicated as shown below.
Precautions are classified and explained by using one of the symbols below, depending on the
nature of the precaution.
WARNING
Indicates a potentially
hazardous situation which,
if not avoided, could result in
serious injury or possibly death.
CAUTION
Indicates a potentially
hazardous situation which,
if not avoided, may result in
minor to moderate injury or
equipment damage.
Indicates an action that must be
performed.
Indicates an action that must
NOT be performed.
Instructions Prohibitions
Prohibitions
Instructions
Instructions
Prohibitions
Safety Precautions To be strictly observed

- IV -
For Basic Operation
CAUTION
Avoid locations where the balance
will be exposed to any of the
following.
This could cause accidents or poor
performance.
• Air flow from an air conditioner,
ventilator, door or window
• Extreme temperature changes
•Vibration
• Direct sunlight
• Corrosive or flammable gases
• Dust, electromagnetic waves or a
magnetic field
Install the balance on a strong and stable flat table or floor in the room.
Placing the balance in an unstable site could lead to injury or trouble with the balance.
When selecting the installation site, take into account the combined weight of the
balance and the item to be weighed.
After a power outage, turn the power back ON.
When a power outage occurs, the power is shut off automatically. Therefore, begin
operation from 4.4 “Turning On the Power” (^page 12) again.
Treat the balance with care and respect.
The balance is a precision instrument. Subjecting it to impacts could cause it to fail.
When moving the balance, remove pan and pan supporter. Grasp it firmly with both
hands to carry it.
If the balance has to be stored for a long time, store it in the packaging box in which it
was delivered.
Do not connect anything other than peripheral devices specified by
Shimadzu to the balance’s connector.
If you do, the balance may stop working normally.
In order to avoid trouble, always connect peripheral devices in accordance with the
directions in this manual.
If you detect anything abnormal (e.g. a burning smell) disconnect the AC
adapter immediately.
Continuing to use the balance with an abnormality could lead to fire or an electric
shock.
Prohibitions
Instructions
Instructions
Instructions
Prohibitions
Instructions

- V -
21 CFR Part 11
21 CFR Part 11, Electronic Records, Electronic Signatures, Final
Rule (often referred to as Part 11) is the United States Food and
Drug Administration (FDA) regulation affecting computer resources
and electronic records that are used for any document that is
required to be kept and maintained by FDA regulations.
Requirements concerning computer resources security are key ele-
ments in Part 11.
The controls implemented as a result of security related require-
ments are intended to result in trusted records.
Shimadzu CLASS-Balance Agent
Shimadzu provides a means for compliance with 21 CFR Part 11
with Shimadzu CLASS-Balance Agent software, part of a compre-
hensive laboratory data management system, Shimadzu CLASS
Agent.
Ask your Shimadzu representative about it.
Shimadzu WindowsDirect
When Shimadzu balances are integrated with laboratory software by
means of our WindowsDirect function, no communication software is
required or used.
The Shimadzu balance functions as a primary device in the system,
just as a keyboard, mouse or other data entry hardware does.
For this reason, system validation and compliance may be greatly
simplified with the use of Shimadzu balances.
Two-way Communication
Shimadzu balances have always been computer friendly and they
can be set up for bi-directional communication as part of a fully auto-
mated production system or LIMS.
This manual includes the command codes and information needed
by programmers to integrate Shimadzu balances with their software.
Shimadzu Balances and 21 CFR Part 11

- VI -
To all user of Shimadzu equipment in the European Union:
Equipment marked with this symbol indicates that it was sold on or after 13th August 2005,
which means it should not be disposed of with general household waste. Note that our equip-
ment is for industrial/professional use only.
Contact Shimadzu service representative when the equipment has
reached the end of its life.
They will advise you regarding the equipment take-back.
With your co-operation we are aiming to reduce contamination from
waste electronic and electrical equipment and preserve natural
resource through re-use and recycling.
Do not hesitate to ask Shimadzu service representative, if you require
further information.
WEEE Mark
Action for Environment (WEEE)

- i -
1. Introduction ........................................................................................................... 1
2. Component Names and Functions ............................................................ 2
2.1 Main Components .............................................................................................. 2
2.2 Key Panel and Operation ................................................................................... 3
2.3 Balance Display and Functions ........................................................................... 4
3. Specifications ....................................................................................................... 5
4. Installation ............................................................................................................. 7
4.1 Installation Site .................................................................................................. 7
4.2 Unpacking and Delivery Inspection .................................................................... 8
4.3 Installation ......................................................................................................... 10
4.4 Turning On the Power ........................................................................................ 12
4.5 Span Calibration ............................................................................................... 13
5. Basic Operation
(Read Chapters 1 to 5 for basic but proper operation of the balance.) 15
5.1 Weighing ........................................................................................................... 15
5.2 Changing the Unit Display .................................................................................. 17
5.3 Switching the Weighing Range (AUW-D series only) ........................................... 17
5.4 For Stable Measurement in Semi-micro Range (AUW-D series only) ................... 18
6. WindowsDirect Function ................................................................................ 20
6.1 What is WindowsDirect? .................................................................................... 20
6.2 WindowsDirect Settings ..................................................................................... 20
6.2.1 Setting the Balance ................................................................................ 20
6.2.2 Connecting the RS-232C Cable .............................................................. 21
6.2.3 Setting Up the Computer ........................................................................ 22
6.2.4 Start and Checking Operation ................................................................. 24
6.3 Troubleshooting the WindowsDirect Communication Function ............................. 25
7. Menu Item Selection ......................................................................................... 27
7.1 What is a menu? ................................................................................................ 27
7.2 What is a menu map? ........................................................................................ 27
7.3 Menu Item Selection Procedures ........................................................................ 28
7.4 Useful Functions Related to Menu ...................................................................... 30
7.4.1 Settings Check Display .......................................................................... 30
7.4.2 Returning to Default Settings (Menu reset) .............................................. 30
7.4.3 Menu Lock ............................................................................................. 31
Contents

- ii -
Contents
8. Setting the Built-in Clock (AUW-D/AUW/AUX series only) ............ 32
8.1 Date ................................................................................................................... 32
8.2 Date Output Style ............................................................................................... 33
8.3 Time ................................................................................................................... 34
9. Display Settings ................................................................................................... 35
9.1 Bar Graph Display .............................................................................................. 35
9.2 Changing the Minimum Display (AUW/AUX/AUY series only) ............................... 36
9.3 Turning the Backlight On and Off (AUW series only) (Not for AUW-D) .................. 37
10. Calibration ........................................................................................................... 38
10.1 What is calibration? ............................................................................................ 38
10.1.1 The Necessity of Calibration .................................................................... 38
10.1.2 Types of Calibration ................................................................................ 39
10.2 Executing Calibration .......................................................................................... 40
10.2.1 Span Calibration With Built-in Weight (AUW-D/AUW/AUX series only) ...... 40
10.2.2 Span Calibration With External Weights ................................................... 41
10.2.3 Calibration Check With Built-in Weight (AUW-D/AUW/AUX series only) .... 42
10.2.4 Calibration Check With External Weights ................................................. 43
10.3 Calibration Settings ............................................................................................. 44
10.3.1 Selecting Preset Calibration Method ........................................................ 44
10.3.2 PSC Fully-automatic span calibration (AUW-D/AUW/AUX series only) ...... 45
10.3.3 Clock-CAL Fully-automatic span calibration (AUW-D/AUW series only) .... 47
10.3.4 PCAL: Calibration of the Built-in Weight (AUW-D/AUW/AUX series only) .. 49
10.3.5 Inputting External Calibration Weight Value for E-CAL ............................. 50
10.3.6 Inputting External Calibration Weight Value for PCAL ............................... 51
10.4 For GLP/GMP/ISO Compliance ........................................................................... 52
10.4.1 Calibration Report Setting ....................................................................... 52
10.4.2 Balance ID Setting .................................................................................. 53
10.4.3 Date Printout Setting ............................................................................... 54
11. Environment Settings ................................................................................... 55
11.1 What are environmental settings? ....................................................................... 55
11.2 Settings for Stability and Response ..................................................................... 55
11.2.1 Standard mode ....................................................................................... 55
11.2.2 Anti-convection mode .............................................................................. 55
11.2.3 High-stability Mode ................................................................................. 56
11.2.4 Pouring Mode (fast response) ................................................................. 56
11.3 Stability Detection Band ...................................................................................... 58
11.4 Zero Tracking ..................................................................................................... 59
11.5 Stability Mark Lighting Timing .............................................................................. 60

- iii -
Contents
12. Units ...................................................................................................................... 61
12.1 Setting Units of Measurement ............................................................................ 61
12.2 Percentage (%) Conversion ............................................................................... 63
13. Application Functions .................................................................................. 64
13.1 Piece Counting (PCS) ........................................................................................ 64
13.2 Solid Specific Gravity Measurement ................................................................... 65
13.3 Liquid Density Measurement .............................................................................. 68
13.4 Auto Print .......................................................................................................... 71
13.5 Interval Timer (AUW-D/AUW/AUX series only) .................................................... 72
13.6 Add-on Mode ..................................................................................................... 74
13.7 Formulation Mode .............................................................................................. 77
14. Communication with Peripheral Devices ........................................... 79
14.1 Electronic Printer EP-80 ..................................................................................... 79
14.2 Personal Computer - RS-232C ........................................................................... 80
14.2.1 Connecting the Cable ............................................................................ 80
14.2.2 Data Format ........................................................................................... 81
14.2.3 Command Codes ................................................................................... 83
14.3 Communication Settings .................................................................................... 85
14.3.1 What are communication settings? ......................................................... 85
14.3.2 Standard Setting .................................................................................... 85
14.3.3 User Setting ........................................................................................... 86
14.4 Decimal Point Symbol in Output Data ................................................................. 89
15. Maintenance and Transport ...................................................................... 90
15.1 Maintenance ...................................................................................................... 90
15.2 Transport ........................................................................................................... 92
16. Troubleshooting .............................................................................................. 93
16.1 Error Code Displays .......................................................................................... 93
16.2 Troubleshooting ................................................................................................. 94
Appendices .................................................................................................................... 95
A-1. Menu map ......................................................................................................... 95
A-2. Standard Accessories and Maintenance Parts List .............................................. 98
A-3. Special Accessories (Options) List ...................................................................... 98
A-4. Specifications for RS-232C Connector ................................................................ 99
A-5. Table of Unit Conversion Constants .................................................................... 100
A-6. Performance Check Guide ................................................................................. 101
A-7. Below-weigh Hook Dimensions .......................................................................... 103
A-8. Index ................................................................................................................. 104


1
1. Introduction
For Basic Operation
1. Introduction
Thank you for choosing the Shimadzu AUW-D/AUW/AUX/AUY Series analytical balance. Shimadzu
confidently offers this high-performance analytical balance, the result of over 90 years of experience in
manufacturing precision balances. While providing rapid and accurate mass measurement, reliability
has been improved even more by employing the UniBloc cell, introduced for use in electronic balances
by Shimadzu in 1989. These Shimadzu analytical balances provide WindowsDirect functions for trans-
fer of measurement results to personal computer without installing software. This and other various
functions can be used to meet the operator’s objectives. Also, the AUW-D/AUW/AUX series offers con-
sistently accurate measurement without calibration work, with temperature detection and time setting,
and the built-in motor-driven calibration weight that performs fully-automatic span calibration.
In order to make full use of the functions and performance provided in the AUW-D/AUW/AUX/AUY
series balance, please read this instruction manual before using the balance and keep the manual for
future reference.
For information on the following points, please contact your Shimadzu Balance representative.
• Product warranty
• After service
This manual has notation for AUW-D series, AUW series, AUX series, AUY series, combined as AUW-
D/AUW/AUX/AUY series (or notations two to three series). Note that the menu settings and the calibra-
tion display examples shown in this manual are mainly for the AUW220 model. On different models,
the numerical values and other items may differ.
The model name can be found in the label placed in front of the weighing chamber. The alphabets in
model name indicate its series name. AUW220D and AUW120D are called AUW-D series.
Symbols Used in the Manual
1,2,3 … Shows operation procedure.
[POWER] key, etc. [ ] shows operation keys .
“E-CAL” etc. Shows items displayed on the balance, including displays appearing during
menu selection.
g display The balance display is in gram unit so the value changes depending on the
load on the pan.
Mass display The balance display is in one of mass units so the value changes depending
on the load on the pan.

2
2. Component Names and Functions
For Basic Operation
2. Component Names and Functions
2.1 Main Components
Read these pages before installation
O/T 1d/10d
UNIT PRINT
POWER
B R K
C A L
MENU
Glass door (3 places)
Opens to allow items to be put in
the weighing chamber.
Must always be closed when
reading the results.
Pan
Supports the object to be weighed.
Weighing chamber
Eliminates the influ-
ence of air flow.
Anti-draft ring
Reduces influence on
measurement from air
drafts.
Balance main body
Sealing sticker
Please do not remove. Level screws
Adjusted for level installation
of the balance.
Display panel
Displays information such as
results, errors, functions in
progress, and information for
function settings.
Key panel
Contains the switches for
executing taring, function
setting, or calibration.
Level indicator
used to install the
balance level.
Theft prevention ring
For chains or other
attachments.
Data I/O connector
DC IN
connector
RS-232C connector
Label
Shows model name and infor-
mation on legal measuring
instrument.
Indications of “Max”, “Min”, “e”,
“d” are required by legal metrol-
ogy and do not restrict weighing
range in general weighing.
Below-weigh hook cover
Ground terminal
attachment screw
Keyboard connector

3
2. Component Names and Functions
For Basic Operation
2.2 Key Panel and Operation
The following is a list of the functions for each key.
*1 Either “Taring” (at a weight exceeding 2.0% of the capacity) or “Zero-setting” (at a weight within 2.0% of the
capacity) takes place with a verified balance as a legal measuring instrument in EU.
*2 Output is not made until the display is stable with a verified balance as a legal measuring instrument in EU.
*3 Not applicable to a verified balance as a legal measuring instrument in EU.
Key During Measurement
Pressed once and released Pressed and held for about 3 seconds
[POWER] Switches between the operation and standby modes. Switches the key notification buzzer on/off.
[CAL] Enter calibration or menu item selection. Enter calibration or menu item selection.
[O/T] Tares the balance. (Displays zero.) *1
[UNIT] Switches the units of measurement.
[PRINT] Outputs the displayed values to an electronic printer,
computer, or other external devices.*2
Outputs the date and time to external
devices. (Not with AUY)
[1d/10d] AUW/AUX/AUY Switches display between 1d/10d. (Minimum display is rounded by one digit.) *3
AUW-D Switches the weighing range.
Key During Menu Item Selection
Pressed once and released Pressed and held for about 3 seconds
[POWER] Return to the menu above the current menu level. Returns to mass display.
[CAL] Moves to the next menu item.
[O/T] Select or set the displayed item, or enter into the displayed menu.
[UNIT] Numerical value input,
increases the numeric value of the blinking digit by 1.
[PRINT] Numerical value input, moves the blinking digit.
[1d/10d] No effect.
O/T 1d/10d
UNIT PRINT
POWER
BR K
C A L
MENU
[POWER] key [CAL] key [O/T] key [UNIT] key [PRINT] key [1d/10d] key

4
2. Component Names and Functions
For Basic Operation
2.3 Balance Display and Functions
Display Name Description
Stability mark Indicates that the weighed value is stable. In menu selection, indicates the
currently selected item.
Tare symbol Indicates that Taring has been made at over 2.0% of the capacity.
Zero symbol
Note: Using a verified balance as a legal measuring instrument in the EU:
Indicates that the balance is set exactly to “Zero” with the zero-setting function
(within ±0.25e: e = verification scale interval).
Weight symbol Appears during span calibration. Blinks before automatic calibration starts.
Blinks to advise necessity of span calibration.
[ ] Bracket Note: Using a verified balance as a legal measuring instrument in the EU:
The figure(s) bordered by the bracket is(are) the auxiliary indicating device.
Number symbol Indicates numeric value entry.
Menu symbol Appears during menu selection. Always shown when the menu is locked.
Add-on symbol Indicates set-up of Add-on mode or Formulation mode.
Memory symbol Indicates set-up of Formulation mode.
Communication
symbol
Indicates communication with external devices via RS-232C cable or Data I/O
connector. Shown when communication functions are ON.
Battery symbol Indicates a low battery voltage when using the balance with the optional bat-
tery pack.
Auto Print symbol
Indicates set-up of the Auto Print function.
Standby mark Appears during standby status. Indicates standby of the interval timer output
function.
Inverse triangle Illuminates as part of the solid specific gravity measurement display.
Bar graph display section Units display section
(Some of the symbols and characters on the balance display are not used by this balance.)
Bar graph display section

5
3. Specifications
For Basic Operation
3. Specifications
Series name AUW-D series
(Dual range type) AUW series AUX Series AUY series
Model name AUW220D AUW120D
AUW320 AUW220 AUW120 AUX 320
AUX220 AUX120 AUY220 AUY120
Capacity 220g/82g 120g/42g 320g 220g 120g 320g 220g 120g 220g 120g
Minimum display
0.1mg/0.01mg 0.1mg/0.01mg
0.1mg 0.1mg 0.1mg 0.1mg 0.1mg 0.1mg 0.1mg 0.1mg
Repeatability
(standard
deviationσ)
≤0.1mg
(220g range)
≤0.05mg
(82g range)
≤0.1mg
(120g range)
≤0.02mg
(42g range)
≤0.15mg ≤0.1mg ≤0.1mg ≤0.15mg ≤0.1mg ≤0.1mg ≤0.1mg ≤0.1mg
Linearity
±0.2mg
(220g range)
±0.1mg
(82g range)
±0.2mg
(120g range)
±0.03mg
(42g range)
±0.3mg ±0.2mg ±0.2mg ±0.3mg ±0.2mg ±0.2mg ±0.2mg ±0.2mg
Response time
(typical)
3s
(220g range),
10s
(82g range,
Pouring mode
)
3s
(120g range),
10s
(42g range,
Pouring mode
)
3 s
Calibration weight Built-in None
Operation tem-
perature range 5 to 40
deg.
C
Temperature coefficient
of sensitivity
(10 to 30 deg.c)
±2ppm/
deg.
C (when PSC function is Off) ±2ppm/
deg.
C
Sensitivity stabil-
ity(10 to 30 deg.c) ±2ppm (when PSC function is On)
Pan size 80mm dia Approx.
Main body
dimensions 220mm W X 330mm D X 310mm H
Main body Weight 7kg Approx.
Rated electric
power supply DC 12V, 1A
Data I/O RS-232C
Pollution Degree 2
Overvoltage Category
Category II
Altitude Up to 2000 m
Installation Site device may only used indoors
AC adapter (primary)
AC 100-240 V, 400mA 50/60Hz
F
u
n
c
t
i
o
n
Display back-
light •••
PSC automatic
span calibration
• • ••••••
Clock-CAL • • •••
Built-in clock • • ••••••
GLP/GMP/ISO
calibration report
• • ••••••
WindowsDirect
• • ••••••••
Interval timer
output • • ••••••
RS-232 C I/F • • ••••••••
Specific gravity
measurement
software,
piece counting,
% display,
unit conversion
• • ••••••••
Analog
display • • ••••••••
Battery
(option) • • ••••••••

6
3. Specifications
For Basic Operation
ECTA series name
AUW-D series (dual range type)
AUW series AUX series AUY series
Model name
AUW220D AUW120D AUW320 AUW220
AUW120 AUX320 AUX220 AUX120 AUY220 AUY120
g
Accuracy class
IIII
IIIIII
Capacity
220g/82g 120g/42g 320g 220g
120g 320g 220g 120g 220g 120g
Verification scale interval (e)
0.001g 0.001g 0.001g 0.001g
0.001g 0.001g 0.001g 0.001g 0.001g 0.001g
Number of verification
scale interval
220000 120000 320000 220000
120000 320000 220000 120000 220000 120000
Scale interval (d)
0.0001g/
0.00001g
0.0001g/
0.00001g 0.0001g 0.0001g
0.0001g 0.0001g 0.0001g 0.0001g 0.0001g 0.0001g
Range of use
0.001g to 220g 0.001g to 120g 0.01g to
320g
0.01g to
220g
0.01g to
120g
0.01g to
320g
0.01g to
220g
0.01g to
120g
0.01g to
220g
0.01g to
120g
Tare range (by subtraction)
220g 120g 320g 220g
120g 320g 220g 120g 220g 120g
ct
Accuracy class
IIII
IIIIII
Capacity
1100ct/410ct 600ct/210ct 1600ct 1100ct
600ct 1600ct 1100ct 600ct 1100ct 600ct
Verification scale interval (e)
0.01ct 0.01ct 0.01ct 0.01ct
0.01ct 0.01ct 0.01ct 0.01ct 0.01ct 0.01ct
Number of verification scale
interval
110000 60000 160000 110000
60000 160000 110000 60000 110000 60000
Scale interval (d)
0.001ct/
0.0001ct
0.001ct/
0.0001ct 0.001ct 0.001ct
0.001ct 0.001ct 0.001ct 0.001ct 0.001ct 0.001ct
Range of use
0.01ct to 1100ct 0.01ct to 600ct 0.1ct to
1600ct
0.1ct to
1100ct
0.1ct to
600ct
0.1ct to
1600ct
0.1ct to
1100ct
0.1ct to
600ct
0.1ct to
1100ct
0.1ct to
600ct
Tare range (by subtraction)
1100ct 600ct 1600ct 1100ct
600ct 1600ct 1100ct 600ct 1100ct 600ct
Calibration weight
Built-in
None
Ambient operation temperature
10 to 30 deg.
C
Pan size
80mm dia approx.
Main body dimensions
220mmW X 330mmD X 310mmH approx.
Main body weight
7kg approx.
Rated electric power supply
DC 12V, 1A
Data I/O
RS-232C
Pollution Degree 2
Overvoltage Category Category II
Altitude Up to 2000 m
Installation Site device may only used indoors
AC adapter (primary) AC 100-240 V, 400mA 50/60Hz
F
u
n
c
t
i
o
n
Display backlight •••
PSC automatic span cali-
bration • • ••••••
Clock-CAL •••••
Built-in clock • • ••••••
GLP/GMP/ISO calibration
report • • ••••••
WindowsDirect • • ••••••••
RS-232C I/F • • ••••••••
Specific gravity measurement
software, piece counting, %
display • • ••••••••
Analog display • • ••••••••

7
4. Installation
For Basic Operation
4. Installation
4.1 Installation Site
(1) Power Requirements
Select an installation site that is near a power source to allow the use of the attached AC
adapter or a site where the special accessory battery pack can be properly used. Verify that the
power voltage conforms to that indicated on the AC adapter.
(2) Installation site
• Sites with air current from air conditioners, ventila-
tors, open doors, or windows.
• Sites with vibration.
• Sites in direct sunlight.
(Continued)
Caution
The balance must be installed in a proper place to ensure safe and accu-
rate measurement. Avoid the following types of sites.
This manual suits for next models
9
Table of contents
Other Shimadzu Scale manuals

Shimadzu
Shimadzu ELB Series User manual
Shimadzu
Shimadzu UW220H User manual
Shimadzu
Shimadzu TW Series User manual
Shimadzu
Shimadzu ATX224 User manual
Shimadzu
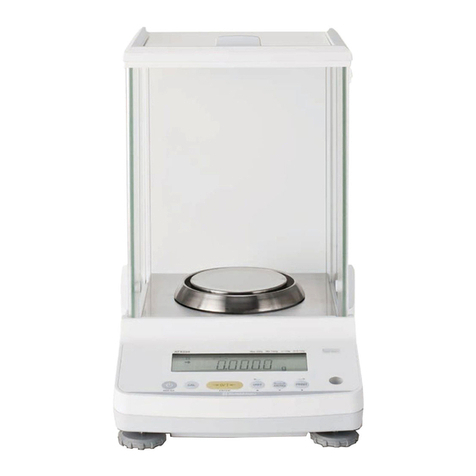
Shimadzu ATX-R Series User manual
Shimadzu
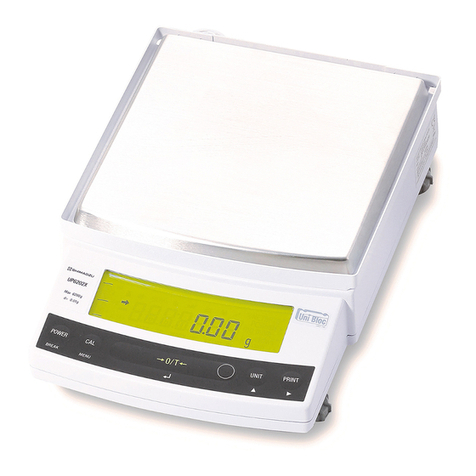
Shimadzu UPX Series User manual
Shimadzu
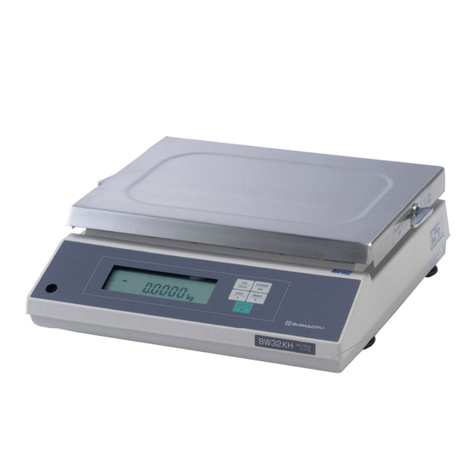
Shimadzu BX32KS User manual
Shimadzu
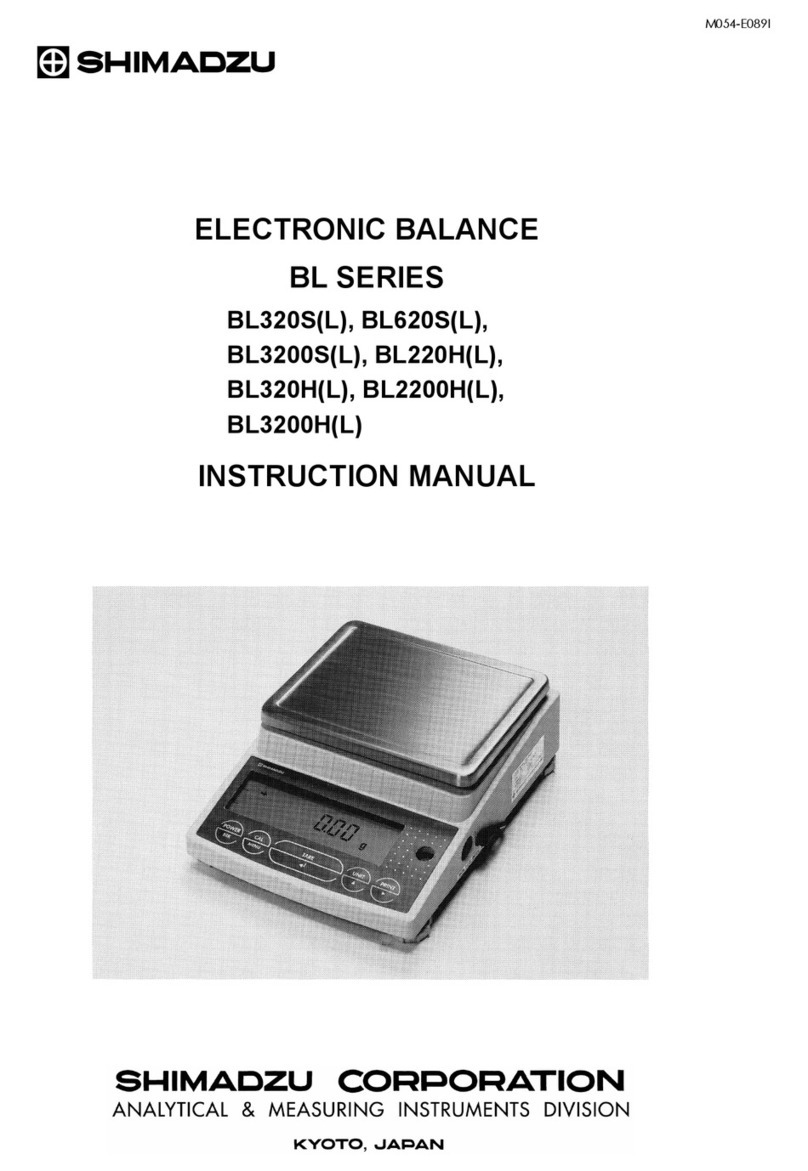
Shimadzu BL3200H User manual
Shimadzu
Shimadzu UW620HV User manual
Shimadzu
Shimadzu ATX Series User manual


