Shiro MJ User manual

MJ MP3 Digital Audio
Player (USB 2.0)
User Guide
Version 1.1

1
Table of ontents
Notice 1
Operation Buttons, Package Includes 2
Power On & Off, Minimum ystem Requirements, Menu Functions 3
Music Operation, Voice Operation, FM Operation 4
ystem ettings 5
etting Equalizer, etting Repeat Mode, etting Different Folder 6
etting A-B Clipping, Picture Operation, Video Operation, Ebook Operation 7
Recycle Operation, Convert video files to MV, Connecting Player to Computer 8
Firmware Upgrade, Troubleshooting Guide 9
Technical pecifications 10
Notice
NoticeNotice
Notice
1. Do not disconnect the player when it is being formatted or uploading/downloading data.
2. This product needs to be charged for at least 3 hours before usage.
3. The file name must not be longer than 50 characters.
4. If the player is locked, please press the HOLD switch to unlock it.

2
Operation Buttons
Operation Buttons Operation Buttons
Operation Buttons
Package Includes
Package IncludesPackage Includes
Package Includes
Installation CD, U B Cable, Earphone, User Guide
Neck trap
Compartment
D/MMC Card Compartment
Microphone
Reset
On/Off,
Play/Pause
A-B/EQ
Hold
peaker
On/Off
Left
Right
Vol
-
Vol+
Menu
Earphone
U B Port

3
Power On & Off
Power On & Off Power On & Off
Power On & Off
To power on the player, press Play/Pause. To power off the player, press and hold Play/Pause.
Minimum System Requirements
Minimum System RequirementsMinimum System Requirements
Minimum System Requirements
• Operating ystem: Windows® 98/98 E/ME/2000/XP or Macintosh™ O 10.x
• Hardware: 20MB of free disk space, 4x CD-ROM or higher, U B port
Menu Functions
Menu FunctionsMenu Functions
Menu Functions
1. Press Menu to go to the mode you need. To return to Main Menu, press and hold Menu.
2. You can select MUSI , VIDEO, PHOTO, FM RADIO, RE ORD, EBOOK, NAVIGATOR, SETUP and
RE Y LE.
3. You can choose the item by pressing Left/Right. Press Menu to enter.
4. Choose MUSI will go to music mode to enjoy your MP3/WMA songs.
5. Choose VIDEO will go to video mode to view movie of MV format only.
6. Choose PHOTO will go to picture viewing mode for JPG/BMP format only.
7. Choose FM RADIO will go to radio mode.
8. Choose RE ORD will go to voice recording mode.
9. Choose EBOOK will go to text file reading.
10. Choose NAVIGATOR will allow you to view different folders.
11. Choose SETUP will go to system settings mode.
12. Choose RE Y LE to delete files.

4
Music Operation
Music OperationMusic Operation
Music Operation
1. From Main Menu, navigate to MUSI .
2. Press Play/Pause will either play or pause the song.
3. Press Left/Right to choose to the next or previous song.
4. Press VOL+ or VOL- to adjust volume.
5. Press and hold Left/Right to fast forward or rewind.
Synchronous Lyrics
You must ensure the Music file has additional .LRC file on the same folder. E.g. ong.mp3 and
ong.LRC. While playing song, the lyrics will be shown automatically.
oice Operation
oice Operationoice Operation
oice Operation
1. From Main Menu, navigate to RE ORD. The voice recording will start automatically.
2. To start, pause or stop recording, press Play/Pause. To save recording and listen, press A-B/EQ.
FM Operation
FM OperationFM Operation
FM Operation
Adjusting and Saving Frequency
1. From Main Menu, navigate to FM RADIO. You can preset 20 fixed channel and navigate using
Left/Right.
2. Press Play/Pause to toggle between Seek and Listen mode.
3. To auto search and save all available stations, press Play/Pause to select Seek. Press and hold
Play/Pause to start scanning and saving all available FM stations.

5
4. To search manually, press Play/Pause to select Seek. Press and hold Left/Right to scan for
available station, press and hold Menu and you will see Save. Press Left/Right to select 20
preset station and press Menu to save the channel at the preset station.
Recording FM
Press and hold A-B/EQ to start recording. Press A-B/EQ to save recording and return to radio mode.
You can listen to the file under MUSI mode.
Delete FM hannel
Press and hold Menu.
To exit FM mode, press Menu.
System Settings
System SettingsSystem Settings
System Settings
From Main Menu, navigate to SETUP mode. Press Vol+/Vol- to navigate between settings.
Press Menu and you can also do the following:
PlayMode et the repeat mode for the music
EQ et the equalizer for the music
ontrast et the contrast of the LCD screen
Display et the duration after which the backlight will turn off automatically
Brightness et the brightness of the LCD screen
Power et the duration for powering off the player while idling
Record Settings et the recording quality for FM/Voice(Mic) from Normal, Middle and High
LR et the ynchronous Lyrics mode

6
Languages et the languages for Menu display
About how the software, internal and external memory information
Exit Exit to Main Menu
Setting Equalizer
Setting EqualizerSetting Equalizer
Setting Equalizer
1. While playing music, press and hold A-B/EQ.
2. You can also navigate from Main Menu to SETUP > EQ.
3. Choose Normal, Rock, Pop, lassical, Jazz or Bass equalizer.
Setting Repeat Mode
Setting Repeat ModeSetting Repeat Mode
Setting Repeat Mode
1. While playing music, press A-B/EQ.
2. You can also navigate from Main Menu to SETUP > PlayMode. Below are the descriptions.
Normal: All music files will play sequentially once.
Repeat One: Repeat current file repeatedly.
Repeat All: All music files will play sequentially and continuously.
Shuffle Repeat: All music in the current folder will play randomly and continuously.
Preview: All music in the current folder will play about 10 seconds sequentially once.
Selecting Different Folder
Selecting Different FolderSelecting Different Folder
Selecting Different Folder
You can set different folder name for the player. Create the folder by connecting the player to the
U B port on the computer and creating the folder manually.
1. From Main Menu, navigate to NAVIGATOR.
2. You will see a:/(Internal Memory) and b:/(SD/MM ).

7
3. Press Right to open the folder. Press Left to go back one level. Press Vol+/Vol- to navigate
between files. Press Menu to play the file.
Setting A
Setting ASetting A
Setting A-
--
-B Clipping
B ClippingB Clipping
B Clipping
1. While playing music, press A-B/EQ to select A-B Clipping mode. You will see A- then press A-
B/EQ to select the end point. The particular portion will repeat continuously.
2. Press A-B/EQ to exit.
Picture Operation
Picture OperationPicture Operation
Picture Operation
1. From Main Menu, navigate to PHOTO mode. You can view either BMP or JPG.
2. Press Left/ Right to view different files. You can also press Menu to view the file list. To exit,
press and hold Menu to go back Main Menu.
ideo Operation
ideo Operationideo Operation
ideo Operation
1. From Main Menu, navigate to VIDEO mode.
2. Press Left/ Right to view different files. You can also press Menu to view the file list. To exit,
press and hold Menu to go back Main Menu.
Ebook Operation
Ebook OperationEbook Operation
Ebook Operation
1. From Main Menu, navigate to EBOOK mode.
2. Press Left/ Right to view the text file. You can also press Menu to view the file list. To exit,
press and hold Menu to go back Main Menu.

8
Recyle Operation
Recyle OperationRecyle Operation
Recyle Operation
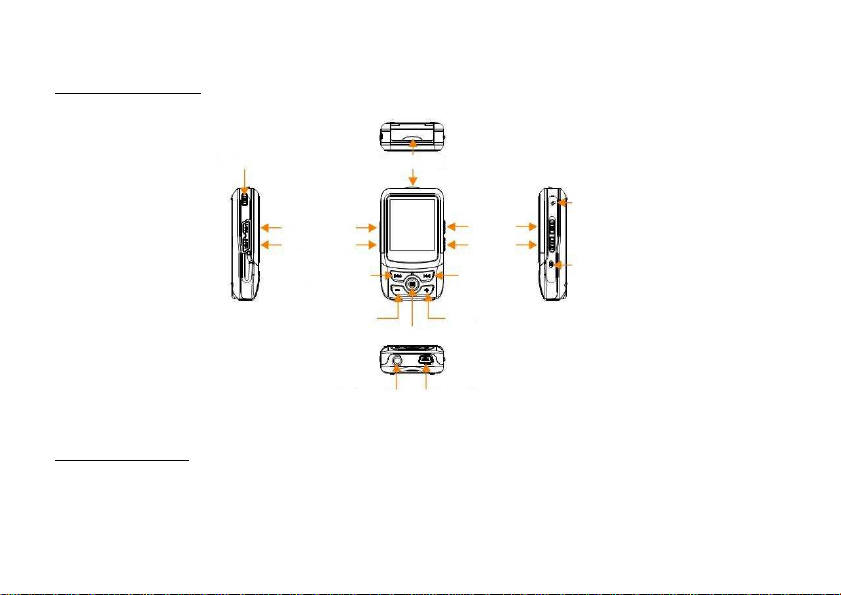
1. From Main Menu, navigate to RE Y LE mode.
2. You will see a:/(Internal Memory) and b:/(SD/MM ).
3. Press Right to open the folder. Press Left to go back one level. Press Vol+/Vol- to navigate
between files. Press Menu to select the file to be deleted. Press Play/Pause to delete the file.
You will be prompted with the confirmation dialog box. elect Yes/No and press Menu.
Convert video files to SM
Convert video files to SM Convert video files to SM
Convert video files to SM
1.Access the CD to locate the file video2smv.exe.
2.Click on “…” found at Input File to select the source audio/video file to convert.
3.Click on “…” found at Output File to select the desired output path. You can file the MV under
this path after conversion completed.
4.Use 128x128 resolution for best viewing. Press onvert to do the conversion.
Connecting Player to Computer
Connecting Player to ComputerConnecting Player to Computer
Connecting Player to Computer
1. Connect the U B port of the player to the computer using the U B cable provided.
2. Please take note if you are using Windows® 98 Second Edition, YOU MUST INSTALL THE
DRIVER PROVIDED IN THE INSTALLATION D-ROM. For user using Windows® Millenium/2000/XP,
your computer will install the driver automatically.
3. You will be able to locate the player under My omputer > Removable Disk.
4. Double-click on it to open up. You can drag and drop your music files here.
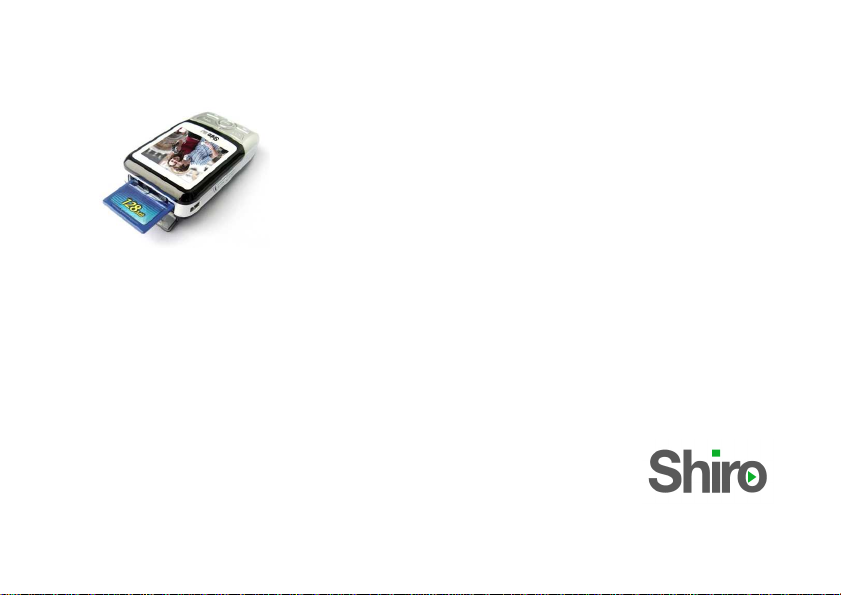
9
Firmware Upgrade
Firmware UpgradeFirmware Upgrade
Firmware Upgrade
1. Click on tart > Programs > igmatel M CNMMC > Firmware Download. You must ensure the
player has been connected to the computer U B port.
2. You may download the firmware file from www.shirocorp.com.
3. Click Start to start upgrading.
4. Once upgrading has been done successfully, the utility will display the message.
Troubleshooting Guide
Troubleshooting GuideTroubleshooting Guide
Troubleshooting Guide
1. My Windows® 98 econd Edition cannot detect the player? What should I do?
Answer: Please install the driver provided on the Installation CD first. Then connect up the player
using U B cable to your computer.
2.I couldn’t scan any station using FM, what should I do?
Answer: Please ensure the earphone is plugged in properly and try again.
3.My player is fully charged but cannot be powered up.
Answer: Please try to reset the player by pressing RESET.
3.How do I know I have inserted the D/MMC card?
Answer: If you have inserted properly, the LCD will display “ ard Inserted”.
4.After connected to the U B port, the computer cannot detect the player.
Answer: Please press RESET at the side of the player then try again.

10
Technical Specifications
Technical Specifications Technical Specifications
Technical Specifications
Built-In Memory Up to 2GB
Battery Li-Ion battery
LCD Resolution 1.5” C TN, 128x128 pixels
ignal Noise Ratio >90dB
Earphone output 10mW+10mW (320ohm)
peaker output 1W
Music Format MV, MP3, WMA, WAV
Record Format WAV
JPEG Format JPG, BMP
EBOOK Format TXT
MTV Format Conversion AVI format file (*.avi), Windows® Media format file (*.asf and *.wmv),
MPEG1 format file (*.mpg and *.mpeg)
U B 2.0 Full- peed (Up to 12Mbps)
Created on 4
th
eptember 2006. MJ MP3 Digital Audio Player.
Please visit us at www.shirocorp.com.

11
LIMITATION OF LIABILITY AND DAMAGES.
THE PRODUCT AND THE SOFTWARES WITHIN ARE PROVIDED "AS IS," BASIS. THE MANUFACTURER AND MANUFACTURER’S RESELLERS
(COLLECTIVELY REFERRED TO AS “THE PARTIES”) DISCLAIM ALL WARRANTIES, EXPRESS, IMPLIED OR STATUTORY, INCLUDING WITHOUT
LIMITATION THE IMPLIED WARRANTIES OF NON-INFRINGEMENT, MERCHANTABILITY OR FITNESS FOR A PARTICULAR PURPOSE, OR ANY
WARRANTIES ARISING FROM COURSE OF DEALING, COURSE OF PERFORMANCE, OR USAGE OF TRADE. IN NO EVENT WILL THE PARTIES BE
LIABLE FOR DAMAGES OR LOSS, INCLUDING BUT NOT LIMITED TO DIRECT, INDIRECT, SPECIAL WILLFUL, PUNITIVE, INCIDENTAL, EXEMPLARY, OR
CONSEQUENTIAL, DAMAGES, DAMAGES FOR LOSS OF BUSINESS PROFITS, OR DAMAGES FOR LOSS OF BUSINESS OF ANY CUSTOMEROR ANY
THIRD PARTY ARISING OUT OF THE USE OR THE INABILITY TO USE THE PRODUCT OR THE SOFTWARES, INCLUDING BUT NOT LIMITED TO THOSE
RESULTING FROM DEFECTS IN THE PRODUCT OR SOFTWARE OR DOCUMENTATION, OR LOSS OR INACCURACY OF DATA OF ANY KIND, WHETHER
BASED ON CONTRACT, TORT OR ANY OTHER LEGAL THEORY, EVEN IF THE PARTIES HAVE BEEN ADVISED OF THE POSSIBILITY OF SUCH
DAMAGES. THE ENTIRE RISK AS TO THE RESULTS AND PERFORMANCE OF THE PRODUCT OR ITS SOFTWARE IS ASSUMED BY CUSTOMER.
BECAUSE SOME STATES DO NOT ALLOW THE EXCLUSION OR LIMITATION OF LIABILITY FOR DAMAGES, THE ABOVE LIMITATION MAY NOT APPLY
TO THE PARTIES. IN NO EVENT WILL THE PARTIES’ TOTAL CUMULATIVE LIABILITY OF EACH AND EVERY KIND IN RELATION TO THE PRODUCT OR
ITS SOFTWARE EXCEEDS THE AMOUNT PAID BY CUSTOMER FOR THE PRODUCT.
Table of contents
Other Shiro MP3 Player manuals