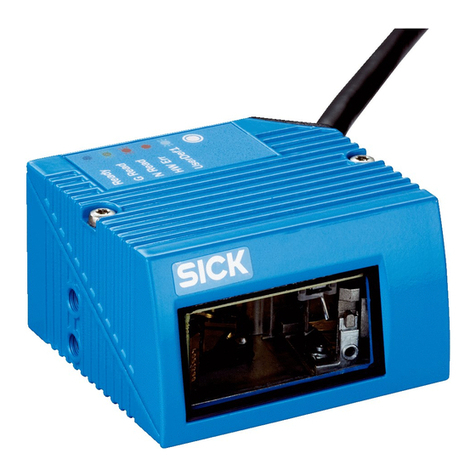
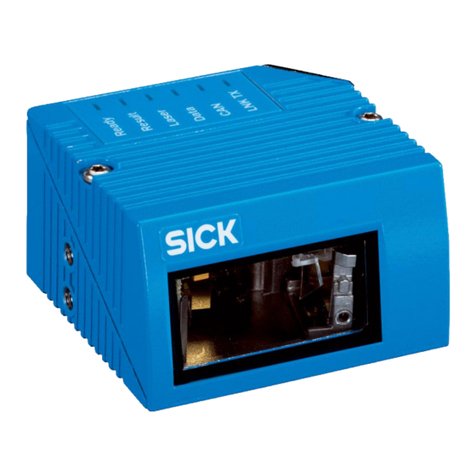
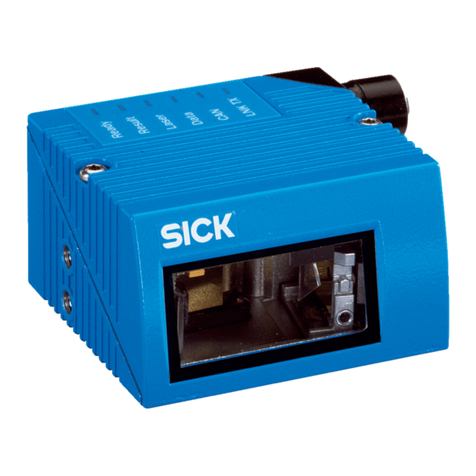
SICK CLV640 User manual

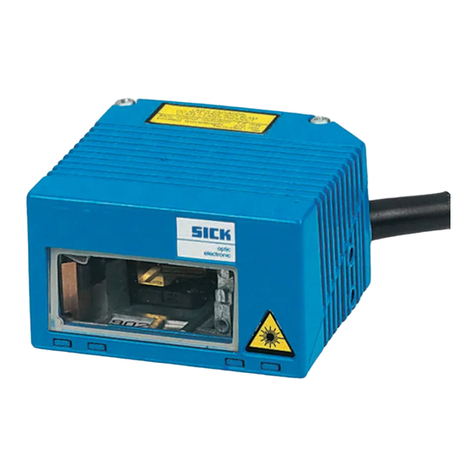
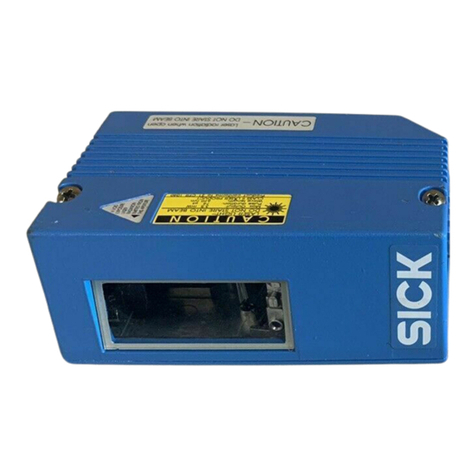
CLV640 Bar Code Scanner
Operating Instructions
OPERATING INSTRUCTIONS
Advanced Line
CLV640
Bar Code Scanner

Operating Instructions
CLV640 Bar Code Scanner
2©SICK AG · Division Auto Ident · Germany · All rights reserved 8011975/0000/2008-04-14
Software Versions
Software Versions
Copyright
Copyright © 2008
SICK AG Waldkirch
Auto Ident, Reute Plant
Nimburger Strasse 11
79276 Reute
Germany
Trademark
Windows 2000TM, XPTM, VistaTM and Internet ExplorerTM are registered trademarks or trade-
marks of the Microsoft Corporation in the USA and other countries.
AcrobatTM ReaderTM is a trademark of Adobe Systems Incorporated.
Latest manual version
For the latest version of this manual (PDF), see www.sick.com.
Software/Tool Function Version
CLV640 Bar Code
Scanner
SICK firmware From v 1.0 0000
Device Description
CLV640
Device-specific software module for SOPAS-ET config-
uration software
From v 2.5
SOPAS-ET Configuration software From v 2.16

Operating Instructions
CLV640 Bar Code Scanner
Contents
8011975/0000/2008-04-14 ©SICK AG · Division Auto Ident · Germany · All rights reserved 3
Table of contents
Figures and Tables............................................................................................................ 5
Abbreviations..................................................................................................... 5
Tables................................................................................................................. 6
Figures ............................................................................................................... 7
1 Notes on this document.................................................................................................11
1.1 Purpose............................................................................................................11
1.2 Target group ....................................................................................................11
1.3 Depth of information.......................................................................................11
1.4 Used symbols ..................................................................................................12
2 Safety information ..........................................................................................................13
2.1 Authorised users .............................................................................................13
2.2 Intended use ...................................................................................................14
2.3 General safety precautions and protection measures .................................14
2.4 Quick stop and quick restart ..........................................................................17
2.5 Environmental information.............................................................................18
3 Quick-Start .......................................................................................................................19
3.1 Preparing the bar code scanner for the quick start......................................19
3.2 Establishing connection with the bar code scanner.....................................19
3.3 Performing the reading...................................................................................20
4 Product description.........................................................................................................23
4.1 Setting up the bar code scanner....................................................................23
4.2 Included in delivery .........................................................................................26
4.3 Device versions ...............................................................................................27
4.4 System requirements......................................................................................27
4.5 Product features and functions (overview) ...................................................28
4.6 Bar code scanner methods of operation.......................................................29
4.7 Indicators and control elements ....................................................................36
5 Installation .......................................................................................................................41
5.1 Overview of installation sequences ...............................................................41
5.2 Installation preparations ................................................................................41
5.3 Installation location ........................................................................................43
5.4 Installation of the bar code scanner..............................................................48
5.5 Installing external components......................................................................49
5.6 Removing the bar code scanner ....................................................................50
6 Electrical installation ......................................................................................................51
6.1 Overview of installation sequence.................................................................51
6.2 Electrical installation preparation..................................................................51
6.3 Electrical connections and cables .................................................................52
6.4 Performing electrical installation ...................................................................56
6.5 Pin assignment and wire colour assignment of the assembled cables......62
7 Startup and configuration..............................................................................................65
7.1 Overview of the startup procedure ................................................................65
7.2 SOPAS-ET configuration software ..................................................................65
7.3 Establish communication with the bar code scanner ..................................66
7.4 First startup .....................................................................................................68
7.5 Default setting.................................................................................................70
7.6 Adjusting the bar code scanner .....................................................................71
8 Maintenance ....................................................................................................................73
8.1 Maintenance during operation.......................................................................73
8.2 Cleaning the bar code scanner ......................................................................73
8.3 Cleaning further optical effective surfaces ...................................................76
8.4 Checking the incremental encoder................................................................76
8.5 Replacing a bar code scanner........................................................................76

Operating Instructions
CLV640 Bar Code Scanner
4©SICK AG · Division Auto Ident · Germany · All rights reserved 8011975/0000/2008-04-14
Contents
9 Troubleshooting .............................................................................................................. 79
9.1 Overview of errors and malfunctions which could occur ............................. 79
9.2 Detailed malfunction analysis ....................................................................... 79
9.3 Status protocol................................................................................................ 80
9.4 SICK Support................................................................................................... 80
10 Technical data................................................................................................................. 81
10.1 Datenblatt Barcodescanner CLV640 (Linien-/Rasterscanner) ................... 81
10.2 Data sheet for the CLV640 Bar Code Scanner (line scanner with oscillating mir-
ror)83
10.3 Specification diagrams................................................................................... 84
10.4 CLV640 Bar Code Scanner dimensional drawings ....................................102
11 Appendix ........................................................................................................................109
11.1 Appendix overview........................................................................................109
11.2 Configuring the bar code scanner with command strings .........................109
11.3 Calculating the code length of a bar code ..................................................110
11.4 Ordering information for bar code scanner and accessories....................111
11.5 Dimensional drawing accessories...............................................................117
11.6 Supplementary documentation ...................................................................121
11.7 Glossary.........................................................................................................122
11.8 EC Declaration of Conformity.......................................................................130
11.9 Code samples of bar codes (selection).......................................................131

Operating Instructions Chapter
CLV640 Bar Code Scanner
Figures and Tables
8011975/0000/2008-04-14 ©SICK AG · Division Auto Ident · Germany · All rights reserved 5
Figures and Tables
Abbreviations
CAN Controlled Area Network (field bus protocol based on the CAN bus)
CDB Connection Device Basic
CDM Connection Device Modular
CLV Code-Leser V-Prinzip
CMC Connection Module Cloning
CMD Connection Module Device
CMF Connection Module Fieldbus
CMP Connection Module Power
DOF Depth Of Field
HTML Hyper Text Markup Language
IInput
LED Light Emitting Diode
MAC Medium Access Control
MTBF Mean Time Between Failure
MTTR Mean Time To Repair
OOutput
PROM Programable Read Only Memory.
RAM Random Acces Memory
ROM Read Only Memory
RTF Rich Text Format (standardised document format with format description)
SD Secure Digital
SMART SICK Modular Advanced Recognition Technology
SOPAS-ET SICK Open Portal for Application and Systems Engineering Tool (PC software for Windows for con-
figuring the bar code scanner)
PLC Programmable Logic Controller
TCP/IP Transmission Control Protocol/Internet Protocol

Chapter Operating Instructions
CLV640 Bar Code Scanner
6©SICK AG · Division Auto Ident · Germany · All rights reserved 8011975/0000/2008-04-14
Figures and Tables
Tables
Tab. 1-1: Target group ..................................................................................................... 11
Tab. 2-1: Required qualification for starting up the bar code scanner ........................ 13
Tab. 2-2: Laser Data of CLV640 ..................................................................................... 16
Tab. 4-1: CLV640 Bar Code Scanner delivery ................................................................ 26
Tab. 4-2: Variants of the CLV640 Bar Code Scanner .................................................... 27
Tab. 4-3: Overview of the bar code scanner's product features and functions ........... 29
Tab. 4-4: Data interface function .................................................................................... 35
Tab. 4-5: LED indications ................................................................................................. 37
Tab. 4-6: Meaning of the LEDs during activation of buttons ......................................... 38
Tab. 5-1: Permitted reading angles between the scanning line and bar code ............ 45
Tab. 6-1: Electrical connections to the bar code scanner with a fixed cable and
connector (standard version) .......................................................................... 53
Tab. 6-2: Electrical connections to the bar code scanner with connector unit
(Ethernet version) ............................................................................................ 53
Tab. 6-3: Standard version: Pin assignment of the 15-pole D-Sub-HD cable
connector .......................................................................................................... 54
Tab. 6-4: Ethernet version: Pin assignment of the 4-pole M12 socket ....................... 54
Tab. 6-5: Ethernet version: Pin assignment on the 12-pole M12 plug ........................ 55
Tab. 6-6: Recommended maximum cable lengths, depending on the selected
data transfer rate ............................................................................................. 57
Tab. 6-7: Ratings for the switching inputs ..................................................................... 60
Tab. 6-8: Ratings for the switching outputs ................................................................... 61
Tab. 6-9: Pin assignment of the 4-pole M12 plug and the 6-pole RJ45 plug .............. 62
Tab. 6-10: Pin assignment of the 12-pole M12 socket and the 15-pole
D-Sub-HD plug .................................................................................................. 62
Tab. 6-11: Pin assignment of the 12-pole M12 socket and wire colours at the
open end ........................................................................................................... 63
Tab. 6-12: Pin assignment of the 5-pole M12 plug and wire colours at the
open end ........................................................................................................... 63
Tab. 6-13: Pin assignment of the 15-pole D-Sub-HD socket and wire colours
at the open cable end ...................................................................................... 64
Tab. 7-1: Default setting for the SOPAS-ET configuration software (excerpt) ............. 66
Tab. 7-2: Connection between the PC with SOPAS-ET configuration software
and the bar code scanner ............................................................................... 66
Tab. 10-1: Technical specifications for the CLV640 Bar Code Scanner
(line/raster scanner)......................................................................................... 82
Tab. 10-2: Technical specifications for the CLV640 Bar Code Scanner
(line scanner with oscillating mirror) ............................................................... 83
Tab. 10-3: Reading conditions for all specification diagrams ........................................ 84
Tab. 11-1: Help table for calculating the code length of a bar code .............................110
Tab. 11-2: Variants of the CLV640 Bar Code Scanner ..................................................111
Tab. 11-3: In stock accessories: Installation accessories..............................................111
Tab. 11-4: In stock accessories: Connection modules...................................................112
Tab. 11-5: In stock accessories: Extensions for connection modules ..........................114
Tab. 11-6: In stock accessories: Separate field bus modules.......................................114
Tab. 11-7: In stock accessories: Cables and connectors for the standard
version of the bar code scanner ....................................................................115
Tab. 11-8: In stock accessories: Cables and connectors for the Ethernet
version of the bar code scanner ...................................................................115
Tab. 11-9: In stock accessories: General cables and connectors for
bar code scanner ............................................................................................116
Tab. 11-10: In stock accessories: Memory media for CLV640 Bar Code Scanner ........117
Tab. 11-11: Supplementary documentation .....................................................................121

Operating Instructions Chapter
CLV640 Bar Code Scanner
Figures and Tables
8011975/0000/2008-04-14 ©SICK AG · Division Auto Ident · Germany · All rights reserved 7
Figures
Fig. 2-1: Outlet opening of the laser radiation at the reading window
(shown here: Ethernet version)........................................................................ 15
Fig. 2-2: Laser warning sign attached to the bar code scanner at delivery ................ 16
Fig. 3-1: Register tab Quickstart .................................................................................... 20
Fig. 4-1: Housing types of the CLV640 Bar Code Scanner ........................................... 24
Fig. 4-2: Device view of the CLV640 Bar Code Scanner
(shown here: Ethernet-Version)........................................................................ 25
Fig. 4-3: Bar code scanner's methods of operation in a conveyor system
(schematic)........................................................................................................ 30
Fig. 4-4: Switching the focus for CLV640: Division of the entire reading
area in distance configurations .................................................................... 31
Fig. 4-5: CLV640 Oscillating Mirror: Example of focal position control in
search run, here with 6 focus positions ......................................................... 32
Fig. 4-6: Reading operation mode for the CLV640 Bar Code Scanner in
stand-alone operation ..................................................................................... 34
Fig. 4-7: Micro SD memory card for storing the parameter set.................................... 40
Fig. 5-1: Example: Fixing the bar code scanner with the bracket no. 2042800 ........ 42
Fig. 5-2: Exchanging the laser warning sign ................................................................. 43
Fig. 5-3: Allocation of the scanning line(s) for the bar code and conveyor system .... 44
Fig. 5-4: Definition of the reading distance a and the aperture angle α..................... 44
Fig. 5-5: Line scanner: Reading angles that occurs between the scanning line
and bar code .................................................................................................... 45
Fig. 5-6: Avoiding surface reflection using the line scanner as an example:
Angle between emitting light and bar code
(tilted away from the plumb line) ..................................................................... 46
Fig. 5-7: Counting direction of the reading angle RA within the scanning l
ine and of the code angle CW with the oscillating mirror .............................. 47
Fig. 5-8: Line scanner: Installation example for positioning the external
reading pulse sensor ....................................................................................... 49
Fig. 6-1: Standard version: Electrical connections at the bar code scanner
with connection cable....................................................................................... 52
Fig. 6-2: Ethernet version: Electrical connections at the bar code scanner
with connector unit ........................................................................................... 52
Fig. 6-3: Direction of rotation of the connector unit ..................................................... 56
Fig. 6-4: Wiring the serial host data interfaces (RS-232 or RS-422) on the
15-pole D-Sub-HD plug .................................................................................... 58
Fig. 6-5: Function of the Ethernet interface .................................................................. 59
Fig. 6-6: Wiring the “Sensor 1“ switching input on the 15-pole D-Sub-HD plug ......... 59
Fig. 6-7: Wiring the "Sensor 2" switching input on the 15-pole D-Sub-HD plug ......... 60
Fig. 6-8: Possible wiring of the "Result 1" switching output on the 15-pole
D-Sub-HD plug .................................................................................................. 61
Fig. 7-1: Configuration with SOPAS-ET and storage the parameter set....................... 68
Fig. 8-1: Cleaning the reading window ........................................................................... 75
Fig. 8-2: Cleaning of the external optical sensors (reading pulse generator) ............ 76
Fig. 10-1: Meaning of selection 1, 2and 3in the reading area diagram r
elated to depth of focus diagram..................................................................... 84
Fig. 10-2: Line scanner/raster scanner with front reading window: min. and
max. reading distance depending on the focus position and the aperture
angle with a resolution of 0.2 mm (8 mil)....................................................... 85
Fig. 10-3: Line scanner/raster scanner with front reading window: min. and max.
reading distance depending on the focus position and the aperture
angle with a resolution of 0.25 mm (10 mil) .................................................. 86
Fig. 10-4: Line scanner/raster scanner with front reading window: min. and max.
reading distance depending on the focus position and the aperture
angle with a resolution of 0.35 mm (14 mil) .................................................. 87

Chapter Operating Instructions
CLV640 Bar Code Scanner
8©SICK AG · Division Auto Ident · Germany · All rights reserved 8011975/0000/2008-04-14
Figures and Tables
Fig. 10-5: Line scanner/raster scanner with front reading window: min. and max.
reading distance depending on the focus position and the aperture
angle with a resolution of 0.5 mm (20 mil)..................................................... 88
Fig. 10-6: Line scanner/raster scanner with front reading window: min. and
max. reading distance depending on the focus position and the
aperture angle with a resolution of 1.0 mm (40 mil) ..................................... 89
Fig. 10-7: Line scanner/raster scanner with side reading window: min. and
max. reading distance depending on the focus position and the
aperture angle with a resolution of 0.2 mm (8 mil)........................................ 90
Fig. 10-8: Line scanner/raster scanner with side reading window: min. and
max. reading distance depending on the focus position and the
aperture angle with a resolution of 0.25 mm (10 mil)................................... 91
Fig. 10-9: Line scanner/raster scanner with side reading window: min. and
max. reading distance depending on the focus position and the
aperture angle with a resolution of 0.35 mm (14 mil)................................... 92
Fig. 10-10: Line scanner/raster scanner with side reading window: min. and
max. reading distance depending on the focus position and the
aperture angle with a resolution of 0.5 mm (20 mil) ..................................... 93
Fig. 10-11: Line scanner/raster scanner with side reading window: min. and max.
reading distance depending on the focus position and the aperture
angle with a resolution of 1.0 mm (40 mil)..................................................... 94
Fig. 10-12: Line scanner with oscillating mirror (side reading window): min. and
max. reading distance depending on the focus position and the aperture
angle with a resolution of 0.2 mm (8 mil)....................................................... 95
Fig. 10-13: Line scanner with oscillating mirror (side reading window): min. and
max. reading distance depending on the focus position and the aperture
angle with a resolution of 0.25 mm (10 mil) .................................................. 96
Fig. 10-14: Line scanner with oscillating mirror (side reading window): min. and
max. reading distance depending on the focus position and the
aperture angle with a resolution of 0.35 mm (14 mil)................................... 97
Fig. 10-15: Line scanner with oscillating mirror (side reading window): min. and
max. reading distance depending on the focus position and the
aperture angle with a resolution of 0.5 mm (20 mil) ..................................... 98
Fig. 10-16: Line scanner with oscillating mirror (side reading window): min. and
max. reading distance depending on the focus position and the
aperture angle with a resolution of 1.0 mm (40 mil) ..................................... 99
Fig. 10-17: Deflection range depending on the reading distance, angle of
deflection and resolution with a focus position F = 280 mm (11 in)..........100
Fig. 10-18: Deflection range depending on the reading distance, angle of
deflection and resolution with a focus position F = 215 mm (8 in) ............100
Fig. 10-19: Deflection range depending on the reading distance, angle of
deflection and resolution with a focus position F = 140 mm (5.5 in).........101
Fig. 10-20: Standard version: Dimensions of the bar code scanner with front
reading window (CLV640-0000 and CLV640-1000)....................................102
Fig. 10-21: Standard version: Dimensions of the bar code scanner with side
reading window (CLV640-2000 and CLV640-3000)....................................103
Fig. 10-22: Standard version: Dimensions of the bar code scanner with
oscilliating mirror (CLV640-6000) .................................................................104
Fig. 10-23: Ethernet version: Dimensions of the bar code scanner with
front reading window (CLV640-0120 and CLV640-1120)...........................105
Fig. 10-24: Ethernet version: Dimensions of the bar code scanner with side
reading window (CLV640-2120 and CLV640-3120)....................................106
Fig. 10-25: Ethernet version: Dimensions of the bar code scanner with
oscilliating mirror (CLV640-6120) .................................................................107

Operating Instructions Chapter
CLV640 Bar Code Scanner
Figures and Tables
8011975/0000/2008-04-14 ©SICK AG · Division Auto Ident · Germany · All rights reserved 9
Fig. 11-1: Dimensions of the fixing bracket no. 2020410 ...........................................117
Fig. 11-2: Dimensions of the quick release clamp no. 2025526 ...............................118
Fig. 11-3: Dimensions of the fixing bracket no. 2042800............................................119
Fig. 11-4: Dimensions of the round rod holder no. 2042801 ......................................120
Fig. 11-5: EC Declaration of Conformity for the bar code scanner
(page 1, scaled down version) ......................................................................130
Fig. 11-6: Code samples of bar codes of various module widths (print ratio 2:1) .....131

Chapter Operating Instructions
CLV640 Bar Code Scanner
10 ©SICK AG · Division Auto Ident · Germany · All rights reserved 8011975/0000/2008-04-14
Figures and Tables

Operating Instructions Chapter 1
CLV640 Bar Code Scanner
Notes on this document
8011975/0000/2008-04-14 ©SICK AG · Division Auto Ident · Germany · All rights reserved 11
1Notes on this document
1.1 Purpose
This document provides instructions for technical staff on the installation and operation of
the bar code scanner series CLV640 with dynamic focus position in the following versions:
•Line scanner / raster scanner / line scanner with oscillating mirror
•With front / side reading window
•With cable and connector (standard version) / with connector unit (Ethernet version)
A summary of all device versions is shown in chapter 4.3 Device versions, page 27.
This document contains the following information:
•Installation
•Electrical installation
•Startup and configuration
•Maintenance
•Troubleshooting
•Replacing the bar code scanner
A step-by-step approach is taken for all tasks.
1.2 Target group
The target group of this document is persons assigned the following tasks:
Tab. 1-1: Target group
1.3 Depth of information
This document contains all the required information for installation, electrical installation
and operation of the bar code scanner at the installation location. The factory default set-
ting (basic configuration) of the bar code scanner is prepared for the use as a stand-alone
device.
Configuration of the bar code scanner for the application-specific reading conditions and
operation is carried out using the SOPAS-ET configuration software on a WindowsTM PC. The
SOPAS-ET configuration software contains an online help system to facilitate configuration.
Important Further information about the design of the bar code scanner as well as the bar code tech-
nology is available from SICK AG, Auto Ident division.
On the Internet at www.sick.com.
Tasks Target group
Installation, electrical installation, maintenance,
replacing the device
Qualified staff, e.g. service technicians and fac-
tory electricians
Startup and configuration Trained staff, e.g. technicians or engineers
Operation of the conveyor system Qualified staff for start-up and operation of the
conveyor system

Chapter 1 Operating Instructions
CLV640 Bar Code Scanner
12 ©SICK AG · Division Auto Ident · Germany · All rights reserved 8011975/0000/2008-04-14
Notes on this document
1.4 Used symbols
To gain easier access, some information in this documentation is emphasised as follows:
Notice!
¾Indicates a potential risk of damage or impair on the functionality of the bar code scan-
ner or other devices.
Warning notice!
A warning notice indicates real or potential danger. This should protect you against acci-
dents.
The safety symbol next to the warning notice indicates why there is a risk of accident, e.g.
due to electricity. The warning levels (DANGER, WARNING, CAUTION) indicate the serious-
ness of the risk.
¾Carefully read and follow the warning notices!
Reference Italic script denotes a reference to further information.
Important This important note informs you about specific features.
Explanation An explanation provides background knowledge of technical nature.
Recommendation A recommendation helps you to carry out tasks correctly.
TIP A tip explains setting options in the SOPAS-ET configuration software.
PROJECT This type of script denotes a term in the user interface in the SOPAS-ET configuration soft-
ware.
A symbol indicates a button in the user interface of the SOPAS-ET configuration software.
There is a procedure which needs to be carried out. This symbol indicates operational in-
structions which only contain one operational step or operational steps in warning notices
which do not have to be followed in any particular order.
Operational instructions comprising several steps are denoted using consecutive num-
bers.
This symbol indicates a reference to other information in the glossary.
Note
This symbol denotes a section in which the operation steps with the SOPAS-ET configuration
software are described.
Important
This symbol indicates supplementary technical documentation.

Operating Instructions Chapter 2
CLV640 Bar Code Scanner
Safety information
8011975/0000/2008-04-14 ©SICK AG · Division Auto Ident · Germany · All rights reserved 13
2Safety information
This chapter deals with your safety and operator safety in the operational area.
¾Read this chapter carefully before using the bar code scanner.
2.1 Authorised users
For correct and safe functioning, the bar code scanner must be installed, operated and
maintained by sufficiently qualified staff.
Repairs to the bar code scanner should only be carried out by qualified and authorised
SICK AG service staff.
¾The operating instructions should be made available to the end user.
¾The end user should be briefed and urged to read the operating instructions by the
technicians.
The following qualifications are required for different activities:
Tab. 2-1: Required qualification for starting up the bar code scanner
Tasks Qualification
Installation, maintenance •Practical technical training
•Knowledge of current health and safety regulations at the work-
place
Electrical installation, device
replacement
•Practical electrical training
•Knowledge of current electrical safety regulations
•Knowledge of start-up and operation of the device in each opera-
tional area (e. g. conveyor system)
Startup, configuration •Basic knowledge of the WindowsTM operating system
•Basic knowledge of designing and setting up (addressing) Ethernet
connections for connecting the bar code system to the Ethernet
•Basic knowledge of working with an HTML browser (e. g. Internet
ExplorerTM) for using the online help
•Basic knowledge of data transfer
•Basic knowledge of bar code technology
Operation of the device in
each operational area
•Knowledge of start-up and operation of the device in each opera-
tional area (e. g. conveyor system)
•Knowledge of the software and hardware environment in each op-
erational area (e. g. conveyor system)

Chapter 2 Operating Instructions
CLV640 Bar Code Scanner
14 ©SICK AG · Division Auto Ident · Germany · All rights reserved 8011975/0000/2008-04-14
Safety information
2.2 Intended use
The CLV640 Bar Code Scanner is an intelligent sensor for the automatic recognition and de-
coding of bar codes on objects e.g. in a conveyor system.
The intended use of the bar code system results from the following description of the func-
tion:
•In a reading station, the bar code scanner is installed in a holder, either on the side of
a conveyor system (side reading) or above it (reading from above).
•The bar code scanner transfers the reading data via the host interface to a superordi-
nate host computer for further processing.
•The bar code scanner is configured/operated using the SOPAS-ET configuration soft-
ware that runs on a standard client PC provided by the customer. Communication takes
place using RS-232 or Ethernet.
Important Any warranty claims against SICK AG shall be deemed invalid in the case changes to the bar
code scanner, such as opening the housing, this includes modifications during installation
and electrical installation or changes to the SICK software.
The bar code scanner is only to be operated in ambient air temperature limit.
2.3 General safety precautions and protection measures
¾Read the general safety precautions thoroughly and observe them during all bar code
scanner activities. Also observe the warning notices above the operational instructions
of each chapter.
2.3.1 Electrical installation work
Important Electrical installation should only be carried out by qualified staff.
Connect or release current linkages only under de-energised conditions.
Wire cross sections and their correct shields have to be selected and implemented accord-
ing to valid engineering standards.
Risk of injuries due to electrical current!
The optional power supply module CMP400/CMP490 is connected to the power supply
(100 ... 250 V AC/50 ... 60 Hz) in connection module CDM420.
¾Observe current safety regulations when working with electrical equipment.

Operating Instructions Chapter 2
CLV640 Bar Code Scanner
Safety information
8011975/0000/2008-04-14 ©SICK AG · Division Auto Ident · Germany · All rights reserved 15
2.3.2 Laser radiation of the bar code scanner
Fig. 2-1: Outlet opening of the laser radiation at the reading window (shown here: Ethernet version)
Important Bar code scanners in series CLV640 operate with a laser of wavelength λ= 655 nm (red
light). The radiation emitted is not harmful to human skin.
The product is classified in laser class 2 (laser class II) in accordance with EN 60825-1,
IEC 60825-1 and 21 CFR 1040.10 (see the warning sign on the device for the date of pub-
lication)
Maintenance is not required to ensure compliance with laser class 2.
The bar code scanner displays a black and yellow laser warning sign.
Damage to the eyes through laser radiation!
The bar code scanner operates with an red light laser of class 2. Looking at the laser's li-
ght path for a longer period of time can damage the eye's retina.
The entire reading window is the LED radiation outlet opening.
Caution - use of controls or adjustments or performance of procedures other than those
specified herein may result in hazardous radiation exposure.
¾Never look directly into the light path (similar to sun light).
¾Never direct the device's laser beam at the eyes of persons.
¾When installing and aligning the bar code scanner, avoid laser beam reflections from
reflective surfaces.
¾Do not open the housing. (Opening does not interrupt the activation of the laser diode
by the reading pulsing.)
¾Always observe the latest valid version of laser protection regulations.

Chapter 2 Operating Instructions
CLV640 Bar Code Scanner
16 ©SICK AG · Division Auto Ident · Germany · All rights reserved 8011975/0000/2008-04-14
Safety information
Fig. 2-2: Laser warning sign attached to the bar code scanner at delivery
Tab. 2-2: Laser Data of CLV640
Important If the bar code scanner is installed in a machine/panelling in such a way that the bar code
scanner's laser warning sign is hidden, additional warning signs in the same language (not
included in delivery) have to be attached to the machine next to the outlet opening of the
laser radiation!
The bar code scanner works as follows in controlling the laser diodes:
•The bar code scanner has monitoring switches that deactivate the laser diode if irreg-
ularities occur in the radiation emission.
•The reading pulse (pulse source) controls the on and off mechanism of the laser diode
during the reading process.
•During reading operation with "Sensor" and "Command" reading pulses, each time level
(laser timeout) switches off the laser diode automatically after 10 minutes (default set-
tings) when a permanent reading pulse has been started. However, it does not stop the
reading pulse.
The reading pulse can be stopped via an appropriate clock signal. The successive read-
ing pulse switches on the laser diode.
•In SOPAS-ET on the "Illumination control" tab you can set or deactivate the laser timeout
within a range of 1 ... 1,500 min (= 25h).
Standard version Ethernet version
Device CLV640
Laser out radiation (maximum/average) 3.2 mW/ <1.0 mW
Emitted wavelength 655 nm
Pulse duration < 300 μs

Operating Instructions Chapter 2
CLV640 Bar Code Scanner
Safety information
8011975/0000/2008-04-14 ©SICK AG · Division Auto Ident · Germany · All rights reserved 17
•"Laser" LED:
During normal reading operation the "Laser" LED lights up when the laser diode is
switched on.
When calling up functions via the two buttons of the bar code scanner (aborting normal
reading operation), the LEDs have got additional display functions. The "Laser" LED will
differ from its original function. It is possible that the "Laser" LED is flashing when Auto-
setup is selected, although the laser diode is still switched off or the laser diode is
switched on, for example, in diagnostic mode (Read Diagn) and the "Laser" LED, how-
ever, is not flashing.
2.4 Quick stop and quick restart
The bar code scanner can be switched on or off using the main switch for connection mod-
ules CDB620 or CDM420.
2.4.1 Switching off the bar code scanner
¾Switch off the power supply to the bar code scanner (the connection module)
- or -
Remove (pull out) the 15-pole D-Sub-HD connector of the bar code scanner's connec-
tion cable from the connection module.
When the bar code scanner is switched off, the following data is lost:
•Application-specific parameter sets in the bar code scanner that were only saved
temporarily in the device
•The last reading result of the bar code scanner
•Daily operating hours counter of the bar code scanner
2.4.2 Switching the bar code scanner back on
¾Switch the power supply to the bar code scanner (the connection module) back on
- or -
Connect the 15-pole D-Sub-HD connector of the bar code scanner's connection cable
to the connection module.
The bar code scanner starts up using the most recent permanently saved configura-
tion. The daily operating hours counter is reset.

Chapter 2 Operating Instructions
CLV640 Bar Code Scanner
18 ©SICK AG · Division Auto Ident · Germany · All rights reserved 8011975/0000/2008-04-14
Safety information
2.5 Environmental information
The bar code scanner has been constructed with minimum environmental pollution in mind.
Excluding the housing, the bar code scanner does not contain any materials using silicone.
2.5.1 Energy requirements
The bar code scanner series CLV640 consumes the following energy:
•Line / Raster scanner: Typically 5.5 W with 24 V DC ± 10 %
•Line scanner with oscillating mirror: Typically 6.5 W with 24 V DC ± 10 %
All values with unwired switching outputs.
2.5.2 Dispose of the device after decommissioning
SICK AG will not currently accept the return of any devices which can no longer be operated
or repaired.
¾Inoperable or irreparable devices must be disposed of in an environmentally friendly
manner and in accordance with valid country-specific waste disposal guidelines.
The design of the bar code scanner allows for its separation as recyclable secondary raw
materials and hazardous waste (electronic scrap).

Operating Instructions Chapter 3
CLV640 Bar Code Scanner
Quick-Start
8011975/0000/2008-04-14 ©SICK AG · Division Auto Ident · Germany · All rights reserved 19
3Quick-Start
3.1 Preparing the bar code scanner for the quick start
The bar code scanner can be operated quickly and easily using the supplied SOPAS-ET con-
figuration software.
The software offers the following options, among others:
•Fast connection with the bar code scanner
•Configuration of the most important reading parameters and display of the reading re-
sults on one clear register tab in the configuration software
System requirements for using the SOPAS-ET configuration software
See chapter 7.2.2 System requirements for the SOPAS-ET configuration software, page 65.
Additional accessories required (not in delivery)
•Connection module CDB620 or CDM420
•For the Ethernet version of the bar code scanner: Connection cable for data and func-
tion interfaces (see chapter 11.4.7 Accessories: Cables for Ethernet version,
page 115)
•3-wire RS-232 data cable (null modem cable no. 2014054)
- or -
To connect an Ethernet version of the bar code scanner to the PC's Ethernet interface:
relevant cable (see chapter 11.4.7 Accessories: Cables for Ethernet version,
page 115).
Perform an electrical connection to the bar code scanner
1. Connect the bar code scanner to connection module CDB620/CDM420.
2. Switch on the power supply for CDB620/CDM420.
3. Switch on the PC for the configuration and install and start the supplied SOPAS-ET con-
figuration software.
4. Connect the bar code scanner.
To achieve this, connect the PC using a 3-wire RS-232 data cable (null modem cable)
to the "Aux“ connection in CDB620/CDM420.
- or -
Connect the PC to the bar code scanner's Ethernet interface (Ethernet version).
For detailed instructions, see chapter 5 Installation, page 41 and chapter 6 Electrical in-
stallation, page 51.
3.2 Establishing connection with the bar code scanner
¾Communicate with the bar code scanner according to the selected data interface (RS-
232 or Ethernet) (see chapter 7.3 Establish communication with the bar code scanner,
page 66) and perform a scan.
TIP To establish a connection quickly and easily via Ethernet, the SOPAS-ET configuration soft-
ware has a CONNECTION WIZARD in the TOOLS menu.

Chapter 3 Operating Instructions
CLV640 Bar Code Scanner
20 ©SICK AG · Division Auto Ident · Germany · All rights reserved 8011975/0000/2008-04-14
Quick-Start
3.3 Performing the reading
Fig. 3-1: Register tab Quickstart
Perform the reading:
1. Ensure that the relevant code types are activated on the register tab.
2. Carry out a test reading with a test bar code.
To achieve this, hold an object with a bar code in front of the bar code scanner's reading
window and trigger the reading by clicking START. The default setting of the focus posi-
tion is 285 mm (11.2 in). If necessary, observe the bar code scanner's depth of fields
ranges in relation to the resolution (see chapter 10.3 Specification diagrams,
page 84).
During reading operation and with default settings, the line scanner with oscillating mir-
ror deflects the scanning line by the central position with a frequency of 1 Hz and at a
max. angle of ± 20°.
The reading result is displayed in the BARCODE CONTENT display field.
The code reading reliability is specified in the relevant display field.
Note
With the SOPAS-ET configuration software, the QUICKSTART register tab contains the most im-
portant reading parameters for configuring and performing a bar code reading:
PROJECT TREE, CLV640, QUICKSTART register tab
Table of contents
Other SICK Barcode Reader manuals

SICK
SICK Lector62 Series Reference guide

SICK
SICK CLV63x User manual

SICK
SICK CLV 420 User manual

SICK
SICK IDM1 Series User manual

SICK
SICK ICR803 User manual

SICK
SICK ICR803 Use and care manual

SICK
SICK CLV 210 User manual

SICK
SICK Lector85x User manual

SICK
SICK CLV622 User manual

SICK
SICK IDM120 Series User manual

SICK
SICK ICR803 User manual

SICK
SICK CLV62 Series User manual

SICK
SICK CLV503 User manual

SICK
SICK CLV620 User manual

SICK
SICK CLV65 Series User manual

SICK
SICK CLV61 DualPort Series User manual

SICK
SICK CLV63 Series Manual

SICK
SICK CLV61x FIELDBUS Series User manual

SICK
SICK Lector620 User manual

SICK
SICK MCR User manual