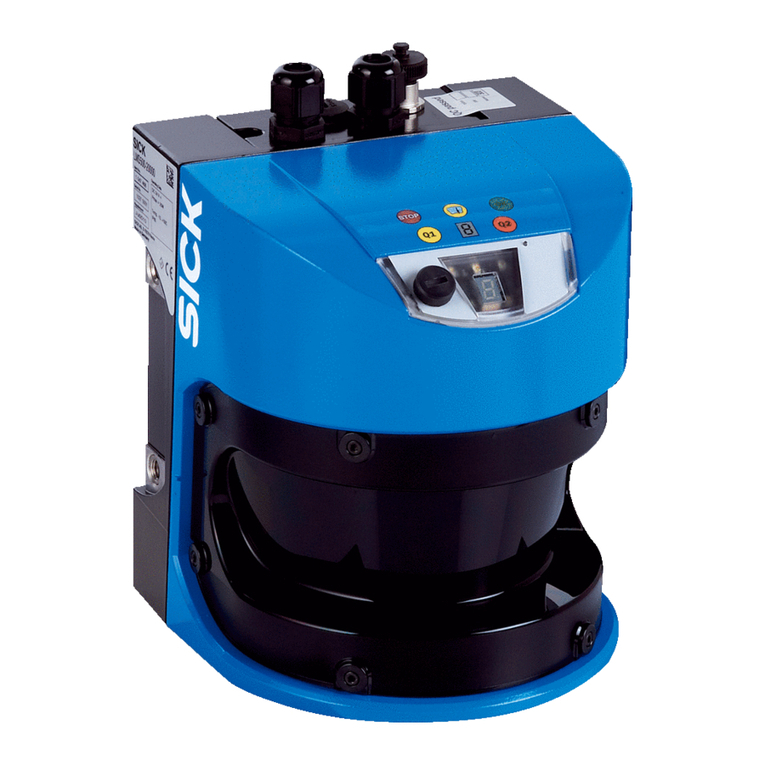
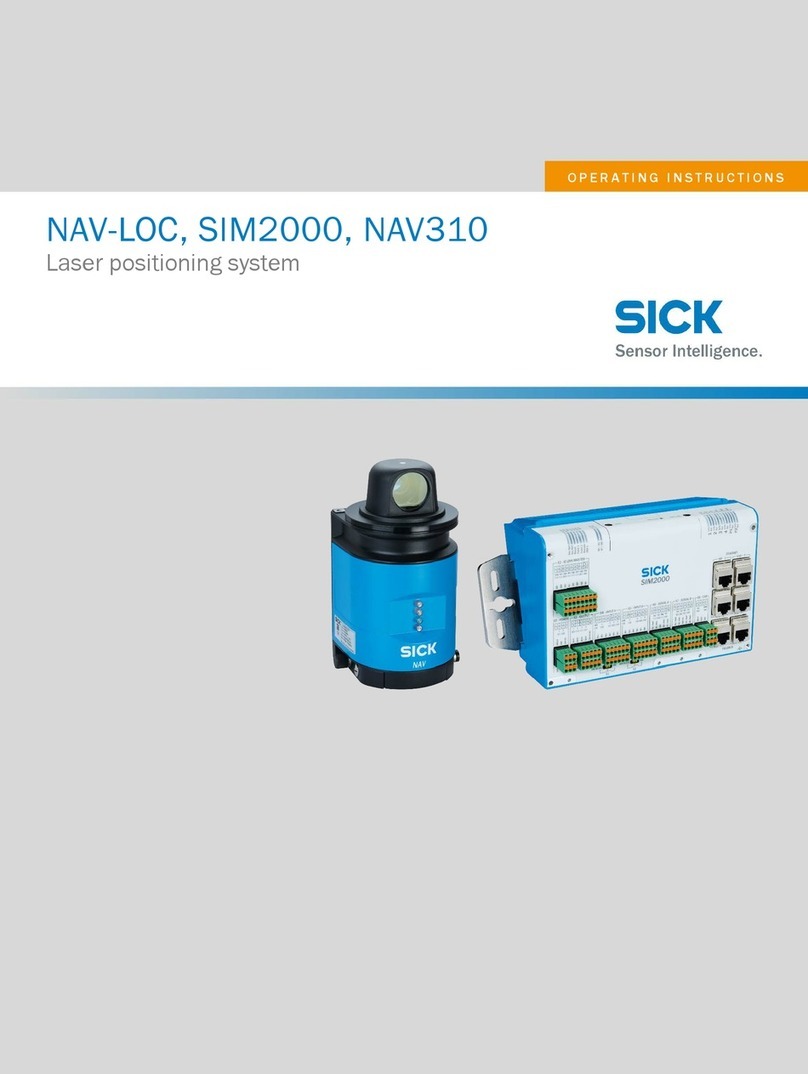
SICK NAV200 User manual

OPERATING INSTRUCTIONS
NAV200
Laser Positioning System for
Navigational Support

Operating Instructions
NAV200 Laser Positioning System
2©SICK AG · Division Auto Ident · Germany · All rights reserved 8011502/R197/2007-02-12
Software versions
The NAV200 Laser Positioning System is intended for use only in industrial environments.
Use in residential areas can cause RF interference.
Copyright
Copyright ©2006
SICK AG Waldkirch
Auto Ident, Reute Plant
Nimburger Strasse 11
D-79276 Reute
Germany
Trademarks
Windows 98TM, Windows METM, Windows 2000TM and Windows XPTM are registered
trademarks or trademarks of the Microsoft Corporation in the USA and other countries.
Latest version of the operating instructions
For the latest version of these operating instructions (PDF), see www.sick.com.
Software/Tool Function Version
NAV200 SICK firmware for NAV200 Laser Positioning System V 4.1.X
NAV200 Setup SICK configuration software under WindowsTM V 1.0.X

Operating Instructions
NAV200
Quick Finder
8011502/R197/2007-02-12 ©SICK AG · Division Auto Ident · Germany · All rights reserved 3
Quick Finder
•What is delivered with the device?
–Section 3.1.1 Scope of delivery (without data cable), Page 17
•Designing the system
–Section "Information for designing the system“, Page 10
•IMPORTANT!
–Section 2 Safety information, Page 13
•Mounting the device on an automated guided vehicle
–Section 4 Installation, Page 39
•Connecting the device
–Section 5 Electrical installation, Page 41
•Overview of the device and its functions
–Section 3 Product description, Page 17
–Section 6.2 Default settings of the NAV200 Setup configuration software, Page 47
–Section 6.5 NAV200 operating modes, Page 61
–Section 9 Technical data, Page 77
•Starting the device with the default settings
–Section 6.3 Quick Start, Page 48
•Configuring the device to the application
–Section 6.6 Performing and testing the configuration, Page 63
•Troubleshooting
–Section 8 Troubleshooting, Page 75
•Where is everything?
–Contents, Page 5

Operating Instructions
NAV200 Laser Positioning System
4©SICK AG · Division Auto Ident · Germany · All rights reserved 8011502/R197/2007-02-12
Quick Finder
Installation procedure (overview)
1. Check the delivery to make sure that none of the components is missing.
2. Mount the NAV200 on an automated guided vehicle (AGV) and align the scanning plane
parallel to the travelled area.
3. Connect the NAV200 to the PC via the RS 232 data cable.
4. Connect the NAV200 to the 24 V DC power supply using the cable socket supplied.
5. Switch on the supply. The NAV200 initializes and changes to "Standby" mode.
6. Install the CD-ROM-based NAV200 Setup configuration software on the PC (minimum
requirement: Windows 98TM).
7. Start the NAV200 Setup configuration software.
8. Choose the required language for the user interface.
9. Set up data communication between NAV200 and PC.
10. Configure the NAV200 with the NAV200 Setup configuration software.
To do this, determine the positions (co-ordinates) of the used reflectors in NAV200 Set-
up as follows:
– more exact method: measure the reflector positions manually on site and enter
them directly in NAV200 Setup or acquire them as structured data in an ASCII file
and adopt in NAV200 Setup
– less exact method: measure reflector data using the NAV200 (“Mapping” mode),
(automatic transfer to NAV200 Setup)
11. Transfer the reflector data permanently to the NAV200 ("Download" mode).
12. Save the reflector data as a project on the PC.
13. Test the successful detection of the reflector positions entered.
For this, move the AGV with the NAV200 in one of the defined layers.
14. Call up “Positioning operation” mode in NAV200 Setup.
Select the appropriate layer and the “All seen reflectors measured” option in the data
entry fields.
15. Check the detected reflectors in the NAV200 Setup display.
16. Change to the next layer etc. with the AGV and repeat steps 14 and 15 each time.
17. Close the NAV200 Setup configuration software.
18. Terminate data communication between NAV200 and PC.
19. Switch off the power supply for NAV200.
20. Disconnect the RS 232 data cable from the PC and connect it to the vehicle computer.
21. Switch on the power supply for NAV200 again.
The NAV200 initializes and changes to "Standby" mode.
The NAV200 is ready for operation with the application-specific settings.

Operating Instructions
NAV200
Contents
8011502/R197/2007-02-12 ©SICK AG · Division Auto Ident · Germany · All rights reserved 5
Contents
1 About this document...................................................................................................... 11
1.1 Function of this document.......................................................................................... 11
1.2 Target groups............................................................................................................... 11
1.2.1 Assembly, electrical installation, device replacement....................................... 11
1.2.2 Commissioning, configuration, maintenance..................................................... 11
1.2.3 Operation .............................................................................................................. 11
1.3 Level of information .................................................................................................... 11
1.4 Symbols used .............................................................................................................. 12
2 Safety information ......................................................................................................... 13
2.1 Authorized personnel.................................................................................................. 13
2.1.1 Assembly and maintenance ................................................................................ 13
2.1.2 Electrical installation and device replacement .................................................. 13
2.1.3 Commissioning, operation and configuration .................................................... 13
2.2 Intended use................................................................................................................ 13
2.3 General safety information and protective measures.............................................. 14
2.3.1 RF interference..................................................................................................... 14
2.3.2 Electrical installation work................................................................................... 14
2.3.3 Laser radiation...................................................................................................... 14
2.4 Quick Stop and Quick Start ........................................................................................ 15
2.4.1 Switching the NAV200 off.................................................................................... 15
2.4.2 Switching the NAV200 on again.......................................................................... 15
2.5 Environmental aspects ............................................................................................... 16
2.5.1 Energy consumption............................................................................................. 16
2.5.2 Disposal after final removal from service........................................................... 16
3 Product description ........................................................................................................ 17
3.1 Design of the system .................................................................................................. 17
3.1.1 Scope of delivery (without data cable)................................................................ 17
3.1.2 System requirements........................................................................................... 18
3.1.3 Product features and functions (overview)......................................................... 18
3.1.4 Applications .......................................................................................................... 19
3.1.5 View of the device ................................................................................................ 20
3.2 How the NAV200 works .............................................................................................. 21
3.3 Operating conditions................................................................................................... 22
3.3.1 Installation requirements..................................................................................... 22
3.3.2 Designing reflector arrangements ...................................................................... 22
3.3.3 Reflectors.............................................................................................................. 22
3.3.4 Designing layers ................................................................................................... 25
3.3.5 Reflector arrangements within a layer................................................................ 27
3.4 Measurement accuracy .............................................................................................. 28
3.4.1 How the NAV200 deals with sources of error .................................................... 30
3.5 Measurement and entry of the reflector co-ordinates ............................................. 32
3.6 Integration of the NAV200 in a navigation system ................................................... 32
3.6.1 Data interface....................................................................................................... 33
3.6.2 Measurement quality as an indicator of the reliability of the positional data . 34
3.6.3 Position measurement (“Positioning operation” mode).................................... 35
3.6.4 Reflector co-ordinates” mode.............................................................................. 36
3.7 Displays and controls.................................................................................................. 37
3.7.1 Controls................................................................................................................. 37
3.7.2 Function of the LEDs on the NAV200 ................................................................. 37
4 Installation....................................................................................................................... 39
4.1 Overview of the installation steps .............................................................................. 39
4.2 Preparation for installation of the NAV200............................................................... 39
4.2.1 Ensure that you have all the required components........................................... 39
4.2.2 Preparing the accessories ................................................................................... 39
4.2.3 Selecting mounting position and installation location for the NAV200 ........... 39
4.3 Mounting the device ................................................................................................... 40

Operating Instructions
NAV200 Laser Positioning System
6©SICK AG · Division Auto Ident · Germany · All rights reserved 8011502/R197/2007-02-12
Contents
4.3.1 Mounting ...............................................................................................................40
4.4 Mounting additional components...............................................................................40
4.4.1 Assembly and mounting of the reflectors ...........................................................40
4.5 Disassembling the system ..........................................................................................40
5 Electrical installation ......................................................................................................41
5.1 Overview of the installation steps ..............................................................................41
5.2 Electrical connections and cables..............................................................................41
5.2.1 Conductor cross-sections .....................................................................................41
5.2.2 Cables ....................................................................................................................41
5.2.3 Screening concept ................................................................................................41
5.3 Pin assignment of the connections ............................................................................42
5.3.1 “Power supply” device plug..................................................................................42
5.3.2 “RS 232 data interface” device plug...................................................................42
5.3.3 Power cord.............................................................................................................43
5.3.4 RS 232 data cable................................................................................................43
5.4 Preparations for electrical installation .......................................................................44
5.4.1 Conditions for the data interface.........................................................................44
5.4.2 Power supply .........................................................................................................44
5.5 Carrying out the electrical installation........................................................................45
5.5.1 Tools and equipment............................................................................................45
5.5.2 Connecting the NAV200 to the PC and vehicle computer .................................45
5.5.3 Connecting the power supply...............................................................................45
6 Operation..........................................................................................................................47
6.1 Overview of the commissioning steps........................................................................47
6.2 Default settings of the NAV200 Setup configuration software ................................47
6.3 Quick Start....................................................................................................................48
6.4 NAV200 Setup Configuration Software......................................................................50
6.4.1 Configuring the NAV200 with the NAV200 Setup software...............................50
6.4.2 Installation of the NAV200 Setup configuration software .................................50
6.4.3 Software functions (overview)..............................................................................51
6.4.4 Overview of the configuration steps ....................................................................51
6.4.5 Starting the NAV200 Setup software ..................................................................51
6.4.6 User interface of the NAV200 Setup configuration software ............................53
6.4.7 Toolbar commands ...............................................................................................56
6.4.8 Project files and reflector data.............................................................................57
6.4.9 Closing the NAV200 Setup configuration software ............................................60
6.5 NAV200 operating modes...........................................................................................61
6.5.1 Standby..................................................................................................................61
6.5.2 Mapping.................................................................................................................61
6.5.3 Download...............................................................................................................61
6.5.4 Upload....................................................................................................................61
6.5.5 Position measurement .........................................................................................61
6.5.6 Reflector co-ordinates ..........................................................................................62
6.6 Performing and testing the configuration ..................................................................63
6.6.1 Measuring, entering and transferring the exact reflector co-ordinates
manually and testing positioning operation........................................................63
6.6.2 Measuring and reading the reflector co-ordinates automatically using
the NAV200’s Mapping ........................................................................................67
6.7 Logging the data communication (log file).................................................................71
6.8 Updating the firmware.................................................................................................71
6.9 Switching the NAV200 off ...........................................................................................71
7 Maintenance ....................................................................................................................73
7.1 Maintenance during operation ...................................................................................73
7.1.1 Cleaning the front pane of the NAV200 ................................................................73
7.2 Maintenance ................................................................................................................74
7.3 Disposal........................................................................................................................74
8 Troubleshooting...............................................................................................................75


Operating Instructions
NAV200
Contents
8011502/R197/2007-02-12 ©SICK AG · Division Auto Ident · Germany · All rights reserved 7
8.1 Overview of possible errors and malfunctions.......................................................... 75
8.1.1 Mounting errors .................................................................................................... 75
8.1.2 Electrical installation errors................................................................................. 75
8.1.3 Parameter setting error........................................................................................ 75
8.1.4 Operational malfunctions .................................................................................... 75
8.2 Monitoring errors and fault signs............................................................................... 75
8.3 SICK support................................................................................................................ 75
9 Technical data.................................................................................................................77
9.1 NAV200 data sheet..................................................................................................... 77
9.2 NAV200 dimensional drawing.................................................................................... 78
10 Appendix .......................................................................................................................... 79
10.1 Overview of the appendices ....................................................................................... 79
10.2 Available accessories.................................................................................................. 80
10.2.1 Mounting accessories .......................................................................................... 80
10.2.2 Accessories for reflectors .................................................................................... 80
10.2.3 Cables and connectors ........................................................................................ 80
10.3 Supplementary documentation.................................................................................. 81
10.4 Replacing a NAV200 ................................................................................................... 82
10.4.1 Replacing a NAV200 with backed-up configuration data.................................. 82
10.5 Reproduction of the EC Declarations of Conformity ................................................. 83
10.5.1 EC Declaration of Conformity for NAV200.......................................................... 83

Operating Instructions
NAV200 Laser Positioning System
8©SICK AG · Division Auto Ident · Germany · All rights reserved 8011502/R197/2007-02-12
Figures and tables
Abbreviations used
AGV Automated Guided Vehicle
LED Light Emitting Diode
USB Universal Serial Bus
Tables
Tab. 3-1: NAV200: Meaning of the LEDs .........................................................................37
Tab. 5-1: Pin assignment of the 8-pin chassis-mount plug for connecting
the power supply ...............................................................................................42
Tab. 5-2: Pin assignment of the 14-pin chassis-mount plug for connecting
the RS 232 data cable ......................................................................................42
Tab. 5-3: Pin assignment of the 8-pin cable socket for connecting the
power supply, view of the soldered connections.............................................43
Tab. 5-4: Pin assignment of the RS 232 data cable 9-pin D-Sub socket......................43
Tab. 5-5: Maximum cable length between NAV200 and vehicle computer..................44
Tab. 6-1: Default settings of the NAV200 Setup configuration software......................47
Tab. 6-2: NAV200 Setup: Function of the buttons in the toolbar ..................................56
Tab. 9-1: NAV200 technical specifications .....................................................................77
Tab. 10-1: Mounting accessories available .......................................................................80
Tab. 10-2: Accessories available for reflectors .................................................................80
Tab. 10-3: Available accessories Cables and connectors ................................................80
Tab. 10-4: Supplementary documentation for the NAV200.............................................81
Figures
Fig. 2-1: Window area in the scanner head of the NAV200..........................................14
Fig. 2-2: Laser warning label attached to the NAV200 .................................................15
Fig. 3-1: NAV200 laser positioning system with accessories (included in
scope of delivery)...............................................................................................17
Fig. 3-2: Arrangement of the NAV200 ............................................................................20
Fig. 3-3: Position measurement of the NAV200 by detection of reflector
arrangements ....................................................................................................21
Fig. 3-4: Detection angle with 100 mm (3.88 in) wide reflector strips made
of Diamond Grade 3000X reflective film (0° = vertical striking of
the measurement beam) ..................................................................................23
Fig. 3-5: Alignment of Diamond Grade 3000X reflective film, production date
before July 2002 ...............................................................................................24
Fig. 3-6: Alignment of Diamond Grade 3000X reflective film, production date
after July 2002 (version currently supplied)....................................................24
Fig. 3-7: Vertical centre line with flat reflectors and vertical central axis
with cylindrical reflectors ..................................................................................25
Fig. 3-8: Absolute and local co-ordinate system with angular position
of the NAV200 ...................................................................................................25
Fig. 3-9: Common use of reflectors of two adjoining layers ..........................................26
Fig. 3-10: Correct, asymmetrical arrangement of reflectors in the layer .......................27
Fig. 3-11: Incorrect, symmetrical arrangement of reflectors in the layer.......................27
Fig. 3-12: Example; low positioning accuracy without the "N closest" function
and without the "Radii of action" function .......................................................28
Fig. 3-13: Example: higher positioning accuracy with the "N closest" function
and with the "Radius of action" function .........................................................29
Fig. 3-14: Overlapping of two reflectors with an angle of less than 1.26°.........................30
Fig. 3-15: Minimum distance from reflectors to other reflective objects .......................31
Fig. 3-16: Integration of the NAV200 in a navigation system .........................................33

Operating Instructions
NAV200
Figures and tables
8011502/R197/2007-02-12 ©SICK AG · Division Auto Ident · Germany · All rights reserved 9
Fig. 3-17: Data communication between NAV200 and vehicle computer
of the AGV.......................................................................................................... 33
Fig. 3-18: Identification of reflectors in "Quickmap" operating condition ...................... 35
Fig. 3-19: Travel along a route with loss of all other reflectors ...................................... 36
Fig. 3-20: Travel along a narrow aisle by means of the “Reflector
co-ordinates” mode .......................................................................................... 36
Fig. 3-21: NAV200: Position of the LEDs on the NAV200............................................... 37
Fig. 5-1: Screening concept of the NAV200 .................................................................. 41
Fig. 5-2: Assembled RS 232 data cable No. 6024723/No. 2030334 ....................... 43
Fig. 5-3: Wiring of the RS 232 data cable...................................................................... 45
Fig. 5-4: Wiring of the cable socket for the power supply............................................. 45
Fig. 6-1: Quick start with Mapping operation ................................................................ 49
Fig. 6-2: Interface parameters in the status bar of NAV200 Setup ............................. 52
Fig. 6-3: Program window of the NAV200 Setup configuration software .................... 53
Fig. 6-4: Selecting the three types of display of the graphics window......................... 54
Fig. 6-5: The same reflector arrangement displayed in the Cartesian
co-ordinate system and in the polar co-ordinate system ............................... 55
Fig. 6-6: Data display: "Distance against angle" (extract from the layer table
and part of the graphics window) .................................................................... 55
Fig. 6-7: “Project settings” dialog box ............................................................................ 57
Fig. 6-8: "Reflector data" text file.................................................................................... 58
Fig. 6-9: Layer selection for data transfer...................................................................... 59
Fig. 6-10: Icons in the NAV and PROJECT columns of the layer table ................................ 60
Fig. 6-11: Dialog box for loading data "Reflector data" text file in NAV200 Setup........ 63
Fig. 6-12: Activating edit mode for reflector data............................................................ 64
Fig. 6-13: Dialog box: data entry for positioning operation............................................. 65
Fig. 6-14: Program window during positioning operation ("Positioning
operation” mode) .............................................................................................. 66
Fig. 6-15: Dialog box for the Mapping parameters after data entry............................... 67
Fig. 6-16: Information box during Mapping...................................................................... 68
Fig. 6-17: NAV200 Setup feedback and processing of Mapping results....................... 68
Fig. 6-18: Program window after completion of Mapping ............................................... 69
Fig. 7-1: Cleaning the front pane on the NAV200 ......................................................... 74
Fig. 9-1: Dimensional drawing of the NAV200 .............................................................. 78
Fig. 10-1: Reproduction of the EC Declaration of Conformity for NAV200
(Page 1, reduced).............................................................................................. 83

Operating Instructions
NAV200 Laser Positioning System
10 ©SICK AG · Division Auto Ident · Germany · All rights reserved 8011502/R197/2007-02-12
Figures and tables
Information for designing the system
The following sections are recommended for support in designing the NAV200 system:
•Section 2 Safety information, Page 13
•Section 3 Product description, Page 17
•Section 4 Installation, Page 39
•Section 5 Electrical installation, Page 41
•Section 6.4 NAV200 Setup Configuration Software, Page 50
•Section 7 Maintenance, Page 73
•Section 9 Technical data, Page 77
•Section 10.2 Available accessories, Page 80
•Section 10.5 Reproduction of the EC Declarations of Conformity, Page 83

Operating Instructions Chapter 1
NAV200
About this document
8011502/R197/2007-02-12 ©SICK AG · Division Auto Ident · Germany · All rights reserved 11
1About this document
1.1 Function of this document
This document gives instruction in the operation of laser positioning systems NAV200.
In operation, the NAV200 Laser Positioning System continuously determines its own
position and orientation within an industrial area using fixed reflectors. Mounted on an
automated guided vehicle (AGV), the NAV200 Laser Positioning System transfers this
positional data on the course to the vehicle computer of the AGV, which steers the vehicle
on the programmed route of the AGV. The NAV200 Laser Positioning System is configured
with the NAV200 Setup configuration software or directly via the vehicle computer using
software telegrams.
The document includes information on
•integrating the NAV200 laser positioning system in an overall system for vehicle control
•Assembly and electrical installation
•Commissioning (startup)
•Operation and configuration (parameter setting)
•Maintenance
•Replacing the system
Note The NAV200 Laser Positioning System is referred to simply as "NAV200" in the remainder
of the document.
1.2 Target groups
The target groups for this document are persons involved with the following activities
1.2.1 Assembly, electrical installation, device replacement
Specialist technical staff such as service technicians or works electricians
1.2.2 Commissioning, configuration, maintenance
Specialist technical staff such as technicians or engineers.
1.2.3 Operation
Specialist technical staff for operation and control of the positioning system
1.3 Level of information
This document contains all the information required for the assembly, electrical installation
and commissioning of the NAV200 with the factory default settings.
Step-by-step instructions are given for all activities.
Configuration (parameter setting) of the NAV200 for the application-specific conditions on
site (entry of fixed reflector co-ordinates) and operation for the reflector detection test by
the NAV200 (positioning operation) can be performed either with the NAV200 Setup config-
uration software that runs under WindowsTM on a PC or, alternatively, from the vehicle com-
puter using software telegrams.
The request for positional data by the vehicle computer in continuous operation is initiated
using software telegrams programmed by the user.

Chapter 1Operating Instructions
NAV200 Laser Positioning System
12 ©SICK AG · Division Auto Ident · Germany · All rights reserved 8011502/R197/2007-02-12
About this document
The software telegrams available are described in the NAV200 Telegram listing
(No. 8009595).
More detailed information on the NAV200 and on laser measurement is available from
SICK AG, Auto Ident Division. On the Internet at www.sick.com.
1.4 Symbols used
Some of the information in this documentation is specially highlighted to simplify quick
access to this information.
Warnings!
Warnings protect against physical injury or protect the NAV200 from serious damage.
¾Always read and follow warnings carefully.
Reference Italics are used to refer to more detailed information.
Note Notes provide information on special features.
Explanations Explanations provides background information on technical aspects.
Recommendations Recommendations provide advice on how to carry out a task more effectively.
TIPS Tips explain setting options in the NAV200 Setup configuration software.
COMMUNICATION This font denotes a term in the user interface of the NAV200 Setup configuration software.
This symbol denotes a section that describes the steps involved in using the NAV200 Setup
configuration software.
This symbol refers to supplementary technical documentation.
¾You have to do something here. This symbol denotes a single-step operating instruction.
Multi-step operating instructions are listed in numerical order.

Operating Instructions Chapter 2
NAV200
Safety information
8011502/R197/2007-02-12 ©SICK AG · Division Auto Ident · Germany · All rights reserved 13
2Safety information
2.1 Authorized personnel
To ensure that the NAV200 operates correctly and safely, it must be installed and operated
by sufficiently qualified personnel.
Repairs on the NAV200 must only be carried out by trained and authorized SICK AG service
personnel.
The operating instructions must be made available to the end user. The end user must be
given expert instruction and encouraged to read the operating instructions.
The following qualifications are required for the different activities:
2.1.1 Assembly and maintenance
•Practical technical training
•Knowledge of the current safety directives at the workplace.
2.1.2 Electrical installation and device replacement
•Practical electrical training
•Knowledge of the current electrical directives
•Knowledge related to operation and control of the navigation system
2.1.3 Commissioning, operation and configuration
•Knowledge of the mechanical and electrical parameters of the navigation system and
the characteristics of the navigation system with regard to operation and control
•Basic knowledge of the WindowsTM operating system used
•Basic knowledge of data transfer processes
2.2 Intended use
The NAV200 is used for determining the position of automated guided vehicles (AGVs) on a
course on the programmed route. Mounted on an AGV, the NAV200 continuously measures
the positions of detected reflectors, with reference to the stored positions of these
reflectors, and uses this information to calculate its own instantaneous position and
orientation on the course. During the journey, it outputs this data to the vehicle computer
of the AGV in the form of co-ordinates. As a result, the vehicle computer can correct the
course of the AGV appropriately in order to keep it on the route.
The NAV200 is a system for use in internal areas.
The NAV200 must not be misused as a device for personal protection as defined in the
applicable machinery safety standards.
In the case of any other use or modifications to the system, including during assembly and
electrical installation, or modifications to the SICK software warranty, all warranty claims
against SICK AG will be forfeited.
Note Do not open the NAV200. Opening the device will invalidate the manufacturer's warranty.

Chapter 2Operating Instructions
NAV200 Laser Positioning System
14 ©SICK AG · Division Auto Ident · Germany · All rights reserved 8011502/R197/2007-02-12
Safety information
2.3 General safety information and protective measures
¾Read the general safety information thoroughly and observe it during all activities
involving the NAV200. Also observe the warnings given before the instructions in the
individual sections.
2.3.1 RF interference
The NAV200 is intended for use solely in industrial environments. Use in residential areas
can cause RF interference.
2.3.2 Electrical installation work
Danger of injury through electrical current!
The NAV200 operates with a 24 V DC power supply. High voltage is produced in the device
when it is operating.
¾Do not open the housing.
¾Observe the usual safety precautions when working on electrical systems.
2.3.3 Laser radiation
Laser radiation!
The NAV200 uses a Class 1 laser.
The laser outlet aperture is a 1 cm diameter circular area in the centre of window area of
the rotating scanner head.
The invisible infra-red radiation emitted is safe to eyes.
Caution — use for other than the intended purpose can lead to exposure to dangerous
radiation.
¾Do not open the housing (opening does not stop the laser switching on)
¾Use for other than the intended purpose can lead to the laser class being exceeded.
¾Observe the latest version of the laser protection regulations.
Fig. 2-1: Window area in the scanner head of the NAV200
outlet aperture
of the laser beam
rotating scanner head

Operating Instructions Chapter 2
NAV200
Safety information
8011502/R197/2007-02-12 ©SICK AG · Division Auto Ident · Germany · All rights reserved 15
Laser power
The laser operates with a wavelength of λ = 855 nm (infrared radiation).
The emitted beam poses no risk to a person's eyes or skin. The laser beam is invisible to the
human eye.
The product is classified as Laser Class 1 in accordance with EN/IEC 60825-1 and
21 CFR 1040.
No regular maintenance is required to ensure that the Class 1 laser classification is
maintained.
Laser warning label
The laser warning label (Fig. 2-2) on the NAV200 is located within the rating plate, above
the electrical connections.
Note If the NAV200 is mounted on an AGV such that the laser warning label is obscured, an
additional warning label (not included in the scope of delivery) must be attached to the
AGV, next to the outlet aperture of the laser beam!
2.4 Quick Stop and Quick Start
2.4.1 Switching the NAV200 off
¾Switch off the 24 V DC supply for the NAV200.
The NAV200 retains the last configuration stored in the nonvolatile reflector memory. The
most recent measurement data determined using Mapping and stored in the working
memory of the NAV200 is lost.
2.4.2 Switching the NAV200 on again
¾Switch on the 24 V DC supply for the NAV200.
The NAV200 starts up in "Standby" mode.
The configuration held in the nonvolatile reflector memory is activated after a change
to either "Mapping" or "Positioning operation" (position measurement) mode.
Fig. 2-2: Laser warning label attached to the NAV200
This device conforms to
Laser Class 1, 21 CFR 1040

Chapter 2Operating Instructions
NAV200 Laser Positioning System
16 ©SICK AG · Division Auto Ident · Germany · All rights reserved 8011502/R197/2007-02-12
Safety information
2.5 Environmental aspects
The NAV200 is constructed in such a way that it causes the least possible damage to the
environment.
2.5.1 Energy consumption
The maximum power consumption of the NAV200 is 24 W.
2.5.2 Disposal after final removal from service
Always dispose of unusable or irreparable equipment in an environmentally-responsible
manner, in accordance with the waste disposal regulations applicable in the particular
country involved. The design of the NAV200 enables its separation into recyclable
secondary raw materials and special waste (electronic waste).
For more details on this, see Section 7.3 Disposal, Page 74.
SICK AG does not currently take back devices that have become unusable or irreparable.

Operating Instructions Chapter 3
NAV200
Product description
8011502/R197/2007-02-12 ©SICK AG · Division Auto Ident · Germany · All rights reserved 17
3Product description
3.1 Design of the system
3.1.1 Scope of delivery (without data cable)
The delivery package of a NAV200 comprises:
•NAV200 with rotating scanner head
•8-pin cable socket for power supply (No. 6024722)
•Information sheet (device information)
•CD-ROM (No. 2040168) with
– NAV200 Setup configuration software for WindowsTM
– NAV200 operating instructions in German and English (PDF)
– NAV200 telegram listing in German and English (PDF)
– The freely-available "Acrobat Reader" PC software for reading PDF files
•Screw kit (No. 2026277) for fixing the NAV200, consisting of
– 4 x hexagon socket (Allen) screws M4 x 10 mm (0.39 in) - A2
– 4 x washers 4.3 - A2
– 4 x spring lock washers B4
The required RS 232 data cable must be ordered separately.
Note The latest versions of all the current publications/documentation included in the scope of
delivery are available for download at www.sick.com.
Section 10.2 Available accessories, Page 80 also gives an overview of the accessories
available, e.g. the required RS 232 data cable.
Fig. 3-1: NAV200 laser positioning system with cable socket
NAV200 RS 232 data cable8-pin cable socket
Additionally required:
Must be ordered separately due to
different lenghts!
See Table 10-3, Page 80.

Chapter 3Operating Instructions
NAV200 Laser Positioning System
18 ©SICK AG · Division Auto Ident · Germany · All rights reserved 8011502/R197/2007-02-12
Product description
3.1.2 System requirements
As part of a navigation system, the NAV200 is controlled by a supervisory unit - the vehicle
computer. Application-specific software that enables communication between vehicle
computer and NAV200 is required for this task.
The user can write suitable software for his application on the basis of the software
telegrams described in the NAV200 telegram listing (No. 8009595).
Other requirements are:
– Sub-division of the area to be travelled into separate layers
– Mounting of fixed reflectors in these layers
– Accurate measurement of the reflector positions (co-ordinates) from a common origin
(zero point) of the area
– Transfer of this layer-related reflector data to the NAV200
SICK offers "Diamond Grade" reflective film as an accessory for constructing suitable
reflectors, see Section 10.2 Available accessories, Page 80.
The sub-division and equipping of layers with reflectors is described in Section 3.3
Operating conditions, Page 22.
Other requirements for commissioning and operating a NAV200 are:
Mounting:
•Flat mounting surface (support, not included in the scope of delivery) for mounting the
NAV200 on an automated guided vehicle (AGV). The NAV200 is mounted parallel to the
area travelled.
Electrical connection
•Bringing the power supply (24 V DC ±25 %) into the 8-pin cable socket
(included in the scope of delivery).
•A supervisory vehicle computer (host) with an RS 232 data interface for processing the
measurement data.
Commissioning/Configuration
•PC with RS 232 serial data interface, CD disk drive, mouse and Windows 98TM, Windows
METM, Windows 2000TM or Windows XPTM operating system.
•RS 232 data cable No. 6024723 (5 m (16.4 ft))/No. 2030334 (6.5 m (21.3 ft))
3.1.3 Product features and functions (overview)
Powerful NAV200:
•Use on courses with a maximum of 40 layers and a maximum of 32 reflectors per layer
•Detection of reflector marks in a 360°scanning angle
•Range 1.2 m to 28.5 m (3.94 ft to 93.5 ft)
•Position measurement accuracy ±4 mm to ±25 mm (±0.16 in to ±0.97 in)
(depending on mean distance to reflector)
•Angular accuracy ±0.1°
•Mounting position with optical axis parallel to the area travelled, overhead mounting
also possible

Operating Instructions Chapter 3
NAV200
Product description
8011502/R197/2007-02-12 ©SICK AG · Division Auto Ident · Germany · All rights reserved 19
Safety and convenience for the user:
•Robust, compact metal housing (max. IP 65), CE mark
•Laser Class 1
•Future-proof through firmware update via serial data interface (Flash PROM)
•Future-proof NAV200 Setup configuration software
•Maintenance-free
Convenient configuration/operation:
•Convenient NAV200 Setup configuration software
•Command interface with software telegrams for measurement, modification and
storage of reflector co-ordinates
•Four status-display LEDs
Modes:
•Standby (manual entry of the reflector positions in the NAV200)
•Mapping (automatic measurement of the reflector positions by the NAV200)
•Positioning operation (continuous position measurement by the NAV200)
•Upload (reading the reflector positions stored in the NAV200)
•Download (transferring new reflector positions to the NAV200)
•Reflector co-ordinates (reflector measurement) in the local co-ordinate system of the
NAV200)
External data communication:
•RS 232 serial data interface to the vehicle computer (host) and to the PC for configuring
the NAV200
Electrical interfaces
•Power supply (24 V DC ±25 %)
•RS 232 data interface
Type of connection:
•RS 232 data interface, 14-pin chassis-mount plug on device
•Power supply ("Power Supply 24 V DC" connection): 8-pin chassis-mount plug on device
3.1.4 Applications
Typical applications for the NAV200 are:
•Shuttle systems
•Self-propelled stackers
•Automated guided transport systems generally

Chapter 3Operating Instructions
NAV200 Laser Positioning System
20 ©SICK AG · Division Auto Ident · Germany · All rights reserved 8011502/R197/2007-02-12
Product description
3.1.5 View of the device
Fig. 3-2: Arrangement of the NAV200
1
2
4
5
6
7
bm
green
Legend:
1Scanner head, rotating
2Light outlet/inlet aperture
3Status indicator (LEDs 4 x)
4RS 232 data cable
(see Table 10-3, Page 80)
59-pin D-Sub socket for
Host/PC connection
614-pin cable socket for
7“RS 232 data interface” connection
(14-pin chassis-mount plug)
8"Power Supply 24 V DC" connection
(8-pin chassis-mount plug)
9Fuse (3.15 A slow-blow)
bl Functional earth terminal
bm Tapped holes in baseplate (4 x)
(not visible here)
bn Laser warning label
bo 8-pin cable socket
3
8
3
red yellow yellow bl9
Table of contents
Other SICK Measuring Instrument manuals

SICK
SICK FWE200DH User manual

SICK
SICK WSE16 Series User manual

SICK
SICK DUSTHUNTER C200 Owner's manual

SICK
SICK GM901 User manual

SICK
SICK Lector85x User manual

SICK
SICK MARSIC300 Guide

SICK
SICK DUSTHUNTER SP100 Ex-3K User manual

SICK
SICK T-EASIC FTS User manual

SICK
SICK DUSTHUNTER T User manual

SICK
SICK MARSIC280 User manual

SICK
SICK FLOWSIC600 User manual

SICK
SICK DL100-SSI User manual

SICK
SICK DUSTHUNTER SP100 Ex-3K User manual

SICK
SICK FLOWSIC100 Flare Operating instructions

SICK
SICK MLG-2 Prime User manual

SICK
SICK GM32 Series Manual

SICK
SICK WebChecker MLG-2 User manual

SICK
SICK GM32 Series User manual

SICK
SICK S710 E User manual

SICK
SICK DME5000 User manual