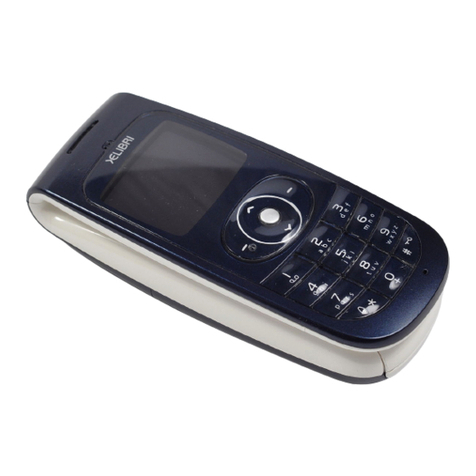
Siemens Xelibri X6 User manual

X6
All you need to know to get the best from your Xelibri
U
USER GUIDE
A31008_H9240_A45_2_7619_ugfront.fm Seite 1 Freitag, 26. September 2003 7:45 07

Contents
1
right page (1) of TWIGGY e2, A31008-H9240-A45-2-7619 (23.09.2003, 15:17)
© Siemens AG 2003, P:\PN\ISDN\XELIBRI Vers. 2\UGS\TWIGGY\e2\twiggyTOC.fm
VAR Language: ENG; VAR issue date: 18-September-2003
Contents Contents of box............. rear cover
Overview ..................................... 2
Getting Started ........................... 3
Fitting battery.............................. 3
Fitting SIM card ............................ 3
Charging ...................................... 3
Switching on ................................ 4
Language..................................... 4
Setting the time and date..............4
Standby ....................................... 4
Switching off ................................ 4
Precautions .................................. 4
Making and Taking Calls ............. 5
Making a call ................................ 5
Adjusting call volume .................... 5
Ending a call................................. 5
Taking a call................................. 5
Flip to answer!.............................. 5
More ways to call ........................ 6
Dialling internationally and in China6
Phonebook ................................... 6
Voice dialling ................................ 6
Redialling numbers ....................... 6
Retrying a busy number ................ 6
Call features................................ 7
Voice mail .................................... 7
Noting a phone number ................7
Pausing a call ............................... 7
Second calls .................................7
‘Party’ calls ...................................7
Phonebook .................................. 8
Making a Phonebook entry ............8
Typing in the Phonebook ...............8
Updating an entry .........................8
Adding extension numbers.............8
Phonebook tips .............................8
Identifying callers .........................9
Voice dialling ................................9
Further Phonebook features...........9
Text messages........................... 10
Receiving a text message ............10
Writing a text message................ 11
Writing other characters ..............12
Sending a message ..................... 12
Managing messages .................... 12
Multimedia (EMS) messages ..... 14
Cards .........................................14
Including a Phonebook number.... 14
Inserting a ready message........... 14
Inserting multimedia ...................14
Saving multimedia.......................14
Activities ................................... 15
Using the alarm clock .................. 15
Using the calendar ......................15
Using the calculator.....................15
Games .......................................15
Features.....................................16
Themes ......................................16
Ring tones ..................................16
Settings .....................................17
Setting up voice mail ...................17
Divert (call forwarding)................17
Setting up favourites ...................17
Symbols .....................................18
Display symbols ..........................18
Menu Summary .........................19
Messages ...................................19
Stay in Touch..............................19
Activities.....................................19
My Xelibri ...................................19
Themes ......................................20
What if...? .................................21
Precautions/Maintenance .........23
Xelibri Service ...........................24
Accessories ................................25
Specifications ............................26
Index .........................................27
twiggy.book Seite 1 Dienstag, 30. September 2003 4:52 16

Overview
2
left page (2) of TWIGGY e2, A31008-H9240-A45-2-7619 (26.09.2003, 07:36)
© Siemens AG 2003, P:\PN\ISDN\XELIBRI Vers. 2\UGS\TWIGGY\e2\twiggy_getting_started.fm
VAR Language: ENG; VAR issue date: 18-September-2003
Overview Reception strength/battery – the
stronger these indicators the better.
Themed background – suit the look and
sound of your Xelibri to your mood (p 16).
Network name – indicates standby –
you’re ready to make and receive calls and
messages.
On, off, or “go back” – do what’s
shown at bottom left of display – often
backspace or cancel. Hold to go back to
standby. Hold to switch on or off.
You can put your favourite number or
feature on this key in standby (p 17).
Up or down – click to move up or down through a
list, menu or message.
In standby,
•clickto view/redial recently called number(s)
•clickto open your
Phonebook
•holdto voice dial.
Reminders – show settings in use – e.g.
jindicates you’ve switched ringer off
(p 16).
Announcements – your Xelibri also dis-
plays text messages ], voice mail \,
missed calls etc. here – click to view.
Menu – do what’s shown at the bottom
right of display – usually open a menu or
confirm a setting.
Call – click to answer an incoming call
or to dial a number shown on the display.
Click to do what’s highlighted first on
the Options menu.
j
Network name
Maria ÓMenu
11Jun
09:15
Messages
Back ÑSelect
Using menus
Click to rotate to the
next menu item.
Click to open it.
Special keys
*– hold to switch all tones off
1– hold to call your voice mailbox
twiggy.book Seite 2 Dienstag, 30. September 2003 4:52 16

Getting Started
3
right page (3) of TWIGGY e2, A31008-H9240-A45-2-7619 (26.09.2003, 07:36)
© Siemens AG 2003, P:\PN\ISDN\XELIBRI Vers. 2\UGS\TWIGGY\e2\twiggy_getting_started.fm
VAR Language: ENG; VAR issue date: 18-September-2003
Getting
Started
Fitting battery
Gently press in the left end of
door (1) and slide it open (2)
to reveal SIM slot and charger
socket.
Continue to slide door to left
until keypad disengages –
maybe use a fingernail to lift
it (3).
The battery fits on the under-
side of the keypad. Gently flip
keypad into the lid (4).
Engage the battery tabs in the
slots (5), then swing battery
into place (6).
Click the keypad back into
place.
To remove battery, gently
press the end of the retaining
clip (7) towards it.
Fitting SIM card
Your service provider supplies your
SIM card. If it’s credit card size,
snap out the smaller portion and
tidy any rough edges.
Open SIM door (Fitting battery,
above) and insert SIM in the top
slot, positioning the cut-off corner
as shown. Press until it clicks into
place.
The SIM is spring-loaded – to remove, press it in.
Charging
Open the SIM door (Fitting bat-
tery, above).
Insert the supplied charger into an
easily accessible mains socket of
the correct rating and plug into the
bottom socket with the pins face
up. While it charges, the battery
indicator will animate – if it doesn’t, then see What if...?
on p 21. Allow 2-3 hours for a full charge.
Be sure to unplug the charger from the mains when
you’re finished.
3
2
1
4
5
6
7
twiggy.book Seite 3 Dienstag, 30. September 2003 4:52 16

Getting Started
4
left page (4) of TWIGGY e2, A31008-H9240-A45-2-7619 (26.09.2003, 07:36)
© Siemens AG 2003, P:\PN\ISDN\XELIBRI Vers. 2\UGS\TWIGGY\e2\twiggy_getting_started.fm
VAR Language: ENG; VAR issue date: 18-September-2003
Switching on
To switch on your Xelibri
Hold . Enter your PIN if asked.
To enter a PIN
A PIN number protects your Xelibri against unauthorised
use. Service providers often supply a SIM with the PIN
switched on; see your documentation for the number.
Type the PIN on the keypad. Click to correct, if neces-
sary.
Click to confirm.
You have three tries at entering the right PIN. If there’s
a problem, see What if...? on p 21. Your provider may
let you switch off the PIN (p 20).
Language
To ch o os e a di f fere nt language, hold the 9key. Click
to highlight the correct language and click to select.
Setting the time and date
When you first use your Xelibri, it will ask you to set the
time and date.
Type the time using 24 hour clock and date, preceding a
number with a zero if it’s less than 10.
Click when done.
Standby
When a network has been found and its name displayed,
your Xelibri is in standby. If you can’t see a network
name, please see What if...? on p 21.
Switching off
From standby, hold .
Precautions
All mobile phones are radio transmitters; switch off
where prohibited (e.g. aircraft).
To be certain you use your Xelibri safely and correctly,
see Precautions/Maintenance on p 23.
Please
enter PIN:
****
<C OK
twiggy.book Seite 4 Dienstag, 30. September 2003 4:52 16
Making and Taking Calls
5
right page (5) of TWIGGY e2, A31008-H9240-A45-2-7619 (26.09.2003, 07:36)
© Siemens AG 2003, P:\PN\ISDN\XELIBRI Vers. 2\UGS\TWIGGY\e2\twiggy_main.fm
VAR Language: ENG; VAR issue date: 18-September-2003
Making and
Taking Calls
Making a call
To make a call
Starting from standby (network name showing), type
the phone number, always including area code.
Click .
To correct a number
Click to clear a digit. Hold to clear all earlier digits.
Click to move the cursor back or forward. Hold to go
to the start or end.
Adjusting call volume
During a call, click .
Ending a call
Click to choose End.
Always do this, even if you think the other person has
hung up.
Your Xelibri tells you how long the call lasted.
Taking a call
Who’s calling?
When you receive a call, the display shows the caller’s
phone number (if available) or their name (if their
number’s in your Phonebook).
You can use special ringer melodies and pictures for call-
ers you recognise (p 9).
To answer a call
Click .
To reject a call
Click to choose:
•Reject – hangs up the call immediately
•Divert – (if you’re using call divert, p 17) forwards
the call to your voice mail or alternative number.
Flip to answer!
When your Xelibri’s shut, answer a call by flipping it
open. End a call by flipping it shut.
You can turn this feature on and off (p 20).
0123456|
<C Options
twiggy.book Seite 5 Dienstag, 30. September 2003 4:52 16
More ways to call
6
left page (6) of TWIGGY e2, A31008-H9240-A45-2-7619 (26.09.2003, 07:36)
© Siemens AG 2003, P:\PN\ISDN\XELIBRI Vers. 2\UGS\TWIGGY\e2\twiggy_main.fm
VAR Language: ENG; VAR issue date: 18-September-2003
More ways to
call
Dialling internationally and in China
Hold 0to enter “+” and type the country code or click
and select the country or Chinese city from the list.
Type the area code (in many countries omitting the first
digit – e.g. “0”) and phone number and click .
Phonebook
To make an entry, see p 8.
To call someone in your Phonebook
From standby, click to open the Phonebook.
Type the first letter of the name (press key the right
number of times) and/or click to go up or down the
list.
Click to call the person highlighted.
Voice dialling
To record a name so you can voice dial the person, see
p9.
To call someone by saying their name
From standby, hold (and then release) . At the tone,
say the name.
Note that a noisy environment may affect your
Xelibri’s ability to recognise what you said.
Redialling numbers
To redial a number you called earlier
From standby, click to display the last number called.
Click to see previous numbers, if required. Click to
dial the number highlighted.
Returning received or missed calls
Choose Menu, Stay in Touch, and select the list of
recent calls you want. Click to highlight the correct
number and click to dial. Alternatively, click to save
the number, send an SMS, etc.
Retrying a busy number
If a number is busy, your Xelibri will offer to retry it.
Choose Yes to redial at intervals for up to 15 minutes.
To stop your Xelibri trying the number, click to cancel
one of the call attempts.
twiggy.book Seite 6 Dienstag, 30. September 2003 4:52 16
Call features
7
right page (7) of TWIGGY e2, A31008-H9240-A45-2-7619 (26.09.2003, 07:36)
© Siemens AG 2003, P:\PN\ISDN\XELIBRI Vers. 2\UGS\TWIGGY\e2\twiggy_main.fm
VAR Language: ENG; VAR issue date: 18-September-2003
Call features Voice mail
If you need to set up your answering service, see p 17.
To listen to voice mails
Service providers may alert you to a new voice mail by
text message (]), the \symbol or a phone call. To
dial your voice mailbox, hold the 1key or click to
choose \, if shown.
Noting a phone number
To take down a phone number during a call, type it on
the keypad. After the call, click to dial, or choose
Options, Save (in Phonebook).
Pausing a call
To interrupt a call for a private conversation, choose
Options and Mute. Repeat to resume.
Second calls
Receiving a second call
If you subscribe to call waiting, you may be alerted to an
additional call while you are using your Xelibri.
• To accept the call, click or choose Swap.
• To reject or divert it (according to your settings), sim-
ply ignore it.
Otherwise, click to hang up your current call and to
answer the new one.
Making a second call
During a call, choose Options and Additional call. Dial
a number (or choose Options, Phonebook) and call as
usual.
Swapping/ending calls
Choose Options, Swap to switch between calls.
To end the active call, click .
‘Party’ calls
When you have two calls on the go, choose Options,
Join to connect them together. Then, if you want,
choose Options, Additional call to add somebody else
to the party. You can join up to five calls together.
Click to end the call for everybody or (where availa-
ble) choose Options, Transfer to connect the callers to
each other and exit.
twiggy.book Seite 7 Dienstag, 30. September 2003 4:52 16
Phonebook
8
left page (8) of TWIGGY e2, A31008-H9240-A45-2-7619 (26.09.2003, 07:36)
© Siemens AG 2003, P:\PN\ISDN\XELIBRI Vers. 2\UGS\TWIGGY\e2\twiggy_main.fm
VAR Language: ENG; VAR issue date: 18-September-2003
Phonebook Making a Phonebook entry
The Phonebook makes it simple to call your favourite
numbers and to recognise incoming calls.
To make a new entry
From standby, type the number on the keypad.
Choose Options, Save. Type the name (see below) and
click to choose OK.
Typing in the Phonebook
Press a number key the right number of times for the
letter you want. For example, press 2once for “a” and
twice for “b”.
Keep pressing for characters with accents.
Leave a short pause between letters that appear on the
same key.
Corrections
Click to clear a letter. Hold to clear all earlier letters.
Click to move the cursor back or forward. Hold to go
to the start or end.
Spaces/punctuation
For a space, press 1.
For punctuation, press *and click or to highlight
the mark you want. Click to insert it.
Updating an entry
From standby, click to show the first entry.
Type the first letter of the name (press key the right
number of times) and/or click to go up or down the
list.
Click to call the person highlighted or click to
choose Options to edit or delete the entry, send a text
message, etc.
Adding extension numbers
You can add extension numbers (or control codes) to
your entry. Enter phone number, then “+” (long press
on “0”) for pause, followed by the extension digits.
Phonebook tips
You can save numbers from your list of calls made,
received or missed (Menu, Stay in Touch), or from
text messages. With a number on your display, choose
Options, Save.
Save more than one number for a person by adding a
letter at the end of their name: “H” for a home number,
“M” for a mobile number, etc.
To use your Phonebook abroad, use the “+” country
code even for saving local numbers. See Dialling inter-
nationally and in China on p 6.
twiggy.book Seite 8 Dienstag, 30. September 2003 4:52 16
Phonebook
9
right page (9) of TWIGGY e2, A31008-H9240-A45-2-7619 (26.09.2003, 07:36)
© Siemens AG 2003, P:\PN\ISDN\XELIBRI Vers. 2\UGS\TWIGGY\e2\twiggy_main.fm
VAR Language: ENG; VAR issue date: 18-September-2003
Identifying callers
So you can tell when your friends are calling, assign a
special ring tone and picture to people in your Phone-
book.
Edit the Phonebook entry and choose Options, Associ-
ate Ringer or Assoc. Graphics. Click to preview the
item you want to use and click to select.
You can also use a special ring tone for Phonebook call-
ers as a whole – see p 16.
Voice dialling
You can call people in your Phonebook by saying their
name (p 6).
When you voice dial, your Xelibri matches what you say
with a recorded sample. You can save samples for up to
20 Phonebook entries. Choose a quiet environment for
recording samples and using voice dialling.
To record a voice sample
Open the Phonebook and highlight the entry that you
want to record.
Choose Options, Voicedialling, Add. At the tone, say
the name, repeating it at the second tone.
To check all samples
With any phonebook entry highlighted, choose Options,
Voice dial list.
To update a voice sample
Open the Phonebook and select the entry.
Click for Options, Voicedialling, and choose to
play, re-record or remove the sample. You may also
update via Voice dial list above.
Further Phonebook features
Depending on your SIM, you may see the following listed
in the Phonebook:
•<Own nos.> – display or record your own phone
number or other useful personal numbers.
•Special numbers – lists numbers supplied by your
service provider.
You can send a Phonebook entry to a friend via text
message. Choose Options, Send entry and dial a
number or select a recipient from the Phonebook as
usual.
twiggy.book Seite 9 Dienstag, 30. September 2003 4:52 16

Text messages
10
left page (10) of TWIGGY e2, A31008-H9240-A45-2-7619 (26.09.2003, 07:36)
© Siemens AG 2003, P:\PN\ISDN\XELIBRI Vers. 2\UGS\TWIGGY\e2\twiggy_main.fm
VAR Language: ENG; VAR issue date: 18-September-2003
Text
messages
Receiving a text message
Your Xelibri can send and receive standard (SMS) and
multimedia (EMS) messages including text, pictures, ani-
mations and sound.
To view a message
When you receive a message, you’ll see the ]symbol.
Click to view the message and to go back and for-
ward.
To save (or dial) a phone number in a message
Choose Options, No. from SMS.
To go back and forward between numbers, click .
Choose Options and Save (in Phonebook) or click to
dial.
To reply to a message
Choose Options, Reply and select a reply as follows:
•New Reply – start a new message
•Edit Reply – start a new message based on the one
you’re reading
•Answer is YES/NO, Please call back, I’ll be late,
Thank you – send the selected phrase in reply.
To delete/archive a message
It’s important to delete messages, because your SIM
card has limited capacity (]will flash on display when
full – and you won’t get any more messages!)
In a message, choose Options, Delete. From standby,
choose Menu, Messages, Inbox and click to high-
light a message. Choose Options, Delete (or Delete
all to empty your Inbox).
Alternatively, choose Options, Move to Archive to
move a message you’re viewing from your SIM card to
your Xelibri. The Archive is just like the Inbox.
11/06 10:24
Can we meet this
evening 7.30 at
usual pub?
Back Options
date and time of
message
twiggy.book Seite 10 Dienstag, 30. September 2003 4:52 16

Text messages
11
right page (11) of TWIGGY e2, A31008-H9240-A45-2-7619 (26.09.2003, 07:36)
© Siemens AG 2003, P:\PN\ISDN\XELIBRI Vers. 2\UGS\TWIGGY\e2\twiggy_main.fm
VAR Language: ENG; VAR issue date: 18-September-2003
Writing a text message
To start a new message
Choose Menu, Messages, Write message.
You can also choose Options, Send whenever you have
a phone number or Phonebook entry on your display.
Using T9 to type
T9 enables you to write text messages by pressing each
number key just once (e.g. 4, 6, 8, 3, 5 for “hotel”).
To type, press the number key that shows the letter you
want, then repeat for the next letter, regardless of
whether the word’s correct. At the end of the word,
check it’s now correct and press 1for a space.
T9 suggestions
If you reach the end of a word and it’s not right, then
click to choose and repeat until you reach the
right suggestion (press 1for a space) or your Xelibri
offers Spell.
To spell a word
Click to choose Spell and spell out the word by press-
ing a key the right number of times for the letter you
want. For example, press 2once for “a” and twice for
“b”.
Keep pressing for characters with accents.
Leave a short pause between letters that appear on the
same key.
When the word is correct, click to choose Save,
which remembers the word next time.
Corrections
Click to clear a letter. Hold to clear final word and
(again) all earlier text.
Click to move back and forward in a message.
text format
“1” – number of SMS
messages used (p 13)
“152” – characters
remaining in current
message
T9 Abc 1/152
Hi
<C ¼
Maria
twiggy.book Seite 11 Dienstag, 30. September 2003 4:52 16
Text messages
12
left page (12) of TWIGGY e2, A31008-H9240-A45-2-7619 (26.09.2003, 07:36)
© Siemens AG 2003, P:\PN\ISDN\XELIBRI Vers. 2\UGS\TWIGGY\e2\twiggy_main.fm
VAR Language: ENG; VAR issue date: 18-September-2003
Writing other characters
Spaces, punctuation and numbers
To switch T9 on or off, type in capitals or lower
case letters
For an unfamiliar word or a name, you may want to
switch T9 off. You may also want to type capitals, lower
case letters or a long number.
Press the #key repeatedly to select the option you
want.
Without T9 you must type the letter you want by press-
ing keys the right number of times.
Sending a message
To send
Click and, unless replying, either:
• type the number, or
•choose
to select a name.
Choose Send (or hold to cancel).
To send to a group
Choose Options, Send to many. Your current group (if
any) is listed.
To add people, choose New entry and highlight the
name in your Phonebook, clicking to confirm.
To remove one (or all) of the names listed, highlight it
and choose Options, Remove (or Delete all).
When your group is correct, highlight one of the names
and choose Options, Send (or click to cancel).
Managing messages
Viewing, deleting and re-sending
Use the Messages menu to manage messages you
have:
• Received (Inbox)
• Sent or last edited (Outbox)
Each message gives you the option to View or Delete.
To edit an Outbox message, choose View and then
Options, Edit.
space press 1
full stop press 0. Using T9, put a full stop
where you intend an apostrophe.
punctuation press *. Click or to highlight
the required mark and click to
insert.
new line press 1twice
number hold the correct key
twiggy.book Seite 12 Dienstag, 30. September 2003 4:52 16
Text messages
13
right page (13) of TWIGGY e2, A31008-H9240-A45-2-7619 (26.09.2003, 07:36)
© Siemens AG 2003, P:\PN\ISDN\XELIBRI Vers. 2\UGS\TWIGGY\e2\twiggy_main.fm
VAR Language: ENG; VAR issue date: 18-September-2003
Service centre
SMS messages are sent to your provider’s SMS service
centre for onward transmission.
If your SIM card doesn’t already contain the service cen-
tre phone number, then you’ll be prompted for it the first
time you send a message. Choose Menu, My Xelibri,
Setup, Service centre to view or update this number,
if necessary.
Longer messages
Your Xelibri sends messages up to 1530 characters long,
whilst your service provider may charge you separately
for each standard SMS (160 characters). When you write
a message, your Xelibri displays a figure like “1/152” at
the top right (p 11), showing that you’re in your first
standard SMS and you can add 152 characters before
you start a second.
twiggy.book Seite 13 Dienstag, 30. September 2003 4:52 16
Multimedia (EMS) messages
14
left page (14) of TWIGGY e2, A31008-H9240-A45-2-7619 (26.09.2003, 07:36)
© Siemens AG 2003, P:\PN\ISDN\XELIBRI Vers. 2\UGS\TWIGGY\e2\twiggy_main.fm
VAR Language: ENG; VAR issue date: 18-September-2003
Multimedia
(EMS)
messages
Cards
On special occasions, you can send your friends greeting
cards that include a picture and melody and in which
you can add a personal message.
These can be received on the latest models from most
prestige phone manufacturers.
Choose Menu, Messages, Multimedia, Cards and
click to highlight a card. Click to view it and either
click to add your message and send or click to pick
a different one.
Including a Phonebook number
After a space, choose Options, Insert media, Insert
from . Click to highlight the person whose number
you want to insert and click .
Inserting a ready message
A ready message is a handy phrase that saves you time
typing.
In the message, choose Options, Insert media,
Ready messages. Click to highlight the phrase you
want to use and click .
Inserting multimedia
In a message, choose Options, Insert media and
select the type of media to insert.
Click to go back and forward between items and click
to include the current one in your message.
Note that you will not see media indicated in your mes-
sage.
Saving multimedia
You can save specific pictures and sounds you receive,
and re-use them. In a received message, Choose
Options, Save media, then the media you want to
save, adding a name if required. Note that not all media
you receive may be in an appropriate format. You can
create and send new messages containing sounds, pic-
tures or animations you have saved via Menu, Mes-
sages, Multimedia).
Happy Birthday
é––
twiggy.book Seite 14 Dienstag, 30. September 2003 4:52 16

Activities
15
right page (15) of TWIGGY e2, A31008-H9240-A45-2-7619 (26.09.2003, 07:36)
© Siemens AG 2003, P:\PN\ISDN\XELIBRI Vers. 2\UGS\TWIGGY\e2\twiggy_main.fm
VAR Language: ENG; VAR issue date: 18-September-2003
Activities Using the alarm clock
Your Xelibri provides a daily alarm that works even with
your Xelibri switched off.
To set the alarm
Choose Menu, Activities, Alarm clock. Click to
choose On/Off. Click to confirm the time shown, or
type a new time (24 hour clock) and choose Set.
When it’s set, you’ll see ynext to the time. To switch
off, choose On/Off again.
When you hear the alarm…
Click to pause (Snooze) or to stop the alarm.
The alarm will sound at the same time tomorrow unless
you switch it off (above).
Using the calendar
As an aid to planning, your Xelibri provides a calendar.
Choose Menu, Activities, Calendar and click to see
different months.
Tip: put your calendar on a favourite key for instant ref-
erence (p 17).
Using the calculator
Choose Menu, Activities, Calculator.
Use the keypad to type numbers up to 8 digits long.
Press (or *) the right number of times for decimal
point, plus, minus, multiply (*), divide (/), and percent-
age. Click to confirm.
Enter next number, click for a result.
Games
Click and to use the game menus. Choose Menu,
Activities and...
Melody tracker
Use the keypad to try to repeat a melody that gets more
and more challenging.
Press *to exit.
Hotchpotch
As new blocks fall into place, try to remove blocks by
placing four or more of the same colour together.
•Clickto rotate the falling blocks,
•clickto position them and
•clickto accelerate them into place.
Press #to pause and *to exit.
twiggy.book Seite 15 Dienstag, 30. September 2003 4:52 16
Features
16
left page (16) of TWIGGY e2, A31008-H9240-A45-2-7619 (26.09.2003, 07:36)
© Siemens AG 2003, P:\PN\ISDN\XELIBRI Vers. 2\UGS\TWIGGY\e2\twiggy_main.fm
VAR Language: ENG; VAR issue date: 18-September-2003
Features Themes
Suit your Xelibri to your mood with different themes,
that include display background, symbols, ringer melo-
dies and screensaver.
Choose Menu, Themes and click to preview. Click
to use the highlighted theme. Note that a theme may
replace custom settings you have made.
Ring tones
To switch off ring tones
In standby, hold *.
Ring tones will be switched off until you:
•hold*to switch them back on, or
• switch your Xelibri off.
Switching off ring tones won’t affect the vibrating alarm
(p 19) or alarm clock (p 15).
To change ringer melodies
You can use different ringer melodies for callers you rec-
ognise and for messages.
Choose Menu, My Xelibri, Audio, Ring melodies and
choose the type of call you want to modify:
•All calls – numbers that aren’t in your Phonebook or
are withheld
•Phonebook calls – numbers that appear in your
Phonebook
•Individual Callers – choose a ring tone for a specific
person in your Phonebook. Select the required name.
You can also assign pictures to callers – see p 9.
•Messages – incoming text messages.
Modify volume by choosing Volume from the Audio
menu.
Quiet and loud settings
To switch quickly between normal, quiet and loud envi-
ronments, choose Menu, My Xelibri, Audio, Profiles
and choose:
•Default to use your standard settings, including cus-
tomised melodies.
•All quiet to quieten the ringer and other sounds, turn
on vibrate and optionally switch the alarm clock off.
•All loud to switch all sounds to high volume.
Tokyo
Back ÓSelect
2
4
3
15
twiggy.book Seite 16 Dienstag, 30. September 2003 4:52 16
Settings
17
right page (17) of TWIGGY e2, A31008-H9240-A45-2-7619 (26.09.2003, 07:36)
© Siemens AG 2003, P:\PN\ISDN\XELIBRI Vers. 2\UGS\TWIGGY\e2\twiggy_main.fm
VAR Language: ENG; VAR issue date: 18-September-2003
Settings Setting up voice mail
If you subscribe to your service provider’s answering
service (voice mail), they will usually have included it on
your SIM.
If not, you may need to enter your voice mailbox
number. Your Xelibri prompts you for it the first time you
hold 1to retrieve your voice mail. Alternatively, choose
Menu, Stay in Touch, Voice mailbox.
You may also need to switch on divert (below).
Divert (call forwarding)
Divert must be switched on to use voice mail, but you
can also divert calls to other numbers.
Choose Menu, My Xelibri, Setup, Divert and:
•For unanswered – the usual setting: forward calls
when your Xelibri is off, out of coverage, busy or when
you don’t answer.
•For all calls – forward every call (if you’re abroad, for
instance).
In each case, choose to forward calls to your voice mail-
box, to an alternative number, or choose Off to stop
diverting calls/using voice mail.
Setting up favourites
To program your Display key
You can put a favourite number or feature on the key
(in standby) so it’s just a click away.
From standby, click to choose Set (if shown). Select
the feature you want, or entry (in which case select a
Phonebook entry) and click to confirm.
Once set, re-program as below.
To program favourite keys
By programming keys 2 to 8, you can hold the key (in
standby) for your favourite number or feature.
Choose Menu, My Xelibri, Keys, Favourites. High-
light the key (‘’ for the Display key) and choose
Change.
Select the feature you want, or entry (in which case
select a Phonebook entry) and click to confirm.
j
Network name
Maria ÓMenu
11Jun
09:15
Display key
twiggy.book Seite 17 Dienstag, 30. September 2003 4:52 16
Symbols
18
left page (18) of TWIGGY e2, A31008-H9240-A45-2-7619 (26.09.2003, 07:36)
© Siemens AG 2003, P:\PN\ISDN\XELIBRI Vers. 2\UGS\TWIGGY\e2\twiggy_main.fm
VAR Language: ENG; VAR issue date: 18-September-2003
Symbols Display symbols
Your Xelibri may display the following information:
Reminders
Back key
Menu key
yAlarm clock on
(p 15)
jRinger off: hold *to
switch on
nAll calls diverted
(p 17)
±Autoanswer on (with
headset)
Headset in use Home zone (special tariff
in some networks)
*!* Ciphering off (pri-
vacy risk in some
networks)
]New text mes-
sage (p 10)
\New voice mail (depend-
ing on network, p 7)
Missed call (p 6) Missed announcement
(when screensaver on)
yMissed alarm.
µHold to unlock
keypad
twiggy.book Seite 18 Dienstag, 30. September 2003 4:52 16

Menu Summary
19
right page (19) of TWIGGY e2, A31008-H9240-A45-2-7619 (26.09.2003, 07:36)
© Siemens AG 2003, P:\PN\ISDN\XELIBRI Vers. 2\UGS\TWIGGY\e2\twiggy_main.fm
VAR Language: ENG; VAR issue date: 18-September-2003
Menu
Summary
This section summarises the menu options on your
Xelibri.
Messages
See p 10.
Stay in Touch
Phonebook
See p 8.
Calls missed/received/dialled
See p 6.
Voice mailbox
See p 17.
Activities
See p 15.
My Xelibri
Display
Audio
Language Choose the language in which to
display your Xelibri’s menus and
options.
To reset from a language you don’t
understand, hold the 9key.
Screensaver Choose or switch off the screensaver
(e.g. clock) displayed after Xelibri has
been idle for a time.
Wallpaper Choose or switch off the display back-
ground.
Welcome
text
Write a message to display when you
switch your Xelibri on.
Illumination Switch display and key illumination on
or off.
Contrast Adjust the contrast of your display (click
).
Ring melo-
dies
Select ringer melodies (p 16).
Ringer set-
ting
Switch ringer tones on or off.
Volume Set ringer volume (click and ).
Info tones Switch non-ringer sounds (network
events, etc.) on or off.
Silent alert Switch your Xelibri’s vibrate alert on or
off, independently of the ringer.
Profiles See p 16.
twiggy.book Seite 19 Dienstag, 30. September 2003 4:52 16
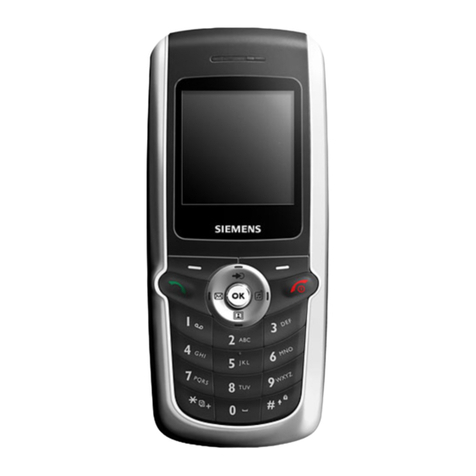
Table of contents
Other Siemens Cell Phone manuals

Siemens
Siemens S6 User manual

Siemens
Siemens C70 User manual

Siemens
Siemens S40 User manual

Siemens
Siemens SL45 User manual

Siemens
Siemens CX70 User manual

Siemens
Siemens SL45i User manual

Siemens
Siemens AL21 User manual

Siemens
Siemens Gigaset C35 User manual

Siemens
Siemens S75 User manual

Siemens
Siemens SIMATIC S7 CP340 Operating instructions

Siemens
Siemens S55 Operator's manual

Siemens
Siemens CL75 User manual

Siemens
Siemens A50 User manual

Siemens
Siemens C65 User manual

Siemens
Siemens 1168 User manual

Siemens
Siemens CF110 User manual

Siemens
Siemens A35 Operator's manual

Siemens
Siemens Controller User manual

Siemens
Siemens A70 User manual

Siemens
Siemens SL10 User manual