manuals.online logo
Brands
  1. Home
  2. •
  3. Brands
  4. •
  5. Siemens
  6. •
  7. Control Unit
  8. •
  9. Siemens FMT-A-ADPT User manual

Siemens FMT-A-ADPT User manual

Other Siemens Control Unit manuals
Siemens SIMATIC ET 200S User manual

Siemens

Siemens SIMATIC ET 200S User manual

Siemens SIRIUS 3RW5 series Technical Document

Siemens

Siemens SIRIUS 3RW5 series Technical Document

Siemens S5-155U User guide

Siemens

Siemens S5-155U User guide

Siemens FDK:085U0321 User manual

Siemens

Siemens FDK:085U0321 User manual

Siemens OLM/P11 V4.0 User manual

Siemens

Siemens OLM/P11 V4.0 User manual

Siemens FT2001-A1 User manual

Siemens

Siemens FT2001-A1 User manual

Siemens RUGGEDCOM RS400 User manual

Siemens

Siemens RUGGEDCOM RS400 User manual

Siemens SIMATIC ET 200AL User manual

Siemens

Siemens SIMATIC ET 200AL User manual

Siemens SIRIUS ACT 3SU1 User guide

Siemens

Siemens SIRIUS ACT 3SU1 User guide

Siemens LMO14 Series User manual

Siemens

Siemens LMO14 Series User manual

Siemens SIRIUS 3RK3 User manual

Siemens

Siemens SIRIUS 3RK3 User manual

Siemens SINAMICS G120P CU230P-2 Administrator guide

Siemens

Siemens SINAMICS G120P CU230P-2 Administrator guide

Siemens Simatic S7-1500 Parts list manual

Siemens

Siemens Simatic S7-1500 Parts list manual

Siemens SINAMICS G120D CU240D-2 DP User manual

Siemens

Siemens SINAMICS G120D CU240D-2 DP User manual

Siemens SIMATIC NET CP 343-1 User manual

Siemens

Siemens SIMATIC NET CP 343-1 User manual

Siemens SIMATIC ET 200SP IM 155-6 PN/2 HF User manual

Siemens

Siemens SIMATIC ET 200SP IM 155-6 PN/2 HF User manual

Siemens SITRANS F M MAG 8000 User manual

Siemens

Siemens SITRANS F M MAG 8000 User manual

Siemens 8GK9735-1KK.0 User manual

Siemens

Siemens 8GK9735-1KK.0 User manual

Siemens SIMATIC User manual

Siemens

Siemens SIMATIC User manual

Siemens PSO 4000 User manual

Siemens

Siemens PSO 4000 User manual

Siemens VAI61 Series User manual

Siemens

Siemens VAI61 Series User manual

Siemens SINAMICS G130 User manual

Siemens

Siemens SINAMICS G130 User manual

Siemens PXC D Series User manual

Siemens

Siemens PXC D Series User manual

Siemens OMM-2 User manual

Siemens

Siemens OMM-2 User manual

Popular Control Unit manuals by other brands

Seitz 14A80 user manual

Seitz

Seitz 14A80 user manual

Wilo RS485 Installation and operating instructions

Wilo

Wilo RS485 Installation and operating instructions

Becker CentralControl CC41 Commissioning Instruction

Becker

Becker CentralControl CC41 Commissioning Instruction

SICK CDB650 operating instructions

SICK

SICK CDB650 operating instructions

Panduit NetKey NKP5E88M Series installation instructions

Panduit

Panduit NetKey NKP5E88M Series installation instructions

MX Options Concentric Petite Fitting instructions

MX

MX Options Concentric Petite Fitting instructions

Clean Water Systems Fleck 2510 Installation & start?up guide

Clean Water Systems

Clean Water Systems Fleck 2510 Installation & start?up guide

Fairchild FSB44104A user guide

Fairchild

Fairchild FSB44104A user guide

LEGRAND Wattstopper LMIN-104 installation instructions

LEGRAND

LEGRAND Wattstopper LMIN-104 installation instructions

PMK ATT10BNCS instruction manual

PMK

PMK ATT10BNCS instruction manual

Tektronix TDS3FFT user manual

Tektronix

Tektronix TDS3FFT user manual

Woodward easYgen Technical manual

Woodward

Woodward easYgen Technical manual

Balluff BNI EIP-502-105-R015 user guide

Balluff

Balluff BNI EIP-502-105-R015 user guide

NXP Semiconductors TWR-LS1021A Getting started

NXP Semiconductors

NXP Semiconductors TWR-LS1021A Getting started

Advantech PCM-3117 Startup manual

Advantech

Advantech PCM-3117 Startup manual

Danfoss MCO 101 manual

Danfoss

Danfoss MCO 101 manual

Moons' Lin Engineering R701P user manual

Moons'

Moons' Lin Engineering R701P user manual

Aventics RV1 operating instructions

Aventics

Aventics RV1 operating instructions

manuals.online logo
manuals.online logoBrands
  • About & Mission
  • Contact us
  • Privacy Policy
  • Terms and Conditions

Copyright 2025 Manuals.Online. All Rights Reserved.

SiemensSiemens
SiemensSiemens
Siemens IndustryIndustry
IndustryIndustry
Industry,,
,,
,Inc.Inc.
Inc.Inc.
Inc.
BuildingBuilding
BuildingBuilding
Building
TT
TT
Tecec
ecec
echnologies Dihnologies Di
hnologies Dihnologies Di
hnologies Divisionvision
visionvision
vision
P/N 315-050338-0
Class A Riser Module for the FMT
Installation Instructions
Model FMT-A-ADPT
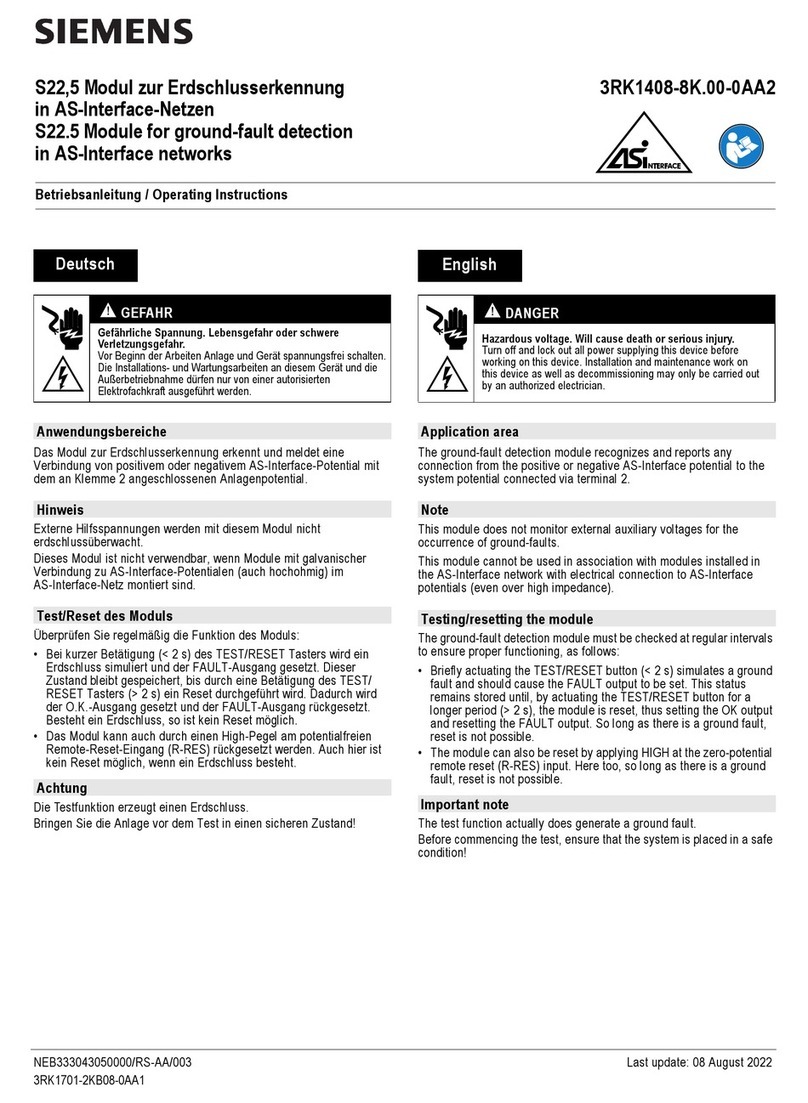
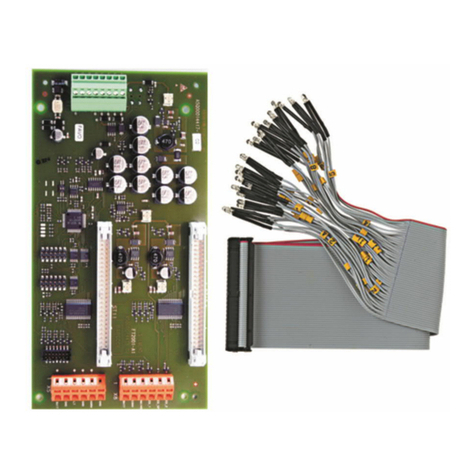
INTRODUCTION The Model FMT-A-ADPT module (as shown in Figure 1) from Siemens
Industry, Inc., provides the FMT with Class A riser capability. The
telephone riser is supervised by the primary FMT.
PRE-INSTALLATION The FMT-A-ADPT is shipped with the bracket for use on the CC-2 or
CC-5 Card Cages attached to the FMT-A-ADPT board.
TT
TT
To use the FMTo use the FMT
o use the FMTo use the FMT
o use the FMT
-A-ADPT on a CC-2 Card Cage,-A-ADPT on a CC-2 Card Cage,
-A-ADPT on a CC-2 Card Cage, yy
yy
you must place it inou must place it in
ou must place it inou must place it in
ou must place it in
Slot 1 (tSlot 1 (t
Slot 1 (tSlot 1 (t
Slot 1 (terminals 9-1erminals 9-1
erminals 9-1erminals 9-1
erminals 9-16) of the top Double Header; on a CC-5 Card6) of the top Double Header; on a CC-5 Card
6) of the top Double Header; on a CC-5 Card6) of the top Double Header; on a CC-5 Card
6) of the top Double Header; on a CC-5 Card
Cage yCage y
Cage yCage y
Cage you must place it in Slot 5 (tou must place it in Slot 5 (t
ou must place it in Slot 5 (tou must place it in Slot 5 (t
ou must place it in Slot 5 (terminals 9-1erminals 9-1
erminals 9-1erminals 9-1
erminals 9-16) of the top Double Header6) of the top Double Header
6) of the top Double Header6) of the top Double Header
6) of the top Double Header..
..
.
The FMT-A-ADPT is shipped with two removable terminal plugs
(see Figures 5 and 6) that are installed in J1 and J2. Remove the
terminal plug from the CC-5/CC-2 header (terminals 9-16) where the FMT-A-ADPT will
be installed. Transfer the existing field wiring in the connector to connector J2 as
explained in the wiring section and discard the connector that was removed.
INSTALLATION
Remove all system power before installation, first battery then AC. (To power up,
connect the AC first, then the battery.)
Install the FMT-A-ADPT (Refer to Figure 2) in the top header of the CC-5/CC-2. Insert
the female plug on the end of the FMT-A-ADPT into the appropriate top header (Slot 5
J1
J4
J2
J3
(FEMALE PLUG)
FMT-A-ADPT MODULE
PLUGS INTO TOP
DOUBLE HEADER OF
SLOT 5 OF CC-5 OR
SLOT 1 OF CC-2 CARD
CAGE.
CC-5 CARD CAGE
INSTALL FMT-A-ADPT
MODULE IN SLOT 5
OF CC-5 CARD
CAGE, AS SHOWN.
FOR CC-2 CARD CAGE,
INSTALL
MODULE IN SLOT 1
AND USE THIS SPACE
FOR CAPTIVE SCREW.
FMT-A-ADPT
CC-5 TOP DOUBLE
HEADER
CAPTIVE SCREW
ANY XLS SINGLE
SLOT MODULE
CC-5 BOTTOM
HEADER
SLOT FOR CAPTIVE
SCREW IN SLOT 1 OF
CC-2 TOP DOUBLE HEADER
SLOT FOR CAPTIVE
SCREW IN SLOT 5 OF
CC-5 TOP DOUBLE HEADER
Figure 3
FMT-A-ADPT Installed in CC-5
Figure 1
FMT-A-ADPT PCB
FMT-A-ADPT
J1
J2
J3
J4
E6
E3
E7
E2
E4
E5
16 9
16 9
1
12345678
Figure 2
FMT-A-ADPT
Siemens Industry, Inc.
Building Technologies Division
Florham Park, NJ
Siemens Building Technologies, Ltd.
Fire Safety & Security Products
2 Kenview Boulevard
Brampton, Ontario
L6T 5E4 Canada
P/N 315-050338-0
for CC-5 or Slot 1 for CC-2) and then secure the retaining bracket under the XLS
module’s retaining captive screw that shares the space. Do not put the FMT-A-ADPT
under the bezel of the XLS module. (Refer to Figure 3.)
WIRING A 46-inch long 10-wire audio cable, P/N 555-150509, connects the FMT-A-ADPT to
the FMT to provide Class A riser capability. One end of this wire plugs into J4 of the
FMT-A-ADPT and the other end plugs into JP1 of the FMT. The connectors are keyed
and fit only one way. Make sure that all cables seat fully into their connectors.
Transfer any existing field wiring that was in positions 9-16 of the terminal block
header to the corresponding position on J2.
The screw terminals for J2 can accommodate one 12-22 AWG or two 16-24 AWG
(stranded only). For J1, the screw terminals can accommodate one 12-22 AWG or
two 16-18 AWG (stranded only). All wiring to the FMT-A-ADPT is power limited.
RETURN
FEED
J1
NO CONNECTION
1234 5678
+
-
+
-
Figure 4
Wiring to J1
To Connect External Wiring 1. Insert the wire to be connected in the desired opening in the side of the remov-
able terminal block.
2. Tighten the appropriate locking screw.
3. Insert the removable terminal block in the appropriate header (J1 or J2) on the
FMT-A-ADPT.
LOCKING SCREWS
OPENING IN
SIDE FOR WIRE
CONNECTION
POSITION 8
POSITION 1
Figure 5
Plug for J1 (Positions 1-8)
ELECTRICAL RATINGS
LOCKING SCREWS
OPENING IN
SIDE FOR WIRE
CONNECTION
POSITION 16
POSITION 9
Figure 6
Plug for J2 (Positions 9-16)
tnerruCenalPkcaBV420
tnerruCV42lanimreTwercS
,snoitcurtsnInoitallatsnITMFehtotrefeR
nonoitamrofnirof,001430-513N/P
.TMFehtrofsgnitarlacirtcele
tnerruCenalPkcaBV2.60
tnerruCybdnatSV420