manuals.online logo
Brands
  1. Home
  2. •
  3. Brands
  4. •
  5. Siemens
  6. •
  7. Industrial Equipment
  8. •
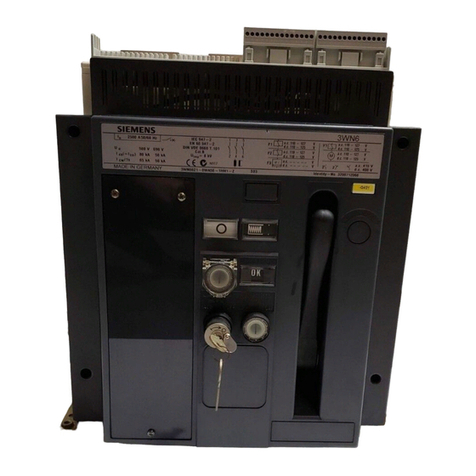
  9. Siemens 3WN6 User manual

Siemens 3WN6 User manual

Other manuals for 3WN6

38

This manual suits for next models

4

Other Siemens Industrial Equipment manuals

Siemens SIRIUS 3RA2933-2AA2 User manual

Siemens

Siemens SIRIUS 3RA2933-2AA2 User manual

Siemens SIVACON 8PS LR User manual

Siemens

Siemens SIVACON 8PS LR User manual

Siemens Flender KMP Series User manual

Siemens

Siemens Flender KMP Series User manual

Siemens AKE 200 User manual

Siemens

Siemens AKE 200 User manual

Siemens NEC Article 409 User manual

Siemens

Siemens NEC Article 409 User manual

Siemens 3RA233.-8X.30-1 User manual

Siemens

Siemens 3RA233.-8X.30-1 User manual

Siemens SIRIUS S00 User manual

Siemens

Siemens SIRIUS S00 User manual

Siemens 3VM9 0WB00 Series User manual

Siemens

Siemens 3VM9 0WB00 Series User manual

Siemens 4MLKA1A User manual

Siemens

Siemens 4MLKA1A User manual

Siemens MOTOX BA 2010 User manual

Siemens

Siemens MOTOX BA 2010 User manual

Siemens MOBILETT XP User manual

Siemens

Siemens MOBILETT XP User manual

Siemens SIMATIC S5 1P 243 Operating instructions

Siemens

Siemens SIMATIC S5 1P 243 Operating instructions

Siemens 3WN6 User manual

Siemens

Siemens 3WN6 User manual

Siemens 3VF9721-1 10 Series User manual

Siemens

Siemens 3VF9721-1 10 Series User manual

Siemens SIRIUS 3RT105/145 A/N Series User manual

Siemens

Siemens SIRIUS 3RT105/145 A/N Series User manual

Siemens 3VA9578-0VM10 User manual

Siemens

Siemens 3VA9578-0VM10 User manual

Siemens SIVACON 8PS BD2 Series User manual

Siemens

Siemens SIVACON 8PS BD2 Series User manual

Siemens BD2 User manual

Siemens

Siemens BD2 User manual

Siemens SIVACON 8PS BD01 User manual

Siemens

Siemens SIVACON 8PS BD01 User manual

Siemens SBMIQR User manual

Siemens

Siemens SBMIQR User manual

Siemens SIMATIC HMI Industrial Thin Client ITC1200 User manual

Siemens

Siemens SIMATIC HMI Industrial Thin Client ITC1200 User manual

Siemens SIMATIC RF1040R User manual

Siemens

Siemens SIMATIC RF1040R User manual

Siemens SIRIUS 3RV2928-1A User manual

Siemens

Siemens SIRIUS 3RV2928-1A User manual

Siemens 8GK9930 - 0KK03 User manual

Siemens

Siemens 8GK9930 - 0KK03 User manual

Popular Industrial Equipment manuals by other brands

ABB +Q957 user manual

ABB

ABB +Q957 user manual

G.B.C BASIC EDGE 50 instruction manual

G.B.C

G.B.C BASIC EDGE 50 instruction manual

Tronair Batpak 11-6602-1000 Operation & service manual

Tronair

Tronair Batpak 11-6602-1000 Operation & service manual

Pilz PNOZ mi2p Operation manual

Pilz

Pilz PNOZ mi2p Operation manual

Clemco Zero BNP 6012 manual

Clemco

Clemco Zero BNP 6012 manual

Erskine Attachments V-Plow Operator's manual

Erskine Attachments

Erskine Attachments V-Plow Operator's manual

ABB HT610965 Operation manual

ABB

ABB HT610965 Operation manual

Morra MH 540 user manual

Morra

Morra MH 540 user manual

Eaton S090ST manual

Eaton

Eaton S090ST manual

GRIGGIO G 240 P4 instructions

GRIGGIO

GRIGGIO G 240 P4 instructions

Nexen AIR CHAMP HT45 user manual

Nexen

Nexen AIR CHAMP HT45 user manual

WTE V5 installation manual

WTE

WTE V5 installation manual

ABB HT845232 Operation manual

ABB

ABB HT845232 Operation manual

SMC Networks CJP Series Operation manual

SMC Networks

SMC Networks CJP Series Operation manual

JohnDow Industries JDI-AFT58 Operator's manual

JohnDow Industries

JohnDow Industries JDI-AFT58 Operator's manual

IMB MB9016A instruction manual

IMB

IMB MB9016A instruction manual

Clarke CUMB1 Assembly & operating instructions

Clarke

Clarke CUMB1 Assembly & operating instructions

amiad Arkal Spin Klin 2 user guide

amiad

amiad Arkal Spin Klin 2 user guide

manuals.online logo
manuals.online logoBrands
  • About & Mission
  • Contact us
  • Privacy Policy
  • Terms and Conditions

Copyright 2025 Manuals.Online. All Rights Reserved.

1
Betriebsanleitung/Operating Instructions Bestell-Nr./Order No.: 3ZX1812-0WX36-4BW3 / 9239 9763 423 0C
Shutter
Shutter
Volet
Shutter
Serranda di protezione
Guilhotina
Inhalt der Packeinheit für Baugröße I und II (Stückliste siehe Seite 2) / Contents of pack for frame size I and II (see
page 2 for list of parts) / Contenu de l'emballage pour tailles I et II (liste des pièces page suivante) / Contenido del
paquete para tamaño I y II (Ver lista de piezas en página 2) / Contenuto della confezione per grandezza costructtiva
I e II (lista a pag. 2) / Conteúdo da embalagem para os tamanhos I e II (lista de peças vide página 2)
5
10 11
9
4
2
37
6
8
12
113
1415
17
16
Hinweis: Diese Betriebsanleitung gilt sinngemäß für 3- und 4 polige Einschubrahmen.
Note: These operating instruction apply correspondingly to 3- and 4 pole guide frames.
Nota: Les présentes instructions valent de manière similaire pour les disjoncteurs tri et tétrapolaires.
Nota: Estas instrucciones de servicio rigen en susentido para bastidores guía de tres y cuatro polos.
Avvertenza: Le presenti istruzioni di servizio sono valide per carrelli a 3 e 4 poli.
Nota: Esta instrução de montagem é válida para gavetas extraíveis tripolares e tetrapolares.
18
Alle Rechte vorbehalten. All rights reserved. Tous droits réservés. Reservados todos los derechos.
Tutti i diretti riservati. Todos os direitos reservados.
© Siemens AG 1996
3WX3684-3..00
2
IIIIII
34 34
3CA00 3CB00 3DA00 3DB00
22 22
1
2
2
2
2
2
2
2
1
1
35
22 22
22 22
88 45
45
22 22
1
1 Steuermechanismus / Control mechanism / Mécanisme / Mecanismo de control /
Meccanismo di comando / Mecanismo de comando
2 Shutter / Shutter / Volet / Barrera / Serranda di protezione / Guilhotina
3 Shutter / Shutter / Volet / Barrera / Serranda di protezione / Guilhotina
4 Abdeckung / Cover / Recouvrement / Tapa / Copertura / Tampa
5 Abdeckung / Cover / Recouvrement / Tapa / Copertura / Tampa
6 Shutter / Shutter / Volet / Barrera / Serranda di protezione / Guilhotina
7 Shutter / Shutter / Volet / Barrera / Serranda di protezione / Guilhotina
8 Abdeckung / Cover / Recouvrement / Tapa / Copertura / Tampa
9 Abdeckung / Cover / Recouvrement / Tapa / Copertura / Tampa
10 Isolierplatte / Insulating plate / Plaque isolante / Placa aislante / Piastra isolante /
Placa isolante
11 Isolierplatte / Insulating plate / Plaque isolante / Placa aislante / Piastra isolante /
Placa isolante
12 Abdeckstreifen / Cover strip / Réglette / Tira protectora / Striscia di copertura / Tira de proteção
13 Haken / Hook / Crochet / Gancho / Gancio / Gancho
14 Flachkopfschraube M 4 x 8 ISO 7045 / Pan-head screw M 4 x 8 ISO 7045 /
Vis à tête plate M 4 x 8 ISO 7045 / Tornillo de cabeza plana M 4 x 8 ISO 7045 /
Vite a testa piana M 4 x 8 ISO 7045 / Parafuso de cabeça chata M 4 x 8 ISO 7045
15 Schraube Plastite 6- 19 x 10 / Plastite screw 6- 19 x 10 / Vis autotaradeuse 6- 19 x 10 /
Tornillo Plastite 6- 19 x 10 / Vite in plastite 6- 19 x 10 / Parafuso Plastite 6- 19 x 10
16 Scheibe 4,3 DIN 125 / Washer 4,3 DIN 125 / Rondelle 4,3 DIN 125 /
Arandela 4,3 DIN 125 / Rondella 4,3 DIN 125 / Arruela 4,3 DIN 125
17 Spannscheibe 4 DIN 6796 / Tensioning washer 4 DIN 6796 /
Rondelle élastique 4 DIN 6796 / Arandela de resorte 4 DIN 6796 /
Rondella elastica 4 DIN 6796 / Arruela de pressão cônica 4 DIN 6796
18 Shutter / Shutter / Volet / Barrera / Serranda di protezione / Guilhotina
Baugröße / Frame size / Taille / Tamaño constructivo /
Grandezza costruttiva / Tamanho
Polzahl / Number of poles / Nombre de pôles / Node polos /
Nr. di poli / Número de polos
Best.-Nr. / Order no. / No de réf. / Node pedido /
Nr. di ordinazione / Nº de ordem
3WX 3684
Inhalt der Packeinheit für Baugröße I und II (Fortsetzung von Seite 1) / Contents of pack for frame size I and II
(continued from page 1) / Contenu de l'emballage pour tailles I et II (suite) / Contenido del paquete para tamaño I y II
(Continuación de página 1) / C ontenuto della confezione per grandezza costruttiva I e II (Continua da pag. 1) /
Conteúdo da embalagem para tamanhos I e II (continuação da pág. 1)
3
Gefahr!
Gefährliche Spannung!
Gefährlicher Federspeicher!
Vor Beginn der Arbeiten Gerät spannungsfrei schal-
ten und gegen Wiedereinschalten sichern.
Nur bei ausgeschaltetem Schalter und entspanntem
Federspeicher arbeiten.
Bei Nichtbeachtung können Tod, schwere Körperver-
letzung oder erheblicher Sachschaden die Folge sein.
Einbau und Montage nur durch Fachpersonal!
Danger
Hazardous voltage!
Hazardous spring pressure!
Before beginning work on the unit, switch it to a deen-
ergized state and secure it against reactivation.
Work only with the circuit-breaker switched off and
the spring discharged.
Non-observance can result in death, severe person-
al injury or substantial property damage.
Only qualified personnel may perform installation and
assembly work.
Tension électrique dangereuse
Tension de ressort dangereuse
Avant le début des travaux, mettre l'appareil hors ten-
sion et le condamner dans cette position.
Intervenir uniquement sur I'appareil en position
d'ouverture et lorsque le dispositif d'accumulation
d'energie par ressorts est détendu.
Le non-respect de ces mesures de sécurité peut en-
traîner la mort, des blessures graves ou des domma-
ges matériels importants.
Installation et montage uniquement par des person-
nes qualifiées.
Attention ¡PELIGRO!
¡Tensión peligrosa!
¡Resorte peligroso!
Antes de iniciar los trabajos hay que desconectar el
aparato y asegurarlo contra reconexiones.
Trabajar únicamente con el interruptor desconecta-
do y el resorte destensado.
La inobservancia de esta advertencia puede causar
la muerte, graves lesiones corporales o altos daños
materiales.
Montaje sólo por personal experto!
Tensione elettrica pericolosa!
Molle precariche!
Prima di iniziare i lavori, assicurarsi che l'apparec-
chio non sia tensione e che sia impossibile una rein-
serzione accidentale.
Si proceda ai lavori solo con interruttore aperto e
con molle scariche.
La mancata osservanza di tali norme può provocare
incidenti mortali, gravi lesioni alle persone e ingenti
danni materiali.
L'installazione e il montaggio devono essere effet-
tuati esclusivamente da personale specializzato!
ATTENZIONE!
Deutsch
English
Français
Español
Ialiano
Perigo!
Tensão perigosa!
Mola pré-carregada perigosa!
Antes de iniciar os trabalhos, desligue o aparelho e
assegure-se de que este não possa ser religado.
Trabalhe somente com o disjuntor desligado e com
a mola descarregada.
A inobservânica destas regras pode ocasionar a mor-
te, graves lesões corporais e danos materiais consi-
de-ráveis.
Instalação e montagem devem ser efetuadas somen-
te por pessoal qualificado.
Português
4
1
2
2
- Führungen herausziehen 1
- Steuermechanismus (1) einrasten 2
- Pull out the guides 1
- Manoeuver control mechanism (1) so that it locks in po-
sition 2
- Sortir les rails de guidage 1
- Encliqueter le mécanisme (1) 2
- Extraer guías 1
- Engatillar mecanismo de control (1) 2
- Estrarre le guide 1
- Agganciare il meccanismo di comando (1) 2
- Extraia os trilhos 1
- Encaixe o mecanismo de comando (1) 2
2
- Shutter (2, 3,18) auf Hebel (1.1) des Steuermechanismus
(1) aufsetzen
- Place shutter (2, 3,18) on the lever (1.1) of the control
mechanism (1)
- Disposer les volets (2, 3, 18) sur les leviers (1.1) du
mécanisme (1)
- Montar barrera (2, 3, 18) sobre palanca (1.1) del
mecanismo de control (1)
- Agganciare la serranda di protezione (2, 3, 18) sulla leva
(1.1) del meccanismo di comando
- Coloque a guilhotina (2, 3, 18) sobre a manivela (1.1) do
mecanismo de comando (1)
2,3
1.1
1
Steuermechanismus (1) ord-
nungsgemäß eingebaut /
Control mechanism (1) properly
fitted /
Mécanisme (1) monté correcte-
ment
Mecanismo de control (1) mon-
tado correctamente
Meccanismo di comando (1)
montato correttamente
Mecanismode comando(1) mon-
tado corretamente
1
Arbeitsfolge für Baugröße I / Work sequence for frame size I / Montage taille I / Secuencia de trabajos para tamaño I /
Sequenza di montaggio per la grandezza costruttiva I / Seqüência de montagem para o tamanho I
18,3
5
- Obere und untere Abdeckungen (4,5) einsetzen
- Fit upper and lower (4,5) in place
- Poser le recouvrement inférieur et le recouvrement su-
périeur (4, 5)
- Insertar tapa superior e inferior (4, 5)
- Posizionare la copertura superiore e inferiore (4, 5)
- Coloque as tampas superior e inferior (4, 5)
12
4,5
15
- Haken (13) an Führungen anschrauben /
- Screw hooks (13) to guides /
- Visser les crochets (13) aux rails de guidage
- Atornillar ganchos (13) en las guías
- Avvitare il gancio sulle guide (13)
- Aparafuse o gancho nos trilhos
17
14
13
Arbeitsfolge für Baugröße I / Work sequence for frame size I / Montage taille I / Secuencia de trabajos para tamaño I /
Sequenza di montaggio per la grandezza costruttiva I / Seqüência de montagem para tamanho I
- Abdeckstreifen (12) anschrauben
- Screw on the cover strip (12)
- Visser les réglettes (12)
- Atornillar tiras protectoras (12)
- Avvitare le striscie di copertura (12)
- Aparafuse as tiras de proteção (12)
nur bei 4-polig / Only on 4-pole version / tétrapolaire /
Sólo con 4 polos / soltanto con quadripolare / somente em
versões de 4 polos
6
➀
➀
➁
➁
1
1.1
1
6,7
Arbeitsfolge für Baugröße II / Work sequence for frame size II / Montage taille II / Secuencia de trabajos para tamaño II /
Sequenza di montaggio per la grandezza costruttiva II / Seqüência de montagem para tamanho II
Steuermechanismus (1) ord-
nungsgemäß eingebaut /
Control mechanism (1) proper-
ly fitted /
Mécanisme (1) monté correc-
tement
Mecanismo de control (1) mon-
tado correctamente
Meccanismo di comando (1)
montato correttamente
Mecanismo de comando (1)
montado corretamente
- Führungen herausziehen 1
- Steuermechanismus (1) einrasten 2
- Pull out the guides 1
- Manoeuver control mechanism (1) so that it locks in po-
sition 2
- Sortir les rails de guidage 1
- Encliqueter le mécanisme (1) 2
- Extraer guías 1
- Engatillar mecanismo de control (1) 2
- Estrarre le guide 1
- Agganciare il meccanismo di comando (1) 2
- Extraia os trilhos 1
- Encaixe o mecanismo de comando (1) 2
- Shutter (6, 7) auf Hebel (1.1) des Steuermechanismus
(1) aufsetzen
- Place shutter (6, 7) on the lever (1.1) of the control
mechanism (1)
- Disposer les volets (6, 7) sur les leviers (1.1) du
mécanisme (1)
- Montar barrera (6, 7) sobre palanca (1.1) del mecanismo
de control (1)
- Agganciare la serranda di protezione (6, 7) sulla leva
(1.1) del meccanismo di comando
- Coloque a guilhotina (6, 7) sobre a manivela (1.1) do
mecanismo de comando (1)
7
- Isolierplatte (10,11) einsetzen und festschrauben
- Fit insulating plate (10,11) and screw tight
- Poser la plaque isolante (10, 11) et la visser
- Insertar placa aislante (10, 11) y atornillar
- Posizionare e avvitare la piastra isolante (10,11)
- Coloque e aparafuse a placa isolante (10, 11)
- Obere und untere Abdeckung (8,9) einsetzen
- Fit upper and lower cover (8,9) in place
- Poser le recouvrement inférieur et le recouvrement su-
périeur (8,9)
- Insertar tapa superior e inferior (8, 9)
- Posizionare la copertura superiore e inferiore (8,9)
- Coloque as tampas superior e inferior (8, 9)
8,9
15,16
10,11
17
14
13
Arbeitsfolge für Baugröße II / Work sequence for frame size II / Montage taille II / Secuencia de trabajos para tamaño II /
Sequenza di montaggio per la grandezza costruttiva II / Seqüência de montagem para tamanho II
- Haken (13) an Führungen anschrauben /
- Screw hooks (13) to guides /
- Visser les crochets (13) aux rails de guidage
- Atornillar ganchos (13) en las guías
- Avvitare il gancio sulle guide (13)
- Aparafuse o gancho (13) nos trilhos
8
Funktionskontrolle Baugröße I und II / Function check frame size I and II / Contrôle fonctionnel tailles I et II / Control
de funcionamiento tamaño I y II / Verifica del funzionamento grandezza costruttiva I e II / Controle de funcionamento
tamanhos I e II
Die jeweils oberen und unteren Hebel (1.1) und (1.2) in Pfeil-
richtung bis zum vollständigen Öffnen der Shutter betätigen.
Nach dem Loslassen der Hebel müssen die Shutter selbst-
tätig schließen.
Move the upper and lower levers (1.1) and (1.2) in the direc-
tions of the arrows to open the shutter completely. The shut-
ter must close by itself when the levers are released.
Repousser les leviers (1.1) et (1.2) en direction des flèches
jusqu’à ouverture complète des volests. Relâcher les leviers:
les volets doivent se refermer.
Accionar las palancas superiores e inferiores (1.1) y (1.2)
en el sentido de las flechas hasta la total apertura de las
barreras. Al soltar las palancas, las barreras deben cerrarse
automáticamente.
Premere rispettivamente la leva superiore e inferiore (1.1) e
(1.2) nella direzione indicata dalla freccia fino all’apertura
completa della serranda. Al rilascio delle leve le serrande
devono chiudersi da sè.
Mova as manivelas superior e inferior (1.1) e (1.2) na dire-
ção das setas até que a guilhotina esteja totalmente aberta.
Após soltar as manivelas, as guilhotinas devem fechar au-
tomaticamente.
1.1
1.2
9
Shutter abschließen Baugröße I und II / Fixing the shutter frame size I and II / Cadenassage tailles I et II
Hinweis:
Es können wahlweise abgeschlossen
werden:
- beide Shutter in geschlossener Stellung
- der obere Shutter in offener Stellung
- der untere Shutter in offener Stellung
- beide Shutter in offener Stellung.
Hierzu sind jeweils zwei Vorhänge-
schlösser notwendig. Sie sind kunden-
seitig beizustellen.
Note:
The shutter can be fixed in the following
positions:
- both shutters in the closed position
- the upper shutter in the open position
- the lower shutter in the open position
- both shutters in the open position.
Two padlocks are needed for this pur-
pose. They must be provided by the
customer.
1. Beide Shutter in geschlossener
Stellung abschließen:
1.1 Führungen (2) bis zum Anschlag
einschieben
1.2 Riegel (3) bis zum Anschlag nach
oben drücken
1.3 In dieLöcher (3.1)Vorhängeschlös-
ser einhängen und abschließen
2. Oberen Shutter in offener Stellung
abschließen:
2.1 Obere Hebel (1.1) in Pfeilrichtung
nach oben drücken
2.2 Weitere Arbeitsfolge wie 1.1 bis
1.3
3. Unteren Shutter in offener Stellung
abschließen:
Arbeitsfolge sinngemäß wie 2
4. Beide Shutter in offener Stellung
abschließen:
4.1 Obere (1.1) und untere (1.2) Hebel
in Pfeilrichtung betätigen
4.2 Weitere Arbeitsfolge wie 1.1 bis1.3
1. Fixing both shutters in the closed
position:
1.1 Push in guides (2) to the stop
1.2 Press catch (3) up to the stop
1.3 Insert padlocks in the holes (3.1)
and lock
2. Fixing the upper shutter in the open
position:
2.1 Move upper lever (1.1) upwards in
the direction of the arrow
2.2 Then proceed as described in 1.1 to
1.3 above
3. Fixing the lower shutter in the open
position:
Proceed in a similar way to that de-
scribed in 2 above
4. Fixing both shutters in the open po-
sition:
4.1 Move upper lever (1.1) and lower
lever (1.2) in the direction of the
arrows
4.2 Then proceed as described in 1.1 to
1.3 above
1.1
1.2
3.1
3
3.1
2
Deutsch English Français
Nota:
les possibilités de verrouillage par
cadenas sont les suivantes:
- les deux volets en position fermée,
- le volet supérieur en position ouverte,
- le volet inférieur en position ouverte,
- les deux volets en position ouverte.
Deux cadenas sont nécessaires (non
livrés).
1. Verrouillage des deux volets en
position fermée:
1.1 enfoncer les rails de guidage (2)
jusqu’en butée,
1.2 repousser le verrou (3) vers le haut
jusqu’en butée,
1.3 enfiler les cadenas dans les trous
et les fermer.
2. Verrouillage du volet supérieur en
position fermée:
2.1 repousser le levier (1.1) supérieur
versle hauten directionde laflèche,
2.2 poursuivre comme sous 1.1 et 1.3.
3. Verrouillage du volet inférieur en
position ouverte:
procéder de manière similaire aux
indications sous 2.
4. Verrouillage des deux volets en
position ouverte:
4.1 repousser le levier supérieur (1.1)
et le levier inférieur (1.2) en direc-
tion des flèches,
4.2 poursuivre comme indiqué sous
1.1 à 1.3.
10
1.1
1.2
3.1
3
3.1
2
Cerrar barreras tamaño I y II / Chiusura della serranda nelle grandezza costruttive I e II / Fechamento da guilhotina tamanhos I e II
Nota:
Pueden cerrarse selectivamente:
- ambas barreras en posición cerrada
- la barrera superior en posición abierta
- la barrera inferior en posición abierrta
- ambas barreras en posición abierta.
Para ello se precisan cada vez dos
candados. Deben ser aportados por el
cliente.
1. Cerrar ambas barreras en posición
cerrada:
1.1 Introducir guías (2) hasta el tope
1.2 Presionar el cerrojo (3) hacia arriba
hasta el tope
1.3 En los agujeros (3.1), colgar los
candados y cerrarlos con llave
2. Cerrar barrera superior en posición
abierta:
2.1 Presionar la palanca superior (1.1)
hacia arriba en el sentido de la
flecha
2.2 Continuar según 1.1 hasta 1.3
3. Cerrar barrera inferior en posición
abierta: Procedimiento equivalente
a 2
4. Cerrar ambas barreras en posición
abierta:
4.1 Accionar palanca superior (1.1) y
palanca inferior (1.2) en el sentido
de la flecha
4.2 Continuar según 1.1 hasta 1.3
Avvertenza:
la serranda può essere fissata nelle
seguenti posizioni:
- entrambe le serrande in posizione chiusa
- la serranda superiore in posizione aperta
- la serranda inferiore in posizione aperta
- entrambe le serrande in posizione aperta
Per eseguire tale operazione sono
necessari due lucchetti che non fanno
parte della fornitura.
Nota:
O fechamento pode ser escolhido entre:
- ambas guilhotinas em posição fechada
- a guilhotina superior em posição aberta
- a guilhotina inferior em posição aberta
- ambas guilhotinas em posição aberta
São necessários dois cadeados para
cada posição. Estes devem ser forneci-
dos pelo cliente.
1. Bloccare entrambe le serrande in
posizione chiusa
1.1 Inserire le guide scorrevoli (2) fino
al riscontro
1.2 Spingere il blocco fino al riscontro
1.3 Inserire ilucchetti nei forie chiudere
2. Fissare la serranda superiore in
posizione aperta
2.1 Premere la leva (1.1) verso l’alto
nelladirezione indicata dallafreccia
2.2 Proseguire come indicato ai punti
1.1, 1.2 e 1.3
3. Fissare la serranda inferiore in
posizione aperta:
Proseguire come indicato al punto 2
4. Fissare entrambe le serrande in
posizione aperta:
4.1 Spingere la leva superiore (1.1) e
quella inferiore (1.2) nella direzione
indicata dalla freccia
4.2 Proseguire come indicato ai punti
1.1, 1.2 e 1.3
Español Italiano Português
1. Travamento de ambas guilhotinas
em posição fechada:
1.1 Empurre os trilhos (2) o máximo
possível
1.2 Pressione o trinco (3) o máximo
possível
1.3 Coloque os cadeados nos orifíci-
os (3.1) e trave-os.
2. Travamanto da guilhotina superior
em posição aberta:
2.1 Empurre a manivela superior (1.1)
em direção da seta para cima.
2.2 Para os demais passos de monta-
gem, vide 1.1 a 1.3.
3. Travamento da guilhotina inferior
em posição aberta:
Para os demais passos, proceder
de forma semelhante ao 2.
4. Travamento de ambas guilhotinas
em posição aberta:
4.1 Empurre a manivela superior (1.1)
e inferior (1.2) na direção da seta.
4.2 Para os demais passos de monta-
gem, vide 1.1 a 1.3