manuals.online logo
Brands
  1. Home
  2. •
  3. Brands
  4. •
  5. Siemens
  6. •
  7. Medical Equipment
  8. •
  9. Siemens ACUSON P10 Parts list manual

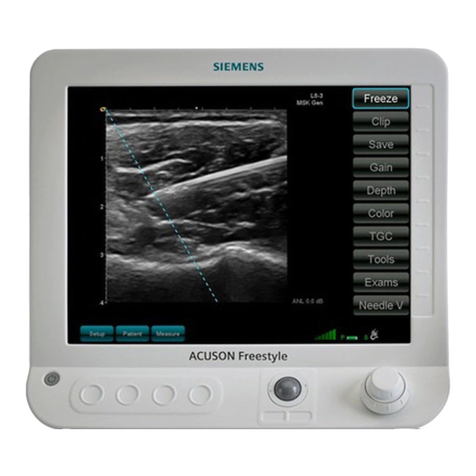
Siemens ACUSON P10 Parts list manual

www.siemens.com/medical
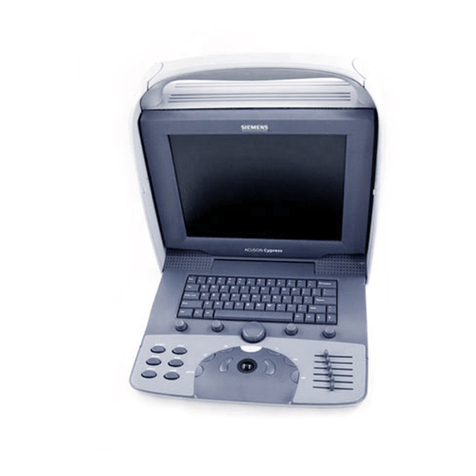
ACUSON P10™ultrasound system
Product version 1.0
Quick Scan Card
© 09.2007, Siemens Medical Solutions USA,Inc.
Headquarters
Siemens Medical Solutions USA
51 Valley Stream Parkway
Malvern, PA 19355-1406 USA
Telephone: +1-888-826-9702
www.usa.siemens.com/medical
Contacts
Europe: +49 9131 84-0
Asia Pacific: +65 6341 0990
Latin America: +1 786-845-0697
Siemens Medical Solutions USA, Inc.
Ultrasound Division
1230 Shorebird Way
P.O. Box 7393
Mountain View, CA 94039-7393 USA
Telephone: +1-888-826-9702
CINE
To activate CINE playback:
1. Press FREEZE.
a. Most recently acquired image is displayed with
CINE bar below image.
b. Press FREEZE again to exit CINE back to 2D imaging.
To activate frame review:
2. To review one frame at a time, use left and right
navigation ring buttons.
3. To playback CINE in a continuous loop, press the
up button in the navigation ring.
a. To adjust the speed of the loop, press the up button.
b. To stop the CINE playback, press the down button.
c. To display the CINE menu, press SELECT.
Recalling an Image
1. To recall an image from a current patient,press
SELECT in freeze.
2. Select RECALL menu entry.
3. To recall all studies saved to the SD memory card,
press MENU, and then RECALL menu entry.
4. System will display a list of all studies
currently saved.
5. Open the required study by selecting “+”,
then select an image or loop to load.
6. Play the loop by pressing the up button on the
navigation ring.
7. Step forward/backward using the right/left
navigation ring buttons.
8. To edit the loop press SELECT key to activate the
FREEZE menu.
9. Press FREEZE to activate live imaging.
Changing the Battery
To insert a new battery, insert the fingers at the connector end
of the battery into the slots in the battery cavity. Gently push
the cable end down until it clicks into the battery clip.
To remove the battery, pull the battery clip towards the probe
cable. Gently pivot the battery up and out of the enclosure by
lifting the edges near the probe cable end. The battery pivots
on fingers at the far end away from the probe cable.
TIP: The battery fit is relatively tight in order to prevent fluid
intrusion so it may be helpful to turn the unit over after opening
the battery clip to allow the battery to drop out into your hand.
Powering up the System
1. To power on the system, open the LCD lid.
2. There is a short delay from opening the lid until
the system is ready to image.
3. Power off the system by closing the LCD lid or
pressing MENU and selecting Shutdown.
Note: The system clears the current study or patient data when powering
off. To save the information press STORE.
Beginning an Exam
To register a patient:
1. Press the NEW PATIENT button to enter patient
name and ID. Use the QWERTY keypad to
enter information.
2. The ENTER or SELECT keys move between fields.
3. Press the RETURN or SELECT keys to save the new
patient information.
a. Press ESC or NEW PATIENT keys to exit the new
patient screen without saving the data.
4. Select EXAM TYPE.
Bypass of patient registration:
1. Begin exam.
2. Press STORE to store images and loops.
3. System stores images and loops to “Unknown”
patient identifier.
Image Screen Display:
Active exam type, depth, gain, frames per second,
grayscale map and compression curve display in upper
left of the image screen.
If TGO™ tissue grayscale optimization technology
is enabled, TGO gain is displayed.
Emergency Workflow
1. Open lid to power up.
2. Do not register patient, unfreeze to begin scanning.
3. Press Store to save images and loops.
4. Patient registered as “Unknown”.
Note: To change system screen brightness (different ambient lighting
situations) press MENU and scroll down to SCREEN BRIGHTNESS.
Acquiring an Image
1. The P10 system powers up in FREEZE mode to
conserve battery life.
2D Imaging:
1. Press FREEZE to enter 2D-mode.
2. Use the Navigation ring buttons to make
adjustments to depth and gain.
a. Up and down to adjust depth.
b. Left and right to adjust gain.
3. Press SELECT to activate the imaging pop-up
menu and access other imaging controls (buttons
move up and down menu.
4. Press SELECT again to activate the menu item
and make selection.
To... …do this: Icon
Change imageSelect Gain +/- or
gain/brightness press up/down buttons
on navigation ring
Adjust depth Select Depth +/- or
press up/down buttons
on navigation ring
Activate/deactivate TGO Select TGO On/Off(2D Menu)
Display annotations Select Annotations (2D Menu)
2D Imaging Pop-up Menu:
TGO – Tissue Gain Optimization, or automatic
gain/brightness uniformity and contrast resolution
adjustment.
Zoom – magnifies image.
RGB Map – selects different grey scale (RGB)
display maps.
Depth – changes depth setting.
Gain – changes overall gain setting.
Comp Map – displays compression curves (changes
dynamic range of image).
Note: TGO technology affects the whole image including artifacts and
defects. For optimal TGO performance, ensure full transducer contact,
minimize depth, and avoid bright reflectors (gas).
Performing Measurements
Press the MEAS key to the right of the Nav ring to
display the measurement window.
To... …do this: Icon
Select the desired Select Caliper1,Caliper2
measurement or Ellipse from menu
Use calipers Move highlighted endpoint
with the navigation ring,
use SELECT to highlight
second caliper
Ellipse Press SELECT to toggle
between ellipse functions;
size, pan or rotate
Change Ellipse functions Use navigation ring buttons
to change size, rotate ellipse,
or pan
Clear/Delete Press Measurement and select
Clear. Removes currently
displayed measurements
Lock Measurements Press MEASUREMENT. Locks value
and location and re-displays
measurement menu.
Store Press STORE
Annotations
1. In 2D, freeze, or when recalling an image,
press SELECT.
2. Select Annotations from menu, and then
select an annotation from the list.
System displays a highlighted box.
3. Press SELECT to position the annotation
on the screen wherethe highlighted
box displays.
4. Todelete annotations, select Clear All from
annotations menu.
Storing an Image
The P10 system stores still frames or loops to a
removable SD Memory Card.
1. Press STORE key of frozen image to store a
single frame.
2. Press STORE while live imaging or playing a
loop to store a loop.

Other Siemens Medical Equipment manuals

Siemens 25 User manual

Siemens

Siemens 25 User manual

Siemens acuson Sequoia Installation guide

Siemens

Siemens acuson Sequoia Installation guide

Siemens MAMMOMAT Novation DR Use and care manual

Siemens

Siemens MAMMOMAT Novation DR Use and care manual

Siemens MOBILETT Plus HP User instructions

Siemens

Siemens MOBILETT Plus HP User instructions

Siemens MAMMOMAT 3000 Setup guide

Siemens

Siemens MAMMOMAT 3000 Setup guide

Siemens ARCADIS Orbic Installation manual

Siemens

Siemens ARCADIS Orbic Installation manual

Siemens SOMATOM Emotion syngo CT 2007E User manual

Siemens

Siemens SOMATOM Emotion syngo CT 2007E User manual

Siemens LITHOSTAR Multiline Guide

Siemens

Siemens LITHOSTAR Multiline Guide

Siemens ARCADIS Varic Guide

Siemens

Siemens ARCADIS Varic Guide

Siemens SIREMOBIL Iso-C User manual

Siemens

Siemens SIREMOBIL Iso-C User manual

Siemens SIREMOBIL Compact User instructions

Siemens

Siemens SIREMOBIL Compact User instructions

Siemens SONOLINE G40 User manual

Siemens

Siemens SONOLINE G40 User manual

Siemens MULTIMOBIL 5C User manual

Siemens

Siemens MULTIMOBIL 5C User manual

Siemens MAMMOMAT 1000 Nova Manual

Siemens

Siemens MAMMOMAT 1000 Nova Manual

Siemens SIREMOBIL Iso-C Operating instructions

Siemens

Siemens SIREMOBIL Iso-C Operating instructions

Siemens Hematek 3000 System User manual

Siemens

Siemens Hematek 3000 System User manual

Siemens MAGNETOM Skyra fit User manual

Siemens

Siemens MAGNETOM Skyra fit User manual

Siemens MAMMOMAT 1000 Nova User guide

Siemens

Siemens MAMMOMAT 1000 Nova User guide

Siemens Drager medical Carina User manual

Siemens

Siemens Drager medical Carina User manual

Siemens POLYMOBIL Plus Installation manual

Siemens

Siemens POLYMOBIL Plus Installation manual

Siemens POLYMOBIL Plus Operating instructions

Siemens

Siemens POLYMOBIL Plus Operating instructions

Siemens MAMMOMAT 3000 Setup guide

Siemens

Siemens MAMMOMAT 3000 Setup guide

Siemens SOMATOM Sensation 16 User guide

Siemens

Siemens SOMATOM Sensation 16 User guide

Siemens ARCADIS Varic Installation manual

Siemens

Siemens ARCADIS Varic Installation manual

Popular Medical Equipment manuals by other brands

CRYOSAFE CM Series owner's manual

CRYOSAFE

CRYOSAFE CM Series owner's manual

Zeiss OPMI Lumera T Instructions for use

Zeiss

Zeiss OPMI Lumera T Instructions for use

AGA Medical AMPLATZER TorqVue Instructions for use

AGA Medical

AGA Medical AMPLATZER TorqVue Instructions for use

Mindfield eSense Skin Response Faq

Mindfield

Mindfield eSense Skin Response Faq

Augmented Vision Labs S5 Inserter user manual

Augmented Vision Labs

Augmented Vision Labs S5 Inserter user manual

Cartiva DRL-06 Instructions for use

Cartiva

Cartiva DRL-06 Instructions for use

Lowenstein Medical prisma SMART Instructions for use

Lowenstein Medical

Lowenstein Medical prisma SMART Instructions for use

Triumph SP12 quick start guide

Triumph

Triumph SP12 quick start guide

Bio Compression Systems Vascu-Ease IC-1200-WH Instructions for use

Bio Compression Systems

Bio Compression Systems Vascu-Ease IC-1200-WH Instructions for use

AGFA 6005/100 6005/200 user manual

AGFA

AGFA 6005/100 6005/200 user manual

M.D. Resource K Pump Instructions for use

M.D. Resource

M.D. Resource K Pump Instructions for use

TruCorp TruUltra TruIV Block user manual

TruCorp

TruCorp TruUltra TruIV Block user manual

Rotec COMPLICITY 300M 2.0 owner's manual

Rotec

Rotec COMPLICITY 300M 2.0 owner's manual

BIOFLEX Therapist Operation manual

BIOFLEX

BIOFLEX Therapist Operation manual

Stiegelmeyer Evario instruction manual

Stiegelmeyer

Stiegelmeyer Evario instruction manual

Physipro Zero Pressure owner's manual

Physipro

Physipro Zero Pressure owner's manual

Synthes The Titanium Femoral Nail System Technique guide

Synthes

Synthes The Titanium Femoral Nail System Technique guide

Sirona cerec ac operating instructions

Sirona

Sirona cerec ac operating instructions

manuals.online logo
manuals.online logoBrands
  • About & Mission
  • Contact us
  • Privacy Policy
  • Terms and Conditions

Copyright 2025 Manuals.Online. All Rights Reserved.