Ethernet
Interface
USB Interface
(Type-B)
LED FEED Switch
https://www.sii-ps.com/slp720rt/
Seiko Instruments Inc. U00145827022 2022/7
Read through the Safety precautions and the User's guide carefully before using the printer,
and handle it safely and properly.
1. Visit our web site.
3. Appropriate software can be downloaded from the above web site.
2. Download the User's guide and read it.
Download User's guide and software
Connect the interface cable to use to the interface connector on the back side of
the printer. For Ethernet+ USB model, the setting at the factory is the Ethernet
interface.
When using the USB interface, press the POWER Switch 3 times within
3 seconds when the printer status is"Power on (print-ready)".
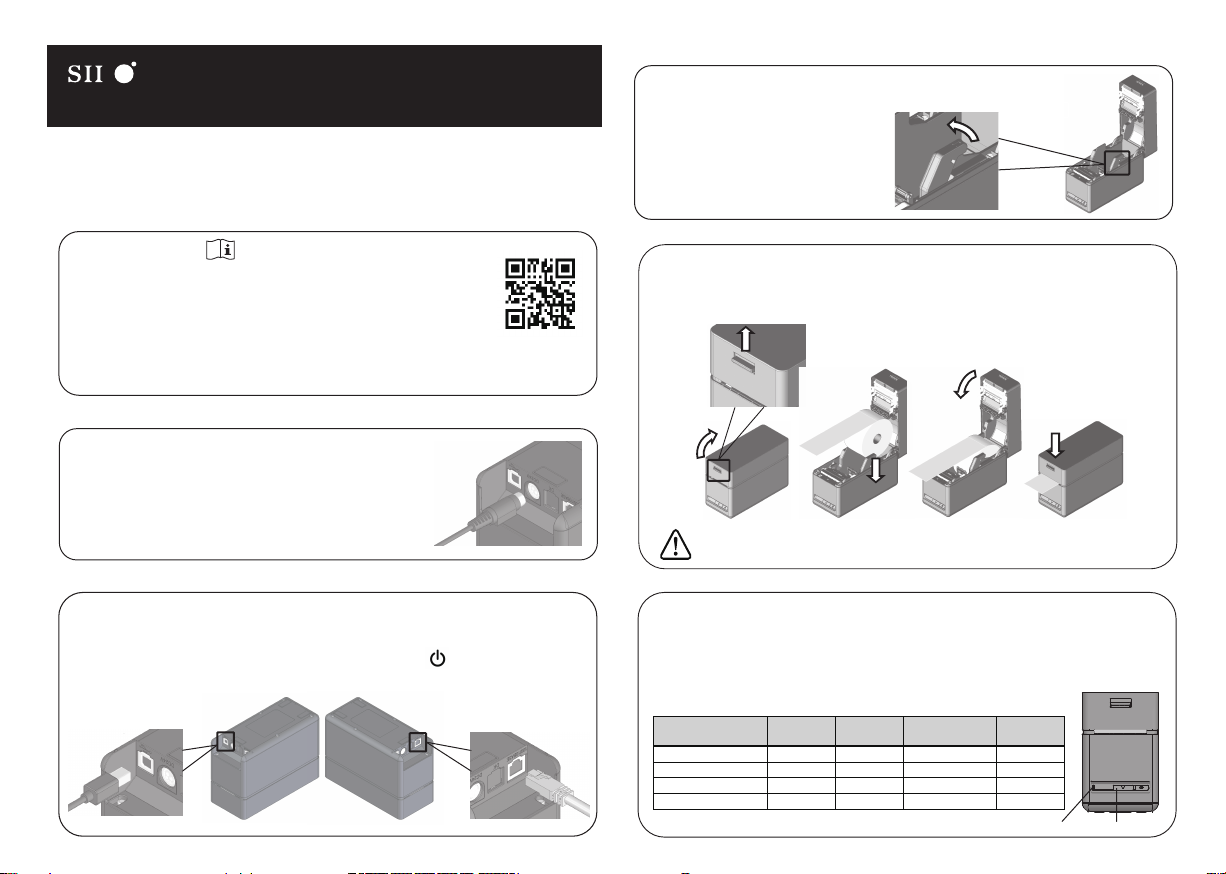
Loading thermal paper
Connecting to host device (Cable connection)
Quick Start Guide (Thermal Printer SLP720RT Series)
Label rolls are available from your local Seiko Instruments or its distributors.
Please access www.sii-ps.com/slp/.
Adjusting paper width
Slide the paper guide while pulling the lever of the paper guide upward.
Pull the release lever of the printer upward and open the top cover.
Then load the thermal paper into the paper holder.
Close the top cover firmly by pushing the center part downward until it locks into
place.
Easy paper setting
1. With the printer turned on, operate the release lever to open the top cover.
2. Press the FEED Switch a number of times within 4 seconds according to the
paper to be used in the table below.
3. The LED blinks once after 4 seconds. Then, close the top cover.
Thermal Paper Mark Mode Taken Mode Number of Times to
Press FEED Switch Standby LED
Linerless label
Linerless label
SLP Label
Receipt
Enable
Enable
Disable
Disable
3
4
5
6
Green
Green
Aqua
Blue
Disable
Disable
Enable
Enable
4. The LED turns to the lighting of ”Standby LED”color.
It is necessary to set the paper to be used. It can be easily set by following
procesures.
DO NOT use thermal paper roll with the roll loosens.
If the paper is used while it loosens, it may cause a paper jam.
Power connection
2. Plug the DC plug of the AC adapter to the power connector
of the printer.
1. Connect the AC cable to the AC adapter.
3. Plug the AC plug of the AC cable to an outlet.


