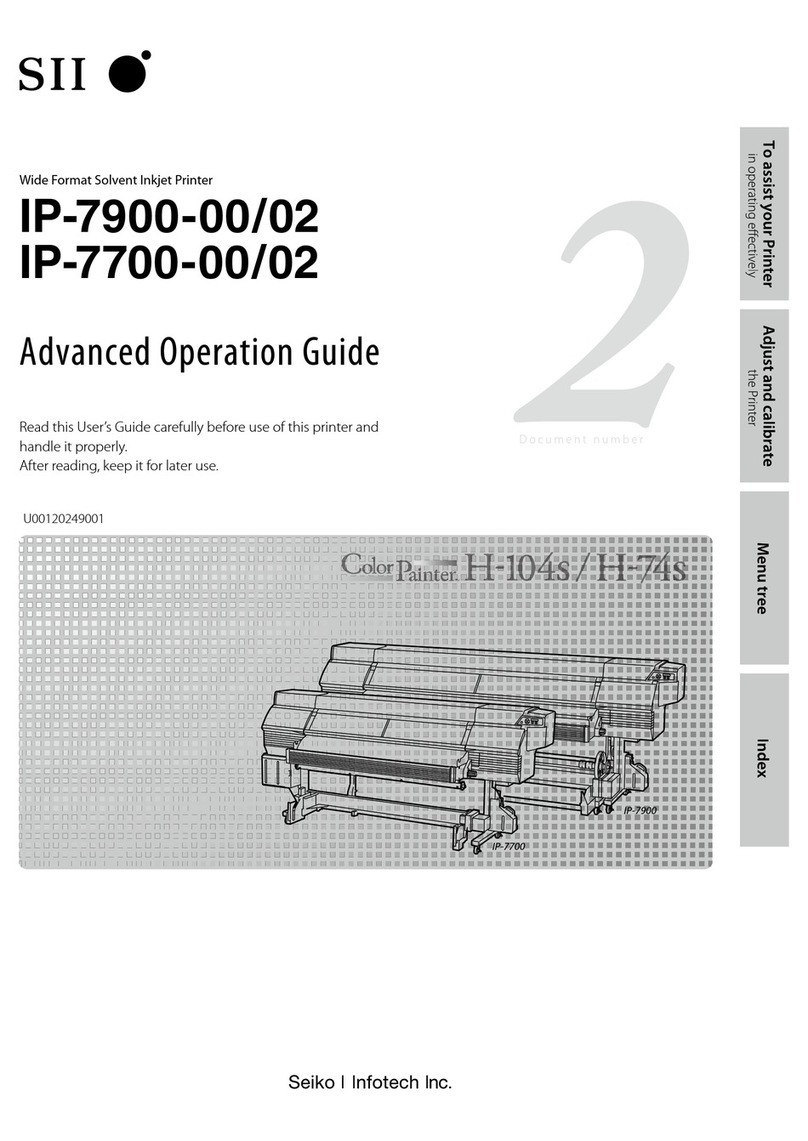
SII IP-7900-02/03 User manual

2
Documentnumber
IP-7900-02/03
IP-7700-02/03
Read this User’s Guide carefully before use of this printer and
handle it properly.
After reading, keep it for later use.
Wide Format Solvent Inkjet Printer
Advanced Operation Guide
IP-7700-02/03
IP-7900-02/03
IP-7900-02/7700-02 応用操作ガイド ( 英語版 ) 表 1/4 背厚:6mm
U00120250100
U00120250100
To assist your Printer
in operating eectively IndexMenu tree
Adjust and calibrate
the Printer

IP-7900-02/-03/7700-02/-03 Wide Format Solvent Inkjet Printer Advanced Operation Guide
Documents Number U00120250100, First Edition, May 2010
Copyright © 2010 by Seiko I Infotech Inc.
All rights reserved
Seiko I Infotech Inc. reserves the right to make changes without notice to the specications and materials contained herein and shall not be
responsible for any damages (including consequential) caused by reliance on the materials presented, including but not limited to
typographical, arithmetic, or listing errors.
Please address any questions, comments, and suggestions to :
Seiko Instruments GmbH, French branch
20 rue Jean Rostand, 91400 Orsay France
Tel: +33-1-60-19-35-41
Fax: +33-1-60-19-35-17
Seiko Instruments USA Inc., Infotech Division
2060 Wineridge Place, Suite A, Escondido,
CA 92029, USA
Tel : +1-760-781-5200
Fax : +1-760-745-1195
Seiko I Infotech Inc.
8 Nakase 1-chome, Mihama-ku, Chiba-shi, Chiba 261-8507, Japan
Phone : +81 43 211 1363
Fax : +81 43 211 8709
This guide acknowledges the following trademarks :
is a trademark of Seiko Instruments Inc.
All other trademarks are the properties of their respective companies.
This equipment has been tested and found to comply with the limits for a Class A digital device, pursuant to Part 15 of the FCC Rules. These
limits are designed to provide reasonable protection against harmful interference when the equipment is operated in a commercial
environment.
This equipment generates, uses, and can radiate radio frequency energy and, if not installed and used in accordance with the instruction
manual, may cause harmful interference to radio communications. Operation of this equipment in a residential area is likely to cause harmful
interference in which case the user will be required to correct the interference at his own expense.
The CE mark, that shows that the products sold in the EU are conformed to the requirements of EC directive, is statutorily obliged to be
axed to the products.
In each directive, the scope of directive to be applied to equipment is explicitly dened. Our company’ s product IP-7900 conforms the EMC
directive (2004/108/EC)) and low voltage directive (2006/95/EC).
Inquiry of CE mark:
Seiko Instruments Europe S.A.
European Head Oce
20 rue Jean Rostand, 91400 Orsay France
Tel: +33-1-60-19-35-41
Fax: +33-1-60-19-35-17
Seiko Instruments USA Inc., Infotech Division
2060 Wineridge Place, Suite A, Escondido,
CA 92029, USA
Tel : +1-760-781-5200
Fax : +1-760-745-1195
Seiko I Infotech Inc.
8 Nakase 1-chome, Mihama-ku, Chiba-shi, Chiba 261-8507, Japan
Phone : +81 43 211 1363
Fax : +81 43 211 8709
IP-7700-02 応用操作ガイド 表 2/3 背厚:6mm

3
Introduction
IP-7900-02/-03/7700-02/-03 Wide Format Solvent Inkjet Printer (hereafter simply called the Printer below.) is
equipped with built-in USB interface that adopts solvent ink and supports media of up to 104-inch width (IP-7700:
74-inch width).
The IP-7900-02/-03/7700-02/03 Wide Format Solvent Inkjet Printer Advanced Operation Guide describes:
- Function setting operation
- Adjustment procedures
For the information below required to start operating the Printer, refer to the “Basic Operation Guide”.
- Basic information required for the operation
- Basic operations to turn the Printer on and o and to handle the media and ink system
To operate the Printer safely and properly, before starting the operation be sure to read the following of the “Basic
Operation Guide.”
• Safety precautions
• Components delivered with the Printer
• Manual legend (notation rules)
Keep these Guides near the Printer so that you can quickly access it at any time.

IP-7900-02/-03/7700-02/03 Advanced Operation Guide
4
To perform your rst printing
Basic Operation Guide
Read the Basic Operation Guide before your rst Printer operation.
This guide describes the basic handling and daily operation of
media, printing, and maintenance.
Advanced Operation Guide
Read the Advanced Operation Guide so that you can operate
the Printer eectively.
This Guide describes the Printer’s ne setting and adjustment to
maximize the Printer’s performance.
To print on other media
To perform double-sided printing
To perform the Printer’s maintenance
To replace the Printer’s ink pack
To replace the Printer’s waste ink bottle
To recover error messages
To clear media jams
To clear banding, white lines, and bleeding
To operate the Printer with ne settings
To print on cut-sheet media
To change heater temperature while printing
To turn the Printer o
To create a new media preset
To switch between 4-color and 8-color modes
How do the two Guides work?
P.26
P.53
P.60
P.64
P.96
P.94
P.86
P.85

5
To perform your rst printing
Basic Operation Guide
Read the Basic Operation Guide before your rst Printer operation.
This guide describes the basic handling and daily operation of
media, printing, and maintenance.
Advanced Operation Guide
Read the Advanced Operation Guide so that you can operate
the Printer eectively.
This Guide describes the Printer’s ne setting and adjustment to
maximize the Printer’s performance.
To print on other media
To perform double-sided printing
To perform the Printer’s maintenance
To replace the Printer’s ink pack
To replace the Printer’s waste ink bottle
To recover error messages
To clear media jams
To clear banding, white lines, and bleeding
To operate the Printer with ne settings
To print on cut-sheet media
To change heater temperature while printing
To turn the Printer o
To create a new media preset
To switch between 4-color and 8-color modes
How do the two Guides work?
P.74
P.26
P.46
P.60
P.8
P.37
P.69

IP-7900-02/-03/7700-02/03 Advanced Operation Guide
6
TABLE OF CONTENTS
Introduction
3
Manual legend (Notational rules)
7
To assist your Printer in operating
effectively
8
Turn the Printer o
8
Service cleaning
9
Head wash
14
Charging the ink system after head wash
19
Check the Printer status
22
Check the remaining ink level
22
Check remaining media length
23
Print reports on the Printer status.
23
Check the USB connection status
24
Check the firmware version on your Printer
25
Check the total print distance
25
Handle the media
26
Create a new media preset
26
Select a preset media
28
Minimize the right and left margins
28
Solve media sticking problem
30
Solve media lifting up problem
30
Print on a thick media
31
Change the automatic cleaning timing
32
Copy a preset media type to create a new one
33
Feed or rewind media
34
Move a print start position (nest function)
36
Print on a cut-sheet media
37
To change the Printer’s basic settings
40
Turn the audio warning beep off
40
Update the system firmware
41
Cleaning options
42
Perform cleaning only for the specified print head
42
Manage the media advance compensation
44
Change media advance compensation
44
Manage print modes
45
Troubleshoot print quality issues
46
The print is light.
46
Missing dots are found at the beginning of printing.
46
The media is curled or wrinkled.
47
White stripes appear on the print.
48
Edges of objects are blurred.
53
A vertical barding appears at the print's edge.
54
Different bandings appear on the print’s right and left.
55
Clear missing dots (nozzle clogging)
56
Strong cleaning
56
Fill the cap with ink
57
Fill the cap with wiper cleaning liquid
58
Switch between 4-color mode and 8-color
mode
60
Adjust the heaters’temperature
68
Procedure to set the heater temperature
68
Display the heater control menu.
69
Key operation in the heater control menu
69
Finish displaying the heater control menu
69
Set the heater preset temperature
70
Select the standby time
71
Smart pass technology
72
Adjust and calibrate the Printer
74
Before adjustment and calibration
74
Procedure to set the smart pass technology [#IMAGE
IMPROVE.] to off
74
Procedures
75
Adjusting media advance compensation
75
Adjust print head position
78
Adjust the nozzle positions at print head’s right and left
80
Adjust bidirectional print positions
82
Asjust the edge sensor position
87
Adjust the print linkage after the automatic cleaning (Adjust
the media back feed)
89
Menu tree
92
Index
98
7
The notational rules such as marks, keys, LCD, and LEDs used for explanation in this guide are as follows:
Marks
WARNING
- Boxes marked with a "WARNING" describe points of caution for avoiding serious personal
injury.
CAUTION
- Boxes marked with a "CAUTION" describe points of caution for avoiding injury to yourself
or damage to the Printer.
TIP:
- This mark oers you the information to facilitate
the Printer operation.
Reference mark
This mark is followed by a reference section or page number.
Manual legend (Notational rules)

IP-7900-02/-03/7700-02/03 Advanced Operation Guide
8
To assist your Printer in operating eectively
Turn the Printer o
Always set the Printer power to on to perform the ll cap operation.
Fillcap is...?
- To remove nozzle clogging from nozzle surface, use llcap option. This option lls the cap with ink to
soak the print head (nozzle surface) in the ink for a minimum of 1 to 2 hours. If possible, leave the Printer
overnight.
Use this option also when nozzles cannot be xed by cleaning repeatedly.
The Printer has an internal clock which allows it to automatically wash the print heads, ushing some ink through
the print heads, which keeps the print heads in good condition. The Printer automatically washes the print heads
72 hours after the last printing, and then regularly washes every 3 days.
If the Printer is turned o for a long period, this process above does not happen. If the ink does not ow through
the print heads regularly, the ink will dry inside the nozzle, reaching a point where they cannot be recovered and
the print heads will fail. This will mean a print head replacement.
So, if the Printer must be turned o, follow the guide below.
For a short period
Clean the print head and the ink flow path with the
storage liquid, and leave the printer with storage
liquid filled.
Prepare the storage liquid set (IP7-137).
Clean the print head and the ink flow path with the
cleaning liquid.
Prepare the cleaning liquid set (IP7-136).
After the head wash, Insert ink trays and charge the
ink system.
Perform the daily maintenance.
When leaving the Printer for
more than one month,
contact your service
representative beforehand.
The service call error is
displayed regardless of
whether service cleaning has
been performed or
not. Contact your service
representative.
For a several days For two weeks or more
Service cleaning
Head wash
Power-off
Power-on
Charging ink after head wash
Daily maintenance
For one month or more
CAUTION
- To protect the print head, do not leave your Printer for more than one month with no ink charged.
- During the service cleaning or head wash, do not open or close the front cover or the lever. Otherwise, the Printer may
restart its initial operation from the beginning, while wasting the ink and cleaning liquid.
P.9
14
19

9
To assist your Printer
in operating eectively IndexMenu tree
Adjust and calibrate
the Printer
Turn the Printer o / Check the Printer status / Handle the media / To change the Printer’s basic settings / Cleaning options
/ Manage the media advance compensation / Manage print modes / Troubleshoot print quality issues / Clear missing dots (nozzle
clogging) / Switch between 4-color mode and 8-color mode / Adjust the heaters’temperature / Smart pass technology
Service cleaning
Required items
Storage liquid set (IP7-137)
Storage liquid pack Dummy subcartridge
Before the operation check that the items below are prepared.
Use the eight storage liquid packs completely in a single service cleaning.
To facilitate this work, set the storage liquid packs to the optional ink trays in advance.
OPEN
INK COVER
INK COVER is displayed to indicate an ink box cover.
NOTE
On the LCD, ink box cover is indicated as INK COVER.
1
Install an empty waste ink bottle.
2
á
INK MEDIA REG
â
ß
MEDIA M.ADV
à
MENU
Set the Printer to oine state and press the
MENU
key.
3
á
REWIND FORM FEED
â
ß
PH.REC PH.MAIN
à
Press the key.
4
#CAP CLEANING
>
• • •
With the key scroll to [#INK SYSTEM
OPT].
5
#INK SYSTEM OPT
>STORE INK SYS
Press the key.

IP-7900-02/-03/7700-02/03 Advanced Operation Guide
10
6
#INK SYSTEM OPT
[
STORE INK SYS
Press the key.
7
Subcartridge cover
Knob screws Open the subcartridge cover.
Loosen the two knob screws on the subcartridge cover
and open the subcartridge cover.
OPEN
SUBCARTRIDGE COVER
8
Subcartridges to be removed Remove the eight subcartridges.
REMOVE SUBCARTRIDGE
9
Dummy subcartridges Set the dummy subcartridges of the storage
liquid set.
LOAD
Y1 DUMMY SUBCART
10
Subcartridge cover Close the subcartridge cover and tighten the
two knob screws.
CLOSE
SUBCARTRIDGE COVER

11
To assist your Printer
in operating eectively IndexMenu tree
Adjust and calibrate
the Printer
11
Knob
Ink box cover Open the ink box cover.
OPEN
INK COVER
12
Ink trays to be removed
Remove the eight ink trays.
REMOVE
Y 1 I N K P A C K
13
Ink box cover Close the ink box cover.
CLOSE
INK COVER
14
START PURGING
[
BOTTLE OK?
PURGING
PLEASE WAIT 12
Press the key.
Ink is purged from the ink system.
15
Knob
Ink box cover Open the ink box cover.
OPEN
INK COVER
16
Ink trays to be set
Insert the ink trays with storage liquid packs
into the slots of the ink box.
LOAD
Y 1 S L P A C K

IP-7900-02/-03/7700-02/03 Advanced Operation Guide
12
17
Ink box cover Close the ink box cover.
CLOSE
INK COVER
18
START SL CHARGING
[
BOTTLE OK?
CHARGING SL
P L E A S E W A I T 1 2
Press the key.
19
Knob
Ink box cover Open the ink box cover.
OPEN
INK COVER
20
Ink trays to be removed
Remove the ink trays with cleaning liquid packs.
REMOVE
Y 1 S L P A C K
21
Ink box cover Close the ink box cover.
CLOSE
INK COVER
22
START PURGING
[
BOTTLE OK?
PURGING
PLEASE WAIT 12
Press the key.
Ink is purged from the ink system.

13
To assist your Printer
in operating eectively IndexMenu tree
Adjust and calibrate
the Printer
23
Knob
Ink box cover Open the ink box cover.
OPEN
INK COVER
24
Ink trays to be set
Insert the ink trays with storage liquid packs
into the slots of the ink box.
LOAD
Y 1 S L P A C K
25
Ink box cover Close the ink box cover.
CLOSE
INK COVER
26
START SL CHARGING
[
BOTTLE OK?
CHARGING SL
P L E A S E W A I T 1 2
#INK SYSTEM OPT
>STORE INK SYS
Press the key.

IP-7900-02/-03/7700-02/03 Advanced Operation Guide
14
Head wash
Required items
Cleaning liquid set (IP7-136)
Before the operation check that the items below are prepared.
OPEN
INK COVER
INK COVER is displayed to indicate an ink box cover.
NOTE
On the LCD, ink box cover is indicated as INK COVER.
Cleaning liquid pack Dummy subcartridge
Use the eight cleaning liquid packs completely in a single head wash.
To facilitate this work, set the cleaning liquid packs to the optional ink trays in advance.
1
Install an empty waste ink bottle.
2
á
INK MEDIA REG
â
ß
MEDIA M.ADV
à
MENU
Set the Printer to oine state and press the
MENU
key.
3
á
REWIND FORM FEED
â
ß
PH.REC PH.MAIN
à
Press the key.
4
#CAP CLEANING
>
• • •
With the key scroll to [#INK SYSTEM
OPT].
5
#INK SYSTEM OPT
>STORE INK SYS
Press the key.

15
To assist your Printer
in operating eectively IndexMenu tree
Adjust and calibrate
the Printer
6
#INK SYSTEM OPT
[
STORE INK SYS
With the key scroll to [
[
CLEAN INK SYS].
7
#INK SYSTEM OPT
[
CLEAN INK SYS
Press the key.
8
Subcartridge cover
Knob screws Open the subcartridge cover.
Loosen the two knob screws on the subcartridge cover
and open the subcartridge cover.
OPEN
SUBCARTRIDGE COVER
9
Subcartridges to be removed Remove the eight subcartridges.
REMOVE
Y1 SUBCARTRIDGE
10
Dummy subcartridges Set the dummy subcartridges of the cleaning
liquid set.
LOAD
Y1 DUMMY SUBCART
11
Subcartridge cover Close the subcartridge cover and tighten the
two knob screws.
CLOSE
SUBCARTRIDGE COVER

IP-7900-02/-03/7700-02/03 Advanced Operation Guide
16
12
Knob
Ink box cover Open the ink box cover.
OPEN
INK COVER
13
Ink trays to be removed
Remove the eight ink trays.
REMOVE
Y 1 S L P A C K
14
Ink box cover Close the ink box cover.
CLOSE
INK COVER
15
START PURGING
[
BOTTLE OK?
PURGING
P L E A S E W A I T 1 2
Press the key.
Ink is purged from the ink system.
16
Knob
Ink box cover Open the ink box cover.
OPEN
INK COVER

17
To assist your Printer
in operating eectively IndexMenu tree
Adjust and calibrate
the Printer
17
Ink trays to be set
Insert the ink trays with cleaning liquid packs
into the slots of the ink box.
LOAD
Y 1 C L P A C K
18
Ink box cover Close the ink box cover.
CLOSE
INK COVER
19
START CL CHARGING
[
BOTTLE OK?
CHARGING CL
P L E A S E W A I T 1 2
Press the key.
20
Knob
Ink box cover Close the ink box cover.
OPEN
INK COVER
21
Ink trays to be removed
Remove the ink trays with cleaning liquid packs.
REMOVE
Y 1 C L P A C K

IP-7900-02/-03/7700-02/03 Advanced Operation Guide
18
22
Ink box cover Close the ink box cover.
CLOSE
INK COVER
23
START PURGING
[
BOTTLE OK?
PURGING
P L E A S E W A I T 1 2
Press the key.
Ink is purged from the ink system.
24
Repeat the steps
16
to
19
to perform the cleaning again.
25
Knob
Ink box cover Open the ink box cover.
OPEN
INK COVER
26
Ink trays to be removed
Remove the ink trays with cleaning liquid packs.
REMOVE
Y 1 C L P A C K
27
Ink box cover Close the ink box cover.
CLOSE
INK COVER

19
To assist your Printer
in operating eectively IndexMenu tree
Adjust and calibrate
the Printer
28
START PURGING
[
BOTTLE OK?
PURGING
P L E A S E W A I T 1 2
OPEN INK COVER
Y1 LOAD INK PACK
Press the key.
Charging the ink system after head wash
1
Clear out the waste ink bottle.
2
á
INK MEDIA REG
â
ß
MEDIA M.ADV
à
MENU
Set the Printer to oine state and press the
MENU
key.
3
á
REWIND FORM FEED
â
ß
PH.REC PH.MAIN
à
Press the key.
4
#CAP CLEANING
>
• • •
With the key scroll to [#INK SYSTEM
OPT].
5
#INK SYSTEM OPT
>STORE INK SYS
Press the key.
6
#INK SYSTEM OPT
[
STORE INK SYS
• • •
With the key scroll to
[
[
CHARGE(INKPACK)].
7
#INK SYSTEM OPT
[
CHARGE(INKPACK)
Press the key.

IP-7900-02/-03/7700-02/03 Advanced Operation Guide
20
8
#INK SYSTEM OPT
[
BOTTLE OK?
Check that the waste ink bottle is empty, and
press the key.
9
Knob
Ink box cover Open the ink box cover.
OPEN
INK COVER
10
Ink tray
Insert the eight ink trays.
LOAD
Y1 INK PACK
Y1
Lm2
C3
Gy4
Lg8
M7
Lc6
K5
Inktray
Y1
M2
C3
K4
Y8
M7
C6
K5
Inktray
8-color mode 4-color mode
11
Ink box cover Close the ink box cover.
CLOSE
INK COVER
12
START INK CHARGING
[
BOTTLE OK?
CHARGING INK
P L E A S E W A I T 1 2
Press the key.
13
Subcartridge cover
Knob screws Open the subcartridge cover.
Loosen the two knob screws on the subcartridge cover
and open the subcartridge cover.
OPEN
SUBCARTRIDGE COVER
This manual suits for next models
1
Table of contents
Other SII Printer manuals

SII
SII MP-A40 SERIES User manual

SII
SII RP-B10 User manual

SII
SII RP-E10 Series User manual

SII
SII MTP Series Use and care manual

SII
SII DPU-S445 SERIES User manual

SII
SII DPU-S445-00A-E User manual

SII
SII LP-2050-MF User manual

SII
SII IP-6900 User manual

SII
SII IP-7700-20 User manual

SII
SII IP-5520 User manual

SII
SII IP-6600-01 User manual

SII
SII SLP720RT Series User manual

SII
SII DPU-S445 SERIES Use and care manual

SII
SII DPU-S445 SERIES User manual

SII
SII Color Painter W-64s User manual

SII
SII LTP3445 Use and care manual

SII
SII IP-7900 User manual

SII
SII IP-7900-00 User manual

SII
SII SLP720RT Series User manual

SII
SII IP-6600 User manual