SII IP-6620 User manual

Read this User’s Guide before operating the printer.
Keep this manual for future reference.
User's Guide
U00130312100
Solvent Ink Color Inkjet Printer
IP-6620
Seiko I Infotech Inc.
Before printing Loading the media Adjustment Maintenance Advanced
operations Troubleshooting Menu tree Appendix

2 3
IP-6620 Solvent Ink Color Inkjet Printer User's Guide
Document Number U00130312100, First edition, July 2013
Copyright © 2013 by Seiko I Infotech Inc.
All rights reserved
The contents of this manual may be changed without prior notice.
Seiko I Infotech Inc. reserves the right to make changes without notice to the specications and materials contained
herein and shall not be responsible for any damage (including consequential) caused by reliance on the materials
presented, including but not limited to typographical, arithmetic, or listing errors.
Please address any questions, comments, and suggestions to the regional oce on:
http://www.seiko-i.com/corp/oces.html
This guide acknowledges the following trademarks:
is a trademark of Seiko Instruments Inc.
All other trademarks are the properties of their respective companies.
This equipment has been tested and found to comply with the limits for a Class A digital device, pursuant to Part 15
of the FCC Rules. These limits are designed to provide reasonable protection against harmful interference when the
equipment is operated in a commercial environment.
This equipment generates, uses, and can radiate radio frequency energy and, if not installed and used in accordance
with the instruction manual, may cause harmful interference to radio communications. Operation of this equipment
in a residential area is likely to cause harmful interference in which case the user will be required to correct the
interference at his own expense.
The CE mark, that shows that the products sold in the EU are conformed to the requirements of EC directive, is
statutorily required to be axed to the products.
In each directive, the scope of directive to be applied to equipment is explicitly dened. Our company’s product IP-
6620 conforms the EMC directive (2004/108/EC), low voltage directive (2006/95/EC) and RoHS Directive 2011/65/EU.
Inquiry of CE mark:
Seiko Instruments GmbH
Siemensstraße 9, D-63263 Neu-Isenburg
Germany
Tel: +49-6102-297-0
Fax: +49-6102-297-320
Seiko I Infotech Inc.
8 Nakase 1-chome, Mihama-ku, Chiba-shi, Chiba 261-8507, Japan
Phone : +81 43 211 1363
Fax : +81 43 211 8709
Thank you very much for purchasing the IP-6620 Color Inkjet Printer (hereafter simply called the printer.)
IP-6620 supports media up to 64 inch width. The printer is a color inkjet printer using solvent ink and equiped
with USB 2.0 interface.
The printer has two types of specications, 7 color specications and 6 color specications, depending on the
number of print heads.
This guide provides explanations for the IP-6620 7 color specifications model. However, individual
information is given when necessary.
This guide, the IP-6620 Solvent Ink Color Inkjet Printer User’s Guide, describes the features and functions
of the printer and the printing procedure. In addition, troubleshooting is also included. Read the sections
suitable for your purpose.
The following items should be read before using the printer to ensure correct and safe operations.
- Safety precautions
- Components delivered with this product
- Manual legend (Notational rules)
Keep this guide in a place where you can quickly access it at any time.
Introduction

4 5
To maintain an excellent print quality
Load the media on the feed unit.
1. Load the media correctly
Set the media on the take-up reel (TUR) unit.
The printer has been designed to facilitate media installation.
If the media is not set correctly…
The media may skew or contact the print heads, greatly decreasing the print quality.
Media jam caused by skewed media
Raise the media with the media lifter.
Incorrect winding
Move the take-up reel unit toward you.
Colors on the right and left
dier due to skewed media.
The printout is not clean due to
media contacting the print heads.
<Examples>
Be sure to pay attention to the following three points to maintain an excellent print quality and use the printer over
a long time.
(1) Load the media correctly
(2) Make proper adjustment
(3) Perform the necessary
maintenance operations
page 37 page 47
page 36 page 44

6 7
Media advance
2. Make proper adjustment
Bidirectional print position
Adjustment can be performed automatically.
If these adjustment operations are not performed when
using a new media…
The ink may not be output to the right position and the print quality may decrease.
<Examples>
Banding (white or black bands) may appear if
media advance adjustment is not performed
correctly.
Grains may become
visible and the image
may appear blurred if
the bidirectional print
position is not adjusted.
The printer has been
designed to facilitate
adjustment.
The capping unit is dirty. The print heads are dirty.
Maintenance status and periods can be
grasped at a glance.
Use CP_Manager…
to make maintenance operations easier.
Clean the capping unit.
3. Perform the necessary maintenance operations
Check the wiper cleaning liquid.
If the printer is used when not clean…
The print quality may not only decrease but the printer may also malfunction.
page 59 page 76page 66
page 59
page 84
page 33

8 9
POWER
NOZZLE PRINT PH.RECOVERY
Media advance value
Media name
Head height
Color stripe
Connect to a computer.
Replace the ink cartridge.
Register the media.
Turn o the power.
Turn on the power.
Load the roll media.
Replace the media.
Starting out...
#PH RECOVERY
>NORMAL
Check the Waste ink bottle.
Check stains on the wiper blade.
Perform a print head cleaning
[NORMAL].
Check the wiper cleaning liquid.
Clean the capping unit.
Perform a nozzle print.
Regular Inspection (Maintenance)
page 31
page 163
page 42
page 30
page 29
page 36
page 43
page 82
page 86
page 79
page 84
page 76
page 80

10 11
Print on a thick media.
Change the media advance adjustment
value during printing.
Adjust the media during printing.
Clean the printer.
Print on the margin of the media.
Change the heater temperature
during printing.
Switch o the printer for a long
period of time.
When you want to...
PERFORM DAILY
MAINTENANCE NOW
Wiper cleaning liquid
Wiper sponge Wiper blade
Waste ink bottle
Replace consumables.
A warning message is displayed.
The media is not straight.
The panel operation is not possible.
The heater does not warm up.
Smears or stripes appear on the print.
page 132
page 153
pag e 148
page 92
pag e 143
page 157
page 104
Replacement and trouble
page 84
page 178 page 173
page 36 page 168
page 182
page 82
page 86page 89

12 13
Table of Contents
Introduction ..................................................... 3
Table of Contents...........................................12
Safety precautions.........................................14
Manual legend (Notational rules) ...............19
Components delivered with this product .20
Operating conditions....................................21
Installation and maintenance space .............................................. 21
Environmental conditions ....................................................................22
Before printing
Printer front (take-up side) .................................................................... 24
Appearance / Main components
and their functions ........................................25
Printer rear (supply side) ........................................................................25
Printer interior ...............................................................................................26
Operation panel .......................................................................................... 27
Printer heater unit ......................................................................................28
To turn the printer on and o......................29
Power-on procedure ................................................................................ 29
Power-off procedure ................................................................................30
To connect the USB cable.............................31
Online and oine ..........................................32
Online ................................................................................................................ 32
Offline ................................................................................................................ 32
CP_ M an age r ....................................................33
Supported media...........................................34
Vinyl ....................................................................................................................34
Banner ...............................................................................................................34
Mesh banner (with liner) .......................................................................34
Backlit banner (FF) .....................................................................................34
Solvent printing coated paper ...........................................................34
Loading the media
Loading the media on the printer ..............36
Procedure to load roll media ..............................................................36
Replacing the media when the end of the roll is reached
.....43
Replacing the media after a media jam .......................................43
Setting the media remaining length .............................................43
Setting the media on the take-up reel unit
..... 44
Tension and loose mode setting procedure ............................44
Procedure to set the media on the TUR unit ............................ 47
Removing the media.....................................51
Procedure to remove the roll media (output side) ............... 51
Procedure to remove the roll media (feed side) .....................53
When using 2-inch tubes ......................................................................54
Cutting the media..........................................55
Adjustment
Before making adjustment ..........................58
Adjustment methods ....................................59
Adjusting media feeding: Media advance adjustment ...... 59
Correcting ink output position: Bidirectional adjustment
66
Maintenance
Daily maintenance.........................................74
Routine maintenance....................................76
Performing capping unit cleaning and normal
cleaning at the same time .................................................................... 76
Performing normal cleaning independently .......................... 79
Print the nozzle print pattern .............................................................80
Nozzle map setting.................................................................................... 81
Maintenance when a message is displayed...
89
Head guard cleaning ...............................................................................92
Maintenance when the printer is dirty ......92
Edge guard cleaning ................................................................................94
Front cover cleaning .................................................................................95
Paper guide cleaning ............................................................................... 95
Pressure roller cleaning ...........................................................................95
Platen cleaning ............................................................................................96
Preparing the sheet mount cleaning ............................................ 97
Performing sheet mount cleaning .................................................. 97
After the operation of the day.................. 102
Advanced operations
When not using the printer for more
than 2 weeks................................................ 104
Service cleaning ...................................................................................... 105
Head wash ................................................................................................... 107
Priming the ink system after head wash ................................... 112
Check the printer information...................114
Check the remaining ink level ..........................................................114
Export printer information .................................................................115
Check remaining media length ......................................................116
Check the USB connection status .................................................118
Check the firmware version on the printer .............................. 119
Check the total print length ............................................................. 120
Handle the media ....................................... 122
Create a new media preset ............................................................... 12 2
Minimize the right and left margins ............................................ 12 5
Prevent the media from sticking and wrinkling .................. 128
Prevent the media from lifting up .................................................131
Print on a thick media ...........................................................................132
Prevent the ink from spreading over the printout ..............135
Change the automatic cleaning timing .....................................137
Copy a media preset ..............................................................................139
Change the type of the preset media without
reloading the media ...............................................................................141
Feed or rewind media .......................................................................... 142
Move the print start position ........................................................... 143
Exit origin setting mode ..................................................................... 14 4
Adjust the head margin before printing .................................. 145
Reinstall the edge guards during printing ..............................146
Remove some media wrinkles during printing ...................148
To change the printer’s basic settings .... 149
Turn the warning beep off ................................................................ 149
Cleaning options..........................................151
Perform cleaning only for the specified print head ...........151
Controlling the media advance
adjustment value........................................ 153
Change the media advance adjustment value
during printing ..........................................................................................153
Print conditions........................................... 154
Print modes ................................................................................................ 15 4
Set the carriage speed ..........................................................................155
Print speed .................................................................................................. 15 6
Adjust the heaters temperatures ............ 157
Procedure to set the heaters temperatures .............................157
Display the heater control menu .................................................. 15 8
Key operations in the heater control menu ........................... 158
Exit the heater control menu display ...........................................159
Set the heater preset temperature ...............................................159
Select the standby time ......................................................................160
Out of ink while printing ........................... 162
Install and replace an ink cartridge .............................................. 163
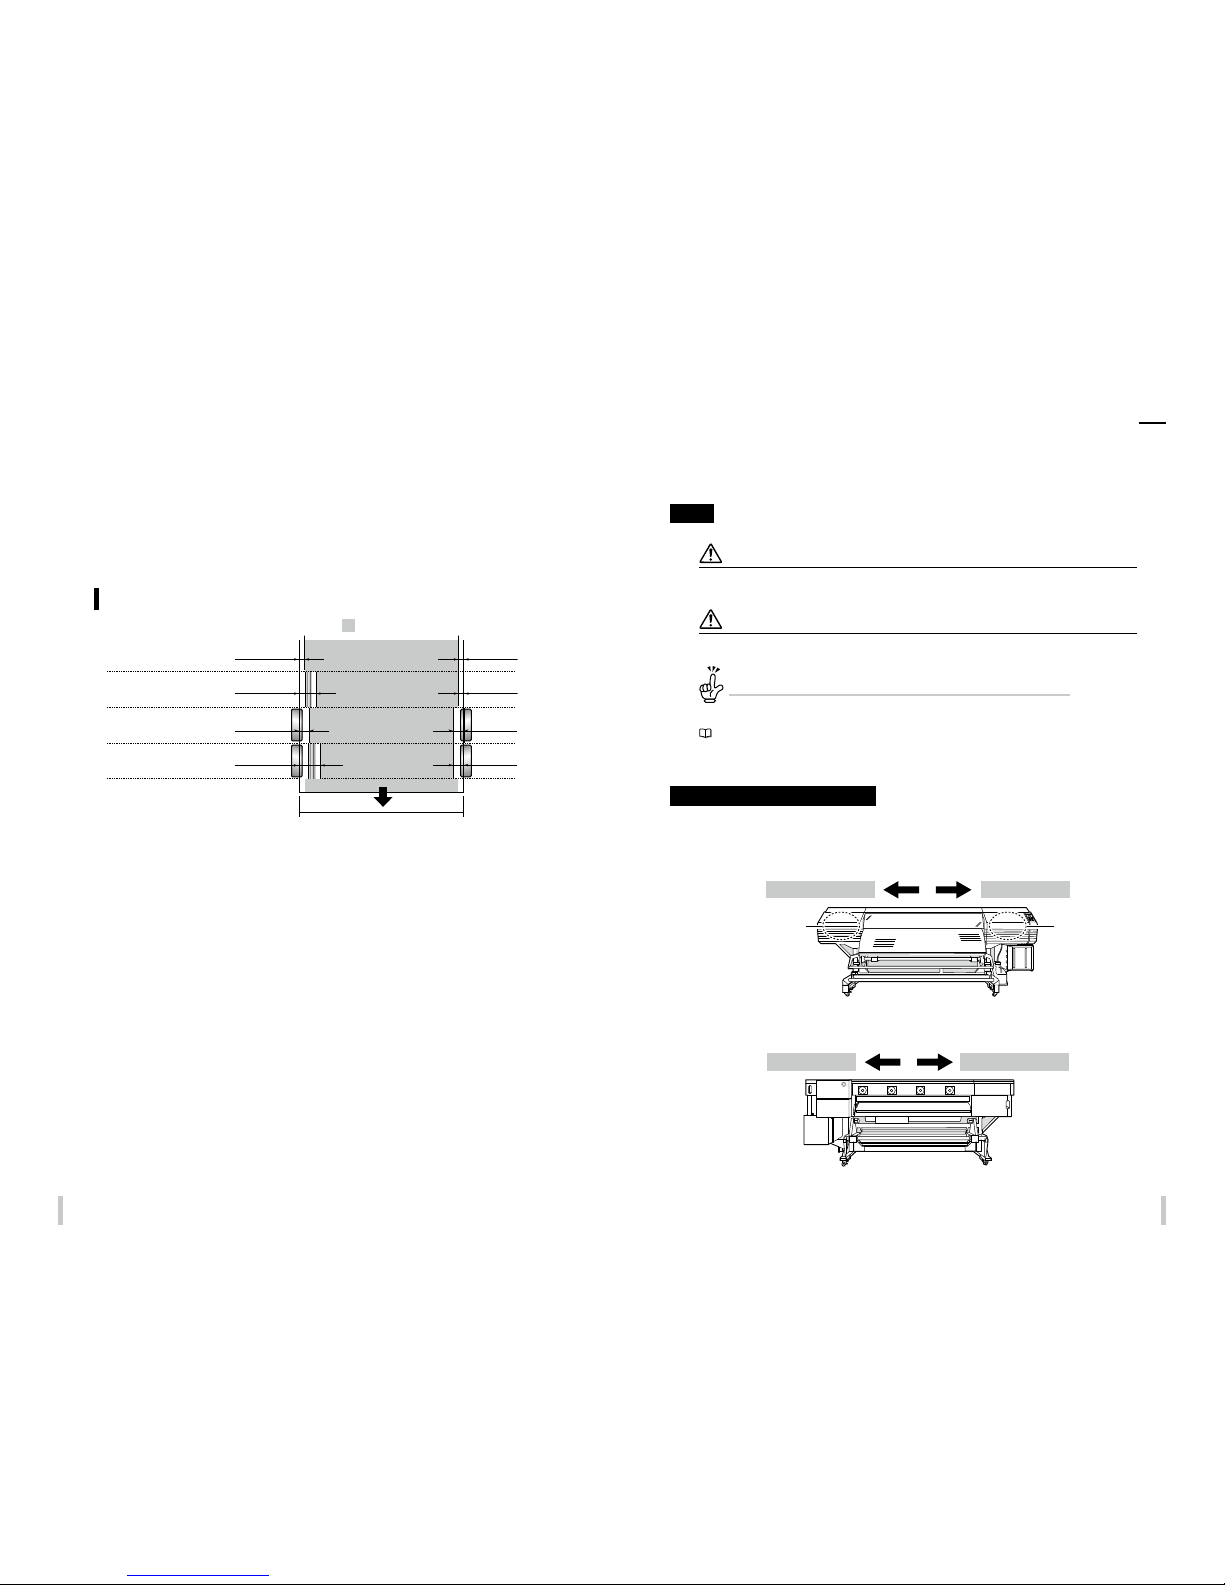
Move the printer ......................................... 166
Troubleshooting
Check the problem ..................................... 168
How to clear media jams............................171
When an error message is displayed....... 173
The media has skewed............................... 177
Warning messages...................................... 178
Clear missing dots (nozzle clogging) ...... 179
Strong cleaning .........................................................................................179
Fill the cap with ink .................................................................................181
Solve print quality issues........................... 182
The print is pale. ....................................................................................... 182
The printout is blurred or grains appear. ..................................182
Missing dots are found at the beginning of printing. ......182
The media is curled or wrinkled. ................................................... 183
White stripes appear on the print. ...............................................184
Black stripes appear on the print. .................................................186
The printout is not clean. ................................................................... 188
Contours of objects are blurred. .................................................... 190
Vertical banding appears at the printout edges. .................192
Different bands appear on the printout right
and left sides. ..............................................................................................193
Menu tree
Appendix
Basic specications......................................216
Consumables ................................................217
Options ......................................................... 220
Distributors ................................................. 221
For inquiries about the printer ........................................................ 221

14 15
Safety precautions
The following symbols are used in the guide to ensure the printer’s proper operation and to prevent the
printer from being damaged. Follow the instructions marked with these symbols:
WARNING
Failure to follow the guidelines marked with this
symbol could result in serious personal injury or
death.
CAUTION
Failure to follow the guidelines marked with this
symbol could result in minor personal injury or
damage to the product.
Example of symbols:
This symbol ( Triangle ) denotes items that require special care while
executing a certain procedure or operation.
This symbol ( Crossed circle ) denotes items that are forbidden.
This symbol ( Plain circle ) denotes items you should follow to
prevent accidents or injury.
WARNING Be sure to read warnings below before use.
Use the power supply voltage specied on the nameplate.
Avoid overloading the electrical outlet used for the printer
with multiple devices.
Make sure that the printer is well grounded. Failure to
ground the printer may result in electrical shock, re, and
increased susceptibility to electromagnetic interference.
Always hold the power cord by the plug when connecting
to and disconnecting from the power outlet.
Never pull on the cord directly. Doing so may damage the
cord and create a risk of re and electric shock.
Do not use a conversion plug.
Do not disassemble or repair the printer yourself. Do not
reinstall the printer in a new location. In such cases, call
your service representative.
Do not damage, break, process, or heat the power
cable. If it is damaged, replace it with a new one. Using a
damaged power cable may cause re or electric shock.
Never use the printer in a place of extreme humidity or
any place where it can possibly be splashed by any liquid.
If any liquid enters inside the printer, it could lead to re,
electric shock, or a breakdown.
Do not allow metal or liquids to touch the internal parts
of the printer. This may cause re, electric shock, or other
serious hazards.
Do not disconnect or connect the power cord with wet
hands. Doing so may lead to electric shock.
Ink used in the ink cartridges is combustible. Do not use
or store ink cartridges near open ames, sparks, or other
sources of ignition.
Operate the printer carefully near the printer's movable
parts, so that your hands or your clothes are not caught
in the printer.
Install and operate the printer in a well-ventilated area.
Otherwise the operator may feel sickish. In such a case,
take a rest in a well-ventilated place.
Media rolls are heavy. Handle them with care using
a dolly or other tools to prevent them from falling.
Dropping a media roll could cause personal injury or
damage to the printer.
It is recommended to carry media rolls with a dolly.
Be careful not to let ink come into contact with your skin
or clothes. If ink touches your skin, immediately wash it
o with soap and water.
Turn o the printer, unplug the power cord from the
power outlet, and contact your service representative in
any of the following cases. Using the printer continuously
in an abnormal state may result in an accident or re.
- Smoke, strange noise or smell is generated from the
printer or the printer is overheated.
- There is smoke or an unusual smell coming from the
printer.
- The printer is making an unusual noise during
normal operation.
- A piece of metal or a liquid (not part of cleaning and
maintenance routines) has touched internal parts of
the printer.
- An error requiring service by a service representative
occurs.
Avoid contact between skin, eyes, and clothing and the
printer’s following consumables: ink, storage liquid,
cleaning liquid, cap cleaning liquid, wiper cleaning liquid,
and waste ink.
- In case of contact, immediately wash your skin with
soap and water.
- Use an approved eye wash station if ink splashed
into your eyes and consult a doctor if necessary. If an
approved eye wash station is unavailable, rinse your
eyes with cold water and consult a doctor. Remove
clothing soaked with ink to avoid contact with your
skin.
Do not swallow ink. If swallowed, do not induce vomiting
but seek immediate medical attention.
Do not place the printer on an unstable table or at a slant
place. If it falls, it may lead to injury.
Do not touch heater surfaces in the media path. This may
cause burns.
Keep ink cartridges and waste ink bottles out of the reach
of children.
CAUTION Be sure to read warnings below before use.
CAUTION
Make sure the media rolls are secured when stored. They are heavy and may cause injury if they roll or fall.
To ensure safe operation of the Printer, pay attention to all the warnings and cautions contained throughout
this manual.

16 17
Power supply
1. Install the printer near the socket. To be able to pull out the power plug in an emergency, the power
socket must be reached easily.
2. Do not share the power supply with noise generating devices such as a motor.
3. Use the power supply voltage specied on the nameplate.
4. Monthly turn o the printer and check the following:
- The power plug is securely inserted into the socket.
- No dust is accumulated between the plug terminals and the socket. When dust is found, clean the area
with a dry cloth.
Printer
1. Do not place anything on the top of the printer. Do not rest your elbows on the printer.
2. Do not apply shock or stress to the printer.
3. During the print operation, do not open the front cover, nor set the pressure roller lever to the open (top)
position. Otherwise the printer operation will end.
4. Do not clean the cover’s surface with benzene or paint thinner. This may damage the printer’s paint. Clean
the cover’s smear with a soft cloth. If the cover is considerably smeared, wipe it o with a cloth moistened
with water-diluted neutral detergent. If it is not cleaned, the printer’s surface paint may be damaged.
5. Always use the SIIT-specified attachments and options. The other products may degrade the image
quality, damage the printer, and make maintenance impossible.
Regular inspection and maintenance
Due to solvent ink characteristics, inspection and maintenance need to be performed periodically. (For
details on maintenance, see the Maintenance section starting on page 73.)
1. Perform the start maintenance every day before starting using the printer.
2. Pay particularly attention to the items below.
- Supply wiper cleaning liquid when the bottle is empty.
- Print heads are highly-precise parts. Do not wipe the nozzle surface directly.
3. If you stop using the printer for more than 2 weeks, perform the service cleaning.
4. If, after the service cleaning, you have left the printer for a long time and you start printing with the
printer again, be sure to perform the head cleaning operation and to prime the ink system.
Consumables
1. SIIT ink cartridges should be installed before the Install By date printed on the pack. Other non-genuine
ink cartridges may damage the printer. In this case, printer repair fees will borne by you.
2. To guarantee print quality, expiration dates are indicated for ink cartridges, cleaning liquid cartridge sets,
and storage liquid cartridge sets. Use these consumables before their expiration date.
3. Put used ink cartridges into a plastic bag and dispose of them as industrial waste. Observe local
regulations for disposal of consumables.
4. Unpack the SIIT ink cartridges only to install them. Do not store SIIT ink cartridges in direct sunlight. Store
the SIIT ink cartridges in a cool, dry place. This prevents deterioration of the ink during storage.
5. Do not disassemble the ink cartridges. They are intended for single use only.
6. Do not drop the ink cartridges. Avoid shock to them. The drop or shock may cause an ink leakage.
Media
Supported media
The Printer supports solvent inkjet media of the types below. Note that print conditions may change depending
on environmental conditions and the media production batch. So you are recommended to test the print with the
media beforehand.
For details, contact your service representative.
zVinyl
zBanner
zMesh banner (with liner)
zBacklit banner (FF)
zSolvent printing coated paper
Precautions when storing media
zWhen storing media, packed or unpacked, avoid direct sunlight and humidity. To avoid dust put the
media into a box or a bag, and keep it in a cool and dark place.
zAvoid rapid temperature change to prevent condensation.
zDo not store media upright. A media stored upright may be deformed, move on the roll due to its weight,
or may its edges may be damaged.
zDo not pile up roll media.
zMake sure the media rolls are secured when stored. They are heavy and may cause injury if they roll or fall.
Precautions when disposing of media
zDispose of media or printout in compliance with all local, state, and federal regulations.
Precautions when using media
zDo not subject unpacked media to temperature and humidity variations. Before loading the media on
the printer, leave the media in the operating environment for three hours or more. Note that ambient
humidity variations caused by turning on or o the air conditioner may aect the media.
zThe media may curl at low temperature, and wrinkle at high temperature. Keep the temperature around
23°C and the humidity around 50% when you use the media.
zDo not use a media when a part of it is scratched, wrinkled, curled, or that is covered with foreign matters.
Never use a damaged media, as the right and left edges of the media are especially critical to feed media
on the printer. Also, do not drop the media and avoid water stains, which may degrade the image quality
and cause the printer to malfunction.
zDo not touch the printed part of the media. Always hold the media by the margin. The image quality may
be degraded by human sebum and sweat.
zIf the media is wound in the shape of a cone, correct the winding before loading and using the media.
Precautions when handling printouts
zDo not touch the printed surface of the media before the ink dries, or especially 24 hours after printing.
Handle the printout by the margins.
zDo not scratch the printout to avoid lost or transfer of colors. To avoid color transfer, do not stack printed
media on one another with their printed surface facing in contact.
zDo not put printed media on a printout from a copier or laser printer. The printouts’ ink or toner may make
the two printouts to stick together.
zNote that ink on a printed surface may come o if the surface is rubbed hard or scratched.
zThe printed image may bleed or disappear if scratched or left while being wet.

18 19
Other precautions
zMedia loses its color and quality with age. Check the media condition and select the media in the best
condition.
zCut the media carefully, as paper dust may make irregular surfaces.
zWhen adhesive-backed media is applied, some adhesive agent may be left on the platen, which may
cause a media jam. So clean the agent completely with a soft cloth moistened with the neutral detergent.
Available area on media
The available area on media in the scanning direction depends on the media width, the media edge guards
application, and the presence pf the color stripe. With the media edge guards and color stripe applied, the available
area decreases by 34.9 mm on the right and 10.0 mm on the left.
Color stripe :NO
Media edge guards :NO
Color stripe :YES
Media edge guards :NO
Color stripe :NO
Media edge guards :YES
Media width
Color stripe :YES
Color stripe :YES 32.6 mm
27.6 mm
10.0 mm 10.0 mm
10.0 mm
5.0 mm 5.0 mm
5.0 mm
Without mesh printing kit nor wide type media
edge guards for platen sheet
Printable area
Manual legend (Notational rules)
The notational rules used for explanation in this guide are as follows:
Marks
WARNING
Boxes marked with a WARNING describe points of caution to avoid serious personal injury.
CAUTION
Boxes marked with a CAUTION describe points of caution to avoid injury to yourself or damage to the printer.
TIP:
This mark indicates useful information, additional items and important operations.
Reference mark
This mark is followed by a reference section or page number.
Capping unit side and wiping unit side
To identify the printer’s right and left, this guide mentions the capping unit side and wiping unit side as follows.
Viewed from the printer’s front (media take-up side)
Maintenance area side Capping unit side
Viewed from the printer’s rear (media supply side)
Maintenance area sideCapping unit side
A maintenance area is arranged. Capping unit is equipped.

20 21
Operating conditions
Installation and maintenance space
Adequate space is required around the printer for replacement of consumables and parts, print processing, and
ventilation during normal operation and maintenance.
Secure the space shown in the gure below.
1000
3900 *6090
3860
400
*1500
400
*1500
2000
(Front side)
Secure 2200 mm in the horizontal direction.
* : Maintenance space
(Unit: mm)
Components delivered with this
product
The following components are delivered with the printer, and must installed to the printer during installation. Check
that all the components below are delivered.
If any item is missing or damaged, contact the dealer from whom you purchased the printer or the nearest service
representative.
Printer
<1 unit>
- with USB interface
- with the feed unit and take-up reel unit
Items packed with printer
Waste ink bottle
IP6 -109
<1 bottle>
Power cable
<1 pieces>
Quick reference guide
<1 volume>
CD-ROM
<1 volume>
PS-RIP
<1 volume>
USB 2.0 cable
<1 piece>
Media jack
<1 piece>
Media stand
<1 piece>
Ink tray
IP7-123
6 colors : <6 pieces>
7 colors : <7 pieces>

2322
Environmental conditions
Operating temperature and humidity levels
Use the printer within the temperature and humidity levels shown below.
Temperature: 15°C to 30°C (60°F to 80°F)
Humidity: 30% to 70%
zTo obtain better print quality, use the printer within a temperature range of 20 to 25°C (68 to 77°F).
The print speed may decrease when the temperature is below 20°C.
zTo ensure a stable and good print quality, the printer slows down the print speed when the head
temperature exceeds 40°C (104°F).
NOTE
If the Printer is not used within the operating temperature and humidity ranges, the print process may
stop or the print quality may be degraded.
Places where the printer should not be installed
Do not install the printer in the following places.
zPlaces near a re
zPlaces exposed to direct sunlight
zPlaces subject to vibration
zPlaces with excessive dust
zPlaces subject to extreme changes in temperature or humidity
zPlaces near an air conditioner or a heater
zPlaces where the printer may get wet
zPlaces exposed to direct exhaust air from an air vent
zPlaces near a diazo copier that may generate ammonia gas
zPlaces with poor ventilation
zUnstable places
Before printing Loading the media Adjustment Maintenance Advanced
operations Troubleshooting Menu tree Appendix
Before printing

24 25
Before printing Before printing
Appearance / Main components and their functions
Printer front (take-up side)
Printer rear (supply side)
Before printing Loading the media Adjustment Maintenance Advanced
operations Troubleshooting Menu tree Appendix
Waste ink bottle
Ink box
Open the cover to install the ink
cartridges.
Guide bar
Guides the media in loose mode.
Pressure roller lever
This lever fixes or releases the media.
Take-up direction switch
Sets the media take-up direction.
Take-up reel unit
Winds the printed media.
Output paper guide
Contains the after heater that dries ink.
Maintenance cover
Open to perform print head
maintenance.
Front cover
Must be closed during printing.
Capping cover
Opened when cleaning the capping
unit or the carriage.
Operation panel
Equipped with LEDs and LCD to display the
printer status, and keys to set functions.
Inner take-up
Winding o
Outer take-up
Pressure roller lever
A lever used to fixe or release the media.
Moves together with the pressure roller lever at the printer
front side.
Exhaust attachment (option)
Installation locations
Power inlet
Connect the power cable to
the power inlet.
Media stand
Temporarily supports the media during loading
and removal procedures.
Can be used also when moved to the TUR unit
side.
Media holder
To be installed at both ends of
the roll media.
Media jack
Lifts or lowers the media during loading and removal
procedures.
Can be used also when moved to the TUR unit side.
Caster
Set the lock to OFF when moving the printer and set
the lock to ON when locking the printer.
USB connector
Used to connect the printer to a
computer.
Printer power switch

26 27
Before printing Before printing
Printer interior
Operation panel
The keys, LEDs and LCD are placed on the printer's operation panel as shown below. In addition, the operation panel
is also equipped with a buzzer to draw attention in case an error occurs or an invalid key is pressed.
POWER
HEATER MENU
CANCEL
SET
ORIGIN
ONLINE
ADJUST
MAINTENANCE
NOZZLE PRINT PH.RECOVERY
LED
Error LED (Orange)
Indicates whether an error has occurred.
ON: An error has occurred.
Blink: Warning state.
OFF: Normal (no error)
Media heater LED
(Green)
Indicates the status of the media heater.
- ON: The set temperature has been reached
- Blink: Currently heating
- OFF: Media heater is o
Ink LED (Green)
Indicates whether ink is remaining.
ON: Ink for all colors is present.
Blink: Ink near-end (The level of any color is low.)
OFF: No ink.
ONLINE LED (Green)
Indicates the online, oine, data reception, and
pause status.
- ON: Online
- Blink (slowly): In pause
- Blink (fast): Data reception
- OFF: Oine
Keys
CANCEL
Cancels entered parameters or returns back to the upper
menu.
ONLINE Switches between online and oine states, and puts the
printer in pause or resumes printing.
HEATER Enters heater control menu.
MENU
Used to display information about the printer and change
printer settings.
ADJUST
Used to enter the adjustment menu.
MAINTENANCE
Used to enter the maintenance menu.
NOZZLE PRINT
Used to perform a nozzle print.
PH.RECOVERY
Used to enter the cleaning menu.
Before printing Loading the media Adjustment Maintenance Advanced
operations Troubleshooting Menu tree Appendix
Carriage
Houses the print heads inside, and
prints image while moving over the
media.
Ink tray
Supports ink cartridges.
Media edge guards
Prevent print heads from being damaged by
deformed the media edges.
Platen
Transports the media.
The platen includes the suction fans and the
printheater to dry the ink.
Wiping unit
Removes foreign substances on
the print head’s nozzle surface.
Capping unit
Prevents the print head’s nozzles
from drying.
Power switch
Used to turn on or off the power of the
printer.
Keys
Use these keys to operate the menu of
the printer.
Refer to the table below.
Up, Down, Left, Right keys
Used to select menu options, switch
between menus (selection, increasing/
decreasing values), etc.
OK key
Used to confirm the menu and
parameters.
LCD
It shows the status of the printer and
displays the menu window (2 rows, 20
characters).
Buzzer
Sounds when an error occurs or an
invalid key is pressed, and warns of daily
maintenance and when the print heads
are uncapped.
LED
ON, blinking and OFF indicate the
status of the printer.

28 29
Before printing Before printing
To turn the printer on and o
The power supply must be 200 V.
CAUTION
Do not use any power cable other than the one supplied with the printer.
The supplied power cable is for 200 V AC only. Note that the plug shape diers from that for 100 V AC.
First turn the printer main power switch on, then use the power switch on the operation panel to turn the printer on
or o.
Supply side
Printer power switch Printer power inlet
Power-on procedure
1
Switch off ( O ) Conrm that the printer power switch at the
back of the printer is turned o (O). If on ( I ),
turn it o (O).
Plug one end of the supplied power cable
into the printer power inlet and the opposite
end into a power outlet.
2
Switch on ( | ) Turn on ( I ) the printer power switch at the
back of the printer.
Printer heater unit
The printer is equipped with three heaters for ink fusing and image quality stabilization.
• Print heater (front)
Penetrates ink into media to fuse the ink.
• Preheater (rear)
Preheats media.
• Afterheater (finishing)
Dries ink to stabilize print quality.
Media
* These three heaters are controlled independently.
The temperature of the heaters can be controlled from the operation panel, the RIP software and Cp_
Manager.
WARNING
Do not touch these heaters to avoid burn as they become hot.
Before printing Loading the media Adjustment Maintenance Advanced
operations Troubleshooting Menu tree Appendix

30 31
Before printing Before printing
3
POWER
HEATER MENU
CANCEL
SET
ORIGIN
ONLINE
ADJUST
MAINTENANCE
NOZZLE PRINT PH.RECOVERY
LORD MEDIA
Power ON/OFF switch
Press the power switch on the operation
panel.
The printer executes a self-diagnostic test and displays the
message to the left on the operation panel.
If an error message appears...
To recover the error, refer to When an error
message is displayed.
If the POWER LED on the operation panel does
not light even when the printer and heater power
switches at the rear of the printer and the power
ON/OFF switch on the operation panel are turned
on, the power supply may have a problem.
CAUTION
Except for emergency, turn o the power while the message PRINTER READY is displayed. If the power is turned o when
the printer is displaying INITIALIZING... or CLEANING, the ink may dribble, the print head may be damaged, or saved
parameters may be lost.
Power-o procedure
1
>EDIT MEDIA PRESETS
2
SELECT PRESET NO.
To turn o the power of the printer, keep the
power switch on the operation panel pressed
for 2 seconds.
The message shown above is displayed on the LCD to indicate that the shutdown process is being executed. The power
turns off after the shutdown procedure is finished.
To keep the print head in good condition during shutdown, the fill cap operation (state where the cap is filled with ink)
is performed. To quickly turn off the power, press the power switch while holding the CANCEL key to skip the fill cap
operation and turn off the power. However, executing the fill cap operation is generally recommended.
Notes
After turning the power o, wait at least 5 seconds before turning it back on.
To keep the print heads in good condition, the printer perform automatically and periodically the ll cap operation while in
standby mode. It is recommended to keep on the power switch on the operation panel during this operation.
To connect the USB cable
1
USB 2.0 cable (B-type connector)
USB connector
Connect the printer’s USB 2.0 cable to the
USB connector at the center of the printer
rear.
Important!
Use the supplied USB 2.0 cable.
For the USB connection and related systems, use
hubs and cables supporting USB 2.0. Note that
normal operation cannot be guaranteed if the
hubs, cables, and the other related devices are not
USB-compliant.
Use a cable of 5 m or shorter. If the connection
length exceeds 5 m, use hubs to extend the
connection. The hub quantity must be ve or less
in total. Note that normal operation cannot be
guaranteed if the cable exceeds 5 m, or if the cable
connection exceeds 5 m without hubs.
Before printing Loading the media Adjustment Maintenance Advanced
operations Troubleshooting Menu tree Appendix

32 33
Before printing Before printing
Online and oine
The printer operates in both online and oine states.
When the printer is in online:
- The printer prints the data sent from the computer’s Raster Image Process (RIP) software.
When the printer is in oine:
- The menu is operated with the operation panel keys.
The Online key switches between online and oine states.
When the MENU, ADJUST, MAINTENANCE, NOZZLE PRINT, or PH.RECOVERY key is pressed in online state, the
printer switched to oine to make menu operations possible.
Online
When the online LED is on, the printer is online.
Media of 1626 mm (64 inches) in width
Media name: PAPER
The number of the selected media: 01
PRINTER READY
01: PAPER / 1626mm
Online state (idle mode) display
When the online LED blinks, the printer is printing.
Print direction
BI: Bidirectional
UNI: Unidirectional
Density
ND: Normal density
HD: High density
Print mode
DRAFT
FAST PRODUCTION
PRODUCTION
STANDARD
QUALITY
HIGH QUALITY
MAX QUALITY
PRINTING
NORMAL ND BI
Online state (print mode) display
Oine
When the online LED is o, the printer is oine.
The message displayed on the panel when the printer switches to oine diers depending on the key that has been pressed.
When the ONLINE key is pressed:
OFFLINE
When the ADJUST key is pressed:
ADJUST
2
MEDIA ADVANCE
When the PH.RECOVERY key is pressed:
PH RECOVERY
2
NORMAL
When an operator call error is displayed...
When an operator call error ( pag e 173) is displayed, the printer may not operate even if the CANCEL key is pressed.
CP_Manager
The Printer supports the CP_Manager software which provides a general view of the printer status. The following
operations can be performed with CP_Manager™.
Panel operations
- Display the printer status
- Create media preset, input adjustment values
- Execute nozzle print, adjustment patterns print
- Maintenance time notice, maintenance operation
Additional functions
- Display operation guidance
- Display the instruction manual (PDF)
Printer
Computer
USB interface
Printer status display
Media preset
CP_Manager display example
Install CP_Manager™ using the CD-ROM supplied with the printer.
Before printing Loading the media Adjustment Maintenance Advanced
operations Troubleshooting Menu tree Appendix

3534 Before printing
Supported media
Vinyl
Vinyl is media with PVC-material surface. As generally vinyl is adhesive-backed, by removing the release paper on
the back you can stick the media easily. Depending on its gloss grade, the vinyl is classied into three categories:
glossy vinyl (with high gloss), matte vinyl (with no gloss), and semi-glossy vinyl (with medium gloss).
When the media is applied on some prints, a gray adhesive-backed vinyl is eective to avoid the prints seen through
the top media.
For backlit purpose application, the PVC material surface is sometimes transparent or translucent.
Banner
Banner is polyester fiber cloth media with both sides coated with synthetic plastic film such as PVC. As the
banner is water- and tear-resistant, it is used for tent canvas, construction wrap sheets, and inkjet-printed banner
advertisements.
Depending on its gloss grade, the banner is classied into three categories: glossy banner (with high gloss), matte
banner (with no gloss), and semi-glossy banner (with medium gloss).
Mesh banner (with liner)
Mesh banner is perforated banner media reinforced with mesh grid. As its open structure allows wind to permeate,
the mesh banner is wind- and tear-resistant, and withstands heavy wind.
Depending on whether liner (ink absorbing back sheet) is present, the mesh banner is classied into two categories:
backed and unbacked.
Backlit banner (FF)
Backlit banner exible face (FF) is translucent, that is, semi-transparent banner media. Thanks to that, it is used for
backlit signs inside light boxes.
Compared with an acrylic sign, the backlit banner is lightweight and easy to handle, wind- and tear-resistant, and
highly safe. it can withstand strong wind pressure.
Solvent printing coated paper
Solvent printing coated paper is media with the printing surface coated, on which solvent ink is cured vividly. Its
thickness depends on the product type.
When the media is applied on some prints, a blue back type is eective to avoid the prints seen through the top
media.
Before printing Loading the media Adjustment Maintenance Advanced
operations Troubleshooting Menu tree Appendix
Loading the media

36 37
Loading the media Loading the media
Loading the media on the printer
Procedure to load roll media
1
Open the front cover and place the right and
left edge guards at each extremity of the
platen. Close the front cover.
Notes
The media edge guards are put aside to avoid any
contacts with the roll ends when loading the media.
When using a media whose end is attached to the roll
tube with adhesive, this adhesive may adhere to the
paper guide or the platen. In this case, be sure to remove
all adhesive before loading the new media.
2
Move the left media holder fully to the left.
3
Move the right media holder fully to the right.
4
Install the media jack and media stand.
The media will be loaded from the left side, so
install the media lifter to the left side and the media
stand to the right side.
Install them considering the media width.
5
Load the media onto the media jack and
media stand.
Before printing Loading the media Adjustment Maintenance Advanced
operations Troubleshooting Menu tree Appendix

38 39
Loading the media Loading the media
Media orientation
<When the surface to be printed on is
at the outer side of the roll>
:printingsurface :printingsurface
<When the surface to be printed on is
at the inner side of the roll>
6
Turn the media jack’s handle clockwise to
raise the media until the roll tube is aligned
with the media holder.
7
Insert the left media holder into the roll tube.
Notes
Pay attention not to unwind the media or damage the
ends of the roll media when inserting it into the media
holder.
Insert as far as it goes to secure the roll tube to the
media holder.
8
Turn the media jack’s handle counter-
clockwise to remove the jack. Then install it
to the right side of the roll.
9
Adjust the roll level using the media jack and
insert the right media holder into the roll the
same way as you did for the left side.
10
Turn the media jack’s handle counter-
clockwise to lower and remove the jack. Then
put the media jack and the media stand away.
Note
If you leave the media jack or the media stand in place
under the roll media, the media may curl or be damaged
when back feeding it. Be sure to put them away.
11
Lift the pressure roller lever.
Note
The pressure roller lever has three positions (low,
medium, and high). Always put the lever in the highest
position when loading the media.
Before printing Loading the media Adjustment Maintenance Advanced
operations Troubleshooting Menu tree Appendix
Table of contents
Other SII Printer manuals

SII
SII IP-5610 User manual

SII
SII SLP720RT Series User manual

SII
SII IP-7900-02/03 User manual

SII
SII IP-7700-02 User manual

SII
SII DPU-3445-30A-E User manual

SII
SII IP-7900-20 User manual

SII
SII DPU-S445-00A-E User manual

SII
SII DPU-S245 Use and care manual

SII
SII IP-5520 User manual

SII
SII RP-E10 Series User manual

SII
SII IP-7900 User manual

SII
SII MP-A40 SERIES User manual

SII
SII DPU-S445 SERIES User manual

SII
SII SLP720RT Series User manual

SII
SII IP-6900 User manual

SII
SII DPU-S445 SERIES User manual

SII
SII RP-D10 Series User manual

SII
SII DPU-S445 SERIES User manual

SII
SII LTP3445 Use and care manual

SII
SII RP-B10 User manual