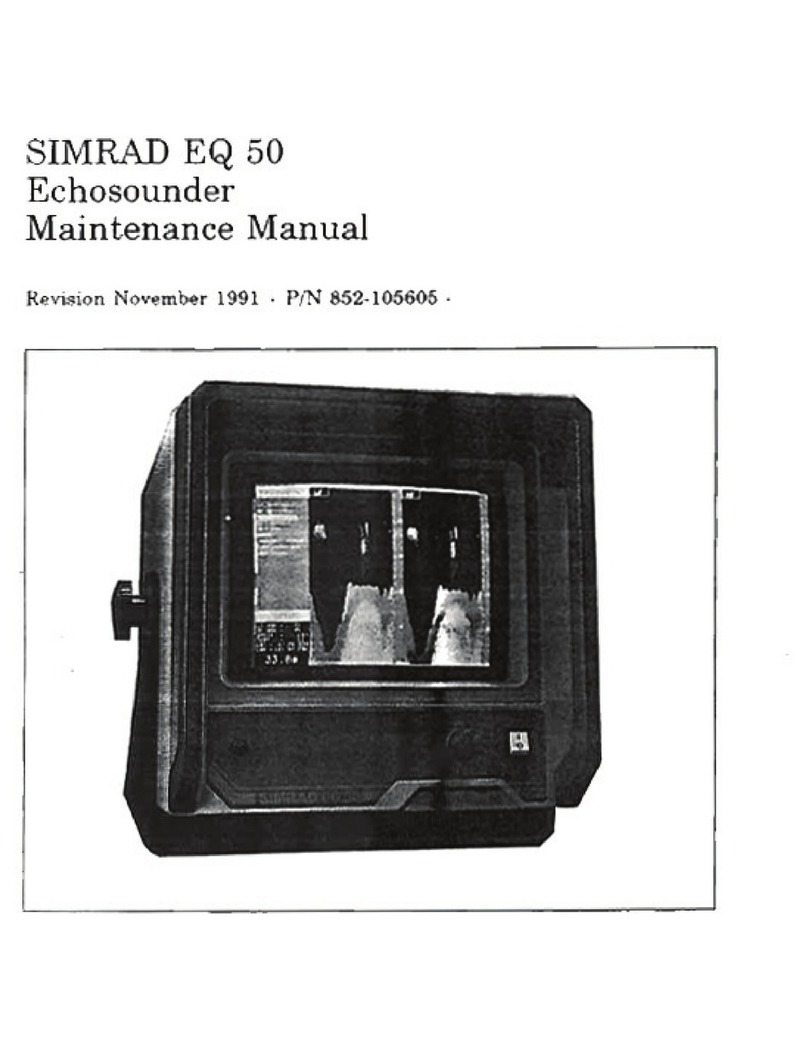
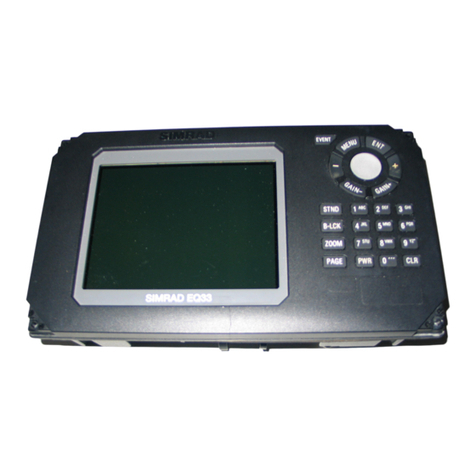
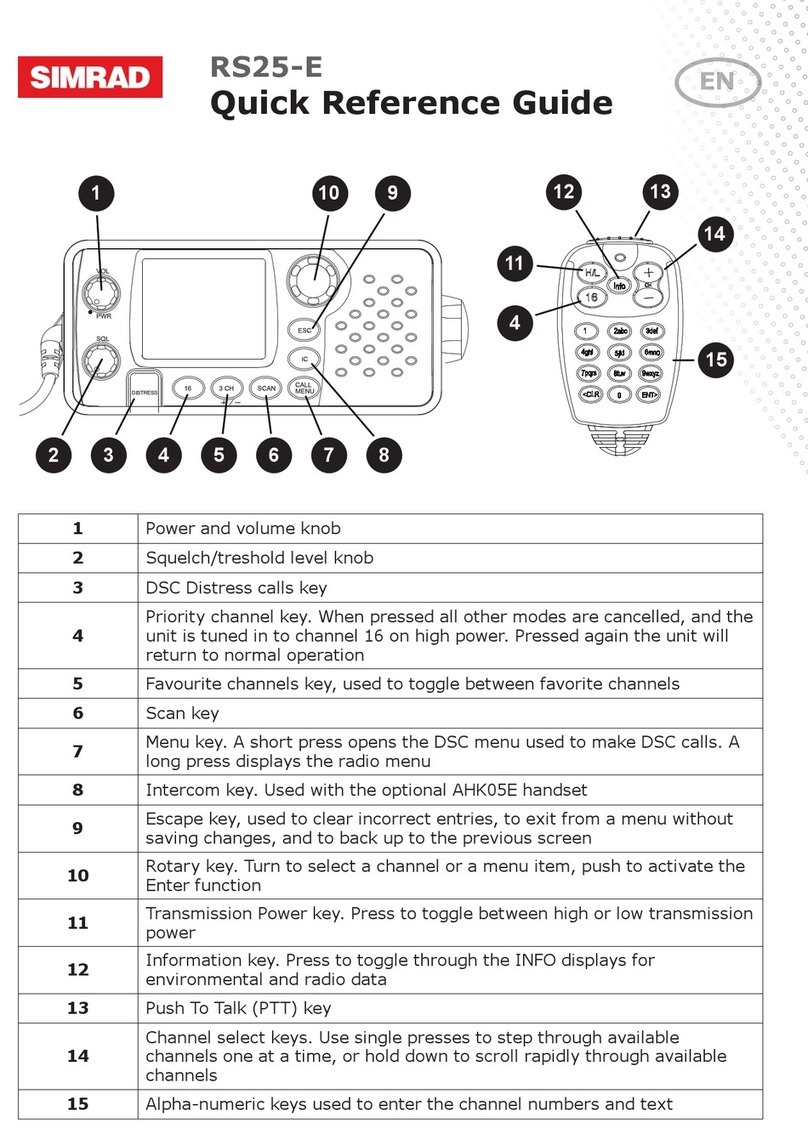
Simrad EQ44 Assembly instructions

M A N U A L
Simrad EQ44/54
Echosounder
183-3403-102 English 05082.20


EQ44/54 Echosounder Table of contents
Chapter 1 Introduction and safety summary
1.1 Introduction and system familiarization ...................................... 1-1
1.2 Safety summary ........................................................................... 1-2
1.3 How to get started ........................................................................ 1-3
1.3.1 Dedicated function keys............................................................... 1-4
1.3.2 Echosounder features ................................................................... 1-5
Chapter 2 Fundamentals and initial startup
2.1 Fundamentals of the display and page system ............................. 2-1
2.1.1 Example of how to exchange a page in the PAGE system ........... 2-2
2.1.2 Example of how to select a new display in a custom screen........ 2-2
2.2 Key functions ............................................................................... 2-3
2.3 Menu bar....................................................................................... 2-5
2.4 Menu layout..................................................................................2-6
2.5 Initial start-up............................................................................... 2-7
2.6 Turn power on............................................................................... 2-8
2.7 Turn power off.............................................................................. 2-8
Chapter 3 Echosounder operation
3. Echosounder operation................................................................. 3-1
3.1 Parts of an echosounder ............................................................... 3-2
3.2 How the echosounder works ........................................................ 3-3
3.3 Transducer beam width ................................................................3-4
3.4 Effects of the vessel’s speed ......................................................... 3-5
Chapter 4 STND menu
4.1 STND menu.................................................................................. 4-1
4.2 Shortcut to the pages in the STND echo-series ........................... 4-1
4.3 Standard echo display................................................................... 4-2
4.4 Variable range marker .................................................................. 4-3
4.5 Echo quick menu ..........................................................................4-4
4.6 Plot event mark on echo display...................................................4-4
4.7 Presentation setup......................................................................... 4-5
Chapter 5 B-LCK menu
5.1 B-LCK menu ................................................................................ 5-1
Chapter 6 ZOOM menu
6.1 ZOOM menu ................................................................................ 6-1

Table of contents EQ44/54 Echosounder
Chapter 7 SHIFT menu
7.1 SHIFT menu................................................................................. 7-1
Chapter 8 PILOT menu
8. PILOT menu................................................................................. 8-1
8.1 Highway display........................................................................... 8-1
8.1.1 Navigation setup........................................................................... 8-1
8.2 Position display............................................................................. 8-3
Chapter 9 Miscellaneous menu
9. Miscellaneous menu..................................................................... 9-1
9.1 Decca lanes................................................................................... 9-1
9.2 Loran C......................................................................................... 9-3
9.3 Depth & temperature diagram ..................................................... 9-5
Chapter 10 Setup menu
10. Setup menu................................................................................. 10-1
10.1 Echosounder setup...................................................................... 10-1
10.2 Pilot/Position setup.....................................................................10-4
10.3 Speed alarm, units & language .................................................. 10-5
10.4 Interface setup ............................................................................ 10-7
10.4.1 Description of sentences............................................................10-13
10.5 Palette setup...............................................................................10-14
10.6 Factory settings .........................................................................10-15
10.7 QuickGuide ...............................................................................10-17
Chapter 11 Installation and service
11. Installation and service ...............................................................11-1
11.1 Installation notes .........................................................................11-1
11.2 Installation of EQ44 ....................................................................11-3
11.3 Installation of EQ54 ....................................................................11-5
11.4 Location for display unit .............................................................11-7
11.5 Electrical connections .................................................................11-8
11.5.1 Power supply connections .........................................................11-10
11.5.2 Fuse............................................................................................ 11-10
11.5.3 Transducer connection ..............................................................11-10
11.5.4 Interface connection..................................................................11-12
11.5.5 Universal connection cable........................................................11-13
11.6 Basic transducer and cable information.................................... 11-14
11.6.1 Transducers (optional)...............................................................11-15

EQ44/54 Echosounder Table of contents
11.6.2 Determining the position for the transducer ............................. 11-18
11.7 Preventive maintenance.............................................................11-20
11.8 Repair and service.....................................................................11-20
11.9 Troubleshooting.........................................................................11-21
11.10 Specifications ............................................................................11-22
Appendix A Glossary of terms...................................................................A-1
Index .............................................................................. end of manual
CE Declaration.......................................................................... end of manual
International warranty .............................................................. end of manual
List of Simrad distributors........................................................ end of manual

Table of contents EQ44/54 Echosounder

EQ44/54 Introduction and safety summary Chapter 1-1
1.1 Introduction and system familiarization
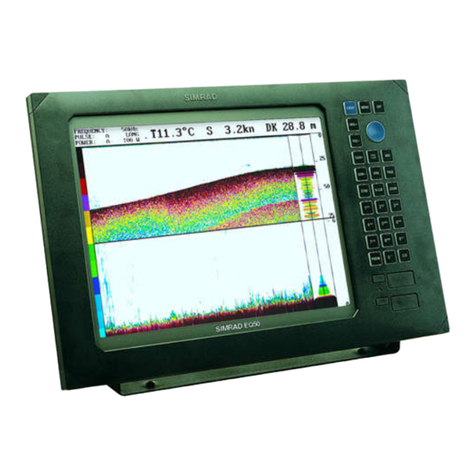
Congratulations on your purchase of SIMRAD EQ44/54 Echosounder and
Fishfinder - a high performance echosounder in a unique slim-line design
with a bright 10” ATFT/TFT (EQ44) or 15” TFT (EQ54) color display.
The EQ44/54 is both an echosounder system with selectable frequency i.e. 38,
50 or 200 kHz, providing an impression of what is to be found in the water
under the vessel, and it is a repeater for navigational data from connected GPS
receiver.
The SimNet data and control network provides high speed data transfer and
control between Simrad products that are integrated as a total navigation,
steering and communication system on board.
How to use this manual?
This manual is written for the products: EQ44 and EQ54, which share the
same type of software. From hereon, these models are referred to as: EQXX.
It is a good idea if you make yourself familiar with the key functions, menu
structure and rotation of pages (screens) described in chapter 2 before you
start out, and then proceed with section 2.5 Initial start-up. For quick location
of a certain term, please check the “Glossary of terms” and the “Index” at the
back of the manual. Also, “How to get started” further on in this chapter will
give you a quick introduction to some of the features you have access to in
your new echosounder.
The display examples shown in this manual are not always an exact copy of
what you will see on the screen, as the presentation depends on your system
configuration and choices of setup.
How to interpret special marked key symbols etc. in the manual:
+/-
Either the + (plus) or - (minus) key may be applied.
0-9
Alpha-numeric keys for insertion of figures.
A-Z
Alpha-numeric keys for insertion of letters.
Emphasizes important points.
1,3
Indicates that you should press the keys [1] and [3] to obtain what is
written in italic next to the key.

Chapter 1-2 EQ44/54 Introduction and safety summary
1.2 Safety summary
Precaution: Do not open the equipment, only qualified persons should work
inside the equipment. If the glass in the screen breaks, be careful not to get cut
on the sharp edges of the glass pieces.
The lifetime of the internal battery is minimum 5 years. If not exchanged
before it goes flat, all data in the unit’s memory will be lost. We strongly
recommend that you have the battery exchanged at your local Simrad work-
shop max. 5 years from date of purchase.
Power source, fuse and power cable: Check that the DC power supplied to
the unit is within the range of 10 to 32 volts. Note that the appropriate fuse
must be employed (see the fuse rating in section 11.10 Specifications). Ensure
that the power cord is firmly attached.
Grounding: To reduce electrical interference and risk of electrical shock,
properly ground the unit to the ship’s ground using the ground screw at the
rear of the unit. Good grounding should also be exercised for any equipment
connected to the EQXX.
Quality service personnel: The EQXX is sealed and does not contain any
user serviceable parts. Opening of the unit will void its warranty. Touch-
ing electrical parts inside may cause bodily harm. If the unit is not working
properly, check sections 11.7 Preventive maintenance, 11.8 Repair and service,
and 11.9 Troubleshooting. If your EQXX requires servicing or repair, call your
authorized SIMRAD dealer.
Cleaning:
Do not use any kind of strong solvents e.g. spirit, alcohol, gasoline or oils.
Glossary of terms: If you have never used an echosounder before or if you are
unsure of how a term is used in this manual, then turn to Appendix A - Glos-
sary of terms.
Default settings: All user implemented data in the EQXX can be erased by
making a reset of the unit and thus return to factory default settings.
Software: The software version of the EQXX (see start-up display) should
always be informed in a service situation.

Automatic input source setup
Interface has not been set up!
To start automatic input
source setup, make sure that
all connected products are
turned ON, and press ENT.
Start
ENT
∆
∆
EQ44/54 Introduction and safety summary Chapter 1-3
1.3 How to get started
When starting up for the very first time, the first time after loading
a new software or after a master reset: Make sure that all hardware
installation and electrical connections are completed in accordance
to the installation instructions.
PWR
Press and hold the [PWR] key until you have a picture on the screen
The system will perform a software update and check for com-
munication activity. When finished, a new start-up window will be
presented on the screen:
After making sure that all connected products are turned ON:
ENT
Press [ENT] to start automatic input source setup, - if a new product
is connected later on, refer to section 10.4 Interface setup.
New window: Automatic input source setup listing Data type, Group
and Source of connected units.
ENT
Press [ENT] to continue
PAGE
Press [PAGE] to scroll through a quick guide which informs of the
use of the keys and where you can enter owner’s setup, etc.
- the quick guide is also accessible via [MENU], [7], [6].
ENT
Press [ENT] when ready to assume normal operation
- go to [MENU], [7], [3] if you wish to make adjustments to the
interface setup.

Chapter 1-4 EQ44/54 Introduction and safety summary
To call up an echo display will require that the connected transducer
type has been selected in the Echosounder setup - [MENU],[7],[STND].
1.3.1 Dedicated function keys
STND
Press [STND] to call up the standard echo display.
Long press will toggle between echo, dual frequency, and custom
screens.
B-LCK
Press [B-LCK] to call up the bottom lock display.
Long press will toggle between echo, dual frequency, and custom
screens.
ZOOM
Press [ZOOM] to call up the zoom display.
Long press will toggle between echo, dual frequency, and custom
screens.
SHIFT
Press [SHIFT] to call up the shift display.
Long press will toggle between echo, dual frequency, and custom
screens.
PAGE
Press the [PAGE] key to toggle between the current active pages
under the main function keys. Press for two seconds to start auto-
matic rotation of these pages. Press any key to return to normal
operation.

EQ44/54 Introduction and safety summary Chapter 1-5
1.3.2 Echosounder features
A-scope - Press [ENT], [2] to toggle A-scope on/off. Echoes are displayed in a
‘bar-graph’ format. The strength of the actual echo is indicated by both width
and color intensity.
Change frequency - Press [ENT], [1] to toggle between e.g. 50 and 200 kHz.
Gain - Adjust gain with the [GAIN-] and [GAIN+] keys to just below the
point where you begin to see speckles of ‘noise’ on the screen.
Range - Select range by the numeric keys 1-9, or adjust with the +/- keys.
Key 0 will select Auto Range.
Bottom expansion* - Press [B-LCK] to call up the bottom lock display.
Activate bottom expansion to expand the view of the bottom in the
echosounder display.
VRM expansion* - Press [ZOOM] to call up the zoom display. Activate VRM
expansion to expand the view near the VRM - Variable Range Marker - in the
echosounder display. Use the up/down cursor to activate and move the VRM
line. Turn off the VRM line with [CLR].
Shift display* - Press [SHIFT] to call up the shift display when operating
in deep waters. Select the range for an expansion window. The expansion
window can automatically follow a changing bottom or be set manually by the
+/- keys.
*Return to standard echosounder display by pressing [STND].
Echo setup (presentation) - Press [ADJ] from echo display to access the setup
display for either 38, 50 or 200 kHz. Press [ENT] to confirm changes, or leave
the setup without having made any changes by pressing [MENU].
Echosounder setup - Press [MENU], [7], [STND] when you need to make
any general settings, selecting a transducer or selecting demo mode etc.
Transmit power off - Press [ENT], [STND] to stop transmission in order to
observe noise picked up by the transducer or to reduce power consumption.

Chapter 1-6 EQ44/54 Introduction and safety summary

B-LCK display ZOOM displaySTND display SHIFT display
EQ44/54 Fundamentals & initial start-up Chapter 2-1
2.1 Fundamentals of the display and page system
The EQ44/54 Echosounder has a multi-function screen and data
presentation system with full screen and different types of split
screens. The series of pages under the function keys (situated in the
left column of the keypad) will in most situations be sufficient infor-
mation for the operator.
In split screens consisting of up to four displays, the active display
is indicated by a solid red frame. Use the [WIN] key to clockwise
toggle between which display on the screen is active. Only active
displays are operable.
The [PAGE] key differs from the other function keys. There are four
pages under the [PAGE] key which can be set up to the presentation
you prefer by exchanging an existing display in the PAGE system
with a new one selected from a function key or via the menu - see
next page. Single press on the [PAGE] key will toggle between the
active pages under the function keys e.g.:

Chapter 2-2 EQ44/54 Fundamentals & initial start-up
Long press on the [PAGE] key will start
a rotation of the four pages in intervals of
5 seconds (increase/decrease the time in
[MENU], [7], [2]). Press any key to stop
rotation.
2.1.1 Example of how to exchange a page in the PAGE system
The four pages in the PAGE system are collected from the STND,
B-LCK, ZOOM and SHIFT menus in the sequence of which the
function keys appear on the keypad ie. the first page is from the
STND function, the second page is from the B-LCK function, the
third page is from the ZOOM function, and the fourth page is from
the SHIFT function. This sequence can not be changed, only the
choice of display collected from each function can be changed e.g.:
PAGE
Press the [PAGE] key until the full screen standard display appears
MENU
Call up the menu bar, and...
1,3
collect the Dual frequency display
- or you can toggle between the available displays in the STND func-
tion by pressing (long press) the [STND] key repeatedly.
The same applies for the other three pages in the PAGE system ie.
press the [PAGE] key until a display from the B-LCK, ZOOM or
SHIFT function appears and then collect a new display from the
appropriate menu.
The display sequence under the function keys is the same as the
display sequence in the matching menu.
2.1.2 Example of how to select a new display in a custom screen
In custom screens with multiple window combinations, all dis-
plays, which are not main function displays, are exchangeable. It is
also possible to change the right half of the screen from half screen
window to two quarter windows and vice versa. Example:
MENU
Call up the menu bar, and...

EQ44/54 Fundamentals & initial start-up Chapter 2-3
Highlight a function e.g. Depth & temperature diagram in the MISC
menu.
WIN
Press [WIN] several times to check the screen image (situated to the
far right in the top line of the menu bar) which windows the function
can be placed into
ENT
Press [ENT] to enter the highlighted function into the highlighted
window
If the function text in the menu is red, the display will not be avail-
able for the selected window.
2.2 Key functions
Some of the key functions are general and can be applied at any
time, other key functions are related to a certain menu(s) and can
only be applied when in the appropriate menu.
EVENT
Inserts a vertical mark at current ping and sends out WPL via NMEA
to connected chartplotter.
MENU
Turns the menu bar on/off. Exits any data display without taking any
action.
ENT
Confirms insertion and editing of data. Calls up quick menu.
Moves cursor in data displays. Moves left/right/up/down in the menu
system. Adjusts gain (left/right). Activates and moves VRM (up/
down) in echo display.
+/-
Changes echosounder range i.e. + (plus) for larger range and -
(minus) for smaller range. Toggles between available values.
GAIN
Adjusts echosounder gain. Optimum adjustment: Press [GAIN+] till
noise appears in ‘water’, then press [GAIN-] till noise just disappears
again.
STND
Shortcut to standard echo displays. Long press will toggle between
standard echo display in full screen, Dual frequency, and two
custom screens.

Chapter 2-4 EQ44/54 Fundamentals & initial start-up
B-LCK
Shortcut to bottom lock displays. Long press will toggle between
bottom lock display in full screen, Dual frequency, and two custom
screens.
ZOOM
Shortcut to zoom display. Long press will toggle between zoom dis-
play in full screen, Dual frequency, and two custom screens.
SHIFT
Shortcut to shift display. Long press will toggle between shift dis-
play in full screen, Dual frequency, and two custom screens.
PAGE
Toggles between active pages under the four main function keys i.e.
[STND], [B-LCK], [ZOOM] and [SHIFT]. Long press starts auto-
matic rotation of these pages. Press any key to stop rotation.
ADJ
Gives access to setup displays related to active display. Scrolls
through adjustable parameters.
VRM
Toggles VRM - Variable Range Marker - on/off.
WIN
Toggles between active windows in split screen. The active window
will have a solid red frame. Only active windows are operable.
0-9
The alphanumeric keys inserts and selects data in data displays.
Keys 1-9 are also Quick-range keys, which each represent a fixed
echosounder range. Key 0 will activate auto range.
CLR
Turns off VRM line in active display. Deletes data in enter or edit
mode.
PWR
Power on - hold key depressed till you have a picture on the screen.
Calls up a window where you can adjust the brightness in the screen,
background light in keypad, and select Daylight displays, Night
display or custom made color palettes. Hold two seconds to turn the
power off.

EQ44/54 Fundamentals & initial start-up Chapter 2-5
2.3 Menu bar
MENU
Toggles the menu bar on /off
To fit the complete menu bar across the screen, some of the menus
have been abbreviated. However, the last selected menu will be high-
lighted, and if it’s an abbreviation of the menu, then the complete
menu title is written above the menu bar.
PILOT
1
STND
2
B-LCK
3
ZOOM
4
SHIFT
5
PILOT
6
MISC
7
SETUP
1
Highway
2
Position
Having selected e.g. 5:PILOT from the menu bar, its associated menus will
drop down. Key in the number next to the function you wish to call forward,
or use the cursor key to highlight the function and press [ENT].
If you want to switch to a different menu, use the cursor key left/right to move
to the adjacent menu.
Most functions in the menus are general, and can be called forward at any
time. Functions not currently available will have a different color from the rest
of the functions. Not all functions are available in any window size i.e. full
screen, half screen or quarter window. Use the [WIN] key to toggle between
the windows in which the highlighted function can be presented. Keep an eye
on the functions in the menu to see how they may change color as you toggle
from window to window.
The menu bar will disappear from the screen at the selection of a function, or
by pressing the [MENU] key. Besides, if not used, it automatically turns off
after 30 seconds.
WIN

Chapter 2-6 EQ44/54 Fundamentals & initial start-up
2.4 Menu layout
1
STND
2
B-LCK
3
ZOOM
1
50kHz
1
50kHz
1
50kHz
2
200kHz
2
200kHz
2
200kHz
3
Dual frequency
3
Dual frequency
3
Dual frequency
4
Custom screen 1
4
Custom screen 1
4
Custom screen 1
5
Custom screen 2
5
Custom screen 2
5
Custom screen 2
4
SHIFT
5
PILOT
6
MISC
1
50kHz
1
Highway
1
Decca lanes
2
200kHz
2
Position
2
Loran C
3
Dual frequency
3
Depth & temperature diagram
4
Custom screen 1
5
Custom screen 2
7
SETUP When selecting a sub-menu in the
SETUP menu, the display will always
appear in a pop-up window, so once you
have accepted the changes or decided to
just exit the display, then the display will
disappear from the screen.
STND
Echosounder setup
1
Pilot/Position setup
2
Speed alarm, units & language
3
Interface setup
4
Palette setup
5
Factory settings
6
QuickGuide

Automatic input source setup
Interface has not been set up!
To start automatic input
source setup, make sure that
all connected products are
turned ON, and press ENT.
Start
ENT
∆
∆
EQ44/54 Fundamentals & initial start-up Chapter 2-7
2.5 Initial start-up
When starting up for the very first time, the first time after loading
a new software or after a master reset: Make sure that all hardware
installation and electrical connections are completed in accordance
to the installation instructions.
PWR
Press and hold the [PWR] key until you have a picture on the screen
The system will perform a software update and check for com-
munication activity. When finished, a new start-up window will be
presented on the screen:
After making sure that all connected products are turned ON:
ENT
Press [ENT] to start automatic input source setup, - if a new product
is connected later on, refer to section 10.4 Interface setup.
New window: Automatic input source setup listing Data type, Group
and Source of connected units.
ENT
Press [ENT] to continue
PAGE
Press [PAGE] to scroll through a quick guide which informs of the
use of the keys and where you can enter owner’s setup, etc.
- the quick guide is also accessible via [MENU], [7], [6].
ENT
Press [ENT] when ready to assume normal operation
- go to [MENU], [7], [3] if you wish to make adjustments to the
interface setup.

Chapter 2-8 EQ44/54 Fundamentals & initial start-up
PWR
Press [PWR] again to adjust the lighting in the screen and select day
or night display etc., move around in display by means of the cursor
key and change settings with +/- keys, and...
ENT
Confirm with [ENT]
Customizing the EQXX to suit individual needs can be done as you
go along i.e. choose a different color for the display background,
text, menu, etc. But to start out it will be wise to select the display
language you prefer to use:
MENU
Call up the menu bar, and...
7,2
press [7], [2] to call up the language display
Press up on the cursor to go to the bottom line in the display
+/-
Select language
ENT
Confirm entry
To call up an echo display will require that the connected transducer
type has been selected in the Echosounder setup - [MENU],[7],[STND].
2.6 Turn power on
Starting up for the first time, or after loading a new software, or
after a master reset - see section 2.5. Starting up at any other time:
PWR
To turn on the EQXX, press and hold the [PWR] key until you have a
picture on the screen
ENT
Press [ENT] when the system is ready
2.7 Turn power off
PWR
Call up INFO window, and...
PWR
Press and hold until screen turns black
The EQXX is now turned off. All the data and setups are saved and
stored in the internal memory and, of course, will be available next
time the unit is turned on.
This manual suits for next models
1
Table of contents
Other Simrad Marine Equipment manuals

Simrad
Simrad FU80 User manual

Simrad
Simrad RF40 User manual

Simrad
Simrad EK80 User manual

Simrad
Simrad ER60 - REV B User manual

Simrad
Simrad EY500 User manual

Simrad
Simrad SN90 User manual

Simrad
Simrad EQ42 User manual

Simrad
Simrad FS70 - REV 3 User manual

Simrad
Simrad CS90 User manual

Simrad
Simrad NSS evo2 Quick start guide

Simrad
Simrad PI32 User manual

Simrad
Simrad AP48 User manual

Simrad
Simrad PI HBU - REV A User manual

Simrad
Simrad CE34 ChartSounder User manual

Simrad
Simrad AP70 User manual

Simrad
Simrad AP24 User manual

Simrad
Simrad IS20 Combi User manual

Simrad
Simrad ES70 - REV A User manual

Simrad
Simrad SR15 User manual

Simrad
Simrad ES80 User manual