Skyfood SSI-13G User manual

Data de Correção: 09/07/2014
UG0176 - INGLÊS
- BESIDES THIS EQUIPMENT, A COMPLETE RANGE OF OTHER PRODUCTS ARE MANUFACTURED, CONSULT OUR DEALERS
- DUE TO THE CONSTANT IMPROVEMENTS INTRODUCED TO OUR EQUIPMENTS, THE INFORMATION CONTAINED IN THE PRESENT
INSTRUCTION MANUAL MAY BE MODIFIED WITHOUT PREVIOUS NOTICE.
Skyfood Equipament LLC
OFFICE
11900 Biscayne Blvd. Suite 512 - North Miami, FL 33181 - USA
1-800-503-7534 | 305-868-1603
www.skyfood.us
SLICER
SSI-13G
INSTRUCTIONS MANUAL

2
1. INTRODUCTION ................................................................................. 3
1.1 Technical CharacterisƟcs ........................................................................................ 4
2. GENERAL NOTES AFTER THE RECEIPT OF THE MACHINE .....................5
2.1 Machine idenƟficaƟon........................................................................................... 5
2.2 InstallaƟon ............................................................................................................ 5
2.3 Preliminary cleaning .............................................................................................. 5
3. ELECTRICAL SUPPLY............................................................................ 6
4. DEFINITIONS...................................................................................... 7
5. SLICER FUNCTIONING AND USE.......................................................... 8
5.1 How to load the product to cut.............................................................................. 8
5.2 How to load short products (last slice) ................................................................... 8
6. BLADE SHARPENING ........................................................................ 10
7. MAINTENANCE ................................................................................ 11
7.1 Cleaning................................................................................................................11
7.3 Guides lubricaƟon.................................................................................................14
8. GENERAL SAFETY PRACTICES............................................................ 15
8.1 Basic OperaƟon PracƟces......................................................................................15
8.3 RouƟne InspecƟon................................................................................................16
8.2 Safety Procedures and Notes before Switching the Machine ON ...........................16
8.4 OperaƟon .............................................................................................................17
8.5 AŌer Finishing The Work.......................................................................................17
8.6 Maintenance ........................................................................................................17
8.7 Warning................................................................................................................18
9. ELECTRICAL DIAGRAM ..................................................................... 19
SKYFOOD EQUIPMENT LLC - SERVICE ................................................... 20
SKYFOOD’S LIMITED WARRANTY ......................................................... 20
SUMMARY ___________________________________________________________
___________________________________________________________
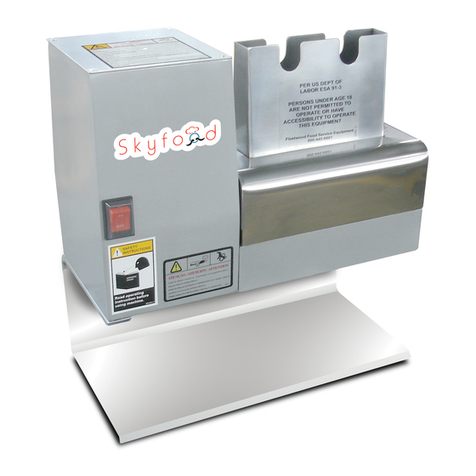
___________________________________________________________
___________________________________________________________
___________________________________________________________
___________________________________________________________
___________________________________________________________
___________________________________________________________
___________________________________________________________
___________________________________________________________
___________________________________________________________
___________________________________________________________
___________________________________________________________
___________________________________________________________
___________________________________________________________
___________________________________________________________
___________________________________________________________
___________________________________________________________
___________________________________________________________
___________________________________________________________
___________________________________________________________
___________________________________________________________
___________________________________________________________
___________________________________________________________
___________________________________________________________
___________________________________________________________
___________________________________________________________
___________________________________________________________
___________________________________________________________
___________________________________________________________
___________________________________________________________
___________________________________________________________
___________________________________________________________
___________________________________________________________
___________________________________________________________
___________________________________________________________
___________________________________________________________

22 3
1. INTRODUCTION
Dear Customer,
The slicing machine is manufactured in accordance with the EEC 2006/42 Machinery
DirecƟve.
The following safety rules regulate the manufacture of the machines:
EN 1974 Slicing machines: Safety and hygiene
specificaons
EN 60204 Electrical equipment of machines: Part 1 General requirements
89/109/EEC Direcves for the materials and things desned to come into contact with
food
Rule CE n. 1935/2004 for the materials and things desned to come into contact with food
2004/108/EEC Direcve on Electromagnec Compability (EMC)
2006/95/EEC Direcve on low voltage
2002/95/CE (RoHS - Restricon of Hazardous Substances).
The EEC DeclaraƟon of Conformity and the circuit diagram are enclosed in this user’s
handbook.
We recommend reading carefully this handbook for a correct installaƟon and use of the
machine.
We hope you will appreciate our products performances.

4
TABLE 01
CHARACTERISTICS UNIT SSI-13G
Voltage V 120
Frequency Hz 60
Power Rang W 350
Thickness Control mm 0 - 20
Ain7
Bin10
Cin11
Din9
Ein20
Fin17
Gin26
Hin22
Iin28
Lin35
Blade Diameter in 13
Net Weight lb 94
Shipping Weight lb 114
1.1 Technical CharacterisƟcs
21

20 5
The machine is delivered in its packing.
Aer the receipt of the machine, check that the packing is intact and that the slicer
corresponds with the model in demand.
Standard 2002/96/CE WAEE: Give the machine back to the manufacturer to manage its
disposal according to the rules.
2.1 Machine idenƟficaƟon
In any communicaon with the manufacturing company always quote the serial number
indicated on the idenficaon label of the machine.
2.2 InstallaƟon
The slicer must be placed on a plane, horizontal, anskid and stable surface, fit for carrying
its weight. The recommended height of the worktop is about 800 mm. Check there are no
obstacles for the product holder stroke.
2.3 Preliminary cleaning
Clean offthe protecve oil from the slicer.
2. GENERAL NOTES AFTER THE RECEIPT OF THE MACHINE

6
3. ELECTRICAL SUPPLY
Check that the voltage corresponds to the label data.
1 - Connect the machine to the socket.
2 - Check that the blade cover fastener handle is ght screwed.
3 - Check that the blade sharpener is lowered and the protecve cover is closed.
4 - Press the ON pushbuon to start the blade rotaon.
5 - The blade must rotate in thedirecon indicated by the arrow
19
9. ELECTRICAL DIAGRAM

18
8.7 Warning
Electrical or mechanical maintenance has to be undertaken by qualified personnel. The
person in charge of maintenance has to be sure that the machine is under TOTAL SAFETY
condions when working.
7
4. DEFINITIONS
1 - Control Pushbuons
2 - Slice Thickness Control
3 - Product Holder Clamping Handle
4 - Product Holder
5 - Pusher
6 - Blade Cover
7 - Blade
8 - Slice Thickness Plate
9 - Slice Deflector
10 - Blade Cover Fastener Handle
11 - Integrated Blade Sharpener Device

8
5. SLICER FUNCTIONING AND USE
WARNING
Do not use your hands to push the products towards the blade.
WARNING
The following products are not sliceable:
- Inedible products
- Products with bones
- Frozen products
Check that the slicer is offand posion the slice thickness control on zero.
5.1 How to load the product to cut
1 - Place the product to cut against the product holder and the thickness plate sides.
2 - Lay the last slice device on the product to cut, far from the slice thickness plate.
The product is fed to the slice thickness plate by gravity, this makes the cut easier.
3 - Rotate the slice thickness control onto the cung thickness you wish.
4 - Press the ON pushbuon to start the blade.
5 - At constant speed feed the product holder to the blade stroke end then return to
the operator and repeat the operaon.
6 When the work is over, pull the product holder towards the operator, press the “0”
buon to turn the blade offand rotate the slice thickness control on zero.
5.2 How to load short products (last slice)
Check that the slicer is offand posion the slice thickness control on zero.
1 - Place the product to be cut against the wall of the product holder and the slice thickness
plate.
2 - Push the goods against the slice thickness plate using the last slice device.
3 - Rotate the slice thickness control onto the cung thickness you wish.
17
IMPORTANT
Always remove the plug from the socket in any emergency situaƟon.
signs of wearing.
When checking the tension of belts or chains DO NOT insert your fingers between belts
and pulleys, nor between the chains and gears.
Check protecons and safety devices to make sure they are working properly.
8.4 OperaƟon
8.4.1 Warnings
Do not use the machine with long hair that could touch any part of the machine. This might
lead to a serious accident. Tie your hair up well and/or cover it with a scarf.
Only trained or skilled personnel shall operate this machine.
Never touch turning parts with your hands or any other way ,
NEVER operate the machine without any original safety devices under perfect condions.
8.5 AŌer Finishing The Work
8.5.1 Precauons
Always TURN THE MACHINE OFF before cleaning by removing the plug from the socket.
Never clean the machine unless it has come to a complete stop.
Put all the components back to their funconal posions before turning the machine ON
again.
Check the level of oil.
Do NOT insert your fingers in between belts and pulleys nor chains and gears.
8.6 Maintenance
8.6.1 Danger
Any maintenance with the machine in working situaon is dangerous. TURN IT OFF BY
PULLING THE PLUG OFF THE SOCKET DURING MAINTENANCE.

16
* Avoid mechanical shocks, once they may cause damages or bad funconing.
* Avoid water, dirt or dust contact to the mechanical and electrical components of the
machine.
* DO NOT change the standard characteriscs of the machine.
* DO NOT remove, tear offor maculate any safety or idenficaon labels stuck on the
machine. If any labels have been removed or are no longer legible, contact your nearest
dealer for replacement.
8.2 Safety Procedures and Notes before Switching the Machine ON
IMPORTANT
Carefully read ALL INSTRUCTIONS of this manual before turning the machine ON.
Be sure to well understand all the informaƟon contained in this manual. If you
have any quesƟon contact your supervisor or your nearest Dealer.
8.2.1 Danger
An electric cable or electric wire with damaged jacket or bad insulaon might cause
electrical shocks as well as electrical leak. Before use, check the condions of all wires and
cables.
8.2.2 Advices
Be sure to well understand all the informaon contained in this manual. Every operaon
funcon or procedure has to be thoroughly clear.
Before using any commands (switch, buons, lever), be sure it is the correct one. In case
of doubt, consult this manual.
8.2.3 Precauons
The electric cable has to be compable with the power required by the machine.
Cables touching the floor or close to the machine need to be protected against short
circuits.
The oil reservoirs have to be filled unl the indicated level. Check and refill if necessary.
8.3 RouƟne InspecƟon
8.3.1 Advice
When checking the tension of the belts or chains, DO NOT insert your fingers between the
belts and the pulleys and nor between the chain and the gears.
8.3.2 Precauons
Check the motor and sliding or turning parts of the machine in case of abnormal noises.
Check the tension of the belts and chains and replace the set when belts or chains show
9
4 - Press the ON pushbuon to start the blade.
5 - At constant speed feed the product holder to the blade stroke end then return to the
operator and repeat the operaon.
6 - When the work is over, pull the product holder towards the operator, press the “0”
buon to turn the blade offand rotate the slice thickness control on zero.

10
6. BLADE SHARPENING
Whenever the cut is not sasfactory, sharp the blade. The me interval between a
sharpening and the following depends on the intensity of use of the slicer and on the kind
of food you cut.
Replace the blade when the diameter becomes 10 mm less than the nominal diameter.
For the replacement, ask the assistant service closest to you.
WARNING
The replacement of the blade is a dangerous operaƟon.
If the sharpening is not appropriate, replace both grindstones.
Contact a customer service.
1. Clean the blade removing any greasy residue.
2. Make sure that the machine is off.
3. Rotate the slice thickness control to zero to make sure that the blade is protected by the
slice thickness plate.
4. Slip offcompletely the sharpener and spin it 180 degrees.
5. Put the sharpener device.
Push the green buon to start the machine.
7. Sharpening: Press the A sharpening wheel buon for about 10-15 seconds, then press
simultaneously also the B grinding stone buon for two seconds.
Contemporaneously loosen the two buons.
8. Press the red stop pushbuon.
Liand rotate 180 degrees the sharpener and reallo-cate it into its inial posion.
Cleaning of the grinding wheels
To obtain an excellent sharpening the grinding wheel must always be clean.
Remove dirt and grease with alcohol and the supplied special brush.
15
The following safety instrucons are addressed to both the operator of the machine as
well as the person in charge of maintenance.
The machine has to be delivered only in perfect condions of use by the Distributor to the
user. The user shall operate the machine only aer being well acquainted with the safety
procedures described in the present manual. READ THIS MANUAL WITH ATTENTION.
8.1 Basic OperaƟon PracƟces
8.1.1 Dangers
Some areas of the electric device have parts that are connected or have parts connected
to high voltage. These parts when touched may cause severe electrical shocks or even be
lethal.
Never touch manual commands such as switches, buons, turning keys and knobs with
your hands wearing wet clothes and/or wet shoes. By not following these instrucons
operator could be exposed to severe electrical shocks or even to a lethal situaon.
8.1.2 Warnings
* The operator has to be well familiar with the posion of ON/OFF Switch to make sure the
Switch is easy to be reached when necessary.
* Before any kind of maintenance, physically remove plug from the socket.
* Provide space for a comfortable operaon thus avoiding accidents.
* Water or oil spilled on the floor will turn it slippery and dangerous. Make sure the floor
is clean and dry.
* Before using any commands (switch, buons, lever), be sure it is the correct one. In case
of doubt, consult this manual.
* Never touch any manual commands (switch, buons, lever) unadvisedly.
* If any work is to be made by two or more persons, coordinaon signs will have to be
given for each operaon step. Every step of the operaon shall be taken only if a sign has
been made and responded.
8.1.3 Advices
* In case of power shortage, immediately switch the machine off.
* Use recommended or equivalent lubricants, oils or greases.
IMPORTANT
If any recommendaƟon is not applicable to your equipment, please ignore it.
8. GENERAL SAFETY PRACTICES

14
or local health codes.
•This slicer shall be cleaned and sanized each me the knife is sharpened.
7.3 Guides lubricaƟon
This operaon must be performed aer cleaning the slicer or whenever the sliding is
difficult. Use oil SHELL ONDINA 15 or ESSO MARCOL 82.
LubricaƟon of the guide bar of the product holder:
1 - Drop some oil on the bar
2 - Let the last slice device slide on the guide bar
LubricaƟon of the guide bar of the product holder carriage:
1 - Push the product holder towards stroke end
2 - Lithe slicer
3 - Drop some oil on the bar
4 - Place the slicer on the work top, push the product holder to and front.
11
7. MAINTENANCE
Disconnect the plug from the power point and take the slice thickness control on zero.
We advise to wear protecve gloves during all the cleaning and maintenance operaons.
Electric cable check
Periodically check the electric cable wear.
Spare parts
In case of parts replacement, ask only original spare parts.
7.1 Cleaning
If you do not use the machine for long me, always carry out a deep cleaning of the
machine before using it.
For the cleaning of all the open parts use a dampen cloth.
WARNING
Do not use water jet
DANGER
During the cleaning operaƟons be careful: danger of accident
IMPORTANT
The slice thickness control is clamped on zero.
Product holder
1. Posion on zero the slice thickness control.
2. Loosen up completely the product holder clamping handle rotang it counterclockwise.
3. Pull the product holder towards the operator to block it. The metallic click means that
the product holder is clamped.
4. Slip offthe pusher from the guide bar.
5. Lithe product holder slipping it offfrom its support.
6. Clean the product holder.
Components Removal

12
Slice deflector
7 - Loosen the fixing screws and remove the slice deflector.
Blade cover
8 - Loosen the blade cover fastener handle rotang it counterclockwise.
9 - Push the handle in the direcon of the blade.
10 - Lithe blade cover.
ATTENTION
Once removed the blade cover, an interlocking device stops the rotaƟon of the
blade.
DANGER
During the cleaning of the blade, be careful of any accidental contact with the
blade.
11 - Mop up the front side of the blade with a dampen cloth and move slowly from the
centre to the edge of the blade, as shown by the arrow in the picture.
12 - Clean in the same way the back side of the blade.
13 - Dry with a cloth both sides of the blade.
14 - Aer cleaning, fix the blade cover.
15 - Insert the fastener and screw to block the blade cover.
Clean all the pieces in warm water and washing-up liquid. Rinse them with hot water and
dry them.
Assemble the machine following in reverse the procedure described above.
SANITIZATION
Sanize all the removable parts and the slicer.
•Wash hands. In a clean basin or sing, in a soluon of clean warm water and correctly dilu-
ted sanizing soluon soak and wash the removable parts. Re- move the parts from the
Blade cleaning
13
basin or sing and allow them to air dry.
•Wipe the slicer with correctly diluted sanizing soluon.
•Press a damp cloth slightly moistened with water and cor- rectly diluted sanizing soluon
on the front side of the knife and move slowly from the centre to- wards the edge; avoid
excess of liquid.
•Insert a damp cloth betwe- en the blade and the protecon ring. Pull it outwards and
rotate it to clean the internal side of the blade cover ring.
•Rotate the index control knob on zero (0) posion and wipe the gauge plate starng at the
blade and moving slowly outwards.
•Install the carriage tray as- sembly and ghten the carriage tray knob.
•Install the knife sharpening asssembly.
•Install the knife cover.
•Install the knife cover knob and secure the knife cover.
INSPECTING THE SLICER
Inspect that the slicer is working properly and in good condion before each use or at least
every six months.
If the slicer is not funconing pro- perly DO NOT USE IT. Have the equipment serviced by
an authorized SKYFOOD service agency. The sealed parts showed below Fig. 1, 2 have to be
inspected at least every six months.
The inspecons have to be made by one of our authorized service agent.
It is mandatory to remove slicer from service unl repaired by our authorized service agent
if any seal is found to be damaged.
Note:
•The sanizer concentra- on shall comply with Secon 4-501.114, Manual and Mecha-
nical Ware washing Equipment, Chemical Sanizaon – Tem- perature, pH, Concentraon,
and Hardness of the FDA Food Code.
•If a chemical sanizer other than chlorine, iodine or quater- nary ammonium is used, it
shall be applied in accordance with EPA-registered label use in- strucons.
•This slicer shall be cleaned and sanized at intervals to comply with naonal, state and/
Table of contents
Other Skyfood Kitchen Appliance manuals

Skyfood
Skyfood ESBS-SUPER User manual

Skyfood
Skyfood Skymsen EXI User manual

Skyfood
Skyfood Fleetwood PC-8 User manual

Skyfood
Skyfood 1212E User manual

Skyfood
Skyfood Skymsen SS-300A User manual

Skyfood
Skyfood RQ-150 User manual

Skyfood
Skyfood INT90S User manual

Skyfood
Skyfood 1212E User manual

Skyfood
Skyfood 312EC User manual

Skyfood
Skyfood Skymsen SS-300A User manual