Slime Smart Spair Plus User manual

EMERGENCY FLAT TIRE REPAIR KIT
SMART SPAIR® PLUS
POWER SOURCE
• Plugs into 12V
power outlet
LIGHT
• Bright LED for
night-time
emergencies
ON/OFF
SWITCH
DIAL GAUGE
• Measures PSI/BAR
QUICK CONNECT
AIR HOSE
KIT INCLUDES
• 14 oz. (414 mL) bottle of Slime Tire Sealant
• Tire inflator with built-in pressure gauge
• Air adapters for inflatables
ADAPTER STORAGE ON INFLATOR BACK
• Inflatable adapters snap-in-place for easy access
AIR ADAPTERS
SLIME RESCUE™
TIRE SEALANT
• No need to remove
the valve core
ATTENTION! READ ALL INSTRUCTIONS CAREFULLY
FAILURE TO FOLLOW WARNING INSTRUCTIONS CAN RESULT IN FIRE,
PERSONAL INJURY OR PROPERTY DAMAGE.
Slime® provides a quick emergency repair. Treated tires should be repaired by a qualified tire professional at the
earliest opportunity to ensure safety and proper cleaning of tire pressure sensor, if so equipped. We recommend
treated tire be repaired within 3 days or 100 miles after use of Slime Tire Sealant, whichever comes first. Advise
tire professional of product use.
PART# 50138 INSTRUCTIONS | REV082620ART

1. Push air hose valve connector on the valve stem.
2. Close thumb latch connector to secure the valve.
3. Plug power cord into 12 volt accessory power outlet.
4. Turn inflator on. Inflate tire to manufacturer’s recommended air pressure. Correct tire
pressure can be found in vehicle’s owner manual or on driver’s side door jamb.
5. Unplug power cord and remove air hose connector.
INFLATOR INSTRUCTIONS
CAUTION: HOT • DO NOT HOLD IN HAND WHILE OPERATING • PLACE INFLATOR ON
A HARD, CLEAN SURFACE. WEAR GLOVES AND SAFETY GLASSES WHILE OPERATING
INFLATOR.
1. Check your tire warranty prior to installation of this product.
2. DO NOT run vehicle while inflator is operating. You may need to be in “accessory” or “on”
position. Please make sure emergency brake is set and car is in park. Always ensure air hose chuck
touches the core of the valve stem for proper inflation.
3. DO NOT use inflator continuously for more than 12 minutes. Allow unit to cool approximately 25
minutes between uses. Do not leave inflator unattended.
4. ALWAYS use a pressure gauge to check tire pressure. DO NOT overinflate.
5. Soft inflatables (i.e. rafts, balls, etc.) may not have recommended pressure markings. Be careful
not to inflate items beyond their capacity.
6. While operating, never block the inflator input or output.
7. Keep inflator out of reach of children.
8. For use with 12 volt DC power outlets rated 15 amps or higher. Do not use with older 8 amp
cigarette lighter receptacles.
WARNING!
This repair kit is only suitable for emergency tire repairs to enable vehicles to be driven to a service
center where proper repairs can be made to the tire. Not intended for use for major tire damage.
Radial ply passenger car tires may only be repaired in the tread area. No repairs are permitted on the
bead, sidewall, or shoulder area of the tire. To prevent injury extreme caution should be used while
using tools. Eye protection should be worn while repairing tire.
To unlock the hammerhead valve,
pull handle upward, then place in
adapter and push down to lock
in adapter.
USING THE ADAPTERS
PULL UP TO
UNLOCK
PUSH DOWN
TO LOCK
14 oz. (414 mL)
HOW MUCH SEALANT PER TIRE?

1. Rotate tire so that the valve stem is in the upper half of the tire. Remove air/sealant hose
from sealant bottle cap by pulling tag as indicated.
2. Screw on the air/sealant hose to the tire’s valve stem. Place the sealant bottle standing
upright on the ground.
3. Remove the installed valve cap from the threaded inlet of the sealant cap. Connect the
inflator to the sealant bottle cap by placing inflator air hose connector on the threaded
inlet and pushing on securely.
4. Close thumb latch connector to lock inflator air hose.
5. Plug power cord into power outlet receptacle.
6. Turn on inflator. The inflator will inject the sealant from the sealant bottle into the tire.
Once the sealant is installed, the inflator will inflate the tire.
7. When proper tire pressure is reached, turn off inflator and unplug power cord. Unscrew
sealant bottle air hose from tire valve stem. Disconnect inflator air hose connector from
sealant bottle.
8. Drive for 2.0mi (3.2km) and stop to verify that the puncture has been sealed. Check tire
pressure. Reinflate if necessary.
REPAIR INSTRUCTIONS
Repairing a flat tire with the Smart Spair Plus is simple and takes only 12 minutes
.
1 3
2.0 MI/3.2 KM
PSI
BAR/KPA
2
4
5 6 87
SEALANT REMOVAL INSTRUCTIONS:
FOR THE TIRE REPAIR PROFESSIONAL
Slime Tire Sealant is non-flammable and water based so clean up is simple. The sealant
should be rinsed or wiped out of the tire prior to making a permanent repair. Should any
sealant fall on the shop floor, simply wipe it up with a rag and rinse off the area with
water. If TPMS sensor present, wipe sensor with damp rag prior to reinstallation. This seal-
ant will not corrode or negatively affect the rim or tire.

TROUBLESHOOTING
Inflator does not turn on (try one or all of the following):
1. Check the power plug and push it firmly into the receptacle, twist it back and forth.
2. Check receptacle and plug terminals for dirt or debris. (Use a non-conductive probe, not
fingers or metal).
2. Check vehicle’s power outlet fuse; it should be 15
amps minimum.
4. Check the fuse. It may have blown:
• 12V fuse is located in the plug adapter: Unscrew
the tip, remove fuse, and inspect. If necessary,
replace fuse with 15A 250V 5mm x 20mm.
Inflator runs but does not inflate:
1. Make sure the air hose connector is on the valve stem as far as possible before closing
locking lever.
2. Check tire for leaks and check hose for breaks and leaks at fittings.
Inflator runs slowly:
1. The unit may have overheated from excessive use. Shut it off and allow it to cool for 25
minutes.
2. Voltage may be too low. Check condition of vehicle’s battery.
NOTE: If tire is totally deflated, it is possible that the tire could separate from the rim,
allowing air to leak out when trying to inflate. In the event this occurs, jack up the vehicle to
aid inflation. If this does not work call roadside assistance.
WARRANTY INFORMATION: www.slime.com/warranty
QUESTIONS OR COMMENTS:
Call (888)457-5463 or visit www.slime.com
ITW Global Tire Repair • 125 Venture Drive, Suite 210, San Luis Obispo, CA 93401 USA
Slime® is a trademark of Illinois Tool Works, Inc., registered in the U.S. and other countries.
WARNING: HARMFUL OR FATAL IF SWALLOWED. IRRITANT TO SKIN AND EYES. Avoid
ingestion and inhalation. Avoid eye and skin contact. Wash hands after use. Use only
as directed. KEEP OUT OF REACH OF CHILDREN. FIRST AID: In case of eye contact, rinse
eyes for 15 minutes with cool water, lifting eyelids occasionally. If on skin, wash with
soap and water. If inhaled, seek fresh air. If ingested, DO NOT INDUCE VOMITING;
drink plenty of water and contact a physician or hospital. Contains ethylene glycol and
natural latex rubber. Call ChemTel: +1-800-255-3924 or 1-813-248-0573 and reference
product name: PART#50138 or #10188 (Refill)

SMART SPAIR® PLUS
REPARACIÓN DE EMERGENCIA DE LLANTAS DESINFLADAS
COMPARTIMIENTO PARA
EL ADAPTADOR DE AIRE
• Los adaptadores inflables se insertan
en su lugar para fácil acceso
SELLADOR DE
LLANTAS SLIME
RESCUE™
EL PAQUETE DE INCLUYE
• Envase de 14 onzas (414 ml) de sellador de llantas
• Inflador de llantas con medidor de aire integrado
• Adaptadores de aire par llantas inflables
¡ATENCIÓN! LEA TODAS LAS INSTRUCCIONES DETENIDAMENTE.
SI NO SIGUE LAS INSTRUCCIONES DE ADVERTENCIA, PUEDE CAUSAR INCENDIO,
LESIONES A PERSONAS O DAÑOS MATERIALES.
LUZ
• LED brillante
• Para emergencias
de noche
ENCHUFE ELÉCTRICO
• Se enchufa a una toma de 12V
INTERRUPTOR
DE ENCENDIDO/
APAGADO
MEDIDOR DE
CUADRANTE
• Mide PSI/BAR
MANGUERA DE AIRE DE
CONEXIÓN RÁPIDA
ADVERTENCIA: Solo para reparación provisional cuando se use en vehículos de pasajeros. Procure efectuar una
reparación profesional permanente antes de los 100 Km. Slime permanece en estado líquido, lo que puede dar
lugar a un desequilibrio o a vibraciones. Si hay vibraciones, retire el sellador. Proteja sus ojos durante la insta-
lación. Inspeccione periódicamente los neumáticos para detectar pinchazos y objetos punzantes. Slime no sella
pinchazos fuera de la banda de rodamiento. Manténgalo fuera del alcance de los niños.
ADAPTADORES
DE AIRE

¿QUÉ CANTIDAD DE
SELLADOR POR LLANTA?
1. Presione el conector de la manguera de aire en el vástago de la válvula.
2. Empuje hacia abajo el pestillo para asegurar la válvula.
3. Enchufe el cable de alimentación eléctrica a un toma-corriente para accesorios de 12 volts.
4. Encienda el compresor. Infle el neumático a la presión de aire recomendada por el fabricante.
La presion de aire recomendada, puede localizarla en el manual de propietario de su vehiculo
o en el marco de la Puerta del conductor.
5. Desconecte el cable de alimentación y retire el conector de la manguera de aire.
INSTRUCCIONES DEL COMPRESOR
Libere la válvula Air Chuck, tire de
la manija hacia arriba, introduzca
el adaptador y empuje hacia
abajo para asegurarlo.
CÓMO USAR LOS ADAPTADORES
TIRE HACIA
ARRIBA PARA
LIBERAR
EMPUJE HACIA
ABAJO PARA
ASEGURAR
14 oz. (414 mL)
PRECAUCIÓN: CALIENTE • NO SOSTENGA CON LA MANO AL OPERAR • COLOQUE EL
INFLADOR SOBRE UNA SUPERFICIE FIRME Y LIMPIA.
1. NO PONGA EN MARCHA el vehículo cuando el inflador esté funcionando. Puede ser necesario
tenerlo en la posición de “accesorios” o “encendido.” Asegúrese de haber puesto el freno de
emergencia y de tener la palanca de cambios en la posición de estacionado “park.” Asegúrese
siempre de que el portaherramientas de la manguera de aire toque el núcleo de la válvula para un
inflado adecuado.
2. NO USE el inflador continuamente durante más de 12 minutos. Permita que la unidad se enfríe
aproximadamente 25 minutos entre cada uso. No inflador funcionando solo.
3. SIEMPRE use un manómetro para medir la presión de la llanta. NO INFLE excesivamente.
4. Los inflables blandos (balsas, pelotas, etc.) pueden no tener marcaciones de presión recomendada.
Tenga cuidado de no inflar los artículos por arriba de su capacidad.
5. Durante la operación, no bloquee la entrada ni la salida del inflador.
6. Mantenga el inflador lejos del alcance de los niños.
7. Para usarse con una alimentación eléctrica de 12 VCD y una corriente nominal de 15 A o mayor. No
use con las tomas antiguas para cigarrillos de 8 A.
ADVERTENCIA!
Este juego de reparación sólo es apropiado para reparar una llanta en forma emergente con el fin de
conducir el vehículo hasta un centro de servicio donde se hagan las reparaciones adecuadas a la llanta.
No debe usarse en caso de daños mayores de la llanta. Las llantas con pliegues radiales solo pueden
repararse en la superficie de rodamiento. No se permite hacer reparaciones en el reborde, en la pared
lateral ni en el hombro de la llanta. Tenga extremo cuidado cuando use herramientas para evitar
lesiones. Utilice protección para los ojos cuando repare llantas.

INSTRUCCIONES DE REPARACIÓN
Reparar un neumático ponchado con un Smart Spair es simple y toma solo 15 minutos.
1 3
2.0 MI/3.2 KM
PSI
BAR/KPA
2
4
5 6 87
1. Gire el neumático de modo que la válvula esté en la mitad superior del neumático. Retire la
manguera de aire / sellador de la tapa de la botella del sellador jalando la etiqueta como se
indica.
2. Atornille la manguera de aire / sellador a la válvula del neumático. Coloque la botella de
sellador de pie en el suelo.
3. Retire la tapa de la válvula instalada en la salida del sellador. Conecte el compresor a la tapa de
la botella de sellador, colocando el conector de la manguera de aire del inflador en la entrada
con rosca, presione y asegure
4. Empuje hacia abajo el pestillo para asegurar la válvula del compresor.
5. Enchufe el cable de alimentación eléctrica a un toma-corriente para accesorios de 12 volts.
6. Encienda el compressor, este inyectará el sellador de la botella en el neumático. Una vez que
se instala el sellador, el compressor continuará con el inflado del neumático.
7. Cuando se alcanza la presión adecuada del neumático, apague el compresor y desenchufe el
cable de alimentación eléctrica. Desenrosque la manguera de aire de la botella del sellador
de la válvula del neumático. Desconecte la manguera de aire conector de la botella de
sellador.
8. Conduzca durante 2.0 millas (320 kilómetros) y verifique que la perforación haya sido
sellada. Revisar la presión del neumático. Infle si es necesario.
INSTRUCCIONES PARA REMOVER EL SELLADOR
PARA EL PROFESIONAL EN REPARACIÓN DE LLANTAS
El sellador de llantas Slime no es inflamable y está hecho a base de agua; por lo tanto, es fácil
limpiarlo. El sellador debe enjuagarse o limpiarse de la llanta antes de hacer una reparación
permanente. En caso de que se llegara a derramar sellador en el piso del taller, simplemente
límpielo con un trapo y enjuague el área con agua. Si cuenta con un sensor TPMS, límpielo
con un trapo húmedo antes de volver a instalarlo. El sellador no corroe ni afecta en forma
negativa al aro ni a la rueda.

INFORMACIÓN DE GARANTÍA: www.slime.com/warranty
PREGUNTAS O COMENTARIOS:
Llamar al +1-805-489-0490 o visitar www.slime.com
ITW Global Tire Repair • 125 Venture Drive, Suite 210, San Luis Obispo, CA 93401 USA
Slime
®
es una marca registrada de Illinois Tool Works, Inc., registrada en Estados Unidos y en otros países.
SOLUCIÓN DE PROBLEMAS
El inflador no enciende (pruebe una o todas las siguientes sugerencias):
1. Empuje con firmeza el enchufe en la toma y gírelo de atrás hacia adelante.
2. Revise si hay suciedad, especialmente tabaco, en la toma y en las terminales del enchufe.
Use una sonda no conductora, no sus dedos o metales, para aflojar y remover residuos.
3. Revise el fusible de la toma de corriente del vehículo; debe ser de un mínimo de 15 A.
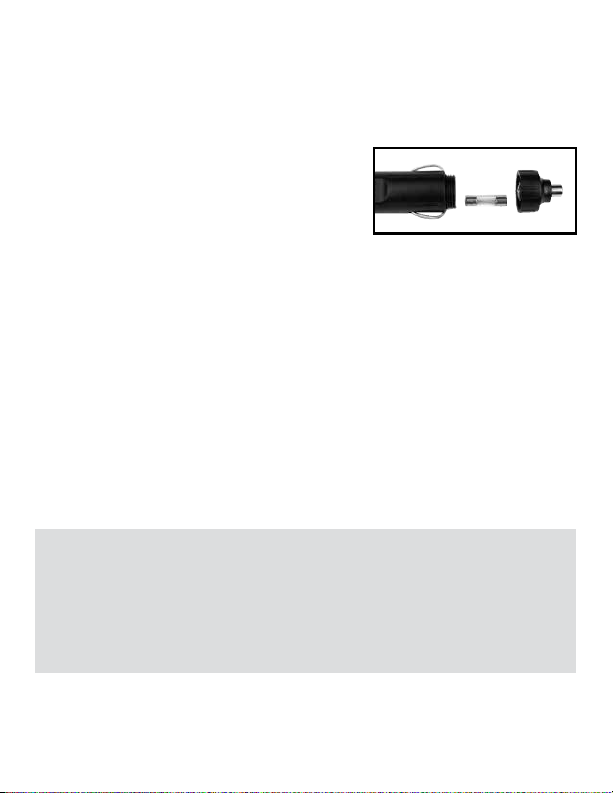
4. Verifique el fusible, puede haberse fundido:
• El fusible de 12 V está ubicado en el adaptador del
enchufe. Desenrosque la punta, retire el fusible e
inspeccione. Si es necesario, reemplace el fusible con
uno de 15A 250V (5mm20mm).
El inflador funciona pero no infla:
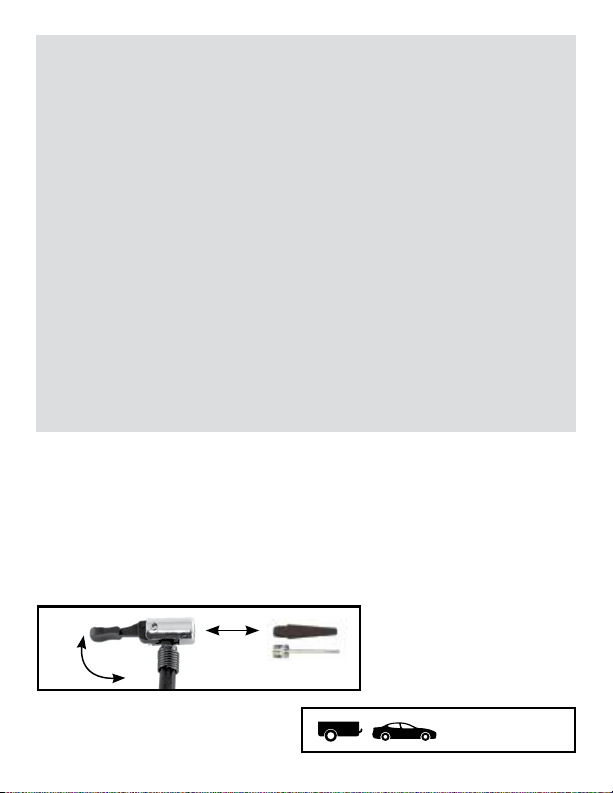
1. Asegúrese de que el conector de la válvula esté bien atornillado en el pivote de la
válvula.
2. Verifique que la llanta no tenga fugas. Revise que la manguera no tenga grietas ni fugas
en las conexiones.
El inflador funciona lentamente:
1. El inflador puede estar sobrecalentado debido a uso excesivo. Apáguelo y espere 25
minutos para que se enfríe.
2. El voltaje puede ser demasiado bajo. Revise la condición de la batería de su vehículo.
NOTA: Si la llanta está totalmente desinflada, es posible que esté separada del aro y éste
permite que el aire se escape cuando trata de inflarla. Si ocurre esta situación, puede ser
necesario levantar la llanta con un gato para inflarla.
ADVERTENCIA: NOCIVO O MORTAL SI SE INGIERE. IRRITANTE PARA LA PIEL Y LOS OJOS. Evitar la
ingestión o la inhalación. Evitar el contacto con ojos o piel. Lávese las manos después de usar. Usar
solamente como indica. MANTENER FUERA DEL ALCANCE DE LOS NIÑOS.
PRIMEROS AUXILIOS: En caso de contacto con los ojos, enjuague los ojos durante 15
minutos con agua fría, levantando los párpados ocasionalmente. En caso de contacto con
la piel, lavar con agua y jabón. Si se inhala, busque aire fresco. Si se ingiere, NO PROVOCAR EL VÓMITO,
beber abundante agua y llamar inmediatamente el médico o el hospital. Contiene el etilenglicol y el
látex de caucho natural. Llamar a ChemTel: +1-800-255-3924 or 1-813-248-0573. Nombre de referencia
del producto: PART#50138 or #10188 (repuesto)
Table of contents
Languages:
Other Slime Service Equipment manuals
Popular Service Equipment manuals by other brands

CLAS
CLAS CANON AIR 19l manual

FLO-DYNAMICS
FLO-DYNAMICS PSX3000 manual

Carlisle Fluid Technologies
Carlisle Fluid Technologies TRISK DeVILBISS TRU-CURE IR3L Service manual

Ranger Products
Ranger Products CRT380R quick guide

ATD Tools
ATD Tools ATD81048 Operating instructions & parts manual

Philadelphia Scientific
Philadelphia Scientific Stealth Watering System FLT-DC12 manual