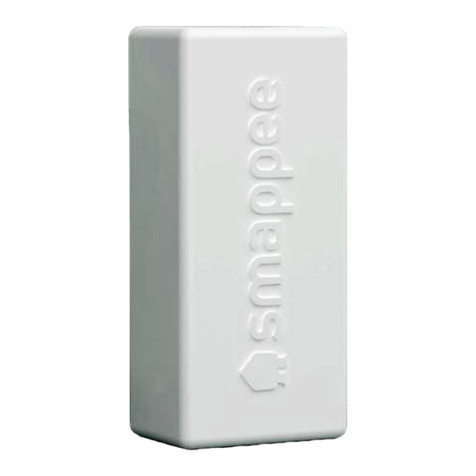
Smappee Energy monitor User manual

Smappee (Solar) Energy Monitor
Installation Manual
English
Version: 2.2, as of 20/2/2017
© 2013-2017 Smappee NV. All rights reserved.
Specifications are subject to change without notice.
All product names are trademarks of their respective companies.

(Solar) Energy Monitor Installation Manual Page 2 of 36
Table of contents
A word from our CEO................................................................................................................... 3
Before you Start........................................................................................................................... 4
Safety instructions....................................................................................................................... 5
Connect Smappee to your Wi-Fi.................................................................................................. 6
Understand the Electrical Network of your Home...................................................................... 7
Connect Smappee to your Fuse Box ........................................................................................... 9
Single Phase Installation Without Solar................................................................................ 11
Single Phase Installation With Solar ..................................................................................... 14
Three Phase Installation Without Solar ................................................................................ 18
Three Phase Installation With Solar...................................................................................... 21
Special Instructions: Three Phase Delta Installation ........................................................... 27
US Split Phase Installation Without Solar............................................................................. 29
US Split Phase Installation With Solar .................................................................................. 32
Declaration of Conformity ......................................................................................................... 36

(Solar) Energy Monitor Installation Manual Page 3 of 36
A word from our CEO
Welcome to the world of Smappee
You will soon notice that Smappee offers nothing but benefits.
Immediately after its installation, Smappee will give you clear insight
into your energy consumption. This will allow you to achieve savings
straight away, without any concessions to comfort. And that’s not all:
you can now leave the house without any worries. After all, you can
simply use the app to check whether or not you have turned off all your
appliances.
Smappee will soon become part of your life. You will automatically
become more conscious of how you use energy, which will contribute to
a better environment for us all. Not only for us, but also for the
following generations! And that might just be the biggest benefit of all.
Stefan Grosjean,
Founder and C.E.O. of Smappee

(Solar) Energy Monitor Installation Manual Page 4 of 36
Before you Start
Overview
The Smappee monitor measures the energy consumption of your electrical appliances in
your home and the production of your solar panels.
You can view the energy consumption and production of your home real-time on your
smartphone or tablet. The Smappee app gives you direct insight into your energy
consumption and costs.
How it all works
The Smappee monitor is connected to your home Wi-Fi router, to communicate with the
Smappee cloud and the App.
Then, the Smappee monitor is installed near to the fuse box. The sensors (current clamps)
are connected to particular wires in or near the fuse box, so that Smappee can measure the
energy consumption of your home.
This manual helps you with all the steps needed for this installation.
Where to Start
Step
Description
Page
1
Read the Safety Instructions
5
2
Connect Smappee to your Wi-Fi network
6
3
Understand your Home Electricity Network
7
4
Connect Smappee to your Fuse Box
9

(Solar) Energy Monitor Installation Manual Page 5 of 36
Safety instructions
Warnings
Please observe the following safety precautions to avoid possible electric shocks, fire, or
personal injury:
• Use the product only as specified as otherwise the safety of the product is not sufficient.
• Do not use the product in environments with explosive gas or vapours, nor in damp or
wet environments.
• Do not use damaged power cords and cables. Check the power cords and cables for
damaged insulation and exposed metal. Check the connection of the power cords.
• Use only the power cord and cables that are supplied with the product.
• Do not use the product if it is damaged.
• Reparations should only be done by authorized technicians.
• Do not open the product. There is a potential for exposure to hazardous voltage.
• Use only specified replacement parts.
• Do not connect the product to a voltage higher than 240 V.
• Turn off the main power switch before you start the installation of the product.
• Follow local and national safety regulations for installation and use of electrical
equipment.
Maintenance
• Clean only the outside with a dry, clean cloth.
• Do not use abrasive agents or solvents.
Technical specifications
• Dimensions: 16 cm (L) x 10 cm (W) x 3,5 cm (H)
• Weight: 300 grams
• Wi-Fi 802.11 b/g/n 2.4 GHz
• Work temperature: 5°C to 40°C
• Storage temperature: -10°C to 60°C
• Relative humidity: 0-80% 5°C to 40°C
• Sealing IP 20.
• Work altitude: 0 to 2.000 meters
• EMC: EN 55022 (Class B)
• Overvoltage category: 300 V/CAT II
• ~110-240V 50/60Hz Max 5W

(Solar) Energy Monitor Installation Manual Page 6 of 36
Connect Smappee to your Wi-Fi
Overview
This section shows how to connect the Smappee to your Wi-Fi network.
Keep your Wi-Fi password secure
Security is important for Smappee. Therefore, the Smappee app securely transfers the
password of your Wi-Fi network to the Smappee Energy monitor, so that it can connect to
your Wi-Fi network
How it works
A new Smappee Energy monitor opens a temporary ad-hoc Wi-Fi network. When you
perform the installation steps in the Smappee App, you connect your smartphone to that ad-
hoc Wi-Fi network.
Then, the Smappee app asks you for the password of your home Wi-Fi network, and sends it
directly to the Smappee Energy monitor.
As soon as the Smappee is connected to your home Wi-Fi network, it connects to the
Smappee Cloud and is there linked to your App account.
Step by Step
Here are the steps you should perform for connecting your Smappee
Energy monitor to your Wi-Fi network:
1. Download the app from the Apple App Store or Google Play.
2. Open the app and create your personal user account.
3. When using the App for the first time, you’ll see three bubbles:
Install, Buy, Logout. To proceed, press ‘Install’.
4. Follow the instructions in the app.
5. Then, continue with section "Understand the Electrical Network of your Home", on
page 7.

(Solar) Energy Monitor Installation Manual Page 7 of 36
Understand the Electrical Network of your Home
Overview
For a correct installation of the sensors (current clamps), it is important that you understand
the type of the electrical installation of your home.
Please find below some tips to identify which installation you have in your home.
Types
There are for major types of networks.
Type of installation
In what countries
1 phase
Most common type in homes and apartments in Europe, Asia
and many other parts of the world.
3 phase ("Star")
Common type in modern and large homes in Europe, Asia
and many other parts of the world.
3 phase "Delta"
Occasionally found in Denmark and Belgium only
Split phase US
Most common type in the US and Canada.
If you are still unsure, please see the additional information on the next page.

(Solar) Energy Monitor Installation Manual Page 8 of 36
What type of electricity network do I have?
This table helps you to identify the type of network of your home.
Type of
Installation
Symbol on your
electricity meter
Number of main cables in
your fuse box
Example
1 phase
2 cables
(1 phase + 1 neutral)
3 phase
("STAR")
4 cables
(3 phase cables + 1 neutral)
3 phase delta
3 cables
(3 phase cables,
NO neutral)
Split Phase
US
2 cables
(2 phase cables)

(Solar) Energy Monitor Installation Manual Page 9 of 36
Connect Smappee to your Fuse Box
Introduction
This chapter describes how to connect the Smappee monitor to your fuse box.
Remember! Before you can connect the Smappee monitor to the fuse box you must first
connect it to your Wi-Fi network as described in the previous chapters.
Consult a certified electrician
If you do not have knowledge about electrical installations, we strongly recommend to
consult a certified electrician for the installation.
Installation Videos
Installation videos are available on our support website or on YouTube:
http://www.smappee.com/support/
https://www.youtube.com/channel/UCFBFXohTW60YDA-TKjCh7sg
Content of the Box
Depending on your region, you find the following items in the Smappee box.
• 1 Smappee Energy monitor or 1 Smappee Solar Energy monitor
• 1 power cord (type depending on your reqion)
• 3 or 6 current clamps (2 or 4 in the US)
• 1 Comfort Plug (which is not needed during the installation)
Tools
For an easy and fast installation, we recommend to have a few tools ready:
• Screwdriver
• Flashlight

(Solar) Energy Monitor Installation Manual Page 10 of 36
Choose the Type of Installation
This section explains the installation steps for various types of electrical installations.
Please select the type on the list and continue at the page indicated.
Installation type
Solar Panels
Continue on Page
1 phase
No Solar
11
1 phase
With Solar
14
3 phase star
No Solar
18
3 phase star
With Solar
21
3 phase delta
With or without Solar
27
Split phase (US, Canada)
No Solar
29
Split phase (US, Canada)
With Solar
32
If you are not sure of the installation type of your home, please refer to page 7.

(Solar) Energy Monitor Installation Manual Page 11 of 36
Single Phase Installation Without Solar
Introduction
The following steps describe the single-phase connection without solar panels.
Instructions
First please locate your fuse box and utility meter.
Turn of the power and open up the fuse box. (you might need a screwdriver for this).
You’ll see 2 coloured wires coming from the utility meter. Ignore the blue wire
(neutral wire) and any green/yellow wires (ground).
The remaining wire is called the phase wire. It’s usually grey, brown or black. In
some installations other colours can be used for the phase wire.
Take a current clamp and find the little arrow on the clamp.
Check for the symbol
L
ß
K in the clamp. The arrow shows the direction of the
energy flow. Make sure that Lpoints in the direction of the
appliances (energy users) and Kin the direction of the
electricity meter.

(Solar) Energy Monitor Installation Manual Page 12 of 36
Place the current clamp over the brown (or phase) cable. Make sure that you properly close
the clamp by pressing your thumb on the side until you hear a click. Please pay close
attention to the direction of the arrow!
Plug the ends of the current clamp cable into input 1 of the Smappee monitor
Now close the fusebox (be carefull not to jam the cable) and turn the power back on.
Important!

(Solar) Energy Monitor Installation Manual Page 13 of 36
Plug the power cord for the monitor into the wall socket and wait until the monitor
shows a green heartbeat.
You can now get started with the Smappee app.

(Solar) Energy Monitor Installation Manual Page 14 of 36
Single Phase Installation With Solar
Introduction
The following steps describe the single-phase connection with solar panels.
Instructions
First please locate your fuse box, utility meter and solar inverter.
Turn of the power and the solar inverter, then open up the fuse box. (you might need
a screwdriver for this)
You’ll see 2 coloured wires coming from the utility meter. Ignore the blue wire
(neutral wire) and any green/yellow wires (Grounding).
The remaining wire is called the phase wire. It’s usually grey, brown or black. In
some installations other colours can be used for the phase wire.
Take a current clamp and find the little arrow on the clamp.
Check for the symbol
L
ß
K in the clamp. The arrow shows the direction of the
energy flow. Make sure that Lpoints in the direction of the
appliances (energy users) and Kin the direction of the
electricity meter.

(Solar) Energy Monitor Installation Manual Page 15 of 36
Place the current clamp over the brown (or phase) cable. Make sure that you properly close
the clamp by pressing your thumb on the side until you hear a click. Please pay close
attention to the direction of the arrow!
Take a V-cable with an unmarked leg and a leg marked solar. Plug the cable of the
current clamp in the unmarked leg of the V-cable and plug the other end of the V-
cable in input 1 of the Smappee. Please respect the polarity of the plug!
Now locate the solar inverter and check the wires running to your fuse box. You’ll
see 1 phase wire which is usually black, brown or grey.
Take a current clamp (CT) and clamp it around the phase wire with the little arrow
on the clamps pointing away from the utility meter. Make sure that you properly
close the clamp by pressing your thumb on the side until you hear a click.
Important!
Important!

(Solar) Energy Monitor Installation Manual Page 16 of 36
Please make sure there are no other cables branching off between the current
clamp and the solar inverter. If there are make sure you put the clamp closer to the
solar inverter, before these other cables branch off.
Now, plug the cable of the current clamp in to the leg marked “solar” of the V-cable
already connected to input 1 of the Smappee. Again, please respect the polarity of
the plug!
Now close the fusebox (be carefull not to jam the cable) and turn the power back on.

(Solar) Energy Monitor Installation Manual Page 17 of 36
Plug the power cord for the monitor into the wall socket and wait until the monitor
shows a green heartbeat.
You can now get started with the Smappee app.

(Solar) Energy Monitor Installation Manual Page 18 of 36
Three Phase Installation Without Solar
Introduction
The following steps describe the three-phase connection without solar panels.
Note: Please refer to page 27 for special instructions if you have a Three phase Delta
installation!
Instructions
First please locate your fuse box and utility meter.
Turn of the power and open up the fuse box. (you might need a screwdriver for this)
You’ll see 4 coloured wires coming from the utility meter. Ignore the blue wire
(neutral wire) and any green/yellow wires (Grounding).
The remaining wires are called the phase wires. They’re usually grey, brown or
black. In some installations other colours can be used for the phase wire.

(Solar) Energy Monitor Installation Manual Page 19 of 36
Take a current clamp and find the little arrow on the clamp.
Check for the symbol
L
ß
K in the clamp. The arrow shows the direction of the
energy flow. Make sure that Lpoints in the direction of the
appliances (energy users) and Kin the direction of the
electricity meter.
Place the current clamp over the brown (or phase) cable. Make sure that you properly close
the clamp by pressing your thumb on the side until you hear a click. Please pay close
attention to the direction of the arrow!
Plug the ends of the current clamp cables into input 1, 2 and 3 of the Smappee
monitor.
Now close the fusebox (be carefull not to jam the cable) and turn the power back
on.
Important!

(Solar) Energy Monitor Installation Manual Page 20 of 36
Plug the power cord for the monitor into the wall socket and wait until the monitor
shows a green heartbeat.
You can now get started with the Smappee app.
Other manuals for Energy monitor
2
Table of contents
Other Smappee Measuring Instrument manuals
Popular Measuring Instrument manuals by other brands

ThermoWorks
ThermoWorks ThermaQ operating instructions
SUTO
SUTO S 120 Instruction and operation manual
Raytech
Raytech Micro Junior 2 instruction manual
Fuji Electric
Fuji Electric X Series Applications manual

Nidek Medical
Nidek Medical AR-600 Service manual
MADDALENA
MADDALENA ElecTo Bulk Instructions for installation, use and maintenance

