Snom 300 User manual

Quick Start Guide
VoIP Business Phone
E N G LI S H
D E UTS CH
FRAN ÇAI S
ITALIAN O
E S PAÑOL
P OR TUG U Ê S

9
snom 300 Quick Start Guide
E
N
G
L
I
S
H
Initializing and registering the phone
Please note: You will need the registration information received from your
Internet service provider or your network administrator - normally the phone or
extension number, the password, and the registrar.
After you have set up the phone and connected it to the network as shown on pages
2 - 5, the phone begins to initialize.
Normally the initialization is completely automatic, using DHCP. If your network does not
support DHCP, you must obtain the IP address, netmask, IP gateway, and DNS server
from your Internet service provider or your network administrator and enter them manually
when you are asked to do so on the display.
Watch the display and, when asked to, make selections with and save with .
1. Language. The default is English. Other languages are available if the phone/
network is connected to the Internet during initialization, so that they can be
provided from the snom server automatically (fi rmware 7 and higher).
2. Dial tone
3. Time zone
4. Enter the account number. Save with 3.
5. Enter the registrar. Save with 3 . The display now shows the idle screen:
2II
Account
Time
Currently used
audio device
Entering numerals, letters, and special characters
The current input mode is indicated on the display by "123" (digits), "abc" (small
letters), "ABC" (capital letters).
TChange input mode SDelete sign to the left of the cursor
WMove cursor to the left XMove cursor to the right
Entering special characters and symbols in letter input mode: Press "1" key one or
more times quickly, with a pause after each character. Examples:
1x = "." 2x = "+" 3x = "@" 4x = "1" 5x = ":"

10
snom 300 Quick Start Guide
E
N
G
L
I
S
H
At a glance
Pound key
(hash key) LEDs of line keys (L1, L2)
•
Fast-blinking: Incoming call.
Press key to accept call.
• Steady light: In call
• Slow-blinking: Call on hold
Navigation key
Navigating in menus
and lists. From idle
screen:
• Call lists: S
• Settings menu: T
Cancel key
Cancelling actions and
input
Volume key
Adjusting volume
Speaker key
• Press briefly to turn
speakerphone on/off
• Press for two
seconds to switch to
headset mode
Alphanumeric
keypad
Display
Enter key
Confirming actions,
selections, and input
Programmable func-
tion keys with LEDs
Default mappings:
• L1, L2: Line keys
•
Redial: Redialing last
number
• Phone directory
• Call transfer
• Mute microphone
(on/off). When idle:
DND on/off (as of FW
8.7.3)
Star key
• Switching between upper & lower
case when pressed briefly while
• in editing mode
• Locking & unlocking the keyboard
when pressed for a few seconds
MWI + missed calls
• Retrieve msg:
• Turn off LED after
missed call:
Administrator/user mode
The factory setting is administrator mode. The default administrator password is 0000
(4 x zero).
• Switch from administrator mode to user mode: Web interface > Advanced > Qos/
Security > Security > Administrator Mode: Off > Save.
• Switch from user mode to administrator mode: Web interface > Advanced >
Administrator Login > enter administrator password > Save.
Settings menu
Press Tto open to top of list (Call Forwarding). Press TSto go to end of list
(Information) from idle screen. Press 2to return to the idle screen.
&DOO)RUZDUGLQJ
2II2II
Asterisk preceding an option: Currently active selection.

11
snom 300 Quick Start Guide
E
N
G
L
I
S
H
6HOHFW:HEVHUYHU
[[[[[+773+7736
Enter / change port
Server
3
HTTP HTTPS
3 3
Web Interface
HTTP only HTTPS only Off
Hand Head Speaker
33 3
Adjust volume of handset, headset,
speakerphone with ,
save with 3
Volume Settings
Select language with , save with 3
3
Call Fwd Time:
number of seconds +
3
Timeout Target: Always Target: Busy Target:
3
number + 3number + 3number + 3
3 3
Select function key 1 - 6,
key type, and number
Call Waiting Indicator Select Functionk
33
on/off + 3
3
Lang
Call Forwarding
Phone Behavior
General Settings
+
Off Time Always Busy
On/Off 3
Headset Device
TimeZone DialTone
33
Select with , save with 3
Other Settings
ID Priority Reset
VLAN Settings
Network Memory
System Info
Yes - automatic configuration:
No - manual configuration:
(enter IP address, netmask, IP
gateway, DNS server manually).
Followed by automatic reboot.
3
3
2
3
2
3
3
3
3
2
Yes:
No:
Resetting to
factory values.
All settings are
lost! Admin
PW required
Are you using
DHCP?
Reboot?
DHCP
3
Reset Reboot
3
3 3
RegConfi guration
Select identity
with , show
details , edit
detail with
3
Information IP Adr
3
MAC Version
3 3
IP address
Look up: serial no. firmware version
CWI Fkeys
Shortcut to
end of menu:
Shortcut to
top of menu:
+ 3
The submenus and the
settings shaded dark-
gray are not available
when the phone is
running in user mode.

12
snom 300 Quick Start Guide
E
N
G
L
I
S
H
The phone's web interface
1. Look up the phone's IP address: T S
. Example: 192.168.10.115.
2. Open a web browser on your PC. Enter http:// and the IP address in the address
bar and press ENTER. The "welcome" screen opens.
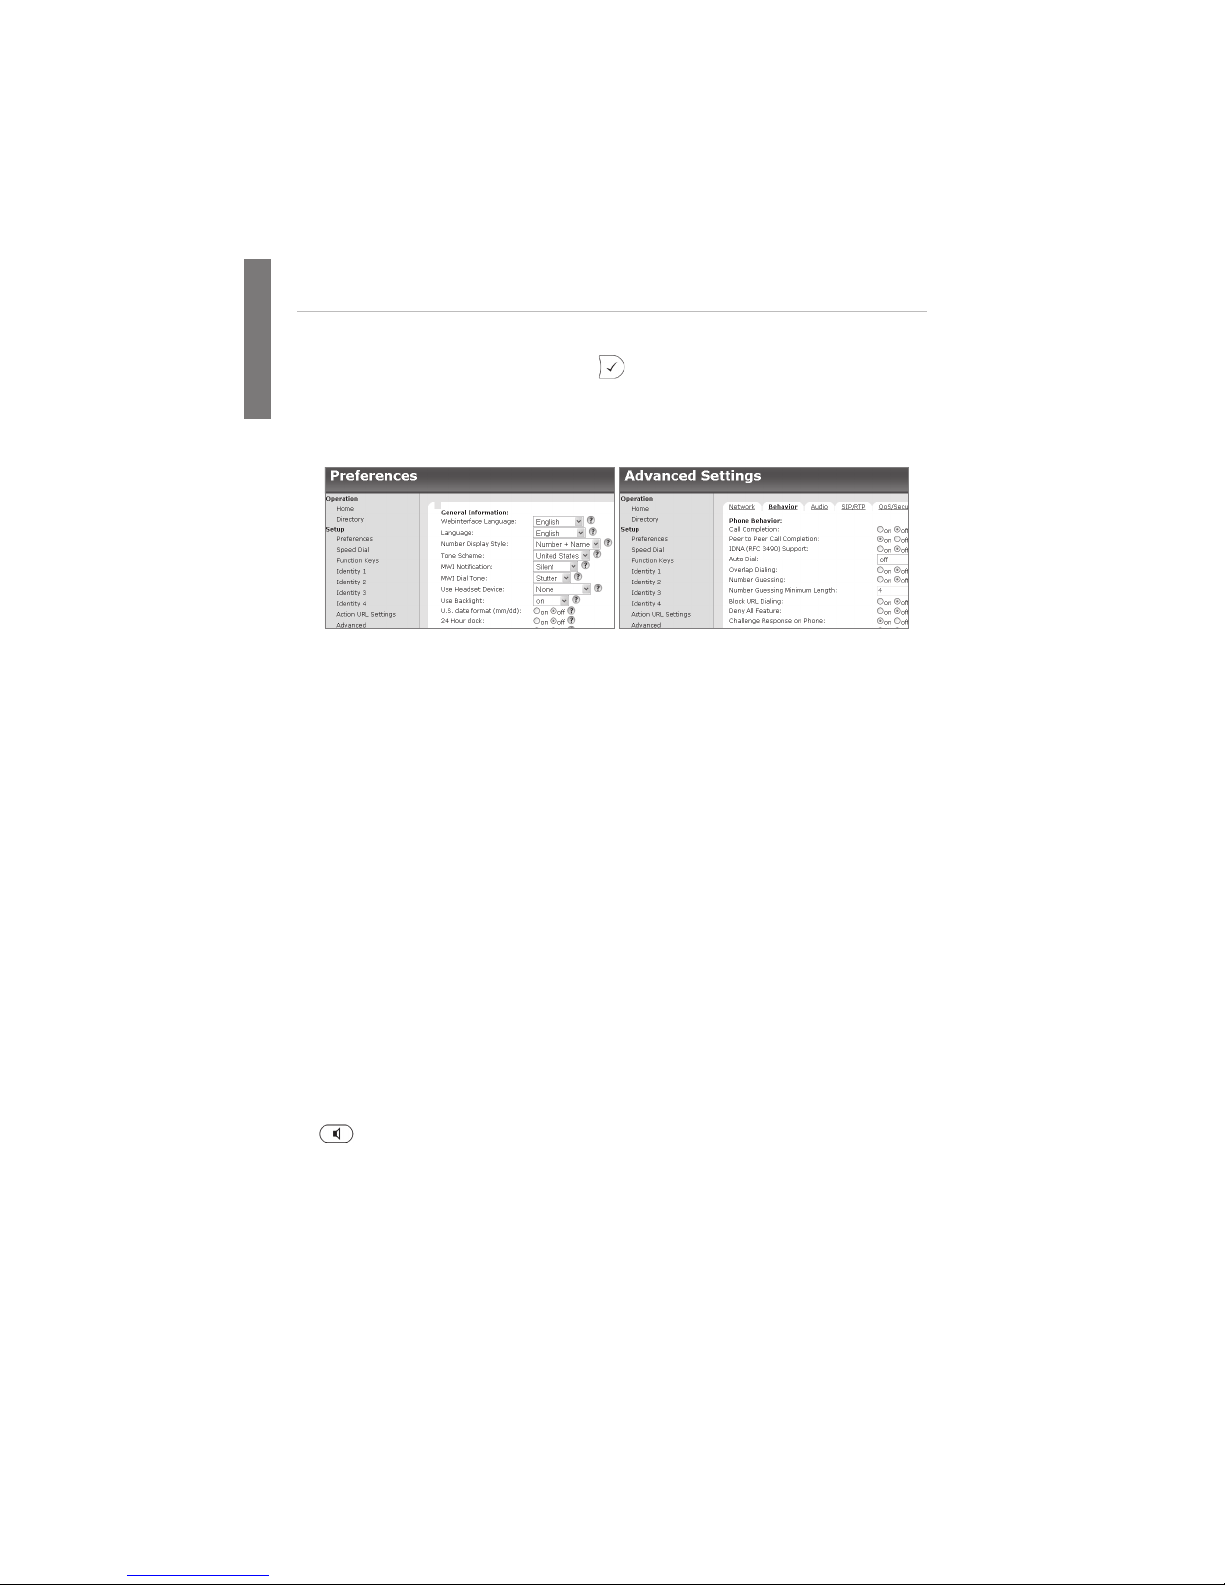
3. Click on an item in the menu on the left side of the screen to open that window.
4. If a window contains several pages, click on the tab at the top to open the page.
The font weight of the characters on the tab of the visible page is bold.
5. Any changes you make will not take effect until you click on "Save". Changes will be
lost if you open another page of the web interface without first clicking on "Save" .
Clock/time format
Web interface > Preferences > General Information > 24 Hour Clock:
On: 24-hour format, 00:01 to 24:00
Off: 12-hour AM/PM format, 0:01 AM to 12:00 PM
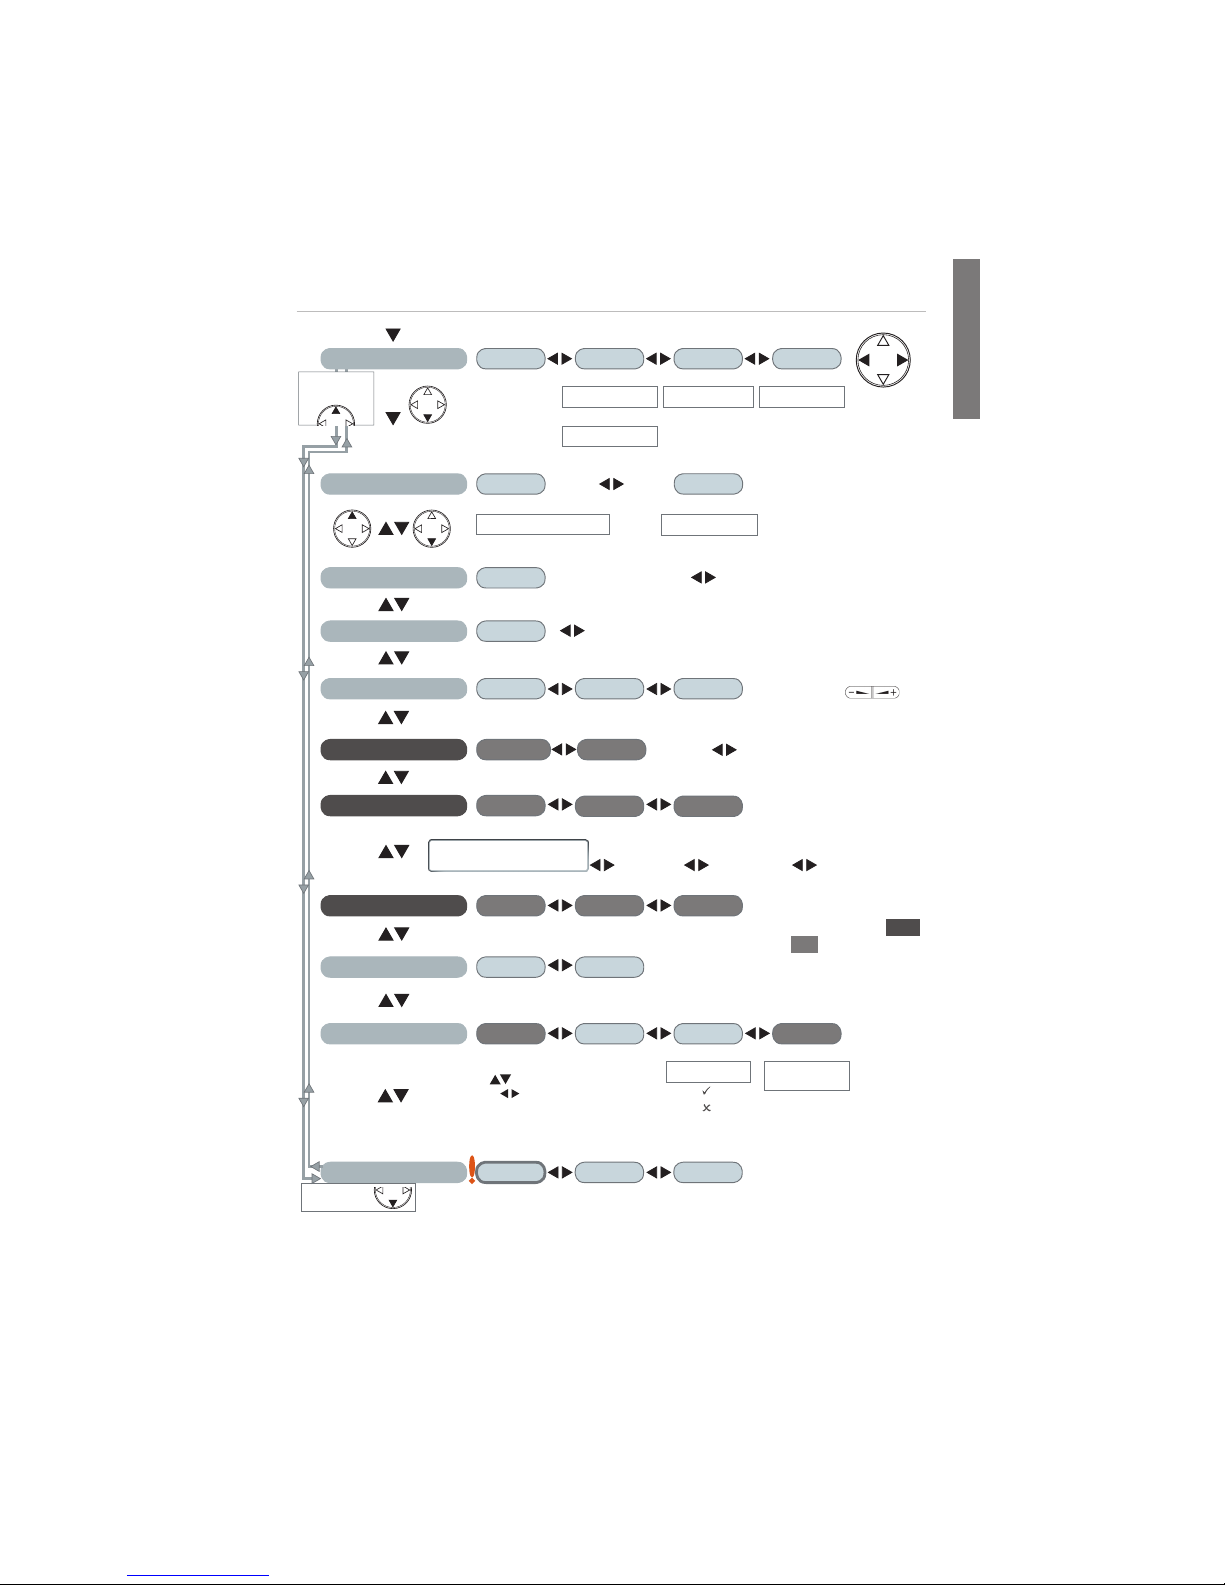
Configuring & modifying identities
Web interface > Identity 1-4 >
Using the phone
Select outgoing identity
From the idle screen, press W X to select one of the configured identities.
Making calls
• Enter the number on the alphanumeric keypad and pick up the handset or
• pick up the handset, enter the number, 3 or
• , enter the number, 3
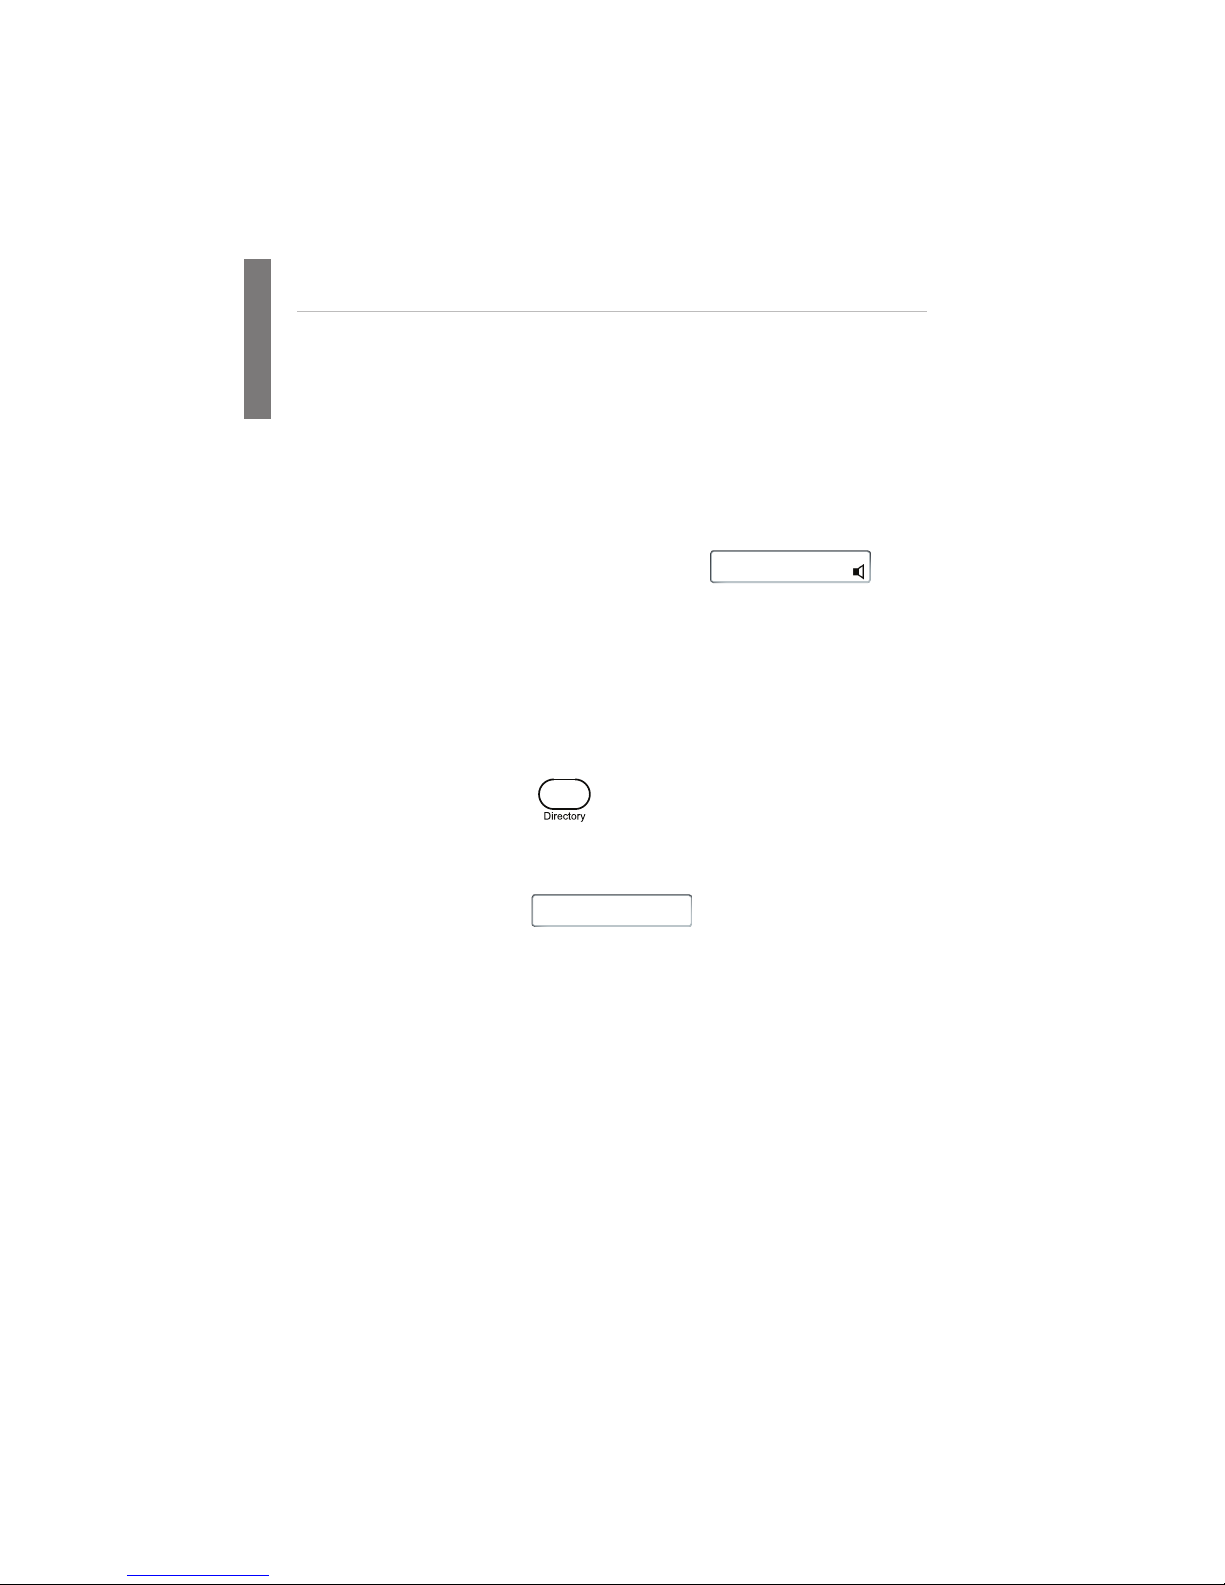
Speed Dial
Settings: Web interface > Speed Dial. Type each phone number with any necessary
area code and/or country code etc. without spaces, hyphens, etc. into one of the
textboxes of the table. One phone number per text box. Do not add any names or
other data. Example: To enter (911) 555-1234, type 9115551234.

13
snom 300 Quick Start Guide
E
N
G
L
I
S
H
Speed dialing: Type the speed dial number or character on the alphanumeric keypad
and press 3.
Emergency Numbers
These numbers can be called even when the keyboard is locked. They must be set on
the web interface.
Settings: Web interface > Preferences > Lock Keyboard > Emergency Numbers
(space separated). Type each number without spaces, hyphens, etc. between the
digits, separate the individual numbers with one empty space between them. Example:
911 115 986543. The numbers "911", "115", and "986543" can be dialled when the
keyboard is locked.
Accepting calls
• With handset: Pick up the handset
• With a headset: Press
or blinking line key
• With the speakerphone: Press
Putting calls on hold
Press the line key of the call. The LED starts to blink
slowly. Press the key again to resume the call.
&DOOVRQ+ROG
;;-DQH'RH
Conference
1. Put fi rst party on hold.
2. Call second party. With second party on line:
-RKQ6PLWK
&QI2Q
3. Press 3 to start conference. In conference:
-DQH'RH
&QI2II
4. Press 3 to stop conference and put both parties on
hold.
&DOOVRQ+ROG
;;-RKQ6PLWK
5. Resume conference: Press line key for one of the parties, then 3.
Call transfer
Attended transfer
Put the call on hold > Dial the number that you wish to transfer the call to > If the
third party wishes to accept the call, press the Transfer key.
Blind transfer
With the call on the line, press the Transfer key, then dial the phone number the call is
to be transferred to and press 3.

14
snom 300 Quick Start Guide
E
N
G
L
I
S
H
Call forwarding
1. Turn call forwarding on.
a. All incoming calls: T Call forwarding > X X Always > 3 Always target >
enter phone number of forwarding target > 3.
b. When busy: T Call forwarding > W Busy > 3 Busy target > enter phone
number > 3 .
c. When call is not picked up: T Call forwarding > X Time > 3 Timeout
target > enter phone number > enter number of seconds after which call will
be forwarded > 3.
d. The idle display when call forwarding is turned on:
P&)ZG2II
2. Turn call forwarding off: T > Off > 3.
Call lists
1. From the idle screen, press S to open.
2. Select list of missed, received, dialed calls with W X and 3.
3. Scroll through list with ST .
Directory
• Opening list of names: Press
• Scroll with ST . Shortcut to <New Item> at the end of the list: S.
• Dial W X Details W X Edit W X Clear. Select with 3.
-RKQ6PLWK
2II'LDO
Trouble shooting
Reboot
Press TSS Confi guration X X Reboot > "Reboot?" > 3
Hard reboot
Disconnect power, wait for a few seconds, reconnect.
Never disconnect the power during a firmware update!
Reset to factory values
TSS Confi guration X Reset > enter administrator password > 3
All customized settings will be lost!
Other manuals for 300
22
Table of contents
Other Snom IP Phone manuals