Snom 320 User manual

Snom320 User's ManualVer2.0.2 november 07 2017
Ver2.0.1 november 10 2016
Copyright © cloudippbx.com

Thank you or purchasing Snom320.
Make sure and acknowledge that you have read this manual be ore using Snom320.
Package Contents:
Package Contents:
1.Main Case
2.Handset
3.Handset Cable
4.AC Power Adaptor
5.Quick Start Guide manual
Disclaimer
* This document is subject to change without prior notice.
* A possibility o noise, broken voice, or disconnection may occur because o customers’ or our network environment.
We cannot guarantee the quality o voice.
* The company assumes no responsibility on the di erence o call or voice quality when the hearing acuity o
individuals is concern.
* The company assumes no responsibility when it was used outside Japan.
* As or SNOM320 regular server maintenance, you may experience temporarily service stops without prior notice.
* The company assumes no responsibility when the customers caused the phone primary source o mal unction or
breakdown.
Copyright © cloudippbx.com 2

Maintenance/Cleaning
Please use so t dry clothes to clean the device.
Don’t use wet clothes.
Don’t use volatile chemical like benzene, or thinner since they can damage the device.
I you want to use a chemical wipe, please read the cautionary notes be ore using it.
Connection Method:
1. Connect the handset cord in the handset and connect it on the main body.
2. Plug the Ethernet (network) cable into the RJ 45 connector labeled “NET” and plug the other end into the network
side to establish a data link.
3. The second RJ45 connector, labeled “PC”, is or daisy-chaining urther Ethernet devices without the need or a
second Ethernet connection line.
4. Insert the plug o the power supply into the connector labeled “DC 5V” and hooks up the casing into the mains.
5. I you want to use a headset, connect it to the RJ audio jack on the bottom shell o the phone.
SNOM320
SNOM320 is a phone device that can be used with our service. It cannot be used as a typical phone. The customer
must subscribe to an Internet Service Provider to be able to use the device. Customer with no broadband router
eature must provide a separate broadband router.
Copyright © cloudippbx.com 3

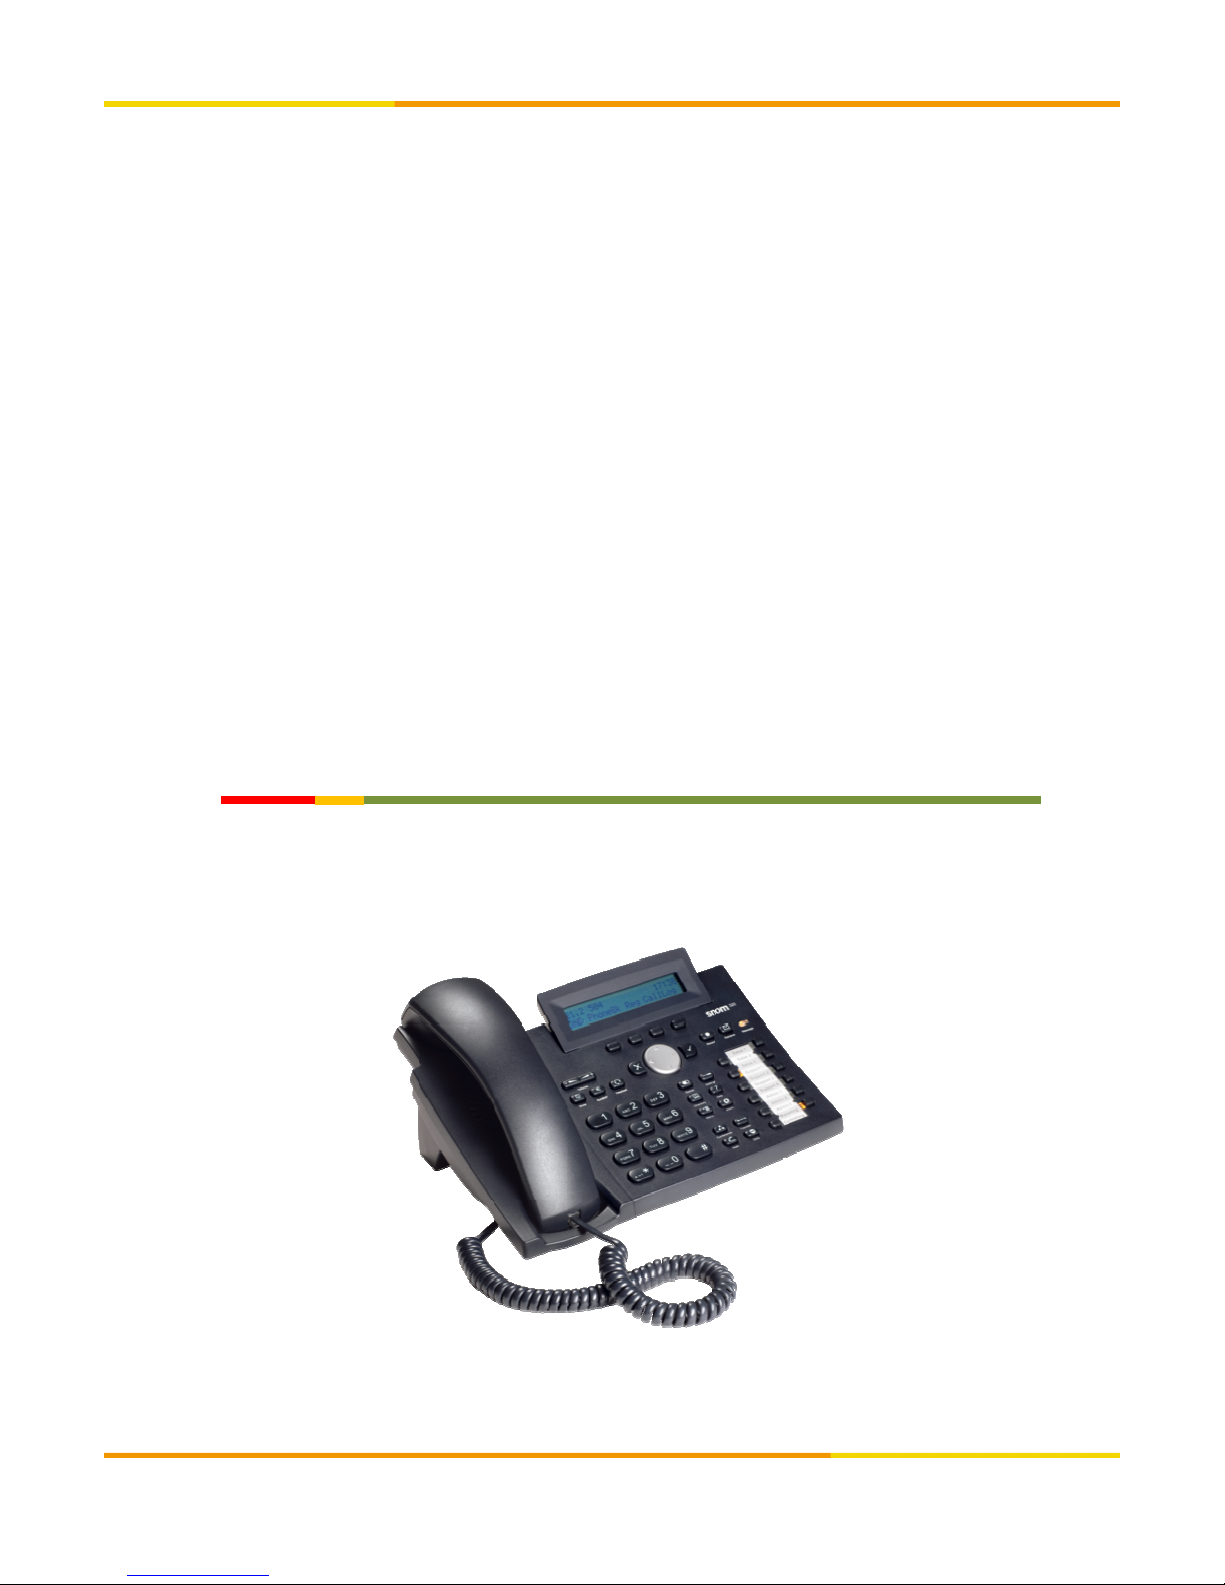
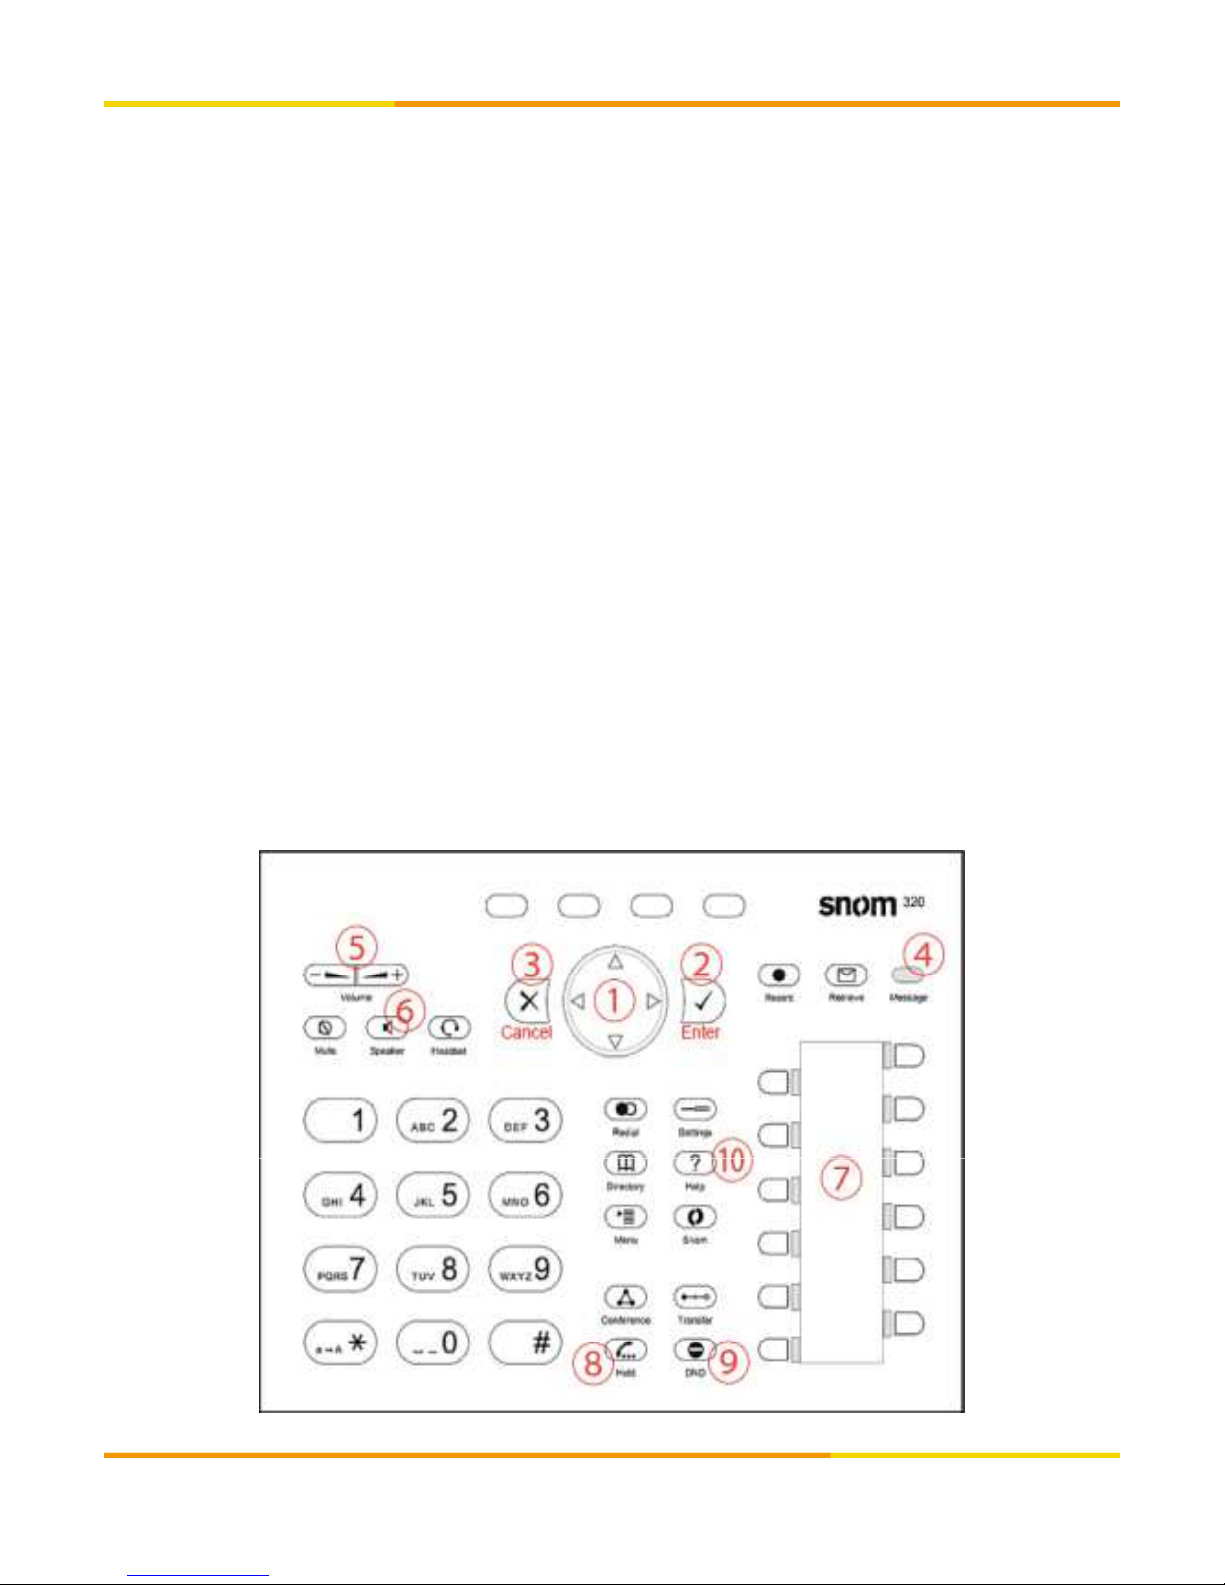
Keypad Familiarization
1. Navigation key – or navigation within the display menu and the phone book.
2. Enter key – to con irm actions, selections and inputs.
*Always press the “ENTER Key” a ter inputting the numbers dialed
3. Cancel Key – to cancel actions or inputs.
4. LED or MWI - (Message Waiting Indicator)
5. Volume Key – key to adjust the volume to (lower/higher)
6. Speaker - turns the speaker on/o
7. The 12 keys on the right with LEDs next to them are the programmable unction keys onto which di erent
unctionalities can be mapped.
8. Hold Key – Key to Put call on hold/resume call
9. DND Key – Do not disturb key or call rejection key.
10. Help Key
-
Used or checking IP and MAC address o the device.
10. Help Key
-
Used or checking IP and MAC address o the device.
Copyright © cloudippbx.com 4

General Settings
1. Veri y device’s IP Address. Press [ elp Key] Select [Information], [IPAdr] [MAC] and [Version] will appear.
Select [IPAdr] and Press enter [Check] button.
2. Snom320 and the PC must be connected to the same network. Launch any web browser such as Internet Explorer.
Enter IP Address observing the ormat below.
http: // (IP address)
Example: I the IP address is written as 192.168.001.002 , it should be entered as http://192.168.1.2/
*A ter initializing the device that you access, you will still not be prompted to enter a username/password.
In order to prevent unauthorized login, please set username and password
I you are unsure o the password please contact our customer service representative.
Copyright © cloudippbx.com 5

3. On the [Setup] options, select [Identity 1].
Display Name and Account: Enter [Unique ID].
Password: Enter [Registered Password](sent thru mail).
* I you changed password, enter your new password.
Registrar and Outbound Proxy: Enter [
Login Server
].
Registrar and Outbound Proxy: Enter [
Login Server
].
Authentication Username: Enter [Unique ID].
Display Text or Idle Screen: Enter [Extension Number].
* Click [Apply] to save changes.
*Click [Play ringer] to con irm your ringing tone. You can also listen through your device,
and make sure to check the device’s volume.
Copyright © cloudippbx.com 6

4. On the [Setup] options, select [Identity 1], then click [NAT].
Keepalive
Interval (seconds): Enter [
20
] seconds.
Keepalive
Interval (seconds): Enter [
20
] seconds.
*Click [Save] to save changes.
Copyright © cloudippbx.com 7

5. On the [Setup] options, select [Preferences].
Web Inter ace Language: Select [English].
Language: Select [English].
Number Display Style: Select [Number].
Tone Scheme: Select [Japan].
*Click [Save] to save changes
Copyright © cloudippbx.com 8

6. On the [Setup] options, select [Function Keys]
Setting Key Allocations
Menu Function keys:
HELP Number: Select [ elp]
TRANSFER Type: Select [DTMF]
TRANSFER Number: Select [#9]
*Click [Save] to save changes
Copyright © cloudippbx.com 9

7. On the [Setup] options, select [Advanced]
NTP Time Server: Enter [ntp.jst.mfeed.ad.jp].
NTP Re resh Time (sec): Enter [
3600
]
NTP Re resh Time (sec): Enter [
3600
]
Timezone: Select pre erred time zone
* Click [Save] to save changes.
Copyright © cloudippbx.com 10

On the [Setup] options, select [Advanced], then click [Audio].
Call Waiting Indication: Select [OFF].
* Click [Save] to save changes.
Copyright © cloudippbx.com 11

8. On the [Setup] options, select [Advanced], then click [SIP/RIP]
Time Support (RFC4028): Select [OFF].
* Click [Save] to save changes
Copyright © cloudippbx.com 12

9. On the [Setup] options, select [Advanced], then click [Update].
Update Policy: Select [Never update, do not load settings].
Subscribe Con ig: Select [OFF].
PnP
Con ig
: Select [
ON
].
PnP
Con ig
: Select [
ON
].
* Click [Apply] to save changes.
*Click [Reboot] to reboot the device to apply all changes.
Copyright © cloudippbx.com 13

10. On the [Setup] options, select [Software Update].
Manual Software Update
Firmware: Enter [http://downloads.snom.com/ w/snom320-8.4.35-SIP- .bin ]
Click [Load] to load the irmware
*It takes ew minutes to load the irmware. Please do not unplug or disconnect the device during irmware loading.
*The Phone is delivered with preinstalled so tware ( irmware), which allows operating your phone lawlessly. I you
require updating the phone’s irmware please ollow the instructions above.
[Disconnected Network] displayed during an outgoing call.
• Currently used version is not updated.
• IP address in the web browser and device does not match. IP address: [http://IP address o the
device/dummy.htm?settings=save&ip- _ rag_enable=on]
• Firmware may not be updated.
* Con iguration o settings depends on the version o the device.
Copyright © cloudippbx.com 14

VIEWING OF CALL ISTORY
11. On the [Operation] options, select [ ome].
You can view the call history on the igure below.
Veri y rom Settings Screen
Dialed Numbers: List o previously called/dialed numbers.
Missed Calls: List o calls that is terminated be ore being answered by its intended recipient.
Received Calls: List o calls answered by the call recipient.
* Calls can be made with just a click rom the numbers on the list.
Veri y rom the device.
Press the second button to the le t on the display menu o the phone or the “CHist” which means “Call History”.
Select among [Missed, Received, Dialed] on what to display on the screen.
Copyright © cloudippbx.com 15

SETTING BLOCKED NUMBERS
11. On the [Operation] options, select [Directory].
Set blocked numbers in the [Add or Edit Entry] area.
Example:
Name
: Type the name o the contact.
Name
: Type the name o the contact.
Number: Type the number @XXX.XXX.XXX.XXXX (Server IP address).
Number Type: Select [sip].
Contact Type: Select [Deny List].
Outgoing Identity: [Active]
Then, click [Add/Edit]. Con igured number will be displayed. I you wish to delete a number, click [Delete].
*The Server IP address depends on your account.
You can also reject calls rom anonymous callers.
The number must be registered in the device to be set as an anonymous caller.
Example:
Name: Anonymous
Number: Anonymous @XXX.XXX.XXX.XXXX (Server IP address)
Copyright © cloudippbx.com 16

SETTING PREFIX (184)
*You can make an anonymous call i you put the pre ix 184 in Japan.
12. On the [Setup] options, select [Identity 1], then click [SIP].
Dial-Plan String: Enter [^(0[0-9]*)$|sip:184¥1@¥d;phone=yes| ]
* You can set up the dial plan or this line here. With a dial plan, you can match user input (digits via
keyboard) to speci ic actions like dialing, using a distinct outgoing identity, etc.
* Use our service phone’s extension number or trans ers.
* Click [Save] to save changes.
Copyright © cloudippbx.com 17

Safety Precautions
This manual contains precautions to assure user’s sa ety while using this product. I the precautions are disregarded, the
extent o consequences is presented below.
This indicates that ignoring or mishandling o this notice might result to death or serious
injury to the person.
WARNING
This indicates that ignoring or mishandling o this notice might result to harm to the person.
CAUTION
CAUTION
WARNING
Immediately unplug the device rom the power supply i there is a strange smell and smoke.
Don’t use the device and immediately contact the dealer or repair. This may cause ire or explosion.
Do not disassemble or modi y. The device may mal unction, cause electric shock and ire.
Do not insert metal to the opening or drop the product. I in case a metal is inserted to the device,
unplug the device and contact the dealer. The device may mal unction, cause electric shock and ire.
Do not pour water or any oreign object inside the device.
I in case water or any oreign object is poured or inserted to the device, unplug the device
and contact the dealer.
Do not touch the device when lightning occurs. This may cause electric shock.
Do not use in bathroom or shower room. The device may mal unction, cause electric shock and ire.
Don’t place in a damp, dusty or direct sunlight. The device may mal unction, cause electric shock and ire.
This device is not waterproo . I in case water entered the device, unplug the device and contact the
dealer.
dealer.
CAUTION
Do not place near the kitchen table or humidi ier, or near oil and moisture. The device
may mal unction, cause electric shock and ire.
Do not place in humid and dusty area. The device may mal unction, cause electric shock and ire.
Do not place in extremely cold place or place with unstable temperature. It may cause explosion.
Do not place in unstable or shaky place. I the device alls it may collapse, it may cause injury or explosion.
Use a ter checking i oreign matters are attached to the speaker o the handset. Thumbtacks, pin,
staple wires and other metallic object may cling to the magnet o the speaker so please be care ul.
Copyright © cloudippbx.com 18

Troubleshooting
Please check the troubleshooting procedure be ore requesting a repair. I the problem doesn’t get resolved,
please contact us.
Problem
Solution
Problem
Solution
General Failure
Plug and Unplug from the power source.
(Do this for few times).
Wait for at least one minute before plugging the device.
If the problem is not resolved after doing this, please contact
our customer support service.
Please provide your number and broadband products.
PROBLEM CAUSE SOLUTION
No Ringer Sound Ethernet Cable is disconnected.
AC Adapter is disconnected.
Did you change the volume settings?
Did you change the settings on the display?
Check the connection of the Ethernet cable.
Check the connection of the AC Adapter.
Adjust the volume on the volume button.
Revert the changed settings.
Disconnect the Ethernet cable. (Please
reboot).
Call is interrupted by noise Are there any abnormalities in the network
environment? Check your network environment.
Copyright © cloudippbx.com 19
Other manuals for 320
19
Table of contents
Other Snom IP Phone manuals

Snom
Snom 320 Original operating instructions

Snom
Snom 105 User manual

Snom
Snom D712 User manual

Snom
Snom UC edition 760 User manual

Snom
Snom 7 Series User manual

Snom
Snom Vodafone 821 User manual

Snom
Snom 300 Instruction manual

Snom
Snom Vodafone 821 User manual

Snom
Snom D735 User manual

Snom
Snom 320 User manual