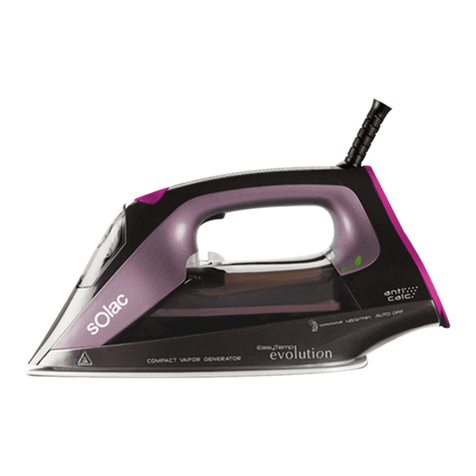
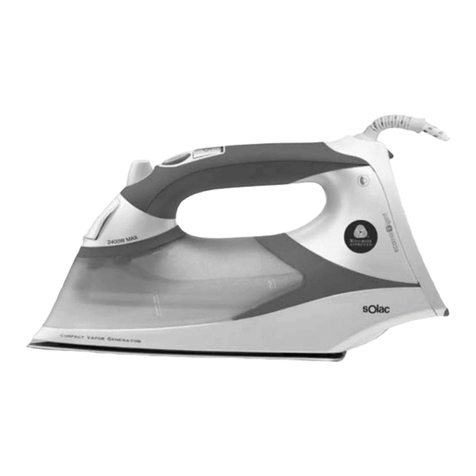
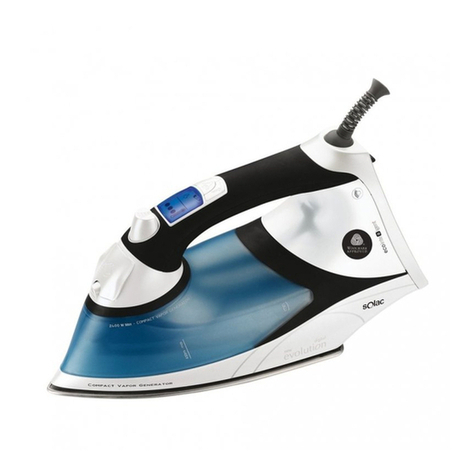
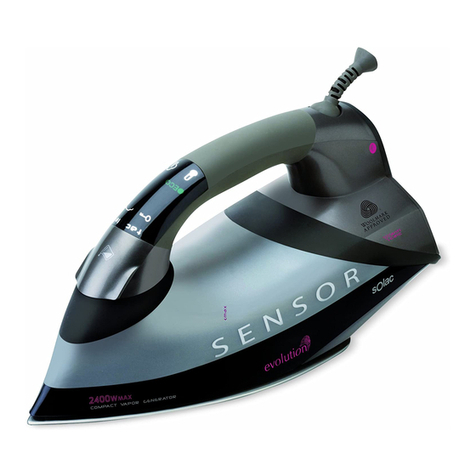
SOLAC CVG 9800 User manual

CENTRO DE PLANCHADO COMPACTO INSTRUCCIONES DE USO
COMPACT VAPOR GENERATOR INSTRUCTIONS FOR USE
CENTRALE DE REPASSAGE COMPACTEC MODE D’EMPLOI
KOMPAKT-BÜGEL-STATION GEBRAUCHSANLEITUNG
CENTRO DE PASSAR COMPACTO INSTRUÇÕES DE USO
CENTRO DI STIRATURA COMPATTO ISTRUZIONI PER L’USO
COMPACTE STRIJKINRICHTING GEBRUIKSAANWIJZING
ŽEHLÍCÍ CENTRUM COMPACT NÁVOD K POUZITÍ
ŻELAZKO KOMPAKTOWE INSTRUCJA OBSLUGI
KOMPAKTNÝ ŽEHLIACI STROJ NÁVOD NA POUZITIU
HASZNALATI ÚTMUTATÓ HASNÁLATI UTASÍTÁS
КОМПАКТЕН ГЛАДЕЩ ЦЕНТЪР инструкция за употреба
KOMPAKTNI SUSTAV ZA GLAČANJE UPUTE ZA UPOTREBU
EVOLUTION COMPACT IRONING CENTRE INSTRUCŢIUNI DE UTILIZARE
MOD. CVG 9800 / C
Solac is a registered Trade Mark 03/08
CVG9800 1 9/4/08, 10:03:31

5- 11 • ESPAÑOL
12- 18 • ENGLISH
19- 25 • FRANÇAIS
26- 33 • DEUTSCH
34- 40 • PORTUGUÊS
41- 47 • ITALIANO
48- 55 • NEDERLANDS
56- 61 • ČESKY
62- 68 • POLSKA
69- 74 • ESLOVENSKY
75- 82 • MAGYAR
83- 89 • българск
90- 96 • HRVATSKA
97-103 • ROMANA
CVG9800 2 9/4/08, 10:03:37

3
CVG9800 3 9/4/08, 10:03:38

4
CVG9800 4 9/4/08, 10:03:40

5
• ESPAÑOL
Gracias por haber elegido Evolution de Solac, el único Centro de Planchado
Compacto del mundo, con el que disfrutará de un planchado profesional con
las ventajas de una plancha tradicional.
El Centro de Planchado Compacto Evolution ha sido testado y
aceptado dentro del programa Woolmark para el cuidado de
prendas de lana en el hogar, y representa una nueva catego-
ría de licencia Woolmark en el cuidado de prendas de vestir.
Evolution incorpora una tecnología radicalmente nueva que
asegura la delicadeza y eficacia en el planchado gracias a la
generación de vapor constante a la temperatura mínima (pun-
to •) y a la uniformidad de la temperatura de la suela.
Número de certificado: M0601
ATENCIÓN
• Antes de utilizar su CPC (Centro de Planchado Compacto), retire todas las
bolsas de papel o plástico, láminas plásticas, cartones y pegatinas eventuales
que se encuentran dentro o fuera del aparato que sirvieron como protección
de transporte o promoción de venta.
• Lea estas instrucciones antes de poner su aparato en funcionamiento.
• No lo conecte sin comprobar que el voltaje del aparato y el de su casa coinciden.
• Verifique que la base del enchufe dispone de una toma de tierra adecuada.
• Tenga cuidado de que el cable no toque las partes calientes del aparato.
• Si Vd. plancha con vapor, remítase al apartado “ANTES DE EMPEZAR A
PLANCHAR”.
• Para llenar su Centro de Planchado Compacto (CPC) o rellenarlo durante
el planchado, siga las instrucciones indicadas en el apartado “ANTES DE
EMPEZAR A PLANCHAR”, desconectándolo de la red y usando el vaso que
lo acompaña.
• No se preocupe si el aparato desprende un poco de humo durante el primer
uso. Desaparecerá rápidamente.
• No proyecte el vapor “vertical” sobre una prenda colgada en el armario o
puesta en una persona. El planchado vertical debe hacerse con la prenda
sobre un colgador y aislada de otras prendas, elementos o personas.
• Mantenga el CPC en posición vertical cuando la guarde, apoyado sobre la talone-
ra del mismo. Es conveniente utilizarlo sobre una mesa de planchado estable.
• Al término del planchado vacíe siempre el agua del depósito. Y si desea
vaciarlo durante el planchado, desconecte también previamente el aparato
de la red.
• Para desconectar el CPC no tire del cable de alimentación, hágalo de la
clavija.
CVG9800 5 9/4/08, 10:03:41

6
• Si el cable de alimentación está dañado, para evitar peligros, debe de ser
sustituido en un S.A.T. (Servicio de Asistencia Técnica) autorizado por SOLAC,
ya que son necesarias herramientas especiales.
• El CPC no debería ser usado si se ha caído o si tiene alguna rotura o fuga
en el depósito del agua. Si observa alguno de estos problemas lleve el CPC
a un S.A.T. autorizado por SOLAC.
• No deje el aparato en funcionamiento sin vigilancia.
• Los niños deberían ser supervisados para asegurar que no juegan con el aparato.
• Este aparato no está destinado para ser utilizado por personas (incluidos niños)
cuyas capacidades físicas, sensoriales o mentales estén reducidas, o carezcan
de experiencia o conocimiento, salvo si han tenido supervisión o instrucciones
relativas al uso del aparato por una persona responsable de su seguridad.
¡¡ATENCIÓN!! Cuando desee desprenderse del aparato, NUNCA lo de-
posite en la basura, sino que acuda al PUNTO LIMPIO o de recogida de
residuos más cercano a su domicilio, para su posterior tratamiento. De
esta manera, está contribuyendo al cuidado del medio ambiente.
COMPONENTES PRINCIPALES
Y ACCESORIOS FIG 1
1. Tapa del orificio de llenado de agua.
2. Salida de spray.
3. Pulsador de spray.
4. Depósito del agua.
5. Filtro antical extraíble.
6. Pies antideslizantes.
7. Pantalla LCD. Fig 2.
a) Indicador cambio temperatura.
b) Temperatura seleccionada.
c) Vapor seleccionado.
d) Indicador llenado de agua.
e) Icono filtro antical.
f) Icono desconexión automática. Auto – Pause.
g) Interruptor On-Off vapor.
h) Botón selección de la temperatura.
i) Botón selección caudal de vapor.
8. Vaso.
ANTES DE EMPEZAR A PLANCHAR
• Con su Centro de Planchado Compacto desconectado de la red eléctrica, abra
la tapa del orificio de llenado Fig 3 (1) girándola hacia atrás (ver flecha).
CVG9800 6 9/4/08, 10:03:43

7
• Debido a los altos niveles de dureza del agua de la red en la mayoría de las
zonas, Solac recomienda utilizar siempre agua destilada o desmineralizada
para planchar. De esta forma, usted garantizará que su Centro de Planchado
Compacto se mantenga en condiciones óptimas durante un mayor período
de tiempo. Si por determinadas circunstancias no puede localizar agua des-
tilada, asegúrese de utilizar un agua pobre en minerales ( blanda ).
• No utilice agentes descalcificantes o productos anticalcáreos en el depó-
sito de agua. Tampoco utilice aguas perfumadas o de planchado. Estos
productos pueden dañar el interior del sistema de generación de vapor.
• Llene el depósito sin rebasar el nivel máximo con ayuda del vaso que se
adjunta Fig.1(8) y manteniendo el CPC en posición vertical, apoyado sobre
los pies anti-deslizantes de la tapa trasera Fig 3 (6). Una vez lleno el depó-
sito cierre la tapa.
• Compruebe si la prenda a planchar tiene alguna etiqueta con indicación
de la temperatura de planchado. Recomendamos clasifique las prendas en
función de la temperatura que requieran para su planchado y empiece por
las prendas que se planchen con la temperatura más baja (•)
LANA, FIBRAS SINTÉTICAS, temperatura mínima (•)
SEDA, temperatura media (••)
ALGODÓN, temperatura alta (•••)
LINO, temperatura máxima (MAX)
NOTA: Planchar prendas delicadas con una temperatura superior a la necesaria,
perjudica al tejido y provoca la adherencia de residuos quemados a la suela.
FUNCIONAMIENTO
• Conecte el Centro de Planchado Compacto a la red. Sonará un pitido, la pantalla
se encenderá automáticamente y aparecerá el símbolo del termómetro parpa-
deando junto con la posición 1 de temperatura (•) y la posición media de vapor
Fig.2. Adicionalmente, aparecerá un icono con el cartucho antical, durante 30
seg, indicando que su plancha dispone de un sistema antical Fig 2 (e). Para
reemplazarlo siga las instrucciones del apartado “SISTEMA ANTICAL”. Por defecto
el CPC cuando se enciende, marca estas posiciones.
• Si mantiene pulsado el botón de temperatura durante 2 segundos se des-
conectará el CPC. Para volver a conectarlo bastará con volver a pulsarlo y
se repetirán los pasos descritos en el párrafo anterior.
Selección de temperatura
• Con su Centro de Planchado Compacto sabrá fácilmente en qué momento
alcanza la temperatura seleccionada y está listo para planchar, ya que en la
CVG9800 7 9/4/08, 10:03:44

pantalla de comunicación el icono del termómetro dejará de parpadear y al
mismo tiempo sonará un pitido. Fig 2.
• El CPC tiene 4 posiciones de temperatura entre las que podrá seleccionar
oprimiendo el botón de selección de temperatura Fig 2 (h). Si pulsa una
vez, en la pantalla aparecerá un nuevo punto junto al que ya existía antes
(••), indicando que se encuentra en el nivel de temperatura 2. El termómetro
parpadeará de nuevo hasta alcanzar la temperatura seleccionada.
• Cuando la haya alcanzado avisará con un pitido y el termómetro dejará de
parpadear Fig 4. Los niveles 3 y MAX de temperatura se seleccionan de la
misma manera.
• Desde la posición MAX de temperatura si pulsa una vez más, el CPC volverá a
la posición inicial con el punto 1 de temperatura y así sucesivamente.
Selección de vapor
• El Centro de Planchado Compacto tiene dos posiciones de vapor; vapor me-
dio (20gr/min) y vapor máximo (45gr/min). El valor medio aparece siempre
por defecto al conectar la plancha.
• Para obtener vapor máximo basta con pulsar el botón de selección de vapor
una vez Fig 2 (i), y en la pantalla aparecerá el icono del vapor en su mayor
caudal. Fig 5. Para volver al caudal medio de vapor sólo tiene que presionar
de nuevo el botón de selección. Fig 2 (i).
• Una vez haya elegido la temperatura así como el caudal de vapor adecuados a
la prenda, presione una vez el interruptor On-Off del vapor Fig 6 (g) y ya puede
comenzar a planchar. No es necesario estar pulsando el interruptor del vapor
de forma continua. Para cortar la salida del vapor, presione de nuevo el interrup-
tor On-Off del vapor Fig 2 (g) y éste dejará de salir automáticamente.
• ECO-INTELLIGENT: este Centro de Planchado Compacto Solac cuenta
con un dispositivo de desconexión de la función vapor tras 3 segundos
sin detección de movimiento. Con ello se consigue un menor consumo
energético así como una mayor autonomía del depósito (menor consu-
mo de agua).
•La función vapor se conectará de nuevo automáticamente al detectar
el más mínimo movimiento del Centro de Planchado Compacto o bien
presionando uno de los pulsadores de salida de vapor.
DESCONEXIÓN AUTOMÁTICA: AUTO - PAUSE
• El Centro de Planchado Compacto posee un sistema de desconexión au-
tomática. Transcurridos 3 minutos desde la última vez que se utilizó, este
se desactiva de forma automática. Esto significa que una vez que actúa el
dispositivo, el CPC deja de calentar y comienza a enfriarse. En ese momen-
to sonará un pitido y aparecerá el icono Fig 2 (f) parpadeando durante 5
segundos sobre la pantalla iluminada, y que posteriormente seguirá parpa-
deando sobre la pantalla apagada Fig 7, indicándole que el aparato se ha
desconectado. Para volverlo a activar, basta con moverlo ligeramente o bien
8
CVG9800 8 9/4/08, 10:03:45
9
pulsar cualquiera de los tres botones de control Fig 2 (g, h, i). El CPC volverá
a la posición de temperatura y vapor que tenía antes de la desconexión.
• Téngase en cuenta que el período transcurrido desde la desconexión hasta
que se vuelva a activar influirá en el tiempo que necesite el CPC para volver
a recuperar la temperatura seleccionada anteriormente.
RECOMENDACIONES DE PLANCHADO
• Dado que el funcionamiento de este modelo se asemeja a un centro de
planchado profesional y debido a su fuerte caudal de vapor al máx, 45 gr/
min, le recomendamos planchar con vapor medio en las posiciones 1 y 2 de
temperatura, y vapor máximo para las posiciones 3 y Máx. de temperatura.
Asimismo le recomendamos primero planchar con vapor (el adecuado a la
prenda que vaya a planchar) y repasar en seco para deshumedecer la ropa
y obtener los resultados de un planchado profesional.
• Para planchar sin vapor, basta con NO accionar el interruptor On-Off del
vapor Fig 2 (i) NO es necesario vaciar el depósito de agua.
PLANCHADO CON VAPOR
• Este modelo le permite planchar con vapor en la posición 1 de temperatura
(•). Dispone de dos caudales de vapor, med 20gr/m y máx 45gr/m. Para la
correcta utilización del caudal remítase al apartado de “Recomendaciones
de Planchado”.
PLANCHADO VERTICAL
• Mantenga pulsado el interruptor del vapor para obtener vapor durante
el planchado vertical.
• Permite eliminar arrugas de prendas delicadas sin necesidad de apoyarlas en
la tabla de planchado: chaquetas, abrigos, cortinas, prendas de ante, etc.
• Coloque la prenda en un colgador, aislada de otras prendas, personas, ...
• Ponga el selector de temperatura en posición (••), (•••) ó (MAX), sitúe el
CPC en posición vertical y accione el pulsador. En el punto (••) obtendrá un
vapor más húmedo y blanco que percibirá mejor, mientras que en el punto
(•••) y (MAX) el vapor es más seco y aunque sigue manteniendo el mismo
caudal le será más difícil verlo.
SPRAY
• Con agua en el depósito, puede pulverizar agua sobre la prenda presionando
el pulsador Fig. 1 (3).
CVG9800 9 9/4/08, 10:03:46

10
RELLENADO DE AGUA
• Si durante el planchado el depósito se queda sin agua, en aproximadamente
30 segundos aparecerá el icono Fig 2 (d) indicando que se ha de rellenar
de agua. Si no se rellena el depósito, la micro-bomba se desconectará au-
tomáticamente en el plazo de 1 minuto para evitar ser dañada. Si se llegase
a quedar completamente sin agua, se oiría un ruido extraño procedente
de la micro-bomba. En este caso pulse el interruptor On-Off, desconecte el
aparato y rellene el depósito de agua. Al pulsar nuevamente el interruptor
On – Off, dicho ruido desaparecerá.
• Desconecte el CPC y rellene el depósito, con el vaso que lleva incorporado
Fig 1 (8), en posición vertical según se indica en la figura Fig 3.
• Rellenado el depósito, el icono no desaparece de la pantalla hasta que no
pulse el interruptor On – Off y comience a planchar de nuevo ( esto no es
inmediato, sino que transcurrirán unos segundos ).
SISTEMA ANTICAL
• El Centro de Planchado Compacto incorpora un innovador sistema antical
recambiable consistente en un filtro de resina que retiene las sustancias
calcáreas del agua, evitando que éstas lleguen a la cámara de vapor de
la suela dando como resultado un alargamiento de la vida del CPC. Este
modelo permite, en caso de desearlo, reemplazar la resina por una nueva
con el objeto de que el CPC se mantenga siempre en óptimo estado. En
caso de desear reemplazar la resina, le recomendamos que lo haga cada 6
meses. El cambio de la resina no implica que se puedan evitar los consejos
sobre la dureza del agua mencionadas en el apartado “ANTES DE EMPEZAR
A PLANCHAR” .
• En caso de no cambiar la resina de este CPC, éste se verá afectado por
los efectos de la cal igual que en otros sistemas de planchado.
• Para el cambio y antes de retirarlo asegúrese de que no hay agua en
el depósito.
• Situado en la talonera del aparato, gire la pieza en el sentido contrario de
las agujas del reloj hasta que haga tope, y la flecha coincida con el candado
abierto (aprox. 180º) y tire hacia atrás del mismo.
• Para colocarlo de nuevo, haga coincidir la flecha con el candado abierto
y gire en el sentido de las agujas del reloj, siguiendo las indicaciones del
dibujo, presionando a su vez la pieza hacia el interior, hasta situarse en el
candado cerrado. Fig 9. Asegúrese de que una vez colocado el filtro, éste
NO SOBRESALE de la parte trasera del CPC. De lo contrario, Ud. lo habrá
colocado incorrectamente y el agua se saldrá del depósito.
CVG9800 10 9/4/08, 10:03:49

11
LIMPIEZA
A) Suela
• Desconecte el aparato y deje que la suela se enfríe.
• Para la limpieza de la suela utilice productos ecológicos basados en arci-
llas.
B) Parte exterior
• Para limpiar la parte exterior de su CPC, utilice un paño humedecido con
agua y jabón.
• No lo limpie con productos químicos abrasivos, ni disolventes ya que pue-
de atacar ciertas partes plásticas y / o eliminar algunas de las marcas y / o
indicaciones.
• Guarde su CPC en posición vertical, enrolle el cable alrededor de la talonera
y fije el cable con la presilla.
• A pesar de disponer en el cable de alimentación de un codo de 360º de
giro, NUNCA FUERCE dicho cable al enroscarlo alrededor del producto
en la primera vuelta.
CONSEJOS PARA DESPRENDERSE
DEL APARATO USADO
• Antes de deshacerse de su aparato usado deberá inutilizarlo de modo visi-
ble, encargándose de su evacuación de conformidad a las leyes nacionales
vigentes. Solicite información detallada a este respecto a su Distribuidor,
Ayuntamiento o Administración local.
CONDICIONES DE GARANTÍA
• Solac no se responsabiliza de las averías de su aparato en caso que no
cumpla las especificaciones de las condiciones de garantía o falta de segui-
miento de las instrucciones de funcionamiento y mantenimiento que para
cada aparato se incluyen en el folleto de instrucciones.
• Las condiciones de garantía las puede encontrar en el librito adjunto “Word-
Wide Guarantee”.
• Le recordamos que los daños producidos por el efecto de la cal no están
cubiertos por la garantía.
CVG9800 11 9/4/08, 10:03:50

12
• ENGLISH
Thank you for choosing Solac Evolution, the unique Compact Vapor Generator
in the world, with which you will obtain the benefits of professional pressing
combined with the advantages of traditional ironing.
The Evolution Compact Ironing Centre has been tested and
accepted into the Woolmark program for the care of wool
garments in the home, and it introduces a new Woolmark
licence category for garment care. Evolution incorporates
radically new technology that ensures ironing delicateness
and efficiency thanks to the generation of constant steam
at a minimum temperature (point •) and at a uniform tem-
perature on the soleplate.
Certificate number: M0601
ATTENTION
• Before using your CVG (Compact Vapor Generator), remove all the paper or plastic
bags, plastic sheets, cards and possible stickers that may be on the outside or inside
of the appliance that acted as handling protection or sales promotion material.
• Read these instructions before first using your appliance.
• Do not plug it in without checking that the voltage of the appliance is the
same as your home mains voltage.
• Check that the socket outlet has a suitable ground connection.
• Take care that the cord does not touch the hot parts of the appliance.
• If you are going to iron with steam, refer to the section “BEFORE STARTING
TO IRON” to extend the life of the independent steam chamber.
• For steam irons and irons incorporating means for spraying water, that the
plug of the supply cord must be removed from the socket-outlet before the
water reservoir is filled with water.
• Do not worry if the appliance gives off a little smoke during first use. It will
soon disappear.
• Do not spray “vertical” steam on a garment hanging in the wardrobe or on
a person. Vertical ironing must be done with the garment on a hanger and
away from other garments, elements or persons.
• Stand the CVG in the vertical position resting on its heel when storing. It is
advisable to use a stable ironing board.
• When you finish ironing, always empty the water from the tank. If you want
to drain it while ironing, always unplug the appliance from the mains first.
• To disconnect the CVG, never pull on the power cord, take out the plug.
• If the supply cord is damaged, it must be replaced by the manufacturer, one
service agent authorized by SOLAC or a similarly qualified person in order
to avoid a hazard.
CVG9800 12 9/4/08, 10:03:51

13
• The CVG should not be used if it has been dropped or has a crack or leak
in the water tank. If you observe any of these problems, take the CVG to a
one service authorized by SOLAC.
• Keep electrical appliances out of reach from Children or infirm persons. Do
not let them use the appliances without supervision.
• Please never leave the CVG unattended while it is connected to the supply.
• Children must be supervised to ensure they do not play with the appliance.
• This appliance is not for use by persons (including children) whose physical,
sensorial or mental capacities are impaired, or who lack sufficient experience
or knowledge, unless they have been supervised or instructed in the use of
the appliance by a person responsible for their safety.
IMPORTANT: When you want to dispose of the appliance, NEVER
throw it in the rubbish. Take it to your nearest CLEAN POINT or waste
collection centre for treatment. If you do that, you will be helping
to look after the environment.
MAIN COMPONENTS AND ACCESSORIES FIG 1
1. Water filler hole cap.
2. Spray outlet.
3. Spray button.
4. Water tank.
5. Removable anticalc filter.
6. Non-slip legs.
7. LCD display. Fig 2.
a) Temperature change indicator.
b) Temperature selected.
c) Steam selected.
d) Water filling indicator.
e) Anticalc filter icon.
f) Automatic Auto – Pause icon.
g) Steam On-Off switch.
h) Temperature selector button.
i) Steam flow selector button.
8. Beaker.
BEFORE STARTING TO IRON
• With your Compact Ironing Centre disconnected from the mains, open the
fill cap shown in Figure 2 (1) by turning it backwards (see arrow).
• Due to the high level of water hardness in most areas, Solac recommends
that you always use distilled or demineralised water for ironing. You will
CVG9800 13 9/4/08, 10:03:52

14
thus guarantee that your Compact Ironing Centre stays in perfect condition
for as long as possible. If you cannot find distilled water for any reason, be
sure to use water that is low in minerals (soft).
• Do not put any type of scale remover solvents or products in the water tank.
Also do not use perfumed or ironing water. These products can damage the
interior of the steam generation system.
• Use the attached cup shown in Figure 1 (12) to fill the tank, without exceed-
ing the maximum level. Keep the CPC in the vertical position, supported
on the non-slip feet of the rear cover (see Figure 2). After the tank is full,
close the cap.
• Due to the fact that this product generates a considerable amount of steam,
we recommend that you fill the tank up to the maximum indicated level,
otherwise you would have to fill up the water tank more frequently.
• Check the garment to be ironed to see if it has a label that indicates the
ironing temperature. We recommend that you classify garments by their re-
quired ironing temperature and that you begin ironing with the garments
that require the lowest temperature ( • ).
WOOL, SYNTHETIC FIBRES, minimum temperature (•)
SILK, medium temperature (••)
COTTON, high temperature (•••)
NB: Ironing delicate garments with a temperature higher than necessary is
harmful for the fabric and causes burnt residue to get stuck to the sole-
plate.
OPERATION
• Plug the Compact Vapor Generator into the mains. A buzzer will sound, the
display will light up automatically and the thermometer symbol will appear
on the blink alongside temperature position 1 (•) and the medium steam
position Fig.2. In addition, an icon will appear with the scale-preventing
cartridge, for 30 sec, indicating that your iron has a scale-prevention system
Fig 2 (e). To replace it, follow the instructions in the section “ANTICALC - SYS-
TEM”. By default, the iron marks these positions when it is switched on.
Temperature selection
• With your Compact Vapor Generator you will easily know when it reaches
the selected temperature and is ready for ironing, as on the communication
display the thermometer icon will cease to blink and at the same time a
buzzer will sound. Fig 2.
• The CVG has 4 temperature positions for you to choose between by press-
ing the temperature selector button Fig 2 (h). If you press once, another
CVG9800 14 9/4/08, 10:03:53

15
dot will appear alongside the one already there (••), indicating that it is at
temperature level 2. The thermometer will go on the blink again until the
selected temperature is reached. When it has reached it, the warning buzzer
will sound and the thermometer will cease to blink Fig 4. Temperature levels
3 and MAX are selected in the same way.
• From the MAX temperature position, if you press the button again, the iron
will revert to the initial position with 1 temperature dot, and so on. Press
the temperature button for 2 seconds to disconnect the iron. To restart it,
simply press the button again.
Steam selection
• The Compact Vapor Generator has two steam positions; medium steam
(20gr/min) and maximum steam (45gr/min). The medium value always ap-
pears by default when the iron is switched on.
• To obtain maximum steam, simply press the steam selector button once
Fig 2 (i), and the steam icon will appear in the display at its highest flow.
Fig 5. To revert to medium flow, you just have to press the selector button
again. Fig 2 (i).
• When you have chosen the appropriate temperature and steam flow for the
garment, press the steam On-Off switch Fig 6 (g) once and you may start to
iron. It is not necessary to be pushing the steam button continually, just
press once and the steam will issue without interruption. To cut off steam
output, press the steam On-Off switch Fig 2 (g) again and it will cease to
issue automatically.
• ECO-INTELLIGENT: this Solac Compact Ironing System includes a device
for disconnecting the steam function after 3 seconds of not detect-
ing any movement. This ensures lower power consumption as well as
greater autonomy of the tank (lower water consumption).
• The steam function switches back on automatically when the slightest
movement of the Compact Ironing System is detected or when any of
the steam outlet buttons is pressed.
AUTOMATIC SWITCH OFF: AUTO - PAUSE
• The Compact Vapor Generator has an automatic switch-off system. It is
switched off automatically 3 minutes after the last time it was used. This
means that once the device is actuated, the CIS ceases to heat and begins
to cool down. At that moment a buzzer will sound and the icon Fig 2 (f)
will appear on the blink for 5 seconds on the illuminated display, and it
will continue blinking afterwards on the display when it is not lit up Fig 7,
indicating that the appliance has been switched off. To switch it back on,
just move it slightly or else press any of the three control buttons Fig 2 (g,
h, i). The CIS will revert to the temperature and steam position it had before
being switched off.
CVG9800 15 9/4/08, 10:03:54

16
• Remember that the period between being switched off and switched back
on again will affect the time that the CVG may need to regain the tempera-
ture selected previously.
IRONING RECOMMENDATIONS
• Since the working of this model is similar to an ironing centre and due to
its strong flow of steam at Max, 45 gr/min, we recommend you to iron with
medium steam at temperature positions 1 and 2, and maximum steam for
temperature positions 3 and Max. We also recommend you to iron first with
steam (the level appropriate to the garment you are going to iron) and go
over the clothes dry to remove the moisture and obtain results comparable
with professional pressing.
• Keep the steam button pressed to obtain steam during vertical ironing.
• To iron without steam, simply do NOT press the steam On-Off switch Fig 2
(i) It is NOT necessary to drain the water tank.
STEAM IRONING
• This model enables you to iron with steam at temperature position 1 (•). It
has two steam flow rates, med. 20gr/m and max. 45gr/m. For correct use of
the flow refer to the section “Ironing Recommendations”.
VERTICAL IRONING
• It enables you to remove creases from delicate garments without having to
lay them on the ironing board: jackets, coats, curtains, suede garments, etc.
• Place the garment on a hanger, away from other garments, persons, ...
• Set the temperature selector at position (••), (•••) or (MAX), place the iron in
the vertical position and press the button. At position (••) you will obtain a
more humid white steam which will be more apparent, whereas at setting
(•••) and (MAX) the steam is drier and, although the same flow is maintained,
it will be harder for you to see.
SPRAY
• With water in the tank, you may spray water over the garment by pressing
the button Fig. 1 (3).
FILLING WITH WATER
• If the water is running out, after 30 seconds aprox. water filling icon will blink
to indicate water tank must be refilled. Fig 2 (d). If the tank is not filled,
pump will stop automatically within 1 minute to prevent damaging it.
CVG9800 16 9/4/08, 10:03:55

17
• Unplug the CVG and fill the tank with the beaker that is supplied Fig 1 (8),
in the vertical position as shown in figure Fig 3.
• When the tank is full, the icon does not disappear from the display until you
press the On – Off switch and start ironing again.
• If the appliance were to run out of water completely, you would hear
a strange noise from the micro-pump. In this case, press the On-Off
switch, unplug the appliance and fill the tank with water. When you
press the On – Off switch again, this noise will disappear.
ANTICALC - SYSTEM
• The Compact Vapor Generator is fitted with a replaceable anticalc – system
consisting of a resin filter, which retains the limy substances in the water,
preventing these from reaching the steam chamber in the sole-plate and
thereby extending the life of your CVG. If you so wish, on this model you may
replace the resin so that the CVG is kept in optimum condition. If you want
to replace the resin, we recommend you to do it every 6 months. Chang-
ing the resin does not mean that you may overlook the advice about water
hardness given in the section “BEFORE STARTING TO IRON” .
• In the event of not changing the resin of this CVG, it will be subject to
the effects of scale just like as in other ironing systems.
• For replacement and before removing it, make sure there is no water
in the tank.
• Turn the part, situated in the heel of the appliance, in an anticlockwise
direction as far as it will go, and the arrow lines up with the open padlock
(approx. 180º) and pull it back.
• To replace it, line up the arrow with the open padlock and turn it in a clock-
wise direction, following the directions in the drawing, pressing the part in-
wards at the same time, until reaching the padlock closed position Fig 9.
• When the filter is in place, make sure that it DOES NOT STAND OUT of
the back of the iron, otherwise you will not have fitted it properly and
water will leak from the tank.
CLEANING
A) Sole-plate
• Unplug the iron and let it cool down.
• Use environment-friendly clay-based products to clean the sole-plate.
B) Outside
• To clean the outside of your CVG, use a cloth moistened in soapy water.
• Do not clean with abrasive chemical products or solvents as it may attack
certain plastic parts and / or remove some of the marks and / or indica-
tions.
CVG9800 17 9/4/08, 10:03:56

18
• Store your CVG in the vertical position, wind the cord round the heel and
secure it with the clip.
• Although the power cord is fitted with a 360º rotational elbow, NEVER
FORCE this cord when winding it around the appliance on the first
turn.
TIPS FOR DISPOSING OFTHE USED APPLIANCE
• Before disposing of your used appliance, you should make it visibly unserv-
iceable and have it disposed of according to current national legislation.
• Ask your Distributor, Town Council or Local Authority for detailed informa-
tion.
WARRANTY CONDITIONS
• Solac accepts no liability for faults in your appliance in the event of non-
compliance with the specifications of the warranty conditions or failure to
follow the operating or maintenance directions included in the instruction
brochure for every appliance.
• The warranty conditions may be found in the accompanying “Word-Wide
Guarantee” booklet.
• We remind you that the damage caused by the effects of scale is not
covered by the guarantee.
CVG9800 18 9/4/08, 10:03:57

19
• FRANÇAIS
Merci d’avoir choisi Evolution de Solac, le Générateur de Vapeur compact et
unique au monde avec lequel vous obtiendrez un repassage professionnel
tout en conservant les avantages du fer traditionnel.
La centrale de repassage compact Evolution a été testée
et acceptée par le programme Woolmark pour le soin des
lainages et représente une nouvelle catégorie de licence
Woolmark pour le soin des vêtements. Evolution dispose
d’une technologie complètement nouvelle qui assure la dé-
licatesse et l’efficacité du repassage grâce à la génération
de vapeur constante à la température minimale (point •) et
à l’uniformité de la température de la semelle.
Numéro de certificat : M0601
ATTENTION
• Avant d’utiliser votre CRC (Centrale de Repassage Compactec), retirez tous
les sacs en papier ou en plastique, les feuilles en plastique, les cartons
et tous adhésifs éventuels qui se trouvent à l’intérieur ou à l’extérieur de
l’appareil ayant servi de protection pendant son transport ou sa promotion
commerciale.
• Lisez ces instructions avant d’allumer votre appareil.
• Ne le branchez pas sans avoir vérifié que la tension de l’appareil correspond
bien à celle de votre domicile.
• Vérifiez que la prise de courant utilisée est bien reliée à la terre.
• Prenez garde à ce que le cordon d’alimentation n’entre pas en contact avec
les parties chaudes de l’appareil.
• Si vous repassez à la vapeur, consultez le point “AVANT DE COMMENCER A
REPASSER” pour rallonger la vie de la chambre de vapeur autonome.
• Pour remplir votre Centrale de Repassage Compactec (CRC) ou le remplir
pendant le repassage, suivez les instructions données au point “AVANT DE
COMMENCER A REPASSER”, débranchez-le et utilisez le récipient fourni avec
l’appareil.
• Ne vous inquiétez pas si l’appareil dégage un peu de fumée lors de sa pre-
mière utilisation. Celle-ci disparaîtra rapidement.
• Désactivez toujours le bouton de vapeur de votre CRC lorsque vous ne
repassez pas. N’actionnez pas l’interrupteur On-Off Fig. 2 (g) de vapeur
sans eau dans la cuve car cela pourrait endommager la micropompe et
écourter la durée de vie du CRC.
• Ne projetez pas la vapeur “verticale” sur un vêtement suspendu dans l’ar-
moire ou mis sur quelqu’un. Le défroissage vertical doit se faire avec le
CVG9800 19 9/4/08, 10:03:58

20
vêtement disposé sur un cintre et éloigné de tous autres textiles, éléments
ou de toutes personnes.
• Rangez toujours le CRC en position verticale, appuyé sur son talon d’appui.
• Il est préférable de l’utiliser sur une table à repasser stable.
• A la fin du repassage, videz toujours l’eau de la cuve. Et si vous voulez la
vider pendant le repassage, débranchez au préalable l’appareil.
• Pour débrancher le CRC, ne tirez pas sur le cordon d’alimentation, faites-
le en tirant sur la prise.
• Si le cordon d’alimentation est endommagé, pour éviter tous dangers, celui-
ci devra être remplacé dans un Service Technique Agréé par SOLAC car des
outils spéciaux sont nécessaires pour cela.
• Ne pas utiliser le CRC en cas de chute, de rupture ou de fuite de la cuve
d’eau. Si vous constatez un de ces problèmes, apportez-le à un Service
Technique agréé par SOLAC.
• Ne laissez pas l’appareil fonctionner sans surveillance. Tenez-le hors de
la portée des enfants.
• Les enfants doivent être surveillés afin de s’assurer qu’ils ne jouent pas avec
l’appareil.
• À moins d’avoir été supervisées ou d’avoir reçu les instructions d’usage
de la personne responsable de leur sécurité, les personnes (y compris des
enfants) aux capacités physiques, sensorielles ou mentales réduites, ou
manquant d’expérience ou de connaissance, ne doivent pas utiliser cet
appareil.
ATTENTION ! Lorsque votre appareil sera hors d’usage, NE LE JETEZ
PAS à la poubelle ; confiez-le à un POINT DE RECYCLAGE ou à la
déchetterie la plus proche afin qu’il soit traité correctement. Vous
contribuerez ainsi à la préservation de l’environnement.
ELEMENTS PRINCIPAUX ET ACCESSOIRES. FIG 1
1. Couvercle de l’orifice de remplissage de l’eau.
2. Sortie du vaporisateur.
3. Bouton du vaporisateur.
4. Cuve d’eau.
5. Filtre anticalcaire amovible.
6. Pieds antidérapants.
7. Ecran LCD. Fig 2.
a) Indicateur de changement température.
b) Température sélectionnée.
c) Vapeur sélectionnée.
d) Indicateur de remplissage d’eau.
e) Symbole filtre anticalcaire.
f) Symbole arrêt automatique. Auto – Pause.
g) Interrupteur On-Off vapeur.
h) Bouton de sélection de la température.
i) Bouton de sélection du jet de vapeur.
8. Récipient.
CVG9800 20 9/4/08, 10:03:59
This manual suits for next models
1
Table of contents
Languages:
Other SOLAC Iron manuals

SOLAC
SOLAC CVG9507 User manual

SOLAC
SOLAC CPB6100 User manual

SOLAC
SOLAC PV1652 User manual

SOLAC
SOLAC Optima Start PV2004 User manual

SOLAC
SOLAC CVG95 Series User manual

SOLAC
SOLAC CVG 9600 User manual

SOLAC
SOLAC PV2020 User manual

SOLAC
SOLAC CVG 96 Series User manual

SOLAC
SOLAC PV1810 User manual

SOLAC
SOLAC CVG 98 series User manual

SOLAC
SOLAC Smart Evolution User manual

SOLAC
SOLAC PV1610 User manual

SOLAC
SOLAC CVG9700 User manual

SOLAC
SOLAC CVG9506 User manual

SOLAC
SOLAC OPTIMA ULTRA 3000 User manual

SOLAC
SOLAC CVG9611 User manual

SOLAC
SOLAC PC1510 User manual

SOLAC
SOLAC CPP6001 User manual

SOLAC
SOLAC CVG9610 User manual

SOLAC
SOLAC Optima Center 3000 User manual