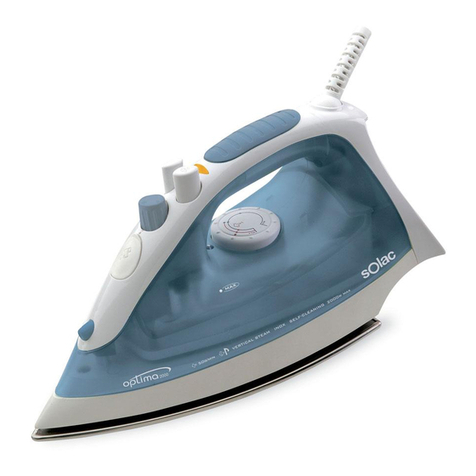
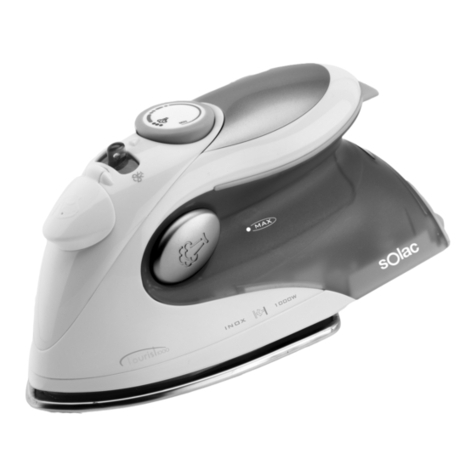
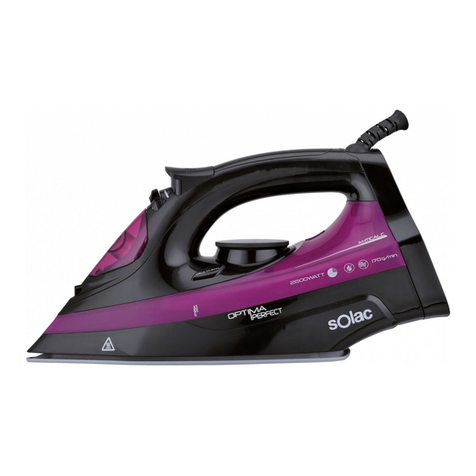
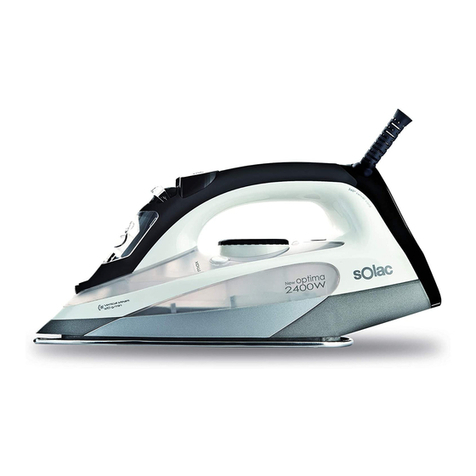
SOLAC PV2020 User manual

Solac is a registered Trade Mark
INSTRUCCIONES DE USO
INSTRUCTIONS FOR USE
MODE D’EMPLOI
GEBRAUCHSANLEITUNG
INSTRUÇÕES DE USO
ISTRUZIONI PER L’USO
GEBRUIKSAANWIJZING
NÁVOD K POUZITÍ
INSTRUCJA OBSLUGI
NÁVOD NA POUZITIU
HASNÁLATI UTASÍTÁS
инсрукция за употреба
UPUTE ZA UPOTREBU
INSTRUCŢIUNI DE UTILIZARE
Plancha de vapor
Steam Iron
Fer à vapeur
Dampfbügeleisen
Ferro de engomar a vapor
Ferro da stiro a vapore
Stoomstrijkijzer
Napařovací žehlička
Żelazko parowe
Naparovacia žehlička
Gőzölős vasaló
Парна ютия
Glačalo na paru
Fier de călcat cu abur
Mod. PV2020
PV2030
07/07
PV2020_2030.book Page 1 Thursday, July 19, 2007 6:45 PM

ESPAÑOL es
ENGLISH en
FRANÇAIS fr
DEUTSCH de
PORTUGUÊS pt
ITALIANO it
NEDERLANDS nl
ČESKY cs
POLSKI pl
SLOVENČINA sk
MAGYAR hu
българск bg
HRVATSKA hr
ROMÂNĂro
5-11 •
12-17 •
18-24 •
25-31 •
32-38 •
39-45 •
46-52 •
53-58 •
59-65 •
66-71 •
72-78 •
79-85 •
86-91 •
92-98 •
PV2020_2030.book Page 1 Thursday, July 19, 2007 6:45 PM

PV2020_2030.book Page 1 Thursday, July 19, 2007 6:45 PM

PV2020_2030.book Page 2 Thursday, July 19, 2007 6:45 PM

Indicaciones de Seguridad 5
es
ESPAÑOL es
1 Indicaciones de Seguridad
• Lea completamente estas instrucciones antes de utilizar su aparato.
• Este aparato es sólo para uso doméstico, no industrial. Cualquier uso
diferente al indicado podría ser peligroso.
• Mantenga el aparato siempre fuera del alcance de los niños y
discapacitados. Cuando lo utilice en su presencia, extreme la vigilancia.
• No realice ninguna modificación ni reparación en el aparato. Ante
cualquier anomalía en el cable u otra parte del aparato, no lo use y
acuda a un servicio de asistencia autorizado.
• No utilice piezas o accesorios no suministrados o recomendados por
SOLAC.
• Antes de enchufar el aparato a la red eléctrica, compruebe que el voltaje
indicado coincide con el de su hogar.
• Desenchufe el aparato siempre después de su uso y antes de
desmontar o montar piezas y realizar cualquier tarea de mantenimiento
o limpieza. Desenchúfelo también en caso de apagón. Cuando enchufe
o desenchufe el aparato, debe estar desconectado.
• No tire nunca del cable ni cuelgue el aparato por él. Desenchufe el
aparato tirando siempre de la clavija, nunca del cable.
• Evite que el cable de alimentación entre en contacto con aristas
cortantes o superficies calientes. No deje el cable colgando por el borde
de la mesa o encimera, para evitar que los niños tiren de él y hagan caer
el aparato.
• No sumerja nunca el aparato en agua u otro líquido, ni lo introduzca en
el lavavajillas.
• El aparato debe conectarse a una base de toma de corriente que
disponga de un contacto de tierra adecuado.
• No deje el aparato enchufado a la red sin vigilancia.
• La temperatura de la suela puede ser elevada cuando el aparato está
en funcionamiento. Durante el funcionamiento, no toque la suela y coja
la plancha sólo por su asa, y no permita que el cable toque la suela.
b¡¡ATENCION!!: Cuando desee desprenderse del aparato, NUNCA lo
deposite en la basura, sino que acuda al PUNTO LIMPIO o de
recogida de residuos mas cercano a su domicilio, para su posterior
PV2020_2030.book Page 5 Thursday, July 19, 2007 6:45 PM
6Descripción
tratamiento. De esta manera, esta contribuyendo al cuidado del
medio ambiente. Solicite información detallada a este respecto a su
Distribuidor, Ayuntamiento o Administración local.
2 Descripción
Componentes principales
1 Cuerpo principal
2 Cable de conexión a la red
3 Suela metálica
4 Salida spray
5 Boca de llenado de agua
6 Depósito de agua
7 Pulsador de spray
8 Pulsador de supervapor
9 Selector de temperatura
10 Selector del caudal de vapor
11 Botón autolimpieza
12 Piloto de calentamiento
13 Vaso
Sistema antical (sólo Mod. PV 2030)
Esta plancha incorpora un filtro de resina que retiene las sustancias
calcáreas del agua, dando como resultado un alargamiento de la vida
de la plancha.
3 Utilización
Este aparato ha sido diseñado exclusivamente para planchar ropa. No
lo emplee para otros usos.
Retire completamente todos los elementos que sirvieron para su
transporte y embalaje.
Si el aparato está caliente, manipúlelo con precaución y no toque la
suela metálica.
Nunca deje la plancha con la suela caliente en posición horizontal.
Apóyela sobre su parte trasera.
Cuando llene el depósito de agua, hágalo siempre con el cable
desenchufado y utilizando el vaso (13).
Tenga cuidado con el vapor, no dirija el vapor hacia personas, animales
u objetos delicados.
Planche siempre sobre superficies estables, firmes y lisas.
PV2020_2030.book Page 6 Thursday, July 19, 2007 6:45 PM

Utilización 7
es
Para prendas muy delicadas, puede utilizar un paño colocándolo entre
la plancha y la prenda delicada, para evitar posibles marcas de la suela.
Antes del primer uso
Antes de utilizarlo por primera vez, haga funcionar el aparato
planchando una toalla vieja, para limpiar el sistema.
1 Llene el depósito de agua como se explica en la sección “Planchado con
vapor”.
2 Extienda el cable completamente y enchufe la clavija a la red. Se
enciende el piloto de calentamiento (12). Ponga la plancha en posición
vertical.
3 Coloque el selector de temperatura (9) en la posición MAX y espere
unos minutos hasta que la plancha alcance la temperatura adecuada
(se apagará el piloto de calentamiento).
4 Coloque el selector del vapor (10) en la posición de apertura total (fig. 2):
el vapor comenzará a salir por los orificios de la suela.
5 Coja la plancha por el asa y deslice la suela sobre una toalla vieja.
6 Cuando se termine el agua del depósito, el vapor dejará de salir. La
plancha está lista para su uso.
No se preocupe si la plancha desprende un poco de humo durante el
primer uso. Desaparecerá rápidamente.
Selección de la temperatura
• Compruebe si la prenda a planchar tiene alguna etiqueta con indicación
de la temperatura de planchado. Recomendamos clasificar las prendas
en función de la temperatura que requieran para su planchado, y
empezar por las prendas que se planchen con la temperatura más
baja (•).
Planchar prendas delicadas con una temperatura superior a la
necesaria, perjudica el tejido y provoca la adherencia de residuos
quemados a la suela.
FIBRAS SINTÉTICAS, temperatura mínima (•)
SEDA, LANA, temperatura media (••)
ALGODÓN, temperatura alta (•••)
LINO, temperatura MAX
PV2020_2030.book Page 7 Thursday, July 19, 2007 6:45 PM

8Utilización
Si tiene dudas sobre la temperatura a utilizar sobre una determinada
prenda, realice una prueba sobre una parte no visible de la misma,
comenzando primero con las temperaturas más bajas.
Cuando cambie la posición del selector de temperatura (9), ya sea para
aumentar o para disminuir la temperatura, es necesario que transcurran
varios minutos hasta que la plancha alcance la temperatura
seleccionada.
Planchado con vapor
1 Con la plancha desenchufada de la red eléctrica, deslice el selector de
vapor (10) hasta la posición de cerrado (fig. 1).
2 Abra la boca de llenado (5). Llene el depósito de agua sin rebasar el
nivel máximo con ayuda del vaso que se adjunta (13) y manteniendo la
plancha en posición horizontal (fig. 4). Una vez lleno el depósito cierre
la tapa.
Al cargar el depósito, procure que el agua no se desborde en la boca de
llenado.
Utilice exclusivamente agua, sin añadir detergentes, perfumes, vinagre
ni ningún producto químico. Puede utilizar agua del grifo salvo si su
contenido de cal es excesivo, en cuyo caso se aconseja agua destilada
o desmineralizada (ver tabla 1). No use agua ionizada de baterías.
3 Conecte la plancha a la red. Para obtener vapor debe situar el selector
de temperatura (9) entre los niveles •• y medio y MAX, según la prenda
a planchar. Cuando el piloto (12) se apague, indicando que ha
alcanzado la temperatura deseada, regule el mando de vapor (10),
hasta conseguir el caudal de vapor deseado (fig. 3).
Tabla 1
DUREZA DEL AGUA DEL GRIFO AGUA AUTILIZAR EN LA PLANCHA
Agua muy blanda (hasta 7º Fr) 100% agua del grifo
Agua blanda (hasta 15º Fr) 50% agua destilada + 50% agua del grifo
Agua media (hasta 25º Fr) 75% agua destilada + 25% agua del grifo
Agua dura (a partir 25º Fr) 100% agua destilada
PV2020_2030.book Page 8 Thursday, July 19, 2007 6:45 PM

Utilización 9
es
Supervapor
Si durante el planchado con vapor desea mayor cantidad del mismo,
accione el pulsador (8) unas dos o tres veces y dirija el supervapor hacia
la zona deseada de la prenda, pasando después la suela de la plancha
para secarla. Esta función es útil para eliminar arrugas.
• Recomendamos presionar el mando en intervalos de 5 segundos.
• Si desea mayor potencia de supervapor deslice el mando de vapor (10)
al mínimo.
Vapor vertical
Permite eliminar arrugas de prendas delicadas sin necesidad de
apoyarlas en la tabla de planchado: chaquetas, abrigos, cortinas, etc.
1 Llene el depósito de agua como se explica en la sección “Planchado con
vapor”.
2 Coloque la prenda en un colgador, aislada de otras prendas, personas,
elementos, animales, etc.
No proyecte el vapor sobre una prenda colgada en el armario o puesta
en una persona.
3 Coloque el mando de vapor (10) en posición cerrado y el selector de
temperatura (9) en posición MAX.
4 Acerque la plancha a la prenda en posición vertical (entre 15 y 30 cm) y
presione el mando de supervapor (8) una sóla vez. No acerque la
plancha a la prenda excesivamente ya que podría dañarla.
5 Espere unos segundos antes de presionar el botón (8) de nuevo, para
no dañar la prenda. La mayoría de las arrugas pueden eliminarse con
tres golpes de vapor.
Planchado en seco
1 Si el depósito tiene agua, coloque el mando de vapor (10) en posición
cerrado (fig. 2), para evitar la salida del agua.
2 Conecte la plancha a la red y coloque el selector de temperatura (9) en
la posición deseada. El piloto (12) se apagará cuando alcance esa
temperatura.
Planchado con spray
Puede obtenerse spray presionando el pulsador correspondiente (7) en
seco o con vapor. No importa el nivel de temperatura.
PV2020_2030.book Page 9 Thursday, July 19, 2007 6:45 PM

10 Limpieza y Conservación
• Presione el pulsador del spray (7), tantas veces como desee utilizar esta
función.
Vaciado del depósito de agua
Al término del planchado vacíe siempre el agua del depósito.
1 Coloque el selector del vapor (10) en posición cerrado (fig. 1).
2 Desenchufe la clavija de la red.
3 Abra la boca de llenado (5) y coloque la plancha boca abajo sobre el
fregadero, agitándola suavemente para vaciarla de agua por completo.
4 Espere a que la plancha esté completamente fría y guárdela en posición
vertical en un lugar seguro.
4 Limpieza y Conservación
Limpie el aparato antes del primer uso, inmediatamente después de
cada uso y tras un largo periodo de tiempo sin usar.
Antes de limpiar el aparato desenchúfelo de la red y espere a que se
enfríe.
1 Limpie el exterior de la plancha con un paño húmedo. No utilice
productos abrasivos.
2 Para la limpieza de la suela, utilice productos ecológicos basados en
arcillas. No utilice objetos punzantes ni afilados.
Autolimpieza
Es aconsejable realizar la operación de autolimpieza una vez al mes
aproximadamente, según la frecuencia de uso y la dureza del agua
utilizada.
1 Asegúrese de que el depósito tiene agua hasta la mitad.
2 Coloque la plancha en posición vertical.
3 Enchufe la plancha a la red y gire el selector de temperatura (9) hasta la
posición MAX.
4 Espere hasta que se apague el piloto luminoso (12) indicando que ha
alcanzado la temperatura deseada.
5 Gire el selector de temperatura (9) a la posición MIN y desenchufe la
plancha de la red.
6 Coloque la plancha en posición horizontal sobre el fregadero o un
recipiente adecuado y pulse el botón de autolimpieza (11),
manteniéndolo en esa posición y realizando ligeros movimientos de
PV2020_2030.book Page 10 Thursday, July 19, 2007 6:45 PM

Limpieza y Conservación 11
es
vaivén con la plancha. El vapor y el agua saldrán por los orificios de la
plancha arrastrando suciedad e impurezas.
Realice la operación con precaución, ya que el agua y el vapor salen
muy calientes y pueden quemarle.
7 Coloque la plancha vertical y espere a que se enfríe por completo.
8 Limpie la suela con un paño húmedo.
Le recordamos que los daños producidos por el efecto de la cal no están
cubiertos por la garantía.
PV2020_2030.book Page 11 Thursday, July 19, 2007 6:45 PM

12 Safety Instructions
ENGLISH en
1 Safety Instructions
• Read these instructions fully before using the appliance.
• This appliance is for domestic use only, not industrial. Any use other than
specified could be dangerous.
• Always keep the appliance out of the reach of children and the disabled.
Maximise caution when using it in their presence.
• Do not modify or repair the appliance in any way. If you detect any
anomalies in the cord or any other part of the appliance, do not use it and
take it to an authorised service centre.
• Do not use parts or accessories that have not been supplied or
recommended by SOLAC.
• Before plugging the appliance into the mains, check that the specified
voltage matches your home voltage.
• Always unplug the appliance after use and before installing or removing
parts or performing any maintenance and cleaning tasks. Also unplug it
in the event of a power cut. The appliance must be switched off when
plugging it in or unplugging it.
• Never pull on the cord or hang the appliance from it. Always unplug the
appliance by pulling on the plug, never on the cord.
• Prevent the cord from coming into contact with sharp edges or hot
surfaces. Do not allow the cord to hang over the edge of a table or
worktop, to avoid children pulling on it and causing the appliance to fall.
• Never immerse the appliance in water or any other liquid, nor place it in
the dishwasher.
• The appliance must be connected to a power socket with a suitable
ground connection.
• Do not leave the appliance connected to the mains unsupervised.
• The soleplate can get very hot when the appliance is in use. During
operation, do not touch the soleplate and only hold the iron by its handle,
and ensure the cord does not come into contact with the soleplate.
bCAUTION! When you want to dispose of the appliance, NEVER throw
it in the rubbish bin. Take it to your nearest CLEAN POINT or the
waste collection centre closest to your home for processing. You will
PV2020_2030.book Page 12 Thursday, July 19, 2007 6:45 PM

13
en
Description
thus be helping to take care of the environment. Ask your distributor,
town council or local authority for the corresponding information.
2 Description
Main components
1 Main body
2 Power cord
3 Metal soleplate
4 Spray outlet
5 Water filler opening
6 Water tank
7 Spray button
8 Supersteam button
9 Temperature selector
10 Steam flow selector
11 Self-cleaning button
12 Temperature pilot light
13 Beaker
Anti-limescale system (only Mod. PV 2030)
This iron has a built-in resin filter that retains the limescale in the water,
so that the iron has a longer life.
3Use
This appliance has been designed exclusively for ironing clothes. Do not
use it for any other purpose.
Remove all transport and packaging elements.
If the appliance is hot, handle it with care and do not touch the metal
soleplate.
Never leave the iron in a horizontal position when the soleplate is hot.
Rest it on its rear end.
When filing the water tank, always ensure the cord is unplugged and use
the beaker (13).
Take care with the steam, do not aim it at people, animals or delicate
objects.
Always iron on stable, solid and smooth surfaces.
For very delicate garments, place a cloth between the iron and the
delicate garment to avoid potential markings from the soleplate.
PV2020_2030.book Page 13 Thursday, July 19, 2007 6:45 PM

14 Use
Before the first use
Before using it for the first time, use it to iron an old towel, so as to clean
the system.
1 Fill the water tank as explained in the “Steam ironing” section.
2 Extend the cord completely and plug it into the mains. The temperature
pilot light (12) comes on. Place the iron in the vertical position.
3 Set the temperature selector (9) to the MAX position and wait for a few
minutes for the iron to reach the appropriate temperature (the
temperature pilot will go out).
4 Set the steam selector (10) to the completely open position (fig. 2):
steam will start to come out of the orifices in the soleplate.
5 Take the iron by the handle and slide the soleplate over an old towel.
6 When the water tank is empty, no more steam will be produced. The iron
is ready for use.
Do not worry if the iron gives off a little smoke when used for the first
time. This will go away quickly.
Selecting the temperature
• Check whether the garment to be ironed has a label indicating the
ironing temperature. We recommend you sort the garments according to
their required ironing temperature and begin with the garments that are
ironed with the lowest temperature (•).
Ironing delicate garments at a temperature higher than necessary spoils
the fabric and causes burnt residue to stick to the soleplate.
If you have any doubts about the temperature to use for a given garment,
perform a test on a part which won’t be seen, beginning with the lowest
temperature settings.
When changing the position of the temperature selector (9), either to
increase or reduce the temperature, several minutes must pass before
the iron reaches the selected temperature.
SYNTHETIC FIBRES, minimum temperature (•)
SILK, WOOL, medium temperature (••)
COTTON, high temperature (•••)
LINEN, MAX temperature
PV2020_2030.book Page 14 Thursday, July 19, 2007 6:45 PM

15
en
Use
Steam ironing
1 With the iron unplugged from the mains, slide the steam control (10) to
the closed position (Fig. 1).
2 Open the water filler opening (5). Fill the water tank without exceeding
the maximum level, using the beaker provided (13) and keeping the iron
in the vertical position (Fig. 4). When the tank is full, close the cap.
When filling the tank, make sure that the water does not overflow from
the water filler opening.
Use only water, with no added detergents, scents, vinegar or chemical
products. Tap water can be used, unless it has an excessive amount of
limescale, in which case it is recommended to use distilled or
demineralised water (see table 1). Do not use ionised water for batteries.
3 Plug the iron into the mains. To obtain steam, set the temperature
selector (9) between levels •• and medium and MAX, depending on the
garment to be ironed. When the pilot light (12) goes off, indicating that
the desired temperature has been reached, adjust the steam control (10)
until the desired steam flow is obtained (Fig. 3).
Supersteam
If you want more steam while ironing, press the button (8) two or three
times, aim the supersteam at the desired area of the garment and pass
the iron soleplate over it to dry it. This function is useful for removing
creases.
• We recommend pressing the control at 5-second intervals.
• If you want more supersteam power, slide the steam control (10) to
minimum.
Table 1
TAP WATER HARDNESS WATER TO BE USED IN THE IRON
Very soft water (up to 7º f) 100% tap water
Soft water (up to 15º f) 50% distilled water + 50% tap water
Medium water (up to 25º f) 75% distilled water + 25% tap water
Hard water (more than 25º f) 100% distilled water
PV2020_2030.book Page 15 Thursday, July 19, 2007 6:45 PM
16 Use
Vertical steam
It allows you to remove creases from delicate garments without having
to place them on the ironing board: jackets, overcoats, curtains, etc.
1 Fill the water tank as explained in the “Steam ironing” section.
2 Place the garment on a hanger, well away from other garments, people,
animals, etc.
Do not discharge steam onto a garment hanging in the wardrobe or on
a person.
3 Set the steam control (10) to the closed position and the temperature
selector (9) to the MAX position.
4 Bring the iron, in the vertical position, close to the garment (between 15
and 30 cm) and press the supersteam button (8) once only. Do not place
the iron too close to the garment as it could cause damage.
5 Wait a few seconds before pressing the button (8) again, so as not to
damage the garment. Most creases can be removed with three blasts of
steam.
Dry ironing
1 If there is water in the tank, turn the steam control (10) to the closed position
(Fig. 2), to prevent water from coming out.
2 Plug in the iron and set the temperature selector (9) to the desired
position. The pilot light (12) will go off when the temperature is reached.
Spray ironing
Spray can be obtained by pressing the corresponding button (7) when
dry ironing or ironing with steam. The temperature level does not matter.
• Press the spray button (7) as many times as you want to use this
function.
Emptying the water tank
When you finish ironing, always empty the water from the tank.
1 Place the steam selector (10) in the closed position (fig. 1).
2 Unplug the plug from the mains
3 Open the water filler opening (5) and place the iron face down over the
sink, gently shaking it to completely empty the tank.
4 Wait until the iron is completely cold and store it in the vertical position in
a secure place.
PV2020_2030.book Page 16 Thursday, July 19, 2007 6:45 PM
17
en
Cleaning and Maintenance
4 Cleaning and Maintenance
Clean the appliance before using it for the first time, immediately after
each use and after not using it for a long period of time.
Unplug the appliance and allow it to cool before cleaning it.
1 Clean the outside of the iron with a damp cloth. Do not use abrasive
products.
2 Use clay-based, environmentally friendly products to clean the soleplate.
Do not use sharp objects.
Self-cleaning
It is advisable to carry out the self-cleaning operation about once a
month, depending on the frequency of use and the hardness of the water
used.
1 Ensure that the tank is half filled with water.
2 Place the iron in the vertical position.
3 Plug in the iron and turn the temperature selector (9) to the MAX
position.
4 Wait for the pilot light to go off (12) indicating that the desired
temperature has been reached.
5 Turn the temperature selector (9) to the MIN position and unplug the iron
from the mains.
6 Place the iron in the horizontal position over a sink or an appropriate
container and press the self-clean button (11), keeping the iron in this
position and swinging it gently from side to side. Steam and water will
come out from the holes in the iron, flushing out dirt and impurities.
Be careful when performing this operation, as the water and steam are
very hot and can cause burns.
7 Place the iron in the vertical position and wait for it to cool completely.
8 Wipe the soleplate with a damp cloth.
Remember that damage caused by the effects of limescale is not
covered in the warranty.
PV2020_2030.book Page 17 Thursday, July 19, 2007 6:45 PM

18 Instructions de sécurité
FRANÇAIS fr
1 Instructions de sécurité
• Lisez attentivement ce mode d'emploi avant d'utiliser l'appareil.
• Cet appareil est destiné uniquement à un usage domestique, non
industriel. Toute utilisation différente de celle indiquée peut être
dangereuse.
• Maintenez toujours l'appareil hors de la portée des enfants et des
personnes handicapées. Lorsque vous l’utilisez en leur présence, soyez
très vigilant.
• Ne modifiez ni ne réparez jamais l’appareil. Si vous constatez une
anomalie sur le câble ou sur une autre partie de l’appareil, ne l’utilisez
pas et amenez-le à un centre de service technique agréé.
• N’utilisez pas de pièces ni d'accessoires non fournis ou recommandés
par SOLAC.
• Avant de brancher l’appareil au courant électrique, vérifiez que la
tension indiquée correspond bien à celle de votre logement.
• Débranchez toujours l’appareil après usage et avant de démonter ou de
monter des pièces et d'effectuer toute opération d’entretien ou de
nettoyage. Débranchez-le également en cas de coupure de courant.
Lorsque vous branchez ou débranchez l’appareil, celui-ci doit être en
position « arrêt ».
• Ne tirez jamais sur le câble et ne suspendez pas l’appareil par le câble.
Débranchez l’appareil en tirant toujours sur la prise, jamais sur le câble.
• Prenez garde à ce que le cordon d'alimentation n'entre pas en contact
avec des éléments tranchants ou des surfaces chaudes. Ne laissez pas
le câble pendre au bord de la table ou du plan de travail afin d’éviter que
les enfants ne tirent dessus et ne le fassent tomber.
• Ne trempez pas l'appareil dans l'eau ou dans tout autre liquide et ne le
mettez pas au lave-vaisselle.
• L’appareil doit être branché à une prise de courant disposant d’une prise
de terre adéquate.
• Ne laissez pas l’appareil branché sans surveillance.
• La température de la semelle peut être élevée lorsque l’appareil est en
marche. Pendant le fonctionnement, ne touchez pas la semelle et
PV2020_2030.book Page 18 Thursday, July 19, 2007 6:45 PM
19
fr
Description
saisissez le fer uniquement par sa poignée, et faites en sorte que le
câble ne touche jamais la semelle.
bATTENTION ! Lorsque vous souhaitez vous débarrasser de
l'appareil, ne le jetez JAMAIS à la poubelle, mais amenez-le au
POINT VERT ou de recyclage des déchets le plus proche de votre
domicile pour son traitement ultérieur. Vous contribuerez ainsi à la
préservation de l’environnement. Informez-vous à ce sujet auprès de
votre distributeur, de votre mairie ou de toute administration locale.
2 Description
Principaux éléments
1 Corps principal
2 Cordon d'alimentation
3 Semelle métallique
4 Sortie spray
5 Ouverture de remplissage d'eau
6 Réservoir d'eau
7 Bouton du vaporisateur
8 Bouton de supervapeur
9 Sélecteur de température
10 Régulateur du débit de vapeur
11 Bouton d’autonettoyage
12 Voyant de chauffe
13 Récipient verseur
Système anti-tartre (uniquement Mod. PV 2030)
Ce fer incorpore un filtre en résine qui retient les substances calcaires
de l'eau, rallongeant ainsi la durée de vie du fer.
3 Mode d’emploi
Cet appareil a été conçu exclusivement pour repasser des vêtements.
Ne l’utilisez pas à d’autres fins.
Retirez complètement tous les éléments ayant servi à transporter et à
emballer l’appareil.
Si l’appareil est chaud, manipulez-le avec précaution et ne touchez pas
la semelle métallique.
Ne laissez jamais le fer, lorsque la semelle est chaude, en position
horizontale. Posez-le sur la partie arrière.
PV2020_2030.book Page 19 Thursday, July 19, 2007 6:45 PM
20 Mode d’emploi
Lorsque vous remplissez le réservoir d’eau, réalisez toujours cette
opération lorsque le câble est débranché et en utilisant le verre doseur
(13) prévu à cet effet.
Soyez vigilant avec la vapeur, ne la dirigez pas vers des personnes, des
animaux ou des objets délicats.
Repassez toujours sur des surfaces stables, fermes et lisses.
Pour des vêtements très délicats, vous pouvez utiliser un linge que vous
placerez entre le fer et le vêtement délicat, pour éviter d’éventuelles
marques de la semelle.
Avant la première utilisation
Avant d’utiliser l’appareil pour la première fois, faites le fonctionner en
repassant un vieux torchon, pour nettoyer le système.
1 Remplissez le réservoir d’eau tel qu’il est indiqué dans la section
« repassage à la vapeur ».
2 Déroulez complètement le câble et branchez la prise. Le voyant de
chauffe s’allume (12). Placez le fer en position verticale.
3 Placez le sélecteur de température (9) sur la position MAX et attendez
quelques minutes jusqu’à ce que le fer atteigne la température
adéquate (le voyant de chauffe s’éteindra).
4 Placez le sélecteur de vapeur (10) en position d’ouverture totale (fig.2) :
la vapeur commencera à sortir par les orifices de la semelle.
5 Saisissez le fer par la poignée et faites glisser la semelle sur un vieux
torchon.
6 Lorsqu’il n’y a plus d’eau dans le réservoir, la vapeur ne sortira plus. Le
fer est prêt à être utilisé.
Ne vous inquiétez pas si l’appareil dégage un peu de fumée lors de sa
première utilisation. Celle-ci disparaîtra rapidement.
Choix de la température
• Vérifiez si le vêtement que vous allez repasser porte une étiquette
indiquant la température de repassage. Nous recommandons de classer
les vêtements en fonction de leur température de repassage et de
commencer par les vêtements exigeant un repassage à basse
température (•).
PV2020_2030.book Page 20 Thursday, July 19, 2007 6:45 PM
This manual suits for next models
1
Table of contents
Languages:
Other SOLAC Iron manuals

SOLAC
SOLAC Optima Center 3000 User manual

SOLAC
SOLAC CVG9507 User manual

SOLAC
SOLAC OPTIMA RELIEVE 3100 User manual

SOLAC
SOLAC CVG9700 User manual

SOLAC
SOLAC CVG 9800 User manual

SOLAC
SOLAC PV1652 User manual

SOLAC
SOLAC PV2014 User manual

SOLAC
SOLAC CPB6100 User manual

SOLAC
SOLAC CVG9611 User manual

SOLAC
SOLAC PV1620 User manual

SOLAC
SOLAC PC1510 User manual

SOLAC
SOLAC CVG 98 series User manual

SOLAC
SOLAC PC1500 User manual

SOLAC
SOLAC CVG 9600 User manual

SOLAC
SOLAC Great Lakes User manual

SOLAC
SOLAC CVG9511 User manual

SOLAC
SOLAC CPB6100 User manual

SOLAC
SOLAC CVG9900 User manual

SOLAC
SOLAC Easy Temp Evolution User manual

SOLAC
SOLAC Optima Extrem User manual