manuals.online logo
Brands
  1. Home
  2. •
  3. Brands
  4. •
  5. Solar-Log
  6. •
  7. Measuring Instrument
  8. •
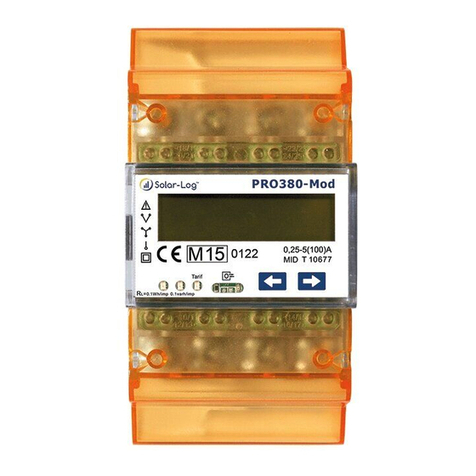
  9. Solar-Log PRO380-Mod-CT User manual

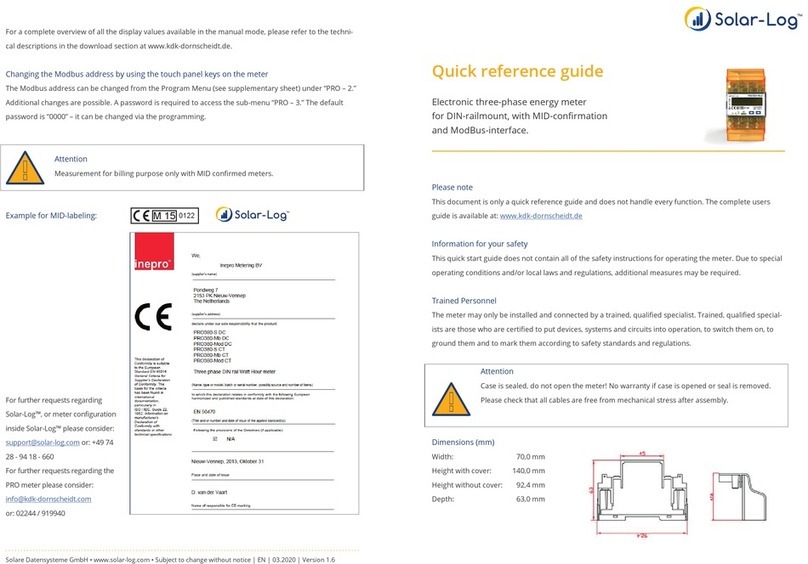
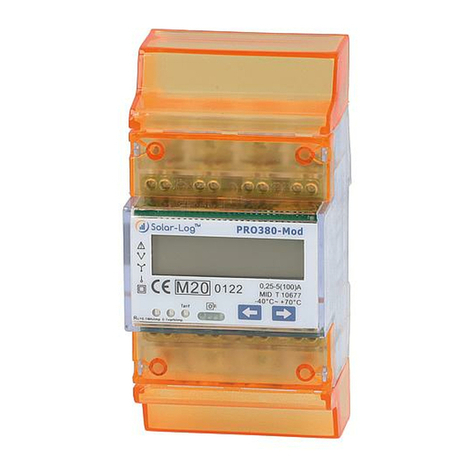
Solar-Log PRO380-Mod-CT User manual

Quick Start Guide
Electronic A.C. current meter for DIN rail mounting with MID
declaration of conformity and ModBus interface
(converter connection meter)
Warning
The meter's case is sealed and may not be opened. Opening the meter and/or breaking the seal invali-
dates the warranty. Please make sure that all of the cables are mounted free from mechanical stress.
Only meters with the MID declaration of conformity can be used for tariff applications.
Important note on adjusting the converter ratio.
The converter ratio can only be set once with this meter.
When the meter is connected to power, the display alternates between “Set CT” and “CT5 0005.” If one of the arrow
keys is pressed, the fi rst number from the left blinks. Defi ne the secondary power between /1A and /5A and con-
fi rm the selection by pressing both of the arrow keys at the same time for 3 seconds. After that, defi ne the primary
current by selecting the 4 numbers from left to right with the keys as described above. Confi rm every number by
pressing both arrow keys for 3 seconds.
The primary power can be freely defi ned in steps of 5A from 0005 to 9995. Once the last digit has been confi rmed,
the converter ratio is saved and cannot be changed again.
Please note
This document is only a quick start guide and does not cover all of the device's functions. Detailed specifi cations
and descriptions are available at www.kdk-dornscheidt.de.
Information for your safety
This quick start guide does not contain all of the safety instructions for operating the meter. Due to special operat-
ing conditions and/or local laws and regulations, additional measures may be required.
Trained Personnel
The meter may only be installed and connected by a trained, qualifi ed specialist. Trained, qualifi ed specialists are
those who are certifi ed to put devices, systems and circuits into operation, to switch them on, to ground them and
to mark them according to safety standards and regulations.
The following values are displayed successively in the automatically rotating display:
Energy fl ow direction display per phase 1 2 3
R = Reverse, F = Forward
Active energy (forward) in kWh (OBIS: 1.8.0)
Accumulating
Active energy (reverse) in kWh (OBIS: 2.8.0)
Accumulating
Active power (total)
For a complete overview of all of the display values available in the manual mode, please refer to the technical
descriptions in the download section at www.kdk-dornscheidt.de. (German).
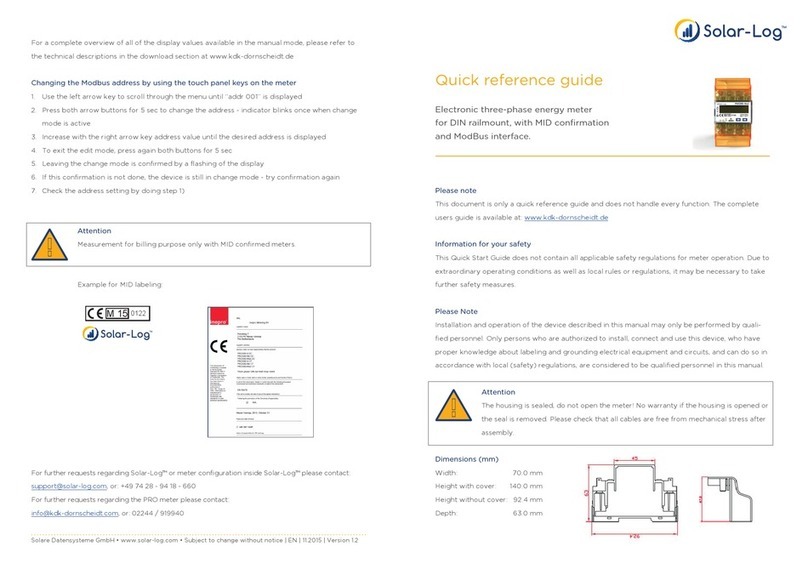
Changing the Modbus address with the sensor buttons on the meter
The Modbus address can be changed from the Program Menu (see supplementary sheet) under “PRO – 2.” Addi-
tional changes are possible. A password is required to access the sub-menu “PRO – 3.” The default password is
“0000” – it can be changed via the programming.
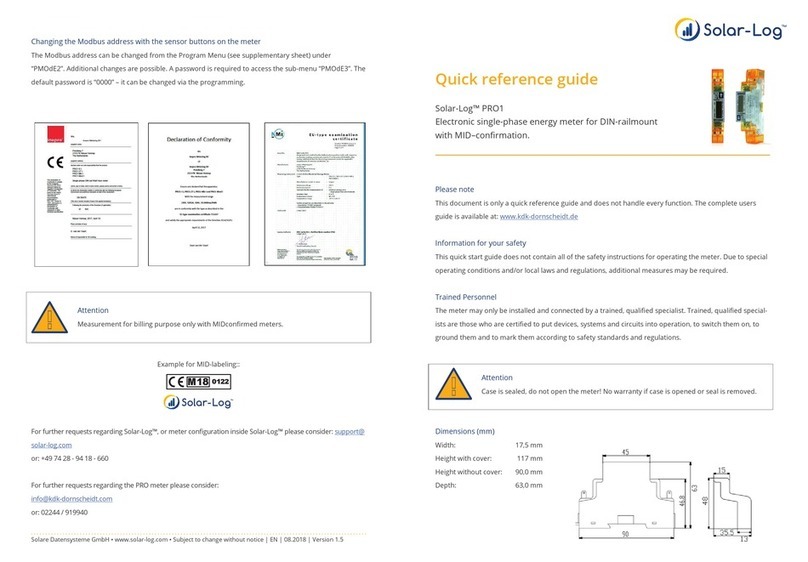
Example of the MID label
The declaration of conformity and certifi cation
(EN 50470) you will fi nd current on: www.
kdk-dornscheidt.de
For questions about the Solar-Log™ or on how
to confi gure the meter in the Solar-Log™, please
contact our support team:
[email protected]
or: +49 7428 94 18 660
For questions about the meter, please contact the
manufacturer: [email protected]
or: +49 2244 919940
M 15 0122
Solare Datensysteme GmbH • www.solar-log.com • Subject to change without notice. | EN | 03.2020 | Version 1.7
V1.1
TechnischeDaten:
Nennspannung:  230/400VAC
Strom:0,255(100)A
Frequenz:50Hz
Messgröße:Wirkverbrauch,Rücklaufsperre
Genauigkeitsklasse:  B
Eigenverbrauch:   <10VA<2W
Breite:4TE(70mm)
ImpulsausgangLED:  10.000Imp/kWh,2,5ms
S0–Impulsausgang:  1.000Imp/kWh,25ms
Arbeitstemperatur:   25°Cbis+55°C
Max.rel.Lufeuchte:  75%imMiel,kurzzeig95%
RegistrierteHarmonische: 0,05–0,25kHz
LED:rotblinkend:Bezug>4W,Impulsrate=Verbrauch
Display:6+2Digits(999999,11kWh)
MaximalerLeiterquerschni:Hauptklemmen: max.35mm²
Zusatzklemmen: max.2,5mm²
BaudrateModBus:   9600baud


Anschlussschema:
Zählertyp:  PRO380,100A
NachSchaltungstyp1000(DIN43856)

Input„L1,L2,L3“  ZuleitungseingangPhaseL1,L2,L3
Output„L1,L2,L3“  ZuleitungsabgangPhaseL1,L2,L3
Klemme„N“NeutralleiteranschlussN
Klemmen18,19  S0Impulsausgang„Bezug“(Kl.18=„+“) 
Klemmen20,21  S0Impulsausgang„Lieferung“(Kl.20=„+“)
Klemme22,23   ModBus–AnschlussKlemme22>A,23>B
Klemme24,25  externeTarifumschaltung(230VAC)
KlemmleistensteckerSolarLog PRO380
KlemmeKlemme
1>     22(A)
4>     23(B)
V1.1
AlleAnzeigewertedesZählers:
DurchDrückenderTastenwechseltderZählervonderautomaschrollierendenAnzeige
indiemanuelleAnzeige.HierkönnenmielsTastendruckalleverfügbarenAnzeigewerte
derReihenachaufgerufenwerden.Wirdkeinegedrückt,kehrtderZählernachkurzerZeit
wiederindenautomaschenModuszurück.
InderautomaschrollierendenAnzeigewerdennacheinanderdiefolgenden
Werteangezeigt:
FüreinevollständigeÜbersichtallerverfügbarenAnzeigewerteimmanuellen
ModusbeachtenSiebiedieausführlichetechnischeBeschreibungalsDown
loadaufwww.kdkdornscheidt.de.
ÄnderungderModbusAdressemitHilfederSensortastenamZähler:

1.MitderlinkenPfeiltastedurchdasMenübläern,bis„addr001“
angezeigtwird
2.ZurÄnderungderAdressebeidePfeiltastenfür5secdrücken–Anzeige
blinkt1xauf,wennÄnderungsmodusakvist.
3.MitderrechtenPfeiltasteAdresswerterhöhen,bisgewünschteAdresse
angezeigtwird
4.ZumVerlassendesÄnderungsmodusnochmalsbeidePfeiltastenfür5sec
drücken
5.VerlassendesÄnderungsmoduswirddurchblinkendesDisplaysbestägt
6.SolltedieseBestägungnichterfolgenistGerätimmernochimÄnde
rungsmodus–Bestägungnochmalsversuchen
7.KontrolledereingestelltenAdressedurchannavigierenwie1)
EnergierichtungsanzeigeproPhase123
r=Lieferung(Reverse)F=Bezug(Forward)

WirkenergieBezuginKWh(OBIS:1.8.0)
Saldierend

WirkenergieLieferunginKWh(OBIS:2.8.0)
Saldierend

Momentan‐Leistung(Gesamt)
The pulse output from the Solar-Log™ PRO380-Mod-CT delivers a pulse that corresponds to the secondary mea-
sured kWh (kvar) values. The pulse length of the pulse output is permanently set to 30 ms.
Connection diagram for diff erent operating modes
Solar-Log™ PRO380-Mod-CT (RS485 or S0) connection assignments
The meter connections are labeled IN (bottom) and OUT (top).
As consumption or sub-consumption meter: Connection to the grid (IN) – connection for appliances (OUT)
As inverter /production meter: Connection for the production (IN) – connection to the grid (OUT)
Solar-Log™ PRO380 connection assignments (only RS485)
As consumption meter (bi-directional): OUT = connection to the grid – IN = connection to the house/plant
As battery meter (bi-directional): IN = connection to the grid – OUT = connection to the battery
Please note that only Solar-Log™ PRO380 meters can operate on the RS485 interface (one or several). It is not
possible to combine the operation with other components.
If the meter is the last device on the bus, it has to be terminated at connection block 22 and 23 with a resistor (120
ohm / 0.25W).
All display values of the meter
Change the meter from the automatically rotating display to the manual display by pressing the keys. Pressing on
the keys here allows all of the available display values to be accessed in sequence. Please refer to the attached
table for the menu navigation. If no keys are pressed after a short time, the meter reverts back to the automatic
display mode.
Meter type: PRO380-Mod-CT
Connection diagram
Dimensions (mm)
Width: 70.0 mm
Height with cover: 140.0 mm
Height without cover: 92.4 mm
Depth: 63.0 mm
Pulse outputs (S0)
Technical Data
Nominal voltage 230 / 400 V AC
Current 0.015 - 1.5 (6) A
Frequency 50 Hz
Measured value Active- and Reactive energy in forward and reverse direction
Accuracy class B
Self-consumption < 10 VA - < 2 W
Start-up current 3 mA
Width 4 TE (70 mm)
Pulse output LED 10,000 Imp/kWh, 2.5 ms
S0Pulse output 10,000 Imp/kWh, 30 ms
Operating temperature -25°C to +70°C
Max. relative humidity: 75 % on average, temporary 95 %
Registered harmonic 0.05 – 0.25 kHz
LED blinking red: Supply > 4 W, pulse rate = consumption
Display 5 + 3 Digits (99999,111 kWh)
Maximum cable cross-section Main terminal blocks: max. 10 mm2
Additional terminals: max. 2.5 mm2
Baud rate ModBus 9,600 baud
CT1 (in) Transformer 1 Terminal k (s1) CT1 (out) Transformer 1 Terminal l (s2)
CT2 (in) Transformer 2 Terminal k (s1) CT2 (out) Transformer 2 Terminal l (s2)
CT3 (in) Transformer 3 Terminal k (s1) CT3 (out) Transformer 3 Terminal l (s2)
N (in) Neutral Terminal Connection N (out) Neutral Terminal Connection
10 Volts Phase 1 (10/11 internally bridged)
12 Volts Phase 2 (12/13 internally bridged)
14 Volts Phase 3 (14/15 internally bridged)
16/17 not used
18/19 S0Pulse output A+ forward
20/21 S0Pulse output A-reverse
22/23 ModBus connection
24/25 Connection for external tariff (230V)
Terminal block connector Solar-Log™ (RS485) Solar-Log Base PRO380-Mod-CT (COM)
Terminal Terminal Terminal
1 -> (A) 6 or (B) 10 (Data+) 22 (A)
4 -> (A) 9 or (B) 13 (Data-) 23 (B)
V1.1
Achtung: ZuVerrechnungszweckendürfennurZählermit
MID–Konformitätserklärungverwendetwerden.

BeispielfürdieMIDKennzeichnung:
BeiRückfragenzumSolarLog™,oderderKonguraondesZählersimSolarLog™
wendenSiesichbiean:support@solarlog.com,oder:07428/9418660

BeiRückfragenzumZählerwendenSiesichbiean:info@kdkdornscheidt.com,
oder:02244/919940
V1.1
Kurzanleitung:
InformaonzuIhrereigenenSicherheit:
DieseKurzanleitungenthältnichtallefürdenBetriebdesZählersgeltenden
Sicherheitsvorschrien.EskannaufGrundbesondererBetriebsbedingungen,örtlichenVorschrienoder
Verordnungennotwendigsein,weitereMaßnahmenzuergreifen.
QualiziertesPersonal:
DerZählerdarfnurvonqualiziertemFachpersonalinstalliertundangeschlossenwerden.Esgeltenjene
Personenalsqualiziert,diezugelassensind,Geräte,SystemeundStromkreiseentsprechendderSicher
heitsnormenundVerordnungeninBetriebzusetzen,einzuschalten,zuerdenundzumarkieren.
Abmessungen(mm):

Breite:   70mm
Höhem.Abdeckung:140mm
Höheo.Abdeckung:92,4mm
Tiefe:   63mm
Achtung:
DasZählergehäuseistversiegelt,derZählerdarfnichtgeönetwerden.
BeiÖnungdesZählersoderZerstörungderSiegelerlischtderGaraneanspruch.

BiebeachtenSie:
BeidiesemDokumenthandeltessichlediglichumeineKurzbeschreibung,in
dernichtaufalleFunkonenderGeräteeingegangenwerdenkann.
EineausführlicheBeschreibungstehtIhnenaufwww.kdkdornscheidt.dezur
Verfügung.
ElektronischerDrehstromzähler
fürDINSchienenmontage
mitMIDKonformitätserklärung
mitModBusSchnistelle

Other Solar-Log Measuring Instrument manuals

Solar-Log PRO380-CT User manual

Solar-Log

Solar-Log PRO380-CT User manual

Solar-Log PRO380 User manual

Solar-Log

Solar-Log PRO380 User manual

Solar-Log Pro 380 User manual

Solar-Log

Solar-Log Pro 380 User manual

Solar-Log PRO1 User manual

Solar-Log

Solar-Log PRO1 User manual

Solar-Log PRO380 User manual

Solar-Log

Solar-Log PRO380 User manual

Solar-Log 300 Instruction manual

Solar-Log

Solar-Log 300 Instruction manual

Solar-Log 1000 User manual

Solar-Log

Solar-Log 1000 User manual

Solar-Log PRO1 User manual

Solar-Log

Solar-Log PRO1 User manual

Solar-Log PRO380 User manual

Solar-Log

Solar-Log PRO380 User manual

Solar-Log 350 User manual

Solar-Log

Solar-Log 350 User manual

Solar-Log 200 User manual

Solar-Log

Solar-Log 200 User manual

Solar-Log 2000 User manual

Solar-Log

Solar-Log 2000 User manual

Solar-Log PRO380-CT User manual

Solar-Log

Solar-Log PRO380-CT User manual

Solar-Log PRO2 User manual

Solar-Log

Solar-Log PRO2 User manual

Solar-Log 300 User manual

Solar-Log

Solar-Log 300 User manual

Popular Measuring Instrument manuals by other brands

King Instrument 7200 Series installation instructions

King Instrument

King Instrument 7200 Series installation instructions

EGT TX-3 instructions

EGT

EGT TX-3 instructions

Agilent Technologies B1500A Training manual

Agilent Technologies

Agilent Technologies B1500A Training manual

EIJKELKAMP HD2 operating instructions

EIJKELKAMP

EIJKELKAMP HD2 operating instructions

Omega Engineering iServer 2 Firmware upgrade guide

Omega Engineering

Omega Engineering iServer 2 Firmware upgrade guide

Kikusui KJM6335 Operation manual

Kikusui

Kikusui KJM6335 Operation manual

AEMC SL261 user manual

AEMC

AEMC SL261 user manual

London Electronics IL2-L Connection details, scaling and general information

London Electronics

London Electronics IL2-L Connection details, scaling and general information

Level Pro ITC 250 SERIES user manual

Level Pro

Level Pro ITC 250 SERIES user manual

MESSKO MLog IM50 operating instructions

MESSKO

MESSKO MLog IM50 operating instructions

Ossila T2006A user manual

Ossila

Ossila T2006A user manual

Futech DISTY 120RC user manual

Futech

Futech DISTY 120RC user manual

Crossbow Technology AHRS400 Series user manual

Crossbow Technology

Crossbow Technology AHRS400 Series user manual

Tektronix 1502B Service manual

Tektronix

Tektronix 1502B Service manual

HELWIG CARBON BPK-Probe operating guide

HELWIG CARBON

HELWIG CARBON BPK-Probe operating guide

Gossen MetraWatt mavolog pro operating instructions

Gossen MetraWatt

Gossen MetraWatt mavolog pro operating instructions

Hanna Instruments HI 93700 instruction manual

Hanna Instruments

Hanna Instruments HI 93700 instruction manual

MRC Spectro-97 Series Operation manual

MRC

MRC Spectro-97 Series Operation manual

manuals.online logo
manuals.online logoBrands
  • About & Mission
  • Contact us
  • Privacy Policy
  • Terms and Conditions

Copyright 2025 Manuals.Online. All Rights Reserved.