manuals.online logo
Brands
  1. Home
  2. •
  3. Brands
  4. •
  5. Solinst
  6. •
  7. Control Unit
  8. •
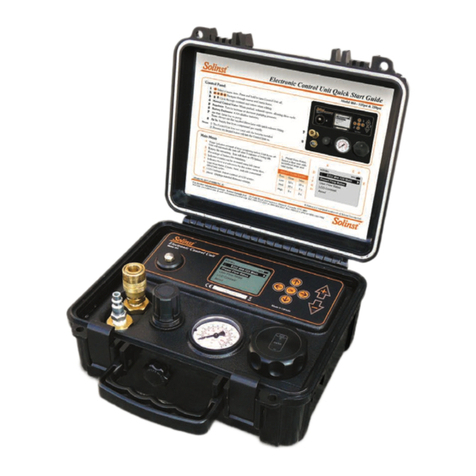
  9. Solinst 464 125 psi Configuration guide

Solinst 464 125 psi Configuration guide

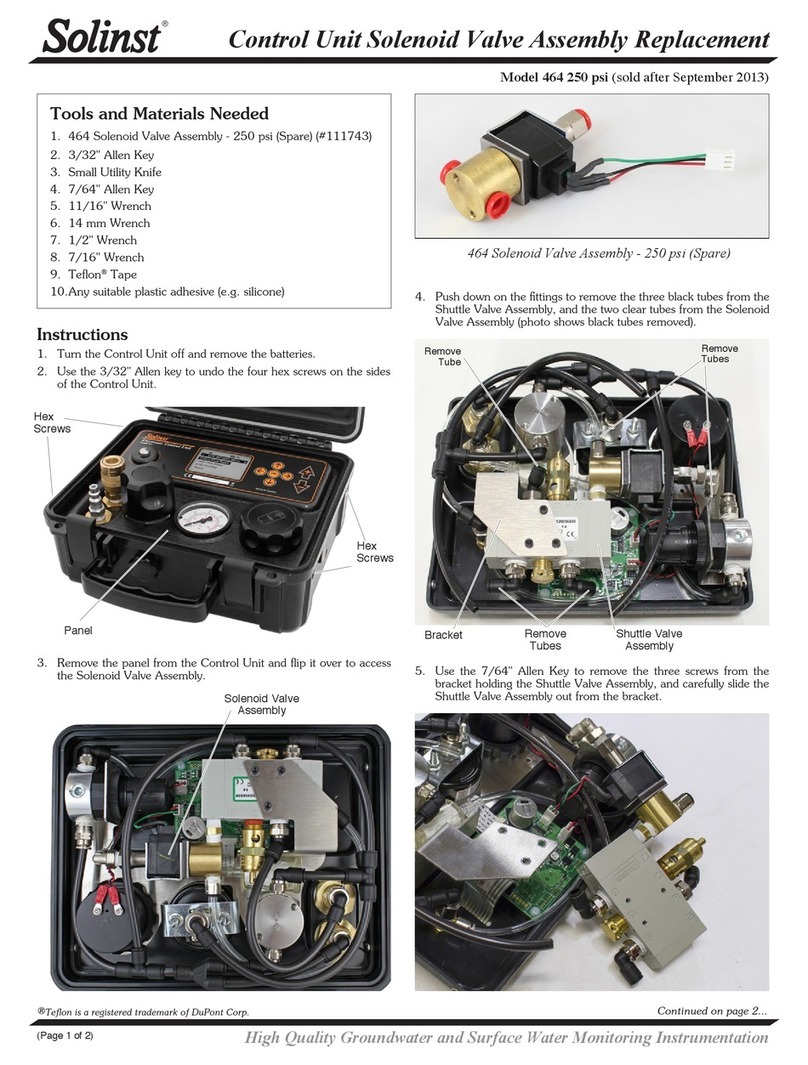
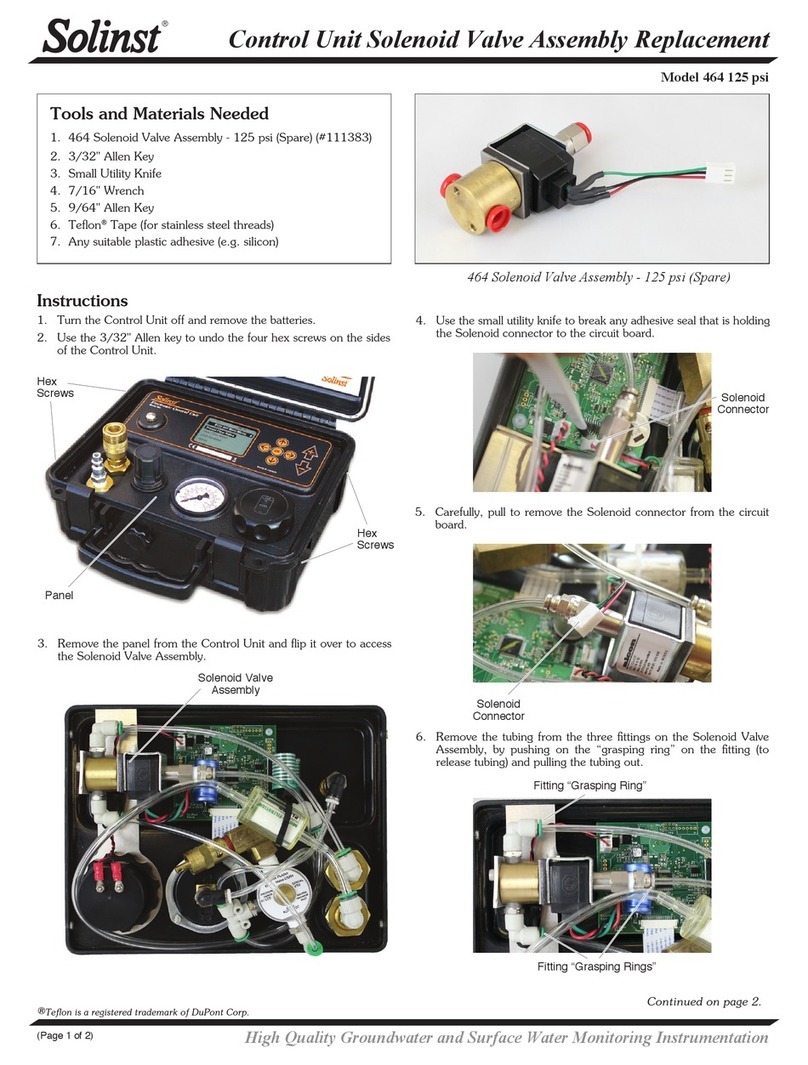
Control Unit Solenoid Valve Cleaning Instructions
High Quality Groundwater and Surface Water Monitoring Instrumentation
(Page 1 of 2)
Model 464 125 psi (sold until January 2016)
Continued on page 2...
Tools and Materials Needed
1. 3/32" Allen Key
2. Small Utility Knife
3. 9/64" Allen Key
4. Cotton swab
5. Distilled water
6. Any suitable plastic adhesive (e.g. silicon)
Hex
Screws
Hex
Screws
3. Remove the panel from the Control Unit and flip it over to
access the Solenoid Valve Assembly.
Panel
4. Use the small utility knife to break any adhesive seal that is
holding the Solenoid connector to the circuit board.
Solenoid Valve
Assembly
5. Carefully, pull to remove the Solenoid connector from the
circuit board.
Solenoid
Connector
Solenoid
Connector
6. Remove the tubing from the three fittings on the Solenoid
Valve Assembly, by pushing on the “grasping ring” on the
fitting (to release tubing) and pulling the tubing out.
Fitting “Grasping Ring”
Fitting “Grasping Rings”
7. Use the 9/46" Allen key to remove the two screws holding
the Solenoid Valve Assembly to the bracket.
Remove
Screws
Instructions
Note: These instructions are for Model 464 125 psi Control Units
sold up until January 2016.
1. Turn the Control Unit off and remove the batteries.
2. Use the 3/32" Allen key to undo the four hex screws on the
sides of the Control Unit.
Printed in Canada
January 22, 2016
(Page 2 of 2)
For further information contact: Solinst Canada Ltd.
Fax: +1 (905) 873-1992; (800) 516-9081 Tel: +1 (905) 873-2255; (800) 661-2023
35 Todd Road, Georgetown, Ontario Canada L7G 4R8
Web Site: www.solinst.com E-mail: [email protected]
8. By hand, unscrew the brass fitting from the Solenoid Valve
Assembly, and pull out to remove the magnetic plunger from
the steel fitting.
9. Inspect the small rubber circular pad on the end of the plunger.
If this pad is damaged, dented, etc., the Solenoid will not
seal properly, therefore you may need a new Solenoid Valve
Assembly. (Contact Solinst). See photo below comparing a
damaged pad to a pad in good condition.
Magnetic
Plunger
®Solinst is a registered trademark of Solinst Canada Ltd.
10.To clean the Assembly, use a cotton swab and distilled water
to clear any debris and dirt from inside the brass fitting, around
the o-ring, steel fitting and from the magnetic plunger.
11.Ensure the o-ring is properly seated inside the brass fitting.
Insert the magnetic plunger back into the Solenoid Valve
Assembly, and screw the brass fitting back onto the Assembly.
12.Mount the Solenoid Valve Assembly to the bracket using the
two screws.
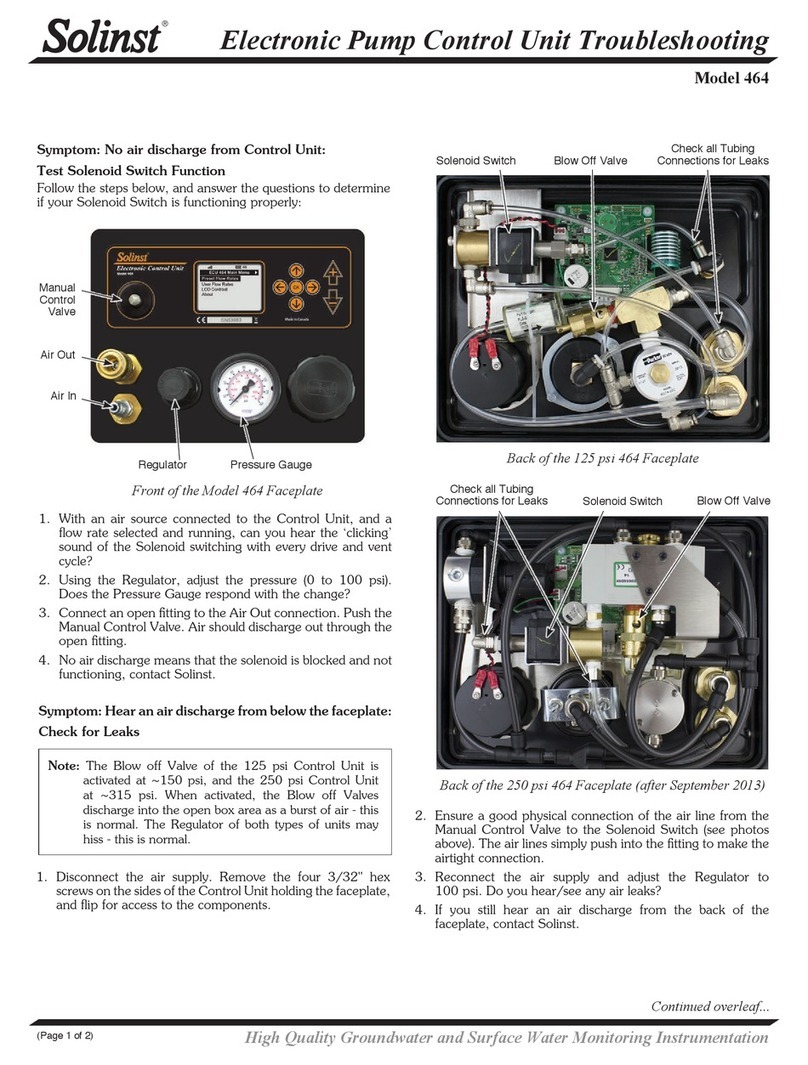
13.Push the tubing into the three fittings. Refer to the photo on
Page 1, to ensure proper connection.
14.Reconnect the Solenoid connector to the circuit board. After
connection, add a small amount of adhesive to the outside of
the connector to help secure it to the circuit board.
15.Place the panel in the Control Unit case and reinstall the four
hex screws.
16.Reinstall the batteries. Test the Control Unit to ensure proper
connections were made and the Solenoid is now functioning.
Steel Fitting
Brass
Fitting
Note: The photo above shows the tubing fittings removed from the
Solenoid Valve Assembly, you do not need to remove these.
O-ring
Magnetic
Plunger

Other Solinst Control Unit manuals

Solinst 464 250 psi Use and care manual
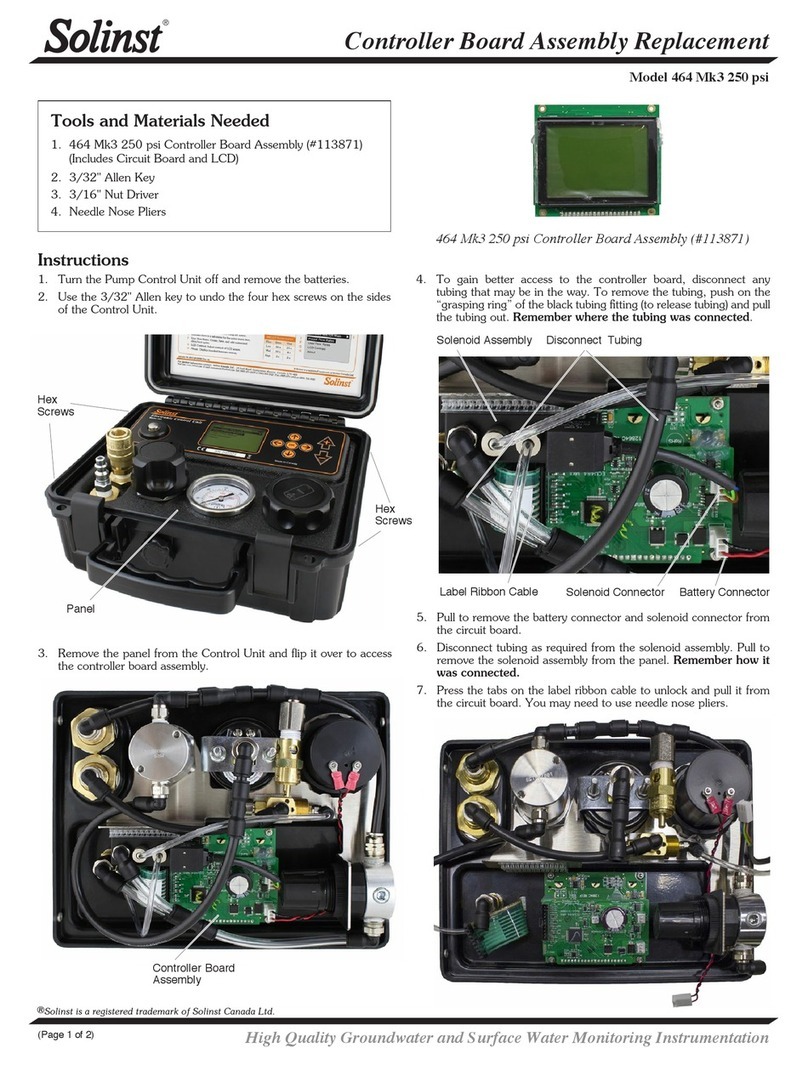
Solinst

Solinst 464 250 psi Use and care manual

Solinst 464 User manual

Solinst

Solinst 464 User manual

Solinst 464 Mk3 User manual

Solinst

Solinst 464 Mk3 User manual

Solinst 464 125 psi Use and care manual

Solinst

Solinst 464 125 psi Use and care manual

Solinst 464 250 psi Configuration guide

Solinst

Solinst 464 250 psi Configuration guide

Solinst 464 Operating instructions

Solinst

Solinst 464 Operating instructions

Solinst 464 250 psi Use and care manual

Solinst

Solinst 464 250 psi Use and care manual

Solinst 464 125 psi Use and care manual

Solinst

Solinst 464 125 psi Use and care manual

Solinst 464 Mk3 250 psi Use and care manual
Solinst

Solinst 464 Mk3 250 psi Use and care manual

Solinst 464 Mk3 250 psi Use and care manual

Solinst

Solinst 464 Mk3 250 psi Use and care manual

Popular Control Unit manuals by other brands

Emerson Neotecha Sapro Operating and safety instructions

Emerson

Emerson Neotecha Sapro Operating and safety instructions

HB-THERM THERMO-5 HB-100Z1 instruction manual

HB-THERM

HB-THERM THERMO-5 HB-100Z1 instruction manual

Grundig GSS HRM 325 Assembly instruction

Grundig

Grundig GSS HRM 325 Assembly instruction

Emos P5630S manual

Emos

Emos P5630S manual

Thetford 23709 manual

Thetford

Thetford 23709 manual

CLIMAVENETA CVM 20 Instructions for use

CLIMAVENETA

CLIMAVENETA CVM 20 Instructions for use

UTC Fire and Security interlogix VT4010 Installation & operation instructions

UTC Fire and Security

UTC Fire and Security interlogix VT4010 Installation & operation instructions

weinor BiEasy 1M operating manual

weinor

weinor BiEasy 1M operating manual

S&C TripSaver II Installation, Operation, and Configuration

S&C

S&C TripSaver II Installation, Operation, and Configuration

CKD 3KA1 instruction manual

CKD

CKD 3KA1 instruction manual

Bosch rexroth DBD 1X/ E Series operating instructions

Bosch

Bosch rexroth DBD 1X/ E Series operating instructions

Valeo SC1000 IVECO operating instructions

Valeo

Valeo SC1000 IVECO operating instructions

GF Signet 9950 instruction sheet

GF

GF Signet 9950 instruction sheet

Texas Instruments ADS5296 user guide

Texas Instruments

Texas Instruments ADS5296 user guide

Emerson Network Power TD3200 Series user manual

Emerson Network Power

Emerson Network Power TD3200 Series user manual

NuWave SSRMAN-1BFS Series user manual

NuWave

NuWave SSRMAN-1BFS Series user manual

SPL Full Ranger manual

SPL

SPL Full Ranger manual

Stahl 9490 Series operating instructions

Stahl

Stahl 9490 Series operating instructions

manuals.online logo
manuals.online logoBrands
  • About & Mission
  • Contact us
  • Privacy Policy
  • Terms and Conditions

Copyright 2025 Manuals.Online. All Rights Reserved.