manuals.online logo
Brands
  1. Home
  2. •
  3. Brands
  4. •
  5. Solinst
  6. •
  7. Control Unit
  8. •
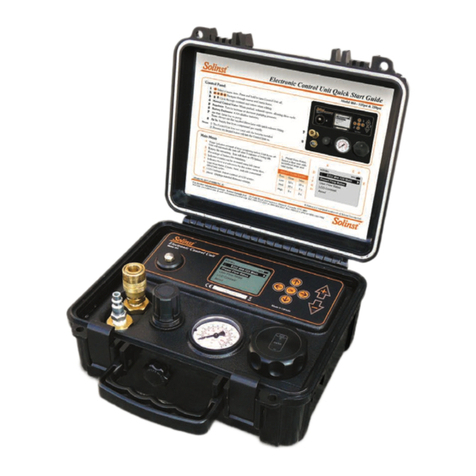
  9. Solinst 464 250 psi Use and care manual

Solinst 464 250 psi Use and care manual

Control Unit Solenoid Valve Assembly Replacement
High Quality Groundwater and Surface Water Monitoring Instrumentation
(Page 1 of 2)
Model 464 250 psi (sold after September 2013)
®Teflon is a registered trademark of DuPont Corp. Continued on page 2...
Tools and Materials Needed
1. 464 Solenoid Valve Assembly - 250 psi (Spare) (#111743)
2. 3/32" Allen Key
3. Small Utility Knife
4. 7/64" Allen Key
5. 11/16" Wrench
6. 14 mm Wrench
7. 1/2" Wrench
8. 7/16" Wrench
9. Teflon®Tape
10.Any suitable plastic adhesive (e.g. silicone)
Instructions
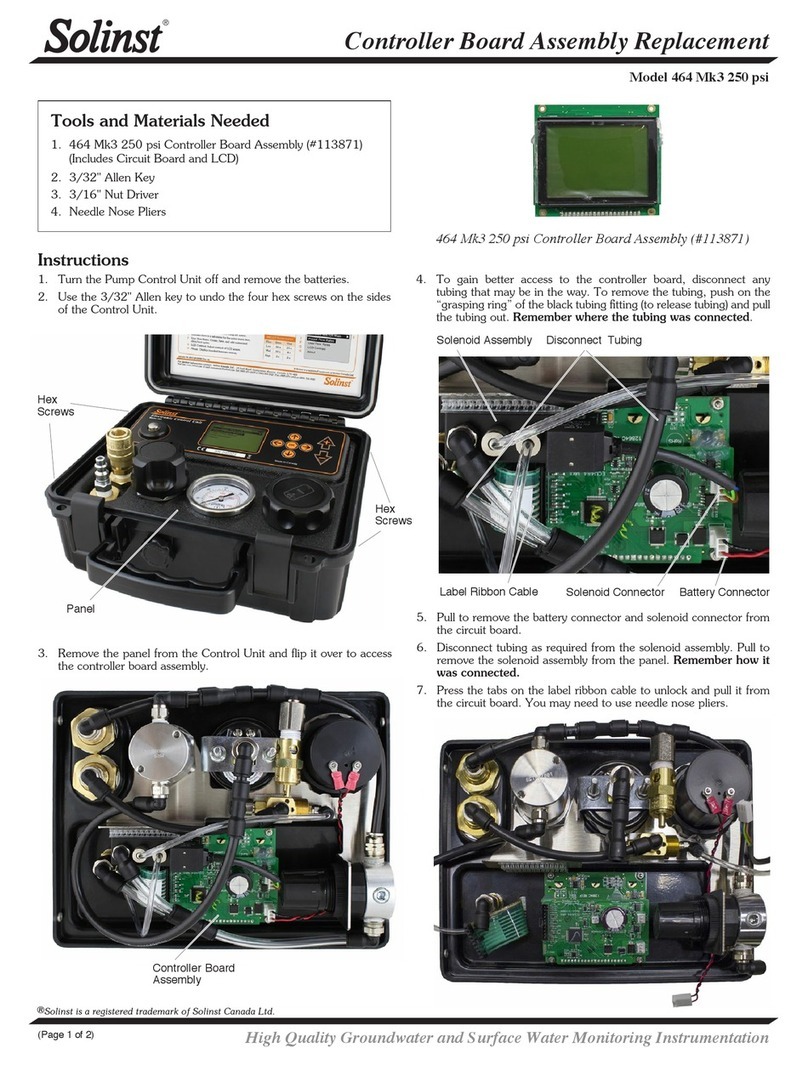
1. Turn the Control Unit off and remove the batteries.
2. Use the 3/32" Allen key to undo the four hex screws on the sides
of the Control Unit.
Hex
Screws
Hex
Screws
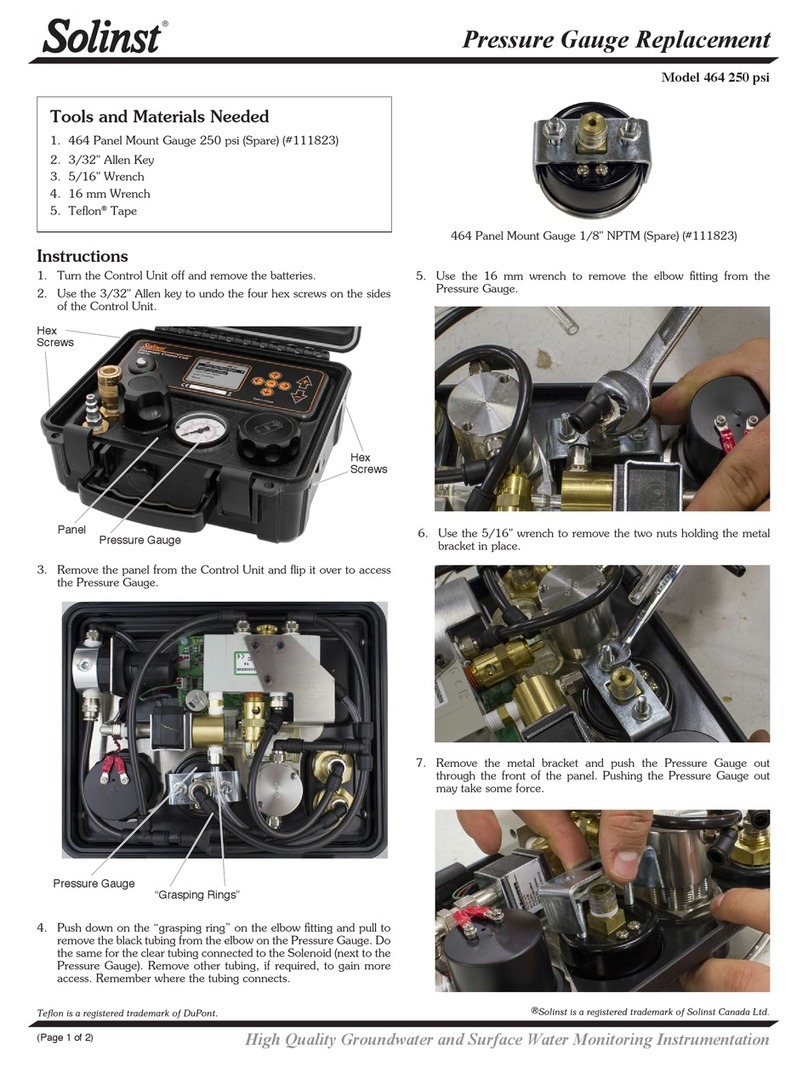
3. Remove the panel from the Control Unit and flip it over to access
the Solenoid Valve Assembly.
Panel
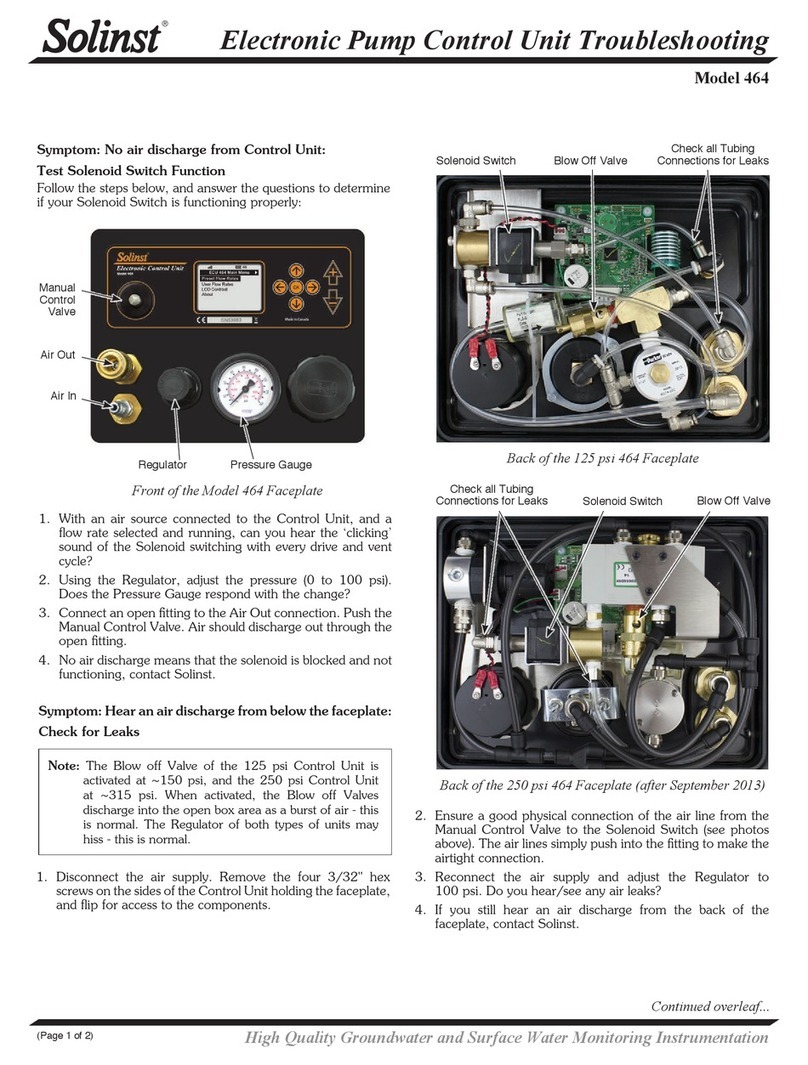
4. Push down on the fittings to remove the three black tubes from the
Shuttle Valve Assembly, and the two clear tubes from the Solenoid
Valve Assembly (photo shows black tubes removed).
Solenoid Valve
Assembly
5. Use the 7/64" Allen Key to remove the three screws from the
bracket holding the Shuttle Valve Assembly, and carefully slide the
Shuttle Valve Assembly out from the bracket.
464 Solenoid Valve Assembly - 250 psi (Spare)
Shuttle Valve
Assembly
Remove
Tubes
Bracket
Remove
Tube
Remove
Tubes
Printed in Canada
October 8, 2014
(#111742)
(Page 2 of 2)
For further information contact: Solinst Canada Ltd.
Fax: +1 (905) 873-1992; (800) 516-9081 Tel: +1 (905) 873-2255; (800) 661-2023
35 Todd Road, Georgetown, Ontario Canada L7G 4R8
Web Site: www.solinst.com E-mail: [email protected]
6. Use a small utility knife to break any adhesive holding the Solenoid
Connector to the Circuit Board. Unplug the Solenoid Connector
from the Circuit Board.
7. Use the appropriate wrenches to remove the two fittings (shown
above) from the Shuttle Valve Assembly. Twist to remove the
Solenoid Valve Assembly from the Shuttle Valve Assembly.
Plugs
Plug
®Solinst is a registered trademark of Solinst Canada Ltd.
Unplug
Solenoid
Connector
9. Remove the three plugs from the new Solenoid Valve Assembly.
8. Use the appropriate wrenches to remove the three fittings from the
old Solenoid Valve Assembly.
10. Screw the three fittings back into the new Solenoid Valve Assembly.
11 Screw the new Solenoid Valve Assembly into the Shuttle Valve
Assembly. Screw the two fittings back into the Shuttle Valve
Assembly (see photo at left for proper connections).
12. Plug the Solenoid Connector back into the Circuit Board, and
apply a small amount of adhesive to the outside of the Connector
to help secure it to the Circuit Board.
13. Slide the Shuttle Valve Assembly back into place under the bracket
and secure it using the three screws.
14. Push the three black tubes back into the fittings on the Shuttle Valve
Assembly. Use the photo below to ensure correct connections.
15. Push the clear tubes into the fittings on the new Solenoid Valve
Assembly. Use the photo below to ensure correct connections.
16. Place the panel in the Control Unit case and reinstall the four hex
screws.
17. Reinstall the batteries. Test the Control Unit to ensure proper
connections were made when replacing the Solenoid Valve
Assembly.
Note: Wrap new Teflon tape around the threads of all the fittings.
Solenoid Valve
Assembly
Shuttle Valve
Assembly
CYL Port
IN Port

Other Solinst Control Unit manuals

Solinst 464 User manual

Solinst

Solinst 464 User manual

Solinst 464 Mk3 250 psi Use and care manual

Solinst

Solinst 464 Mk3 250 psi Use and care manual

Solinst 464 125 psi Use and care manual

Solinst

Solinst 464 125 psi Use and care manual

Solinst 464 Mk3 250 psi Use and care manual

Solinst

Solinst 464 Mk3 250 psi Use and care manual

Solinst 464 Mk3 User manual

Solinst

Solinst 464 Mk3 User manual

Solinst 464 125 psi Configuration guide

Solinst

Solinst 464 125 psi Configuration guide

Solinst 464 250 psi Use and care manual

Solinst

Solinst 464 250 psi Use and care manual

Solinst 464 125 psi Use and care manual

Solinst

Solinst 464 125 psi Use and care manual

Solinst 464 250 psi Configuration guide
Solinst

Solinst 464 250 psi Configuration guide

Solinst 464 Operating instructions

Solinst

Solinst 464 Operating instructions

Popular Control Unit manuals by other brands

Dewetron DAQP-LV Technical reference manual

Dewetron

Dewetron DAQP-LV Technical reference manual

ICP DAS USA M-7026 quick start guide

ICP DAS USA

ICP DAS USA M-7026 quick start guide

BTR BCR - 2 A Installation and commissioning instructions

BTR

BTR BCR - 2 A Installation and commissioning instructions

Watts Lync DigiTemp Jr V23 User guide/instruction manual

Watts

Watts Lync DigiTemp Jr V23 User guide/instruction manual

Armada Technologies Pro700 operating instructions

Armada Technologies

Armada Technologies Pro700 operating instructions

Globalstar ST150 user manual

Globalstar

Globalstar ST150 user manual

Avocent AMIQDM Quick installation guide

Avocent

Avocent AMIQDM Quick installation guide

Transient Modules 2M Build manual

Transient Modules

Transient Modules 2M Build manual

Belimo FS Series instructions

Belimo

Belimo FS Series instructions

Siemens Simatic TI405 user manual

Siemens

Siemens Simatic TI405 user manual

Diamond Systems STEVIE user manual

Diamond Systems

Diamond Systems STEVIE user manual

Ingics IWM438 user manual

Ingics

Ingics IWM438 user manual

City Theatrical Multiverse 5907 user manual

City Theatrical

City Theatrical Multiverse 5907 user manual

Emerson Yarway 9200 Series Installation and maintenance instructions

Emerson

Emerson Yarway 9200 Series Installation and maintenance instructions

Trane TCONT850 installation guide

Trane

Trane TCONT850 installation guide

sks 300057 installation instructions

sks

sks 300057 installation instructions

Sharp PN-ZB03PC installation manual

Sharp

Sharp PN-ZB03PC installation manual

tau K120M installation guide

tau

tau K120M installation guide

manuals.online logo
manuals.online logoBrands
  • About & Mission
  • Contact us
  • Privacy Policy
  • Terms and Conditions

Copyright 2025 Manuals.Online. All Rights Reserved.