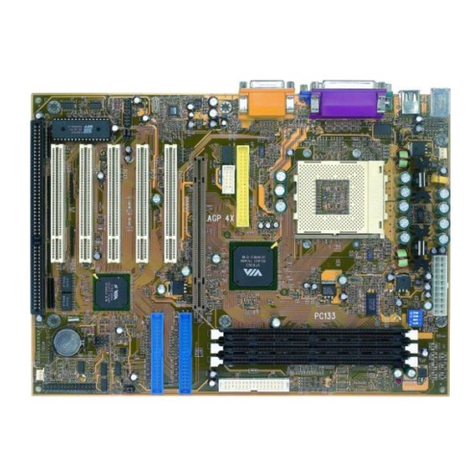
SOLTEK SL-65FVB User manual

This User’s Guide & Technical Reference is for assisting system
manufacturers and end-users in setting up and installing the
mainboard.
Every effort has been made to ensure that the information in this
manual is accurate. Solte Computer Inc. is not responsible for
printing or clerical errors. Information in this document is subject to
change without notice and does not represent a commitment on
the part of Solte Computer Inc.
No part of this manual may be reproduced, transmitted, translated
into any language in any form or by any means, electronic or
mechanical, including photocopying and recording, for any purpose
without the express written permission of Solte Computer Inc.
Companies and products mentioned in this manual are for identifi-
cation purpose only. Product names appearing in this manual may
or may not be registered trademar s or copyrights of their respec-
tive companies.
Solte Computer Inc. Provides this manual “AS IS” without war-
ranty of any ind, either express or implied, including but not limited
to the implied warranties or conditions of merchantability or fitness
for a particular purpose. In no event shall Solte Computer Inc. Be
liable for any loss or profits, loss of business, loss of use or data,
interruption of business, or for indirect, special, incidental, or con-
sequential damages of any ind, even if Solte Computer Inc. Has
been advised of the possibility of such damages arising from any
defect or error in this manual or product.
© Copyright 2000 Soltek Computer Inc.
All rights reserved
Model : SL- 5FVB
Edition : June, 2000
Version : 1.0
http://www.solte .com.tw
e-mail: support@solte .com.tw
NOTICE TO END USER

5FVB/ 5FVB-X
2
C O N T E N T
Chapter 1: Introduction .................................................. 4
1-1 CPU .............................................................................................. 4
1-2 CHIPSET ...................................................................................... 4
1-3 L2 CACHE .................................................................................... 4
1-4 MAIN MEMORY............................................................................ 4
1-5 BIOS ............................................................................................. 4
1-6 SUPER I/O FUNCTON ................................................................. 4
1-7 OTHER FEATURES ..................................................................... 5
1-8.1 MOTHERBOARD LAYOUT --- 65FVB....................................... 6
1-8.2 MOTHERBOARD LAYOUT --- 65FVB-X ................................... 7
Chapter 2: Hardware Setup ............................................ 8
2-1 CPU INSTALLATION .................................................................... 8
2-2 CPU TYPE CONFIGURATION ................................................... 10
2-3 SYSTEM MEMORY CONFIGURATION ..................................... 12
2-4 JUMPER definitions .................................................................... 12
2-5 CONNECTORS .......................................................................... 15
2-5.1 J1 SWITCH SIGNAL SUMMARY............................................. 16
2-5.2 J2 SWITCH SIGNAL SUMMARY............................................. 18
2-5.3 ATX POWER SUPPLY CONNECTOR..................................... 20
2-5.4 PS/2 MOUSE AND PS/2 KEYBOARD..................................... 20
2-5.5 IRQ DESCRIPTION ................................................................. 21
2-6 VOICE DIAGNOSTIC FUNCTION --- 65FVB-X.......................... 22
Chapter 3: BIOS Setup.................................................. 23
3-1 STANDARD CMOS SETUP........................................................ 24
3-2 BIOS FEATURES SETUP .......................................................... 26
3-3 CHIPSET FEATURES SETUP ................................................... 30
3-4 POWER MANAGEMENT SETUP............................................... 33
3-5 PNP / PCI CONFIGURATION SETUP........................................ 37
3-6 LOAD SETUP DEFAULTS.......................................................... 39

5FVB/ 5FVB-X
3
3-7 CPU SPEED SETTING............................................................... 40
3-8 INTEGRATED PERIPHERALS................................................... 42
3-9 SUPERVISOR / USER PASSWORD.......................................... 46
3-10 HDD AUTO DETECTION.......................................................... 47
3-11 SAVE & EXIT SETUP................................................................ 47
3-12 EXIT WITHOUT SAVING .......................................................... 47

5FVB/ 5FVB-X
4
Chapter 1: Introduction
1-1 CPU
• Supports Intel FC-PGA 370 Celeron / Pentium III (Coppermine) CPU at
300MHz up to 750MHz or higher.
• Supports VIA Cyrix III (Joshua) CPUs.
• Supports CPU voltage auto-detect circuit.
• Supports 66 / 75* / 83* / 100 / 103* / 112* / 124* / 133* / 140* / 150* MHz
system bus speed.
• Cloc multipliers up to 8x or higher.
1-2 CHIPSET
• VIA VT82C693A + VT82C596B chipset with 133MHz FSB.
• PCI Rev 2.1, 5V, 33MHz interface compliant.
• Supports 66 / 100 / 133MHz, 3.3V AGP (Accelerated Graphics Port) slot.
1-3 L2 CACHE
• Pentium II / Pentium !!! supports 512K write bac cache with Pipelined
Burst SRAMs.
1-4 MAIN MEMORY
• Memory range from 8MB up to 768MB (SDRAM) with DRAM Table Free
configuration.
• Supports SDRAM with 12 / 10 / 8 / 6 ns speed.
• Supports 3pcs 168pin DIMM soc ets. (3.3V Unbuffered and 4 cloc type)
• DRAM supports ECC or Parity function.
1-5 BIOS
• Award Plug and Play BIOS.
• Supports ACPI and legacy APM.
• Flash Memory for easy upgrade.
1- SUPER I/O FUNCTON
• Integrated USB (Universal Serial Bus) controller with 2 USB ports.
• Supports 2 IDE channels with 4 IDE devices. (including ZIP / LS-120 devices)
• Provides PCI IDE Bus Master function and supports Ultra DMA33 / 66
function.

5FVB/ 5FVB-X
5
• Provides 1 floppy port.
• 2 high speed 16550A FIFO UART ports.
• 1 parallel port with EPP / ECP / SPP capabilities.
• PS/2 mouse connector and PS/2 eyboard connector.
• Built-In RTC, CMOS, eyboard controller on single I/O chip.
• Peripherals boot function. (with ATX power)
1-7 OTHER FEATURES
• ATX size 17.0cm x 30.5cm.
• 5x PCI Master slots, 1x ISA slot, 3x DIMM soc ets, and 1x AGP slot.
• Provides DIP switch setting.
• Supports 66 / 100 / 133MHz Bus Cloc .
• Supports WOL (Wa e On LAN) function.
• Supports Keyboard Power On function.
• BIOS supports 103 / 112 / 133 / 150MHz Bus Cloc .
• Provides Voice Diagnostic function for easy debug. ( 5FVB-X only)

5FVB/ 5FVB-X
NOTE: FOR 100 / 133MHz CPU ENVIRONMENT, THE SDRAM MUST COMPLY WITH PC-100 / PC-
133 SPEC.
1-8.1 MOTHERBOARD LAYOUT --- 5FVB
• DEFAULT SETTING: Celeron 300/66MHz, Pentium II / Pentium !!! 450/
100MHz.
1 3
JP5
1 3
JP4
3
1
JP2
1 3
JP3
1 3
1 3
JVGA1
JP ;
JP7
1 3
JP12
1 3
JBAT1
CFAN1
SFAN1
PFAN1
SPK RST PWR/LED SUSLED
HD/LED IR PWR SMI
J1;
J2
15
15
JWOL1
AGP
PCI 1
PCI 2
PCI 3
PCI 4
PCI 5
FDC
DIMM1;
DIMM2;
DIMM3
IDE2
IDE1
SOCKET 370
ATX POWER
ISA
FLASH BIOS
Li
Battery
Clock;
Generator
I/O;
Controller
Intel
Cyrix
1-2 SHORT
JP3/JP4/JP5
2-3 SHORT
VIA
93A
VIA
59 B
USB0
USB1 PS/2;
MOUSE
PS/2;
K/B
LPT1
COM2 COM1
upper
lower
upper
lower
SW1
ONDIP
8 7 5 4 3 2 1
PC100/PC133 SDRAM

5FVB/ 5FVB-X
7
NOTE: FOR 100 / 133MHz CPU ENVIRONMENT, THE SDRAM MUST COMPLY WITH PC-100 / PC-
133 SPEC.
1-8.2 MOTHERBOARD LAYOUT --- 5FVB-X
• DEFAULT SETTING: Celeron 300/66MHz, Pentium II / Pentium !!! 450/
100MHz.
1 3
JP5
1 3
JP4
3
1
JP2
1 3
JP3
1 3
1 3
JVGA1
JP ;
JP7
1 3
1 3
JP9;
JP8
1 3
JP12
1 3
JP11
1 3
JBAT1
CFAN1
SFAN1
PFAN1
SPK RST PWR/LED SUSLED
HD/LED IR PWR SMI
J1;
J2
15
15
JWOL1
AGP
PCI 1
PCI 2
PCI 3
PCI 4
PCI 5
FDC
DIMM1;
DIMM2;
DIMM3
IDE2
IDE1
SOCKET 370
ATX POWER
ISA
FLASH BIOS
Li
Battery
Clock;
Generator
I/O;
Controller
Intel
Cyrix
1-2 SHORT
JP3/JP4/JP5
2-3 SHORT
VIA
93A
VIA;
59 B
USB0
USB1 PS/2;
MOUSE
PS/2;
K/B
LPT1
COM2 COM1 upper
lower
upper
lower
SW1
ONDIP
8 7 5 4 3 2 1
PC100/PC133 SDRAM

5FVB/ 5FVB-X
8
SOCKET 370
2-1 CPU INSTALLATION
1. Pull the lever sidways away from the soc et, and then raise the lever up
to a 90-degree angle.
2. Ta e note of the red circle as below picture. When insert the CPU into
soc et, you can find out there is a definite pin orientation for CPU and
soc et.
SOCKET 370
Chapter 2: Hardware Setup

5FVB/ 5FVB-X
9
3. Ma e sure that the CPU positions in the soc et tightly, and then put the
lever down to complete the CPU installation.
SOCKET 370

5FVB/ 5FVB-X
10
2-2 CPU TYPE CONFIGURATION
BUS CLOCK SELECT
BUS RATIO SELECT
SW1 DIP1 ~ DIP4 SETTING
3.0x 3.5x
4.0x 4.5x
5.0x 5.5x
.0x .5x
7.0x 7.5x
8.0x
ON
ON
ON
ON
87654321
OFF
ON
ON
ON
87654321
OFF
OFF
ON
ON
ON
ON
87654321
OFF
ON
ON
ON
87654321
OFF
OFF
ON
ON
ON
87654321
OFF
OFF
ON
ON
87654321
OFF
OFF
OFF
ON
ON
ON
ON
87654321
OFF
ON
ON
ON
87654321
OFF
OFF
ON
ON
ON
87654321
OFF
OFF
ON
ON
87654321
OFF
OFF
OFF
ON
ON
ON
87654321
OFF
OFF
Auto Select /100/133 MHz
(default)
SW1 DIP5 ~ DIP8 SETTING
MHz
100MHz
133MHz
ON;
ON
ON
87654321
OFF
OFF
ON;
ON
87654321
OFF
OFF
OFF
ON;
87654321
OFF
OFF
OFF
OFF
ON;
ON
ON
87654321
OFF
OFF

5FVB/ 5FVB-X
11
CPU MODEL BUS RATIO BUS CLOCK
NOTE: (#) Pentium III Coppermin FC-PGA CPUs.
Celeron 300/
( MHz * 4.5x)
Pentium III 00EB/133#
(133MHz * 4.5x)
Pentium III 533EB/133#
(133MHz * 4.0x)
Celeron 333/
( MHz * 5.0x)
Pentium III 500E/100#
(100MHz * 5.0x)
Pentium III 7B/133#
(133MHz * 5.0x)
Celeron 3 /
( MHz * 5.5x)
Pentium III 550E/100#
(100MHz * 5.5x)
Pentium III 733B/133#
(133MHz * 5.5x)
Celeron 400/
( MHz * .0x)
Pentium III 00E/100#
(100MHz * .0x)
Celeron 433/
( MHz * .5x)
Pentium III 50/100#
(100MHz * .5x)
Celeron 4 /
( MHz * 7.0x)
Pentium III 700/100#
(100MHz * 7.0x)
Celeron 500/
( MHz * 7.5x)
Pentium III 750/100#
(100MHz * 7.5x)
Celeron 533/
( MHz * 8.0x)
ON
ON
ON
87654321
OFF
OFF
ON
ON
ON
87654321
OFF
OFF
ON
ON
ON
87654321
OFF
OFF
ON
ON
ON
87654321
OFF
OFF
ON
ON
ON
87654321
OFF
OFF
ON
ON
ON
87654321
OFF
OFF
ON
ON
ON
87654321
OFF
OFF
ON
ON
ON
87654321
OFF
OFF
ON
ON
ON
87654321
OFF
OFF
ON
ON
ON
ON
87654321
OFF
ON
ON
ON
87654321
OFF
OFF
ON
ON
ON
87654321
OFF
OFF
ON
ON
87654321
OFF
OFF
OFF
ON
ON
ON
ON
87654321
OFF
ON
ON
ON
87654321
OFF
OFF
ON
ON
ON
87654321
OFF
OFF
ON
ON
87654321
OFF
OFF
OFF
ON
ON
ON
87654321
OFF
OFF
Over 8.0x
Using these CPUs which bus ratio exceed;
8.0x, user can not change all values from ;
the DIP switch but detection by BIOS ;
automatically.

5FVB/ 5FVB-X
12
2-3 SYSTEM MEMORY CONFIGURATION
• This VIA 693 Apollo Pro Plus motherboard supports 168pin DIMM of 4MB,
8MB, 16MB, 32MB, 64MB, 128MB, and 256MB to form a memory size
between 8MB up to 768MB (SDRAM). VIA 693 Apollo Pro Plus chipset
provides “Table-Free” function. It means that users can install DRAM with
any configuration and in any ban , and that is why the DRAM table is not
needed but do remember that the DRAM must be 3.3V type. For 100 /
133MHz CPU environment, the SDRAM specification must comply with
PC-100 / PC-133 spec.
2-4 JUMPER DEFINITIONS
• The figure below shows the location of the motherboard’s jumper bloc s.
CAUTION
• Do not move the jumper with the power on. Always turn off the power and unplug
the power cord from the computer before changing the jumper. Otherwise, the
motherboard could be damaged.
GND
+12V
SENSOR
Those connectors support processor/system/chassis cooling fan with +12V. Those
support three pin head connector. When connecting the wire to FAN connectors
user should give attention that the red wire is the positive and should be connected
to the +12V the black wire is Ground and should be connected to GND. If your
motherboard has Hardware Monitor chipset on-board you must use a specially
designed fan with speed sensor to take advantage of this function.
For fans with fan speed sensor every rotation of the fan will send out 2 pulses.
System Hardware Monitor will count and report the fan rotation speed.
NOTE 1: Always consult vendor for proper CPU cooling fan.
NOTE 2: CPU FAN supports the FAN control. You can install PC
Alert utility. This will automatically control the CPU
FAN speed according to the actual CPU temperature.
CPU FAN
CFAN1/SFAN1/PFAN1: ONBOARD FAN (12V)
SFAN1
CFAN1
CHASSIS FAN PFAN1
SYSTEM FAN

5FVB/ 5FVB-X
13
Intel CPU (default)
VIA Cyrix III (Joshua) CPU
JP3/JP4/JP5: CPU SELECT
1 3
1 3
JP3
JP3
1 3
1 3
JP4
JP4
1 3
1 3
JP5
JP5
Disabled (default)
Enabled
JP2: KEYBOARD POWER ON
3
1
JP2
3
1
JP2
NOTE: When the keyboard power on fun tion shows any ompatible
problem, hoose Disabled and report to the keyboard vendor/
manufa turer,
Chinese Language
English Language (default)
JP8/JP9: VOICE DIAGNOSTIC LANGUAGE SELECT
1 3
1 3
JP9
JP8
1 3
1 3
JP9
JP8
1 3
1 3
JP9
JP8
1 3
1 3
JP9
JP8
Japanese Language
Spanish Language
NOTE: JP8, JP9 and JP11 are supported by 65FVB-X only.
Enabled (default)
Disabled
JP11: VOICE CONTROLLER CHIP
3
1
JP11
3
1
JP11
Redirect USB port to USB 1
connector (default)
JP /JP7: USB PORT SELECT
1 3
1 3
JP ;
JP7
1 3
1 3
JP ;
JP7
Redirect USB port to AGP

5FVB/ 5FVB-X
14
NOTE: For support WOL fun tion, the ATX power supply must
provide at least 5V / 720mA standby urrent.
Connect the Wa e On LAN signal from LAN card
to JWOL1
JWOL1 : WAKE ON LAN (WOL) FUNCTION
JWOL1
NOTE: We re ommend user to unplug the power ord from ATX
power supply to take pre autions. Clear CMOS memory by
shorting this jumper pin 2 & pin3 momentarily, and then
remove the ap ba k to pin 1 & pin2 to retain original CMOS
setting.
Clear CMOS Data
Retain Data (default)
JBAT1: CLEAR CMOS DATA
3
1
JBAT1
3
1
JBAT1
Enabled
Normal (default)
JP12: POWER LOST RESUME
1 3
JP12
1 3
JP12
NOTE: This jumper allows user to use the swit h of ATX power supply
to ontrol ON/OFF swit h dire tly instead of using the power
swit h on the motherboard.

5FVB/ 5FVB-X
15
A : PS/2 MOUSE
B : USB O
C : LPT 1
D : PS/2 KEYBOARD
E : USB 1
F : COM 1
G : COM 2
A.
D. E. F. G.
B. C.
2-5 CONNECTORS
A1 : 1st HDD LED
A2 : 2nd HDD LED
B : INFRARED (IR)
C : POWER SWITCH
D : SMI
E : SPEAKER
F : RESET SWITCH
G : POWER LED
H : KEYLOCK
I : SUSPEND LED
EF G
C
H I
D
A1 A2 B
++
--
+-
J1
J2
1 15
1 15

5FVB/ 5FVB-X
1
2-5.1 J1 SWITCH SIGNAL SUMMARY
12345 789101112131415
J2
J1
PIN 1; +5V
HDD LED CONNECTOR
PIN 2; HDD LED SIGNAL
PIN 3; HDD LED SIGNAL
PIN 4; +5V
DESCRIPTION
This connector supplies power to the cabinet's IDE
activity LED. Read and write activity by devices
connected to the Primary or SecondaryIDE
connector will cause the LED to light up.
12345 7891011 12 13 14 15
J2
J1
INFRARED CONNECTOR
PIN ; INFRARED TRANSMIT SIGNAL
PIN 7; GND
PIN 8; INFRARED RECEIVE SIGNAL
PIN 9; NONE
PIN 10; +5V
DESCRIPTION
This connector supports an optional wireless
transmitting and receiving infrared module. This
module mounts to a small opening on system cases
that support this feature.
User must also configure the setting through
BIOS program "Peripheral Setup" to select whether
UART2 is directed for use with COM2 or IrDA.
Use the five pins and connect a ribbon cable from
the module to the motherboard's IR connector
according to the pin definitions.

5FVB/ 5FVB-X
17
ATX POWER SWITCH
PIN 12; ATX POWER SWITCH
PIN 13; GND
DESCRIPTION
The system power is controlled by a momentary
switch connected to this lead.
Pressing the button once will switch the system
between ON and SOFT OFF.
Pushing the switch while in the ON mode for more
4 seconds will turn the system off.
The system power LED shows the status of the
system's power.
12345 789101112 13 14 15
J2
J1
SMI CONNECTOR
PIN 14; SMI(System Managment Interrupt) SIGNAL
PIN 15; GND
DESCRIPTION
This allows user to manually place the system into a
suspend mode or "Green" mode, where system
activity is decreased to save electricity and prolong
the life of certain components when the system is
not in use. This 2-oin connector connects to the
case-mounted suspend switch. If you do not have a
switch for the connector, you may use the "Turbo
Switch".
SMI is activated when it detects a short to open
moment and therefore leaving it shorted will not
cause any problems. This may require one or two
presses depending on the position of the switch.
Wake-Up can be controlled by settings in the BIOS
but the keyboard will always allow wake-up(the SMI
lead cannot wake up the system).
12345 7891011121314 15
J2
J1

5FVB/ 5FVB-X
18
2-5.2 J2 SWITCH SIGNAL SUMMARY
12345 7 8 9 10 11 12 13 14 15
J1
J2
PIN 1; SPEAKER SIGNAL
SPEAKER CONNECTOR
PIN 2; NONE
PIN 3; GND
PIN 4; +5V
DESCRIPTION
This SPEAKER connector connects to the case-
mounted speaker. Two sources (LINE OUT and
SPEAKER) allow you to hear system beeps and
warnings. Only SPEAKER allows you to hear system
beeps before the integrated audio has been properly
initialized.
12345 7 8 9 10 11 12 13 14 15
J1
J2
PIN 5; RESET SIGNAL
RESET SWITCH CONNECTOR
PIN ; GND
DESCRIPTION
RESET SWITCH connector connects to the case-
mounted reset switch for rebooting your system
without having to turn off your power switch. This is
a preferred method of reboot to prolong the life of
the system's power supply.
12345 7891011 12 13 14 15
J1
J2
PIN 8; +5V
POWER LED CONNECTOR
PIN 9; NONE
PIN 10; GND
DESCRIPTION This Power LED connector connects the system
power LED, which lights when the system is
powered on and blinks when it is in sleep mode.

5FVB/ 5FVB-X
19
12345 7891011121314 15
J1
J2
PIN 14; SUSPEND LED SIGNAL
SUSPEND LED
PIN 15; GND
DESCRIPTION Connect to Suspend indicator light.

5FVB/ 5FVB-X
20
2-5.4 PS/2 MOUSE AND PS/2 KEYBOARD
PIN : None
PIN 5 : Mouse Clock
PIN 4 : Vcc
PIN 3 : GND
PIN 2 : None
PIN 1 : Mouse Data
PS/2 MOUSE
PIN : None
PIN 5 : Keyboard Clock
PIN 4 : Vcc
PIN 3 : GND
PIN 2 : None
PIN 1 : Keyboard Data
PS/2 KEYBOARD
2-5.3 ATX POWER SUPPLY CONNECTOR
• This connector connects to an ATX power supply. The plug from the power
supply only inserts in an orientation because of the different hole sizes.
Find the proper orientation and push down firmly ma ing sure that all pins
are aligned.
• Reminding that your power supply should support at least 10mA on the 5V
standby voltage. It may cause an difficulty to power on the system if the
power supply cant support the load.
• For Wake On LAN function, the power supply should support at least
720mA current.
+3.3 Volts
-12.0 Volts
GND
Power Supply On
GND
GND
GND
-5.0 Volts
+5.0 Volts
+5.0 Volts
+3.3 Volts
+3.3 Volts
GND
+5.0 Volts
GND
+5.0 Volts
GND
Power Good
+5.0V Standby
+12.0 Volts
Table of contents
Other SOLTEK Motherboard manuals

SOLTEK
SOLTEK SL-85MR2 User manual

SOLTEK
SOLTEK SL-B9D-FGR User manual

SOLTEK
SOLTEK 85DRV5-L User manual

SOLTEK
SOLTEK KT400-C User manual

SOLTEK
SOLTEK SL-65MIE User manual

SOLTEK
SOLTEK SL-65ME-T User manual

SOLTEK
SOLTEK 85DIR User manual

SOLTEK
SOLTEK SL-67EV1 Use and care manual

SOLTEK
SOLTEK 865Pro-FGR User manual

SOLTEK
SOLTEK SL-85DRV+ User manual

SOLTEK
SOLTEK SL-85DRV3 User manual

SOLTEK
SOLTEK SL-63AV Use and care manual

SOLTEK
SOLTEK SL-65MIV-C User manual

SOLTEK
SOLTEK SL-845GVI User manual

SOLTEK
SOLTEK SL-B8D-F User manual

SOLTEK
SOLTEK 75FRN Series User manual

SOLTEK
SOLTEK SL-65KVB User manual

SOLTEK
SOLTEK SL-75DRV-X User manual

SOLTEK
SOLTEK SL-65DVB User manual

SOLTEK
SOLTEK SL-75MIV User manual