DCT2RTS interface
Product manual
SAFETY AND IMPORTANT INFORMATION
• This Somfy product must be installed by a professional installer, for whom these
instructions are intended.
• Before installation, check that this product is compatible with the associated
equipment and accessories.
• These instructions describe how to do installation, commission and use this product.
• Moreover, the installer must comply with current standards and legislation in the
country in which the product is being installed, and inform his customers of the
operating and maintenance conditions for the product.
• Any use outside the sphere of application specified by Somfy is not approved. Such
use, or any failure to comply with the instructions given herein will void the
warranty, and Somfy refuses to accept liability.
• The equipment (interface) is for indoor use.
PRODUCT DESCRIPTION
• DCT2RTS gateway: Provides communication between third party home automation
systems and RTS motors through simple dry contact input interface.
1.2 RTS commissioning
Before using the DCT2RTS interface, we recommend programming each motor in
advance using an individual Somfy remote control (e.g. Situo) and set the limit
positions of each motor.
1.2.1 Procedure
1. Select the channel of the motor on the existing remote control, hold the
program button on the remote for 3 seconds, for the motor to jog
2. Select the desired channel (channel 1 – channel 5) via the RTS channel selector.
3. Press and hold the RTS PROG button for 1 second.
4. RTS motor jogs; the motor is now programmed to DCT2RTS gateway.
5. Repeat the same procedure to remove a motor from the DCT2RTS gateway.
1.2.2 RTS motors functional test
1. Select the channel via the RTS channel selector.
2. Press the UP/DOWN button on DCT2RTS interface to control RTS motors.
3. The motor jogs to indicate the connection is successfully established. If the
motor does not respond to the command, it means the establishment failed.
Repeat 1.2.1 Procedure, Steps 1-4 again. Alternately it may simply mean
that the RTS motor has been removed.
1.3 Operation
1. To activate an UP command, a minimum of 0.5 second closure is required
between the UP and COM terminals (5VDC). The status LED turns blue to
indicate that RTS signal is sent.
2. To activate a DOWN command, a minimum of 0.5 second closure is required
between the DOWN and COM terminals (5VDC). The status LED turns blue to
indicate that RTS signal is sent.
3. To activate a STOP command, a closure is required between UP, DOWN and
CMD terminals.
Attention:
Press and hold the RTS_PROG button for 5 seconds, the concerned RTS motor will enter to RTS
programming mode.
DCT2RTS interface functions
description
A – RTS LED / Status LED
Green : Power ON
Blue : Transmitting RTS
command
Red : Error
B – RTS Program button
C – RTS test buttons for UP/DOWN/STOP
D – Reserved for other usage
E – Reserved for other usage
F – Reset button
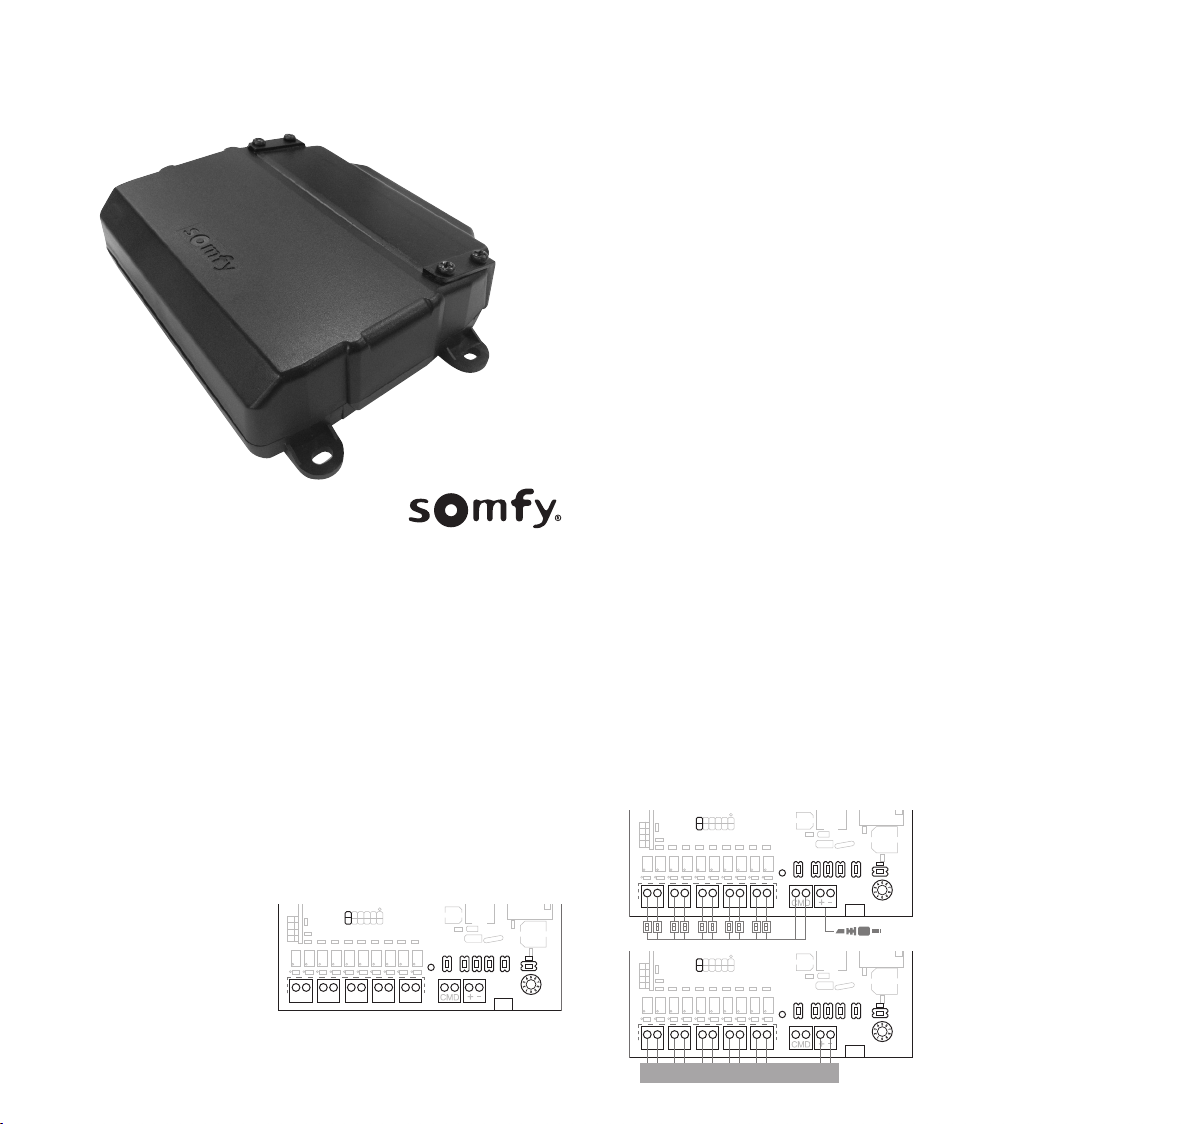
2. Wiring diagram
J
K
A
B C D E
F
G
H
I
Fig.1
Fig.2 Switches direct connect to
DCT2RTS interface wiring
Fig.3 Home automation system directs
connect to DCT2RTS interface wiring
3rd parties home automation system
G – RTS channel selector
H – 5VDC micro-USB port
I – 12-24V DC input port
K – Switch type selection
Please select either “Fixed position switch mode” or “Momentary switch mode” by
the jumper (item K) before powering ON the device.
• Jumper close (short)=Momentary switch (default)
• Jumper open=Fixed position switch
1. DCT2RTS interface setting
1.1 Installation
1.1.1 Disconnect the power
1.1.2 Select which type of switch will be connected (fig.1)
1.1.3 Wire either switches (fig.2) or dry-contact relay outputs (fig.3) to the indicated
DCT terminals at the bottom of the DCT2RTS Interface.
1.1.4 Connect the power. The status LED will turn green to indicate the device is
operating.


