No print!
Caution: Risk of electric shock!
Do not attempt to disassemble or modify the unit or its
accessories. In case any part is damaged, immediately power
off the unit and seek the assistance of a specialist.
Waste equipment must be collected and disposed separately
from household waste because it may contain components
hazardous to the environment or health. Used or waste
equipment may be dropped off free of charge at the point of
sale, or at any distributor which sells equipment of identical
nature and function. Dispose of the product at a facility
specializing in the collection of electronic waste. By doing so,
you will protect the environment as well as the health of others
and yourself. If you have any questions, contact the local waste
management organization. We shall undertake the tasks
pertinent to the manufacturer as prescribed in the relevant
regulations and shall bear any associated costs arising.
In the event that the power cable should become damaged, it
should only be replaced by the manufacturer, its service facility
or similarly qualified personnel.
SPECIFICATIONS
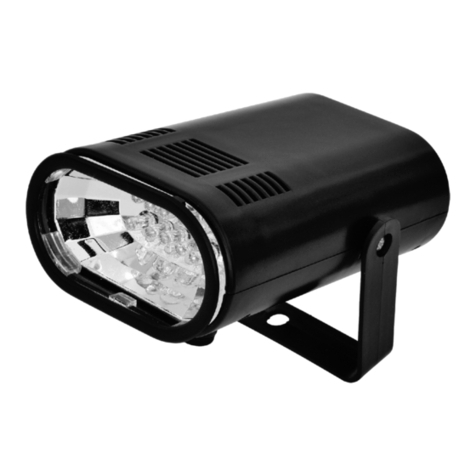
magnifier lens diameter / magnification / secondary lens:90 mm / 3/12 diopters
fluorescent lamp outer diameter:.................................... 115 mm
fluorescent lamp type: ....................................................230 V ~12 W
base size: ...................................................................... 210 x 175 mm
connector cable: ............................................................ 1,5 m
power supply: ................................................................ 230 V 50 Hz / 12 W
INSTALLATION
1. After removing the packaging, place the lamp on a horizontal
surface.
2. Adjust the desired position using the screw on the head and
base.
3. Connect the lamp to the mains and switch it on. (Keep the
dust cover closed when it is not in use.)
MAINTENANCE
Replacing the fluorescent lamp
1. Switch the lamp off the power it off by unplugging the mains
plug.
2. Allow the light source to cool.
3. Remove the five screws from the bottom of the head
assembly. Remove the 5 screws from the bottom of the head
part. Carefully lift the cover and the lens up!
4. Unclip the mounting metal “grip” from around the fluorescent
tube.
5. Gently pull the tube out of the four-pole connector.
6. Replace the fluorescent lamp with the same type and then
replace the lamp parts..
Replacing the igniter
1. Switch the lamp off and power it off by pulling the mains plug
out.
2. Let the light source cool down.
3. Remove the five screws from the bottom of the head part.
4. Lift up the cover part and the lens carefully.
5. Replace the lens and assemble the lamp.
WARNINGS
· Always place the lamp on a horizontal surface.
· For indoor use only! Do not use in humid rooms or outdoors!
· Do not expose to direct sunlight or other radiant heat!
· Warming of the base and the luminaire during operation is a
natural phenomenon. These should not be covered during use!
· Power the appliance off by unplugging it when it is not in use!
· Only fluorescent lamps and lenses of the same type may be
used for maintenance!
· Only qualified personnel may repair or disassemble the lamp!
· In case of injury – especially with regard to possible damage to
the mains cable – immediately power it off and consult a
specialist!
· If it does not work, check the mains connection and the
operation of the fluorescent lamp, and the igniter!
· Use glass cleaner and a soft cloth to clean the lens, making
sure not to scratch it!

