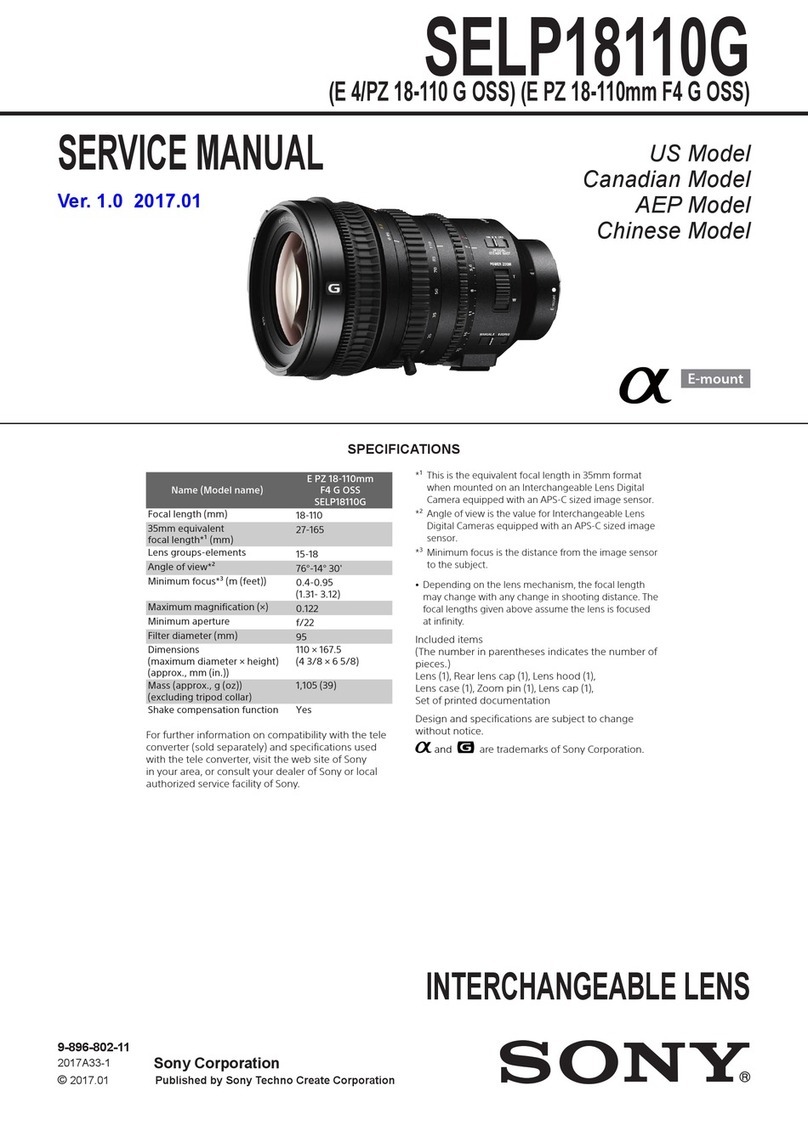
Sony SEL1635GM User manual

SERVICE MANUAL
Sony Imaging Products & Solutions Inc.
US Model
Canadian Model
AEP Model
Chinese Model
INTERCHANGEABLE LENS
© 2017.07
2017G33-1
9-896-806-11
Ver. 1.0 2017.07
SEL1635GM
(FE 2.8/16-35 GM) (FE 16-35mm F2.8 GM)
SPECIFICATIONS
E-mount
*1This is the equivalent focal length in 35mm format
when mounted on an Interchangeable Lens Digital
Camera equipped with an APS-C sized image sensor.
*2Angle of view 1 is the value for 35mm cameras, and
angle of view 2 is the value for Interchangeable Lens
Digital Cameras equipped with an APS-C sized image
sensor.
*3Minimum focus is the distance from the image
sensor to the subject.
ˎDepending on the lens mechanism, the focal length
may change with any change in shooting distance.
The focal lengths given above assume the lens is
focused at infinity.
Included items
(The number in parentheses indicates the number
of pieces.)
Lens (1), Front lens cap (1), Rear lens cap (1),
Lens hood (1), Lens case (1), Set of printed
documentation
Design and specifications are subject to change
without notice.
and are trademarks of Sony Corporation.
Product name
(Model name)
FE 16-35mm F2.8 GM
(SEL1635GM)
Focal length (mm) 16-35
35mm equivalent
focal length*1(mm) 24-52.5
Lens groups-elements 13-16
Angle of view 1*2107°-63°
Angle of view 2*283°-44°
Minimum focus*3(m (feet)) 0.28 (0.92)
Maximum magnification (X) 0.19
Minimum aperture f/22
Filter diameter (mm) 82
Dimensions (maximum
diameter × height)
(approx., mm (in.))
88.5 × 121.6
(3 1/2 x 4 7/8)
Mass (approx., g (oz)) 680 (24)
Shake compensation
function No

1-1
SEL1635GM
1. SERVICE NOTE
1-1. CHEMICALS
Some chemicals used for servicing are highly volatile.
Their evaporation caused by improper management affects your
health and environment, and wastes resources.
Manage the chemicals carefully as follows.
• Store chemicals sealed in a specific place to prevent from exposure
to high temperature or direct sunlight.
• Avoid dividing chemicals into excessive numbers of small con-
tainers to reduce natural evaporation.
• Keep containers sealed to avoid natural evaporation when chemi-
cals are not in use.
• Avoid using chemicals as much as possible. When using chemi-
cals, divide only required amount to a small plate from the con-
tainer and use up it.
1-2. EXTERIOR PARTS
Be careful to the following points for exterior parts used in this unit.
• Use a piece of cleaning paper or cleaning cloth for cleaning
exterior parts. Avoid using chemicals.
Even if you have to use chemicals to clean heavy dirt, do not
use paint thinner, ketone, nor alcohol.
• Insert the specific screws vertically to the part when installing
an exterior part.
Be careful not to tighten screws too much.
1-3. UNLEADED SOLDER
This unit uses unleaded solder.
Boards requiring use of unleaded solder are printed with the lead
free mark (LF) indicating the solder contains no lead.
(Caution: Some printed circuit boards may not come printed with
the lead free mark due to their particular size.)
• Set the soldering iron tip temperature to 350 °C approximately.
If cannot control temperature, solder/unsolder at high tempera-
ture for a short time.
: LEAD FREE MARK
Be careful to the following points to solder or unsolder.
Caution: The printed pattern (copper foil) may peel away if
the heated tip is applied for too long, so be careful!
Unleaded solder is more viscous (sticky, less prone
to flow) than ordinary solder so use caution not to let
solder bridges occur such as on IC pins, etc.
• Be sure to control soldering iron tips used for unleaded solder
and those for leaded solder so they are managed separately.
Mixing unleaded solder and leaded solder will cause detach-
ment phenomenon.
注意
如果电池更换不当会有爆炸危险。
只能用同样类型或等效类型的电池来更换。
务必按照说明处置用完的电池。
1-4. SAFETY CHECK-OUT
After correcting the original service problem, perform the following
safety checks before releasing the set to the customer.
1. Check the area of your repair for unsoldered or poorly-soldered
connections. Check the entire board surface for solder splashes
and bridges.
2. Check the interboard wiring to ensure that no wires are
“pinched” or contact high-wattage resistors.
3. Look for unauthorized replacement parts, particularly transis-
tors, that were installed during a previous repair. Point them out
to the customer and recommend their replacement.
4. Look for parts which, through functioning, show obvious signs
of deterioration. Point them out to the customer and recommend
their replacement.
5. Check the B+ voltage to see it is at the values specified.
6. Flexible Circuit Board Repairing
• Keep the temperature of the soldering iron around 350 °C
during repairing.
• Do not touch the soldering iron on the same conductor of the
circuit board (within 3 times).
• Be careful not to apply force on the conductor when solder-
ing or unsoldering.
SAFETY-RELATED COMPONENT WARNING!!
COMPONENTS IDENTIFIED BY MARK 0OR DOTTED
LINE WITH MARK 0ON THE SCHEMATIC DIAGRAMS
AND IN THE PARTS LIST ARE CRITICAL TO SAFE OP-
ERATION. REPLACE THESE COMPONENTS WITH SONY
PARTS WHOSE PART NUMBERS APPEAR AS SHOWN
IN THIS MANUAL OR IN SUPPLEMENTS PUBLISHED BY
SONY.
ATTENTION AU COMPOSANT AYANT RAPPORT
À LA SÉCURITÉ!
LES COMPOSANTS IDENTIFIÉS PAR UNE MARQUE 0
SUR LES DIAGRAMMES SCHÉMATIQUES ET LA LISTE
DES PIÈCES SONT CRITIQUES POUR LA SÉCURITÉ
DE FONCTIONNEMENT. NE REMPLACER CES COMPO-
SANTS QUE PAR DES PIÈCES SONY DONT LES NUMÉ-
ROS SONT DONNÉS DANS CE MANUEL OU DANS LES
SUPPLÉMENTS PUBLIÉS PAR SONY.
Caution
Danger of explosion if battery is incorrectly replaced.
Replace only with the same or equivalent type.
Dispose of used batteries according to the instructions.
1-2E
SEL1635GM
1-5. NOTE ON REPLACEMENT OF
MAIN BOARD
To replace the Main Board (CL-1052 board), connect the E-mount
lens to the ILCE-5000, and read/write of the adjustment data in the
following procedure.
• Before main board replacement
“Command” of E-Mount Lens Adjustment (Adjustment Applica-
tion for Service) is set to [READ] to implement the [Adjustment
Data Backup].
• After main board replacement
“Command” of E-Mount Lens Adjustment (Adjustment Appli-
cation for Service) is set to [WRITE(SAVE)] to implement the
[Adjustment Data Backup].

2-1
SEL1635GM
OPERATION NOTES
Make sure that the conductive side of a flexible board does not have any stain or foreign materials.
Do not touch the conductive side of flexible boards with bare hands.
Plug in a flexible board straight, fully into the connector until it reaches the end inside. (Fig. 1, Fig. 2, Fig. 3)
OK
(The flexible board was plugged in straight
and completely)
NG
(The flexible board was plugged in
crooked.)
NG
(The flexible board was not plugged in
completely.)
Flexible
Board Flexible
Board
Connector Connector
Reference
line
Flexible
Board
Connector Connector
Flexible
Board
Reference
line
Connector Connector
Flexible
Board
Flexible
Board
Reference
line
Fig. 1 Fig. 2 Fig. 3
When opening the connector's holder in direction A, do not open
it with excessive force.
When closing the connector's holder, press it evenly while pushing
a flexible board in direction B.
Holder
Connector Flexible Board
A
AHolder
Insulation side
Connector Flexible Board
B
• Make sure that the flat cable and flexible board are not cracked
or bent at the contact end.
• Do not apply excessive force to the gilded flexible board.
Cut and remove the part of gilt
which comes off at the point.
(Be careful or some
pieces of gilt may be left inside)
• The proper way to disconnect a connector is to grab the con-
nector instead of the wires. If you pull on the wires, they might
be broken.
• The proper way to connect a connector is to grab the connector
instead of the wires. If you push on the wires, they might be
broken.
2. DISASSEMBLY & ASSEMBLY
Display Use Part No.
B-10 Adhesive bond (B-10) J-6082-612-A
B-110 Adhesive bond (B-110) J-6082-617-A
G-85 Grease (G-85) J-6082-626-A
SERVICE TOOLS

2-2
SEL1635GM
2-1. CONSTITUTION DIAGRAM
ornament plate assy
outer barrel assy
focus ring key
rear shield barrel
rear barrel sheet
mount block assy
ESD gasket M
C tape
mount rubber
C tape
C tape
BL contact
assy
focus ring key
focus ring key
F ring block assy
focus ring rubber
4-5 group block assy
3 group block assy
3rd FPC plate assy
2nd FPC plate assy
2 group block assy
5th FPC plate
zoom cam assy
cam follower I_A (4.0)
cam pin I_A
cam pin G_E
cam pin G_B
cam pin G_B cam pin G_B
cam pin A
cam pin A cam pin A
1st moving holder assy
ESD gasket
cam pin G_B
cam pin G_B
cam pin G_B
cam pin G_E
cam pin G_E
cam follower G_B (5.0_4.5_4.0)
cam follower
G_B (5.0_4.5_4.0)
cam follower G_A (5.0_4.5)
cam follower
G_B (5.0_4.5_4.0)
cam pin I_A
cam pin I_A
cam follower I_A (4.0)
cam pin shaft
cam pin shaft
cam pin shaft
cam follower
I_A (4.0)
5th gap washer
guard tape
guard tape
zoom linkage pin
zoom linkage pin
ring click 2 spring
ring click 2 spring
Z ring block assy
M pin A
M pin A
FHB unit
ornament plate base assy
filter screw barrel
1st lens assy
ESD gasket W5H4L3
ESD gasket W5H4L3
rear outer block assy
zoom ring rubber
adjustment washer C
back washer
back washer
P tape
board spacer
CL-1052 board
shift holder washer
1st shift holder assy
shift holder washer
A
A
C
B
B
C
D
D
E
E
)URQWVHFWLRQ
0LUURUWXEHVHFWLRQ
0RXQWVHFWLRQ
Red arrow direction : Shown the front (lens) side
Black arrow direction : Shown the rear (mount) side
(for optical axis adjustment)
(for resolving power adjustment)
(for resolving power
adjustment)

2-3
SEL1635GM
2-2. DISASSEMBLY
• This set can be disassembled in the order shown below.
2-2-1. DISASSEMBLY FLOW
FRONT SIDE (LENS SIDE) REAR SIDE (MOUNT SIDE)
2-2-4. 1ST LENS ASSY
(Page 2-5)
2-2-6. REAR SHIELD BARREL BLOCK
(Page 2-6)
2-2-8. CL-1052 BOARD
(Page 2-7)
2-2-2. ORNAMENT PLATE ASSY,
ORNAMENT PLATE BASE ASSY
(Page 2-4)
2-2-3. FILTER SCREW BARREL
(Page 2-4)
2-2-7. MOUNT BLOCK ASSY,
BACK WASHER
(for resolving power adjustment)
(Page 2-6)
RESOLVING POWER ADJUSTMENT
(MOUNT BLOCK ASSY)
RESOLVING POWER
ADJUSTMENT (1ST LENS ASSY)
2-2-9. REAR OUTER BLOCK ASSY
(Page 2-7)
2-2-11. Z RING BLOCK ASSY
(Page 2-9)
2-2-16. 4-5 GROUP BLOCK
(Page 2-12)
2-2-17. 3 GROUP BLOCK ASSY
(Page 2-13)
2-2-19. 2 GROUP BLOCK ASSY
(Page 2-15)
2-2-20. ZOOM CAM BARREL
(Page 2-15)
2-2-18. 1ST MOVING HOLDER ASSY
(Page 2-14)
2-2-12. OUTER BARREL BLOCK
(Page 2-10)
2-2-14. F RING BLOCK ASSY
(Page 2-11)
2-2-15. FHB UNIT
(Page 2-11)
2-2-10. ZOOM RING RUBBER, GUARD TAPE
(Page 2-8)
2-2-13. FOCUS RING RUBBER,
GUARD TAPE
(Page 2-10)
2-2-5. 1ST SHIFT HOLDER ASSY
(Page 2-5)
OPTICAL AXIS ADJUSTMENT
(1ST LENS ASSY)
OPTICAL AXIS ADJUSTMENT
(4-5 GROUP BLOCK ASSY)

2-4
SEL1635GM
Note: Follow the disassembly procedure in the numerical order given.
2-2-2. ORNAMENT PLATE ASSY, ORNAMENT PLATE BASE ASSY
rear (mount) side
front (lens) side
name ring wrench (80 mm):
J-6082-804-A
1Rotate the ornament plate base block in the
direction of the arrow, and remove it.
3ornament plate assy
4ornament plate base assy
2adhesive tape
Note: Remove the ornament plate base block
using the name ring wrench (80 mm).
rear (mount) side
front (lens) side
2filter screw barrel
3ESD gasket W5H4L3 (RT)
1three screws (DIA. 2 (CH)) (M2 u5)
2-2-3. FILTER SCREW BARREL

2-5
SEL1635GM
2-2-4. 1ST LENS ASSY
2-2-5. 1ST SHIFT HOLDER ASSY
rear (mount) side
front (lens) side
31st lens assy
2three screws (DIA. 2 (CH)) (M2 u5)
4three adjustment washers C
(for resolving power adjustment)
Note: Take note of the amount of adjustment washers C.
1st lens assy
(from front (lens) side)
1fourteen adhesive bond
2three screws (DIA. 2 (CH)) (M2 u5)
rear (mount) side
front (lens) side
41st shift holder assy
3three shift holder washers
1st lens assy
(from front (lens) side)
1adhesive
bond
1adhesive bond
1adhesive bond
1two adhesive bond
1two adhesive
bond
1two adhesive bond

2-6
SEL1635GM
2-2-6. REAR SHIELD BARREL BLOCK
rear (mount) side
front (lens) side
2rear shield barrel block
rear shield barrel rear barrel sheet
1three tapping screws
(M1.4 u2)
7KHUHDUVKLHOGEDUUHOEORFNFDQEHGLVDVVHPEOHG
DVVKRZQLQWKHILJXUHEHORZ
2-2-7. MOUNT BLOCK ASSY, BACK WASHER (for resolving power adjustment)
tapping screw
(M1.4 u2)
BL contact assy
mount block
ESD gasket M
three C tapes
Note 3: C tapes cannot
be reused.
Be sure to replace
them with new
parts.
mount rubber
rear (mount) side
front (lens) side
7ring click 2 spring
6M pin A
6M pin A
3BL contact
flexible board
4mount block assy
1four screws (M2 u8)
2Lift up the mount block assy
Note 1: Take care not to damage the
BL contact flexible board.
5back washer
(for resolving power adjustment)
Note 2: Take note of the amount
of back washers.
7KHPRXQWEORFNDVV\FDQEHGLVDVVHPEOHG
DVVKRZQLQWKHILJXUHEHORZ

2-7
SEL1635GM
2-2-8. CL-1052 BOARD
2-2-9. REAR OUTER BLOCK ASSY
rear (mount) side
front (lens) side
5SW flexible board
4OP flexible board
2board spacer
1P tape
6boss
6boss
6boss
35th flexible board
7CL-1052 board
flexible board
3six screws (M2 u8)
2Peel off the ESD tape.
1ESD gasket W5H4L3 (RT)
rear (mount) side
front (lens) side
4rear outer block assy
Note: Take care not to damage
the flexible board.

2-8
SEL1635GM
2-2-10. ZOOM RING RUBBER, GUARD TAPE
2guard tape
1zoom ring rubber
rear (mount) side
front (lens) side

2-9
SEL1635GM
2-2-11. Z RING BLOCK ASSY
rear (mount) side
front (lens) side
flexible board
1Setting the Z ring block assy to the TELE position.
3Setting the Z ring block assy to the WIDE position.
2zoom linkage pin2zoom linkage pin
4Z ring block assy
Note: Take care not to damage
the flexible board.

2-10
SEL1635GM
2-2-12. OUTER BARREL BLOCK
2-2-13. FOCUS RING RUBBER, GUARD TAPE
rear (mount) side
front (lens) side
4outer barrel block
2Lift up the outer barrel block.
1six screws (P2 (M1.7 u5))
5th flexible board
hole
3Draw the 5th flexible board out of
the hole in outer barrel block.
Note: Take care not to damage
the flexible board.
2guard tape
1focus ring rubber
rear (mount) side
front (lens) side

2-11
SEL1635GM
2-2-14. F RING BLOCK ASSY
rear (mount) side
front (lens) side
3F ring block assy
2focus ring key
2focus ring key
2focus ring key
1six adhesive bond1six adhesive bond
1six adhesive bond
1six adhesive bond
2-2-15. FHB UNIT
rear (mount) side
front (lens) side
1FHB unit flexible board
2two hooks
5FHB unit
hole
3Remove the FHB unit in
the direction of the arrow.
4Draw the FHB unit flexible board out of
the hole in outer barrel assy.

2-12
SEL1635GM
2-2-16. 4-5 GROUP BLOCK
rear (mount) side
front (lens) side
3cam pin G_E
3cam pin G_E
3cam pin G_E
0Rotate the 5 group rear block in the
direction of the arrow, and remove it.
4-5 group block
4cam followers G_B
(5.0_4.5_4.0)
4cam followers G_B
(5.0_4.5_4.0)
4cam followers G_B
(5.0_4.5_4.0) 7Lift up the 5th
FPC plate
95th FPC plate
63 group flexible board 53 group flexible board
84-5 group block
2two screws (special head (M1.4 u2.5))
zoom cam barrel
1Rotate the zoom cam barrel in the direction of the arrow.
qa 5th gap washer
Note: Take note of the amount of
back 5th gap washers.

2-13
SEL1635GM
2-2-17. 3 GROUP BLOCK ASSY
1cam pin G_B
1cam pin G_B
1cam pin G_B
2three cam followers G_B (5.0_4.5_4.0)
33 group block block
73 group block assy
63rd FPC plate assy
5tapping screw
(1.7 u5) (CH)
rear (mount) side
front (lens) side
rear (mount) side
front (lens) side
4Peel the 3rd flexible board off
the adhesive tape.
Note: Take care not to damage
the flexible board.
adhesive tape

2-14
SEL1635GM
2-2-18. 1ST MOVING HOLDER ASSY
ESD gasketESD gasket
1st moving holder block 1cam pin A
1cam pin A
1cam pin A
21st moving holder assy
rear (mount) side
front (lens) side
3cam pin shaft (M)
3cam pin shaft (M)
3cam pin shaft (M)
rear (mount) side
front (lens) side
4three cam followers G_A (5.0_4.5)
7KHVWPRYLQJKROGHUDVV\FDQEHGLVDVVHPEOHG
DVVKRZQLQWKHILJXUHEHORZ

2-15
SEL1635GM
2-2-19. 2 GROUP BLOCK ASSY
2-2-20. ZOOM CAM BARREL
rear (mount) side
front (lens) side
1cam pin G_B
1cam pin G_B
1cam pin G_B
2three cam followers G_B (5.0_4.5_4.0)
32 group block
72 group block assy
62nd FPC plate assy
5tapping screw
(1.7 u5) (CH)
rear (mount) side
front (lens) side
4Peel the 2nd flexible board off
the adhesive tape.
Note: Take care not to damage
the flexible board.
adhesive
tape
rear (mount) side
front (lens) side
zoom stationary barrel
3zoom cam barrel
1cam pin I_A
1cam pin I_A
1cam pin I_A
2three cam followers I_A (4.0)

2-16
SEL1635GM
2-3. ASSEMBLY
• This set can be assembled in the order shown below.
2-3-1. ASSEMBLY FLOW
2-3-2. ZOOM CAM BARREL
(Page 2-17)
FRONT SIDE
(LENS SIDE)
REAR SIDE
(MOUNT SIDE)
ZOOM STATIONARY BARREL
OUTER BARREL ASSY
2-3-15. BL CONTACT ASSY
(Page 2-27)
MOUNT BLOCK
2-3-17. REAR SHIELD BARREL
(Page 2-28)
2-3-19. 1ST LENS ASSY
(Page 2-29)
2-3-18. 1ST SHIFT HOLDER ASSY
(Page 2-28)
2-3-13. REAR OUTER BLOCK ASSY
(Page 2-25)
2-3-20. FILTER SCREW BARREL
(Page 2-29)
2-3-14. CL-1052 BOARD
(Page 2-26)
2-3-12. GUARD TAPE, ZOOM RING RUBBER
(Page 2-25)
2-3-9. GUARD TAPE, FOCUS RING RUBBER
(Page 2-23)
2-3-11. Z RING BLOCK ASSY
(Page 2-24)
2-3-10. OUTER BARREL BLOCK
(Page 2-23)
2-3-8. F RING BLOCK ASSY
(Page 2-22)
2-3-7. FHB UNIT
(Page 2-21)
2-3-3. 2 GROUP BLOCK ASSY
(Page 2-17)
2-3-4. 1ST MOVING HOLDER ASSY
(Page 2-18)
2-3-5. 3 GROUP BLOCK ASSY
(Page 2-19)
2-3-6. 4-5 GROUP BLOCK
(Page 2-20)
2-3-16. MOUNT BLOCK ASSY,
BACK WASHER
(for resolving power adjustment)
(Page 2-27)
2-3-21. ORNAMENT PLATE BASE ASSY,
ORNAMENT PLATE ASSY
(Page 2-30)
RESOLVING POWER
ADJUSTMENT (1ST LENS ASSY)
OPTICAL AXIS ADJUSTMENT
(1ST LENS ASSY)
RESOLVING POWER ADJUSTMENT
(MOUNT BLOCK ASSY)
OPTICAL AXIS ADJUSTMENT
(4-5 GROUP BLOCK ASSY)

2-17
SEL1635GM
Note: Follow the assembly procedure in the numerical order given.
2-3-2. ZOOM CAM BARREL
rear (mount) side
front (lens) side
zoom stationary barrel
1Align the ditch, and install
the zoom cam barrel.
ditch
ditch
3cam pin I_A
1P
3cam pin I_A
1P
3cam pin I_A
1P
2three cam followers I_A (4.0)
Note: When replacing the cam follower I_A (4.0),
choose parts that do not cause backlash
and confirm that movement is smooth.
2-3-3. 2 GROUP BLOCK ASSY
rear (mount) side
front (lens) side
zoom stationary barrel
flexible board
depression 6Align the ditch.
zoom cam barrel
9cam pin G_B
1P
9cam pin G_B
1P
9cam pin G_B
1P
4tapping screw (1.7 u5) (CH)
1P
7Align the flexible board with the depression,
and install the 2 group block assy.
12 group block
assy
3two bosses
22nd FPC
plate assy
rear (mount) side
front (lens) side
adhesive
tape
5Paste the 2nd flexible board on the
adhesive tape.
Note 1: Confirm that the flexible board
does not float.
8three cam followers G_B (5.0_4.5_4.0)
Note 2: When replacing the cam follower G_B (5.0_4.5_4.0),
choose parts that do not cause backlash and confirm
that movement is smooth.
Table of contents
Other Sony Lens manuals

Sony
Sony VCL-717BXEA User manual

Sony
Sony VPLL-FM30 User manual

Sony
Sony SEL2470GM User manual

Sony
Sony VPLL-3003 User manual

Sony
Sony VPLL-3050 User manual

Sony
Sony G MASTER SEL2470GM2 User manual

Sony
Sony VPLL-Z2019 User manual

Sony
Sony SEL135F18GM User manual

Sony
Sony VCL-MHG07 - HIGH GRADE 0.7X WIDE-ANGLE LENS User manual

Sony
Sony SEL50F18/B User manual

Sony
Sony VCL-HGE07TB User manual

Sony
Sony E 30 mm F3.5 Macro User manual

Sony
Sony VCL-610WEA User manual

Sony
Sony VPLL-Z4107 User manual

Sony
Sony VPLL-ZM100 User manual

Sony
Sony G MASTER SEL400F28GM User manual

Sony
Sony SAL70200G2 User manual

Sony
Sony FE 16-35mm F4 ZA OSS User manual

Sony
Sony G Master SEL100400GM User manual

Sony
Sony VCL-TW25 User manual