Spraying Systems TankJet 360 Series User manual

MI-TJ360 &TJ180
spray.com
TankJet®360 Series
Tank Cleaners
USER GUIDE
TJ180
TJ360

2spray.com | 1.800.95.SPRAY | Intl. Tel: 1.630.665.5000
TABLE OF CONTENTS
IMPORTANT! Read all instructions in this manual before operating machine.
TABLE OF CONTENTS................................. 2
GENERAL SAFETY INSTRUCTIONS ..................... 3
READ THE FOLLOWING INSTRUCTIONS: .............3
PRINCIPLES OF OPERATION........................... 4
TECHNICAL SPECIFICATIONS ......................4
PREVENTATIVE MAINTENANCE ....................... 7
CLEANING SOLUTION FILTRATION ..................7
GEARBOX LUBRICATION ..........................7
SEALS AND O-RINGS ............................7
INSPECTION OF WEAR PARTS .....................7
DISASSEMBLY PROCEDURE........................... 8
STATOR AND ROTOR REMOVAL . . . . . . . . . . . . . . . . . . . . 8
NOZZLE HOUSING ASSEMBLY REMOVAL ............8
GEARBOX COVER REMOVAL .......................8
GEARTRAIN REMOVAL ...........................9
GEARBOX DISASSEMBLY .........................9
TEE HOUSING AND INLET STEM ...................9
ASSEMBLY PROCEDURE ............................. 10
INLET STEM ASSEMBLY .........................10
TEE HOUSING ASSEMBLY........................10
GEARBOX ASSEMBLY ...........................10
GEARTRAIN ASSEMBLY .........................10
GEARBOX COVER ASSEMBLY .....................11
ROTOR INSTALLATION...........................11
NOZZLE HOUSING ASSEMBLY ....................11
TROUBLESHOOTING GUIDE ......................... 12
FINAL INSPECTION ................................. 12
STATOR INSTALLATION.............................. 12
WARRANTY ........................................ 14
PRODUCT VIEWS ................................... 15
TANKJET®360 WITH TWO NOZZLE HUB ............... 20
TANKJET 360 WITH THREE NOZZLE HUB .............. 20
TANKJET®360 SELF-RINSING WITH
TWO & THREE NOZZLE HUB.......................... 21
TANKJET®180 WITH THREE NOZZLE HUB ............. 22
DATA SHEET........................................ 23
EXPLODED VIEW AND PARTS LIST.................... 24

3
spray.com | 1.800.95.SPRAY | Intl. Tel: 1.630.665.5000
READ THE FOLLOWING INSTRUCTIONS:
WARNING: All safety related and operating instructions should
be read before the nozzle is operated. Follow all operating
instructions. Failure to do so could result in serious injury.
• WARNING: It is important to recognize proper safety
precautions when using a pressurized spray system. Fluids
under pressure can penetrate skin and cause severe injury.
• WARNING: When dealing with pressure applications, the
system pressure should never exceed the lowest rated
component. Always know your system and all component
capabilities, maximum pressures and flow rates.
• WARNING: Before performing any maintenance, make sure
all liquid supply lines to the machine are shut off and /or
disconnected and chemical/fluid are drained.
• WARNING: The use of any chemicals requires careful
control of all worker hygiene.
• WARNING: Spraying Systems Co. does not manufacture
or supply any of the chemical components used in this
equipment and is not responsible for their effects. Because
of the large number of chemicals that could be used and
their different chemical reactions, the buyer and user of this
equipment should determine compatibility of the materials
used and any of the potential hazards involved.
• WARNING: Spraying Systems Co. strongly recommends the
use of appropriate safety equipment when working with
potentially hazardous chemicals.
• WARNING: Before use be sure appropriate connections are
secure and made to withstand weight and reaction forces
of the operating unit.
This equipment includes but is not limited to:
• Protective hat
• Safety glasses or face shield
• Chemical-resistant gloves and apron
• Long sleeve shirt and long pants
NOTE: Always remember to carefully read the chemical
manufacturer’s label and follow all directions.
• WARNING: DO NOT USE TO SPRAY FLAMMABLE LIQUIDS-
-SUCH USE COULD RESULT IN FIRE OR EXPLOSION
CAUSING BODILY INJURY OR DEATH.
• WARNING: It is important to operate equipment within
the temperature range of all components. Also insure that
appropriate time lapses or proper safety equipment is used
when handling components after they’re exposed to high
temperatures.
• WARNING: Never operate tank cleaning equipment in the
open due to the potential of bodily injury.
• WARNING: Remove equipment from the tank before
attempting any repairs.
• WARNING: If walking on top of a tank is deemed safe and
is necessary, use proper safety precautions to protect
individuals as well as the equipment.
• WARNING: Do not put any part of your body in the tank
during operation of the tank cleaner. This is NOT a safe
procedure for verification of operation.
• WARNING: Proper hoisting procedures should be used
when installing and removing all equipment.
• WARNING: To insure the safety of the equipment as well as
the individuals using them, only use Spraying Systems Co.
components.
• WARNING: When packaging and transporting use
structurally sound boxes or crates that can handle the
weight of the equipment.
• WARNING: Tank cleaners should be flushed out with clean
water before they’re stored or shipped to minimize health
hazards or cross contamination.
• WARNING: Do not use any equipment outside the intended
purposes of the product. Misuse can result in personal
injury or product damage.
The container being cleaned should be sealed as best as possible
while the TankJet model is running its cycle. The combination of
temperature, cleaning solution, spray impact and the potential toxic
materials being cleaned can cause a hazard to anyone in the path of
the spray.
NOTE: Due to the possible build up of electrical charge caused by
the nature of the machine it’s vital to avoid applications involving
combustible fluids and materials.
GENERAL SAFETY INSTRUCTIONS

4spray.com | 1.800.95.SPRAY | Intl. Tel: 1.630.665.5000
PRINCIPLES OF OPERATION
TankJet®360 series tank cleaning machine is hydraulically driven by
the cleaning solution. As the fluid passes through the inlet, a stationary
turbine (stator) forces the liquid past the rotor which causes it to rotate
at high speed. The rotor is fastened to a rotor shaft which is supported
radially by an upper and lower bearing. The rotor shaft extends into the
gearbox, and is connected to the geartrain which reduces the speed
of the rotor shaft by either 655:1 or 273:1, depending on machine
configuration, and transmits the rotation to the Tee Housing on a
horizontal plane.
The Tee Housing has a fixed bevel gear which drives a bevel gear
mounted on the Nozzle Housing. During tee housing rotation in the
horizontal plane, the nozzle housing rotates in the vertical plane
simultaneously. Due to the difference in the number of teeth on the
bevel gears, an indexing occurs which precisely advances the nozzle
housing rotation ahead of the tee housing, creating the spherical 360
degree spray pattern for complete tank coverage.
Cycle times will vary with water pressure, flow rate and the machine
configuration. Because no two cleaning applications are the same,
TankJet 360 tank cleaning machine can be configured for specific cycle
times, nozzle dwell time and water usage. One basic machine can be
altered with interchangeable nozzles, rotors, stators and geartrain
ratios to maintain the highest degree of operating efficiency. Refer to
the performance data sheet for sample cycle times and water usage,
or call your sales representative for assistance in choosing the proper
machine configuration for your tank cleaning needs.
TankJet®360 series has been designed for a long reliable service
life. Every attempt has been made to design in reliability, but like
all other man-made mechanical devices, this machine is subject
to altered performance or break downs. Preventative maintenance
is the key to maintaining uninterrupted machine performance, and
minimal downtime. Due to the numerous factors that affect rotary
tank cleaners such as flow rate, pressure, chemical concentration,
etc., it is necessary to create specific Preventative Maintenance (PM)
programs for each machine that is being used under various operating
conditions. Refer to Page 7: Preventative Maintenance or check with
your sales representative for specific recommendations.
TECHNICAL SPECIFICATIONS
MATERIALS AND SPECIFICATIONS
Casting Material: 316L Stainless Steel
Weight: dual-nozzle 360 25 lbs. 11.35 kg.
triple-nozzle 360 26 lbs. 11.80 kg.
triple-nozzle 180 29 lbs. 13.17 kg.
Height: dual- & triple-nozzle 360 13.3 in. 338 mm
triple-nozzle 180 12.25 in. 311 mm
Minimum Tank Opening (Inside Diameter):
dual-nozzle 360 6.25 in. 158 mm
triple-nozzle 360 10.25 in. 260 mm
triple-nozzle 180 12.25 in. 311 mm
INLET CONNECTION
2" NPT (F) with 2-1/2" quick disconnect (M)
2" NPT (F) with 2-1/2" NST (NH) hose thread (M)
2" BSPT (F) with 2-1/2" quick disconnect (M)
Rotor Shaft: Stainless Steel substrate is plasma flame sprayed with
Chromium Oxide, then ground to finish dimension. The final product
is a hard, dense surface that is resistant to abrasive wear, high
temperatures and chemical corrosion. The smooth surface also lends
itself to sealing with rotary seals. The thrust imparted on the rotor
shaft is distributed by a tungsten carbide thrust washer fastened to
the rotor shaft pinion gear. Carbide is an excellent wear material and
has very high corrosion resistance.
Main Bearings: The main bearings that support the rotation of the
Tee Housing and Nozzle Housing are composed of a carbon fiber
reinforced thermoplastic material, with 15% PTFE for lubricant. These
bearings have an extremely low coefficient of thermal expansion, and
both a low water absorption and wear factor. Ball bearings have been
eliminated by the use of this bearing material.
OPERATING PRESSURE AND FLOW RANGE
40 – 350 psi 2.81 – 24.61 kg /cm
30 – 300 gpm 1.89 – 18.92 ltr / sec
Temperature Range: up to 250° F (121° C)
Seals: Static seals (o-rings) are compounded for extended use in
various tank cleaning applications. Several different types of o-rings
are available to suit specific tank cleaning environments. Dynamic
seals (which seal rotating parts) are specially designed spring or
pressure seals. The jacket material is a Teflon alloy which increases
wear life and corrosion resistance.
Geartrain: The internal gearbox reduction is achieved using
a spur gear system, and is available in two gear ratios: 655: 1
and 273: 1.
Geartrain Lubrication: Two types of lubrication are available;
sealed gearbox with food grade gear oil or flow-thru gearbox;
where the cleaning solution lubricates the gears. See Preventative
Maintenance, page 7 for specific types of oil.
Nozzle Housing Drive: Pin drive or clutch drive is available. Pin
drive is recommended for CIP applications, while the clutch drive is
recommended for portable use, where the machine will be handled
often.
CIP Applications: Several self cleaning features are built into all
machines; rinsing of the bevel gears and ring gear assist in preventing
a buildup of debris that could interfere with operating efficiency. CIP
models can also be equipped with the optional self rinse nozzle which
washes the exterior surfaces of the machine while it is operating.
Additional passages allow high pressure rinsing of internal areas of
the machine where deposits of solids could allow bacterial growth.
Drainage holes can be provided for complete drainage of cleaning
solution.
Nozzle Sizes: Nozzles are available in the following sizes:
A 1/4 in. 6.35 mm
B 9/32 in. 7.14 mm
C 5/16 in. 7.94 mm
D 3/8 in. 9.53 mm
E 7/16 in. 11.11 mm
F 1/2 in. 12.70 mm
G 9/16 in. 14.29 mm
H 5/8 in. 15.58 mm

5
spray.com | 1.800.95.SPRAY | Intl. Tel: 1.630.665.5000
0
50
100
150
200
250
300
050 100 150 200 250 300 350
Flow Rate (GPM)
Pressure (PSI)
Pressure vs. Flow Rate (2 Nozzle Hub)
5/8"
9/16"
1/2"
7/16"
3/8"
5/16"
9/32"
1/4"
0
50
100
150
200
250
300
050 100 150 200 250 300 350
Flow Rate (GPM)
Pressure (PSI)
Pressure vs. Flow Rate (3 Nozzle Hub)
5/8"
9/16"
1/2"
7/16"
3/8"
5/16"
9/32"
1/4"

6spray.com | 1.800.95.SPRAY | Intl. Tel: 1.630.665.5000
10
12
14
16
18
20
22
24
26
28
30
32
020406080100 120 140 160 180200 220240 260280
300
Cycle Time (minutes)
Flow Rate (GPM)
Cycle Time vs. Flow Rate (2 Nozzle Hub)
10
12
14
16
18
20
22
24
26
28
30
32
020406080100 120 140 160 180200 220 240 260 280
300
Cycle Time (minutes)
Flow Rate (GPM)
Cycle Time vs. Flow Rate (3 Nozzle Hub)

7
spray.com | 1.800.95.SPRAY | Intl. Tel: 1.630.665.5000
PREVENTATIVE MAINTENANCE
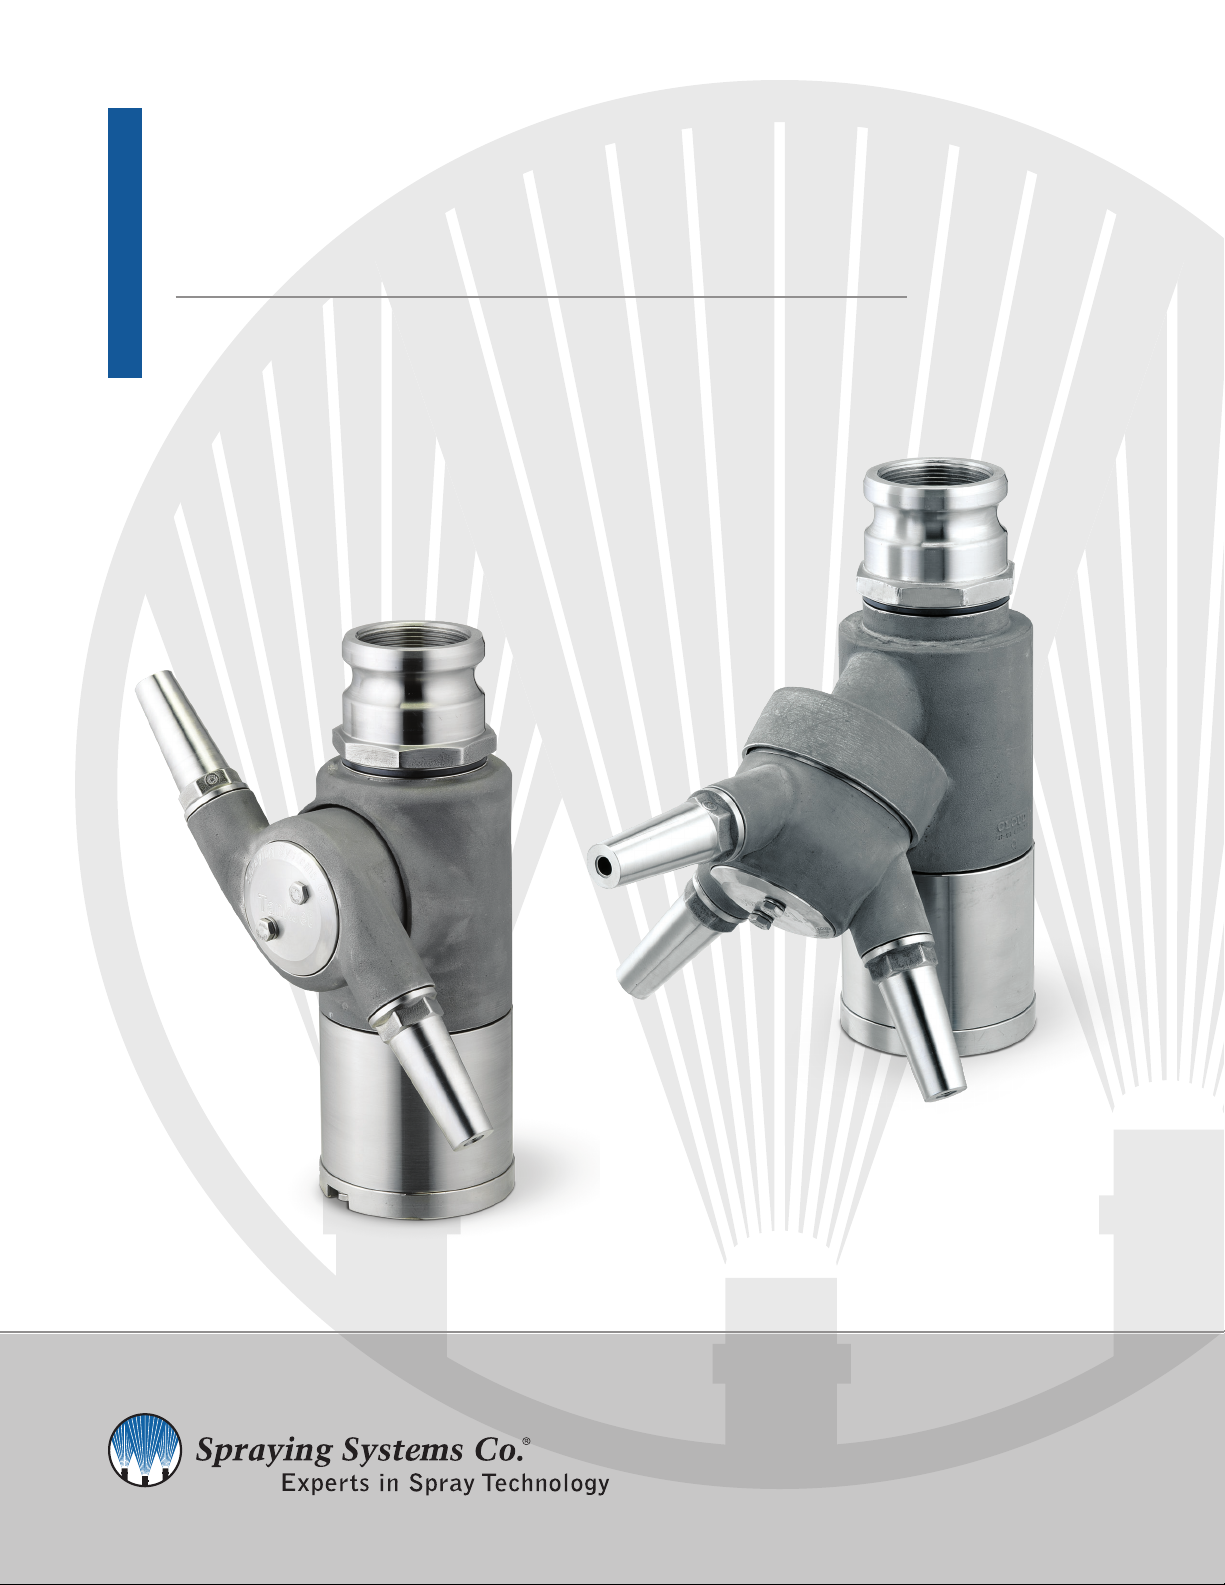
TankJet®360 series has been designed to operate under a wide
variety of conditions and to provide long-term reliability with a
minimum amount of servicing. All wear parts are engineered for quick
inspection and simple replacement. Servicing can be accomplished in
the field, eliminating the need to send machine elsewhere for repair
or maintenance.
Each cleaning application is unique, and therefore affects the seals,
o-rings, cups and bearings in a different way. A good preventative
maintenance program tailored for your specific tank cleaning machines
will help to eliminate the possibility of failure during a cleaning cycle,
or the need to replace major cast parts later from excessive wear. The
expense of periodic inspection and subsequent replacement of wear
parts on a regular basis is less costly than waiting until the machine
fails to replace parts. The added advantage to PM is that you have
control over when a machine is to be serviced; either between batches
or during the off season, instead of during a cleaning cycle when you
need reliability the most. Check with your sales representative for
advice on establishing a PM program at your facility.
CLEANING SOLUTION FILTRATION
It is recommended that a strainer be placed in line with the pump to
filter out small particles which could lodge inside the tank cleaning
machine decreasing its efficiency. This is very important where
recirculation of the cleaning solution is being employed. The mesh and
wire size of the strainer will vary depending on the type of cleaning
and particle size. Be certain that the water supply system has been
flushed out to remove any solid particles before attaching TankJet
360. Following each use of the TankJet 360, we recommend a clean
water rinse to thoroughly remove any cleaning solution (recirculated
or new) residue which could affect the seals and o-rings during non
operational storage.
GEARBOX LUBRICATION
Oil level inside the gearbox should be checked regularly; the specific
time period to be determined by the type of service the machine is
in. The more severe the service, the more often it is recommended to
check the oil level. To inspect oil level, turn machine upside down and
remove the gearbox cover. The oil level should just cover the lower
(22) gearset on the (18) final drive shaft (about 1" below the machined
end of the gearbox). All lubricated machines are supplied with the
following type of oil:
OIL TYPE: Food Grade U.S.D.A. Acceptable H-1
QTY. 14 oz. (414 ml.) S.A.E. – 90
Oil Alternatives: For non-food industry applications, H-2 lubricants
can be used such as Keystone Keygear 90, KLC-20/50 or KSL-365.
Lightweight gear oils (50-90) are also suitable. It should be noted that
heavy weight (140) gear oils or greases will alter the performance of
the machine regarding cycle times. If upon inspection of the gearbox
there is cleaning solution mixed into the gear oil, then it is advisable to
inspect the rotor shaft seals (31), final shaft seal (38) and the gearbox
cover o-ring (34). Replace seals and o-rings as necessary.
SEALS AND O-RINGS
All of the standard TankJet 360 series are shipped with o-rings
constructed of a Flourocarbon Elastomer (Viton) compound. This
compound is suitable for a broad range of temperatures and chemical
resistance. Other materials are available. The type of cleaning
application and chemicals used will in large part determine the length
of service for o-rings. Upon inspection, if an o-ring has any cracks,
worn sections or is swollen in size, then replacement is recommended.
The spring energized seals (part #’s 35, 36, 37 and 38) have a PTFE
alloy jacket which increases the longevity and sealing capabilities.
Once the seals have worn thru the jacket to the spring, they are no
longer providing a proper seal. Particles in the cleaning solution are
then able to lodge in the machine, decreasing its efficiency, and
perhaps stopping it altogether. Prolonged use with worn out seals can
damage the castings the seals were meant to protect.
A regularly scheduled inspection program is recommended for the
main bearing seals (35 and 36). Inspection is easily accomplished by
removing the nameplate (6) and the nozzle housing assembly (5). If
these seals are worn, or need to be cleaned of deposits, then the tee-
housing seals will also need attention.
INSPECTION OF WEAR PARTS
All of the bearing clearances in TankJet 360 series have been
designed to provide the best possible support for the adjacent parts,
while maintaining reliability between servicing. Most of the bearing
clearances are very close when the machine is assembled at the
factory. This allows for longer periods of operation before overall
machine performance is altered due to bearing wear. In many cases,
the bearings can wear down 25% and the machine will continue
to operate properly. It should be noted that while the machine may
continue to operate with worn bearings, it is recommended that
bearings be changed at the first evidence of wear to protect the
long term performance and reliability of the unit. In severe service
(high pressure and/ or chemical concentration), the period between
servicing will be shortened. Several parts in TankJet 360 have been
designed as replaceable wear parts. These parts are easily replaced
in the field at a reasonable cost, with a minimum of down time or
labor costs.
Main Bearing: After removal, inspect the bearings; they may have
grooves on the O.D. from particles or deposits that may have lodged
between the bearing and cup during machine operation.
Also, if the clearance between the bearing O.D. and the cup I.D. is
loose compared to when new, it may be time to change the bearings.
The normal clearances between cups and bearings are held to close
tolerances to maintain proper mesh of the bevel gears (10 and 11),
and to allow the maximum amount of wear on the bearings before
they need to be replaced.
Like any other type of bearing, if allowed to wear beyond normal limits
or if used in severe service without any maintenance, the bearings may
fail, which could alter the performance of the machine. Refer to page
8 – Nozzle Housing Assembly Removal. Subsequently, if the nozzle
housing bearings need replacement, then the tee housing bearings
will also need to be changed. Refer to page 10 – Tee Housing.
Cups: After extended use, the cups may show signs of wear from one
of the seals (36 or 35) that has worn thru the jacket into the spring.
Rotation of the nozzle housing or tee housing against the static seal
can wear a groove into the cup. This groove will prevent proper
sealing when a new seal has been installed. Replacement of the cup
is recommended whenever visual grooves or wear marks are evident.
(See Disassembly Procedure for removal).
Cups will also wear out from rotation against the bearings; however,
often times the bearings can be changed two or three times before

8spray.com | 1.800.95.SPRAY | Intl. Tel: 1.630.665.5000
the cups may need to be replaced. This is dependent on the type
of cleaning solution, pressure and the regularity of inspection and
preventative maintenance.
Rotor Shaft Bearings: The upper and lower bearings that support
the rotor shaft can easily be inspected while the machine is fully
assembled. To inspect the upper and lower rotor shaft bearings (47
and 46), remove the stator (7). Rotate the rotor shaft by turning the
rotor (7) with your finger or a screwdriver. If the bearings allow side to
side movement so that the rotor is contacting the inlet stem wall, then
the bearings need to be replaced. Refer to Disassembly Procedure
on page 8-10 and Assembly Procedure on page 10-12 for details on
parts replacement.
Gearbox Bearings: There are six bearings inside the gearbox,
which maintain the gear shaft alignment. Removal of the gearbox
cover (2) and the geartrain allows for inspection of these bearings.
If there is notable side to side play of one of the gear shafts (# 17,
18 or 20) and one of the mating bearings (# 26, 27, 28, 29, 30) then
replacement is recommended. Refer to Disassembly Procedure on
page 8-10 and Assembly Procedure on page 10-12 for details on
parts replacement.
NOTE: While it may appear that the gearbox bearings are standard off-
the-shelf bearings, they have all been modified by the manufacturer
to meet the design specifications set forth by the manufacturer.
Replacement of these bearings by any type other than Spraying
Systems Co. parts can compromise the performance of the machine.
DISASSEMBLY PROCEDURE
During disassembly of TankJet 360 series, several inspections can be
made which aid in determining a preventative maintenance schedule
or in troubleshooting, should there be a problem. If you have already
disassembled a machine, read through the disassembly procedure
then refer to the Assembly Procedure section beginning on page 10-
12. Item numbers are shown in parentheses. A check mark √ precedes
an inspection of a part or assembly. If upon your inspection you find
something that differs from what is normal in a new part or assembly,
make a note of it, and then continue the disassembly procedure. At
the end of the disassembly, compare your notes to the troubleshooting
guide at the back to find a solution.
STATOR (8) AND ROTOR (9) REMOVAL
With machine standing upright, remove stator retaining ring (39) with
needle nose pliers. Lift out stator (8) with pliers or by hand.
√ check to see that rotor shaft spins free: rotate the rotor
shaft by turning the rotor with your finger or a screwdriver.
It should spin freely with minimum pressure, and the tee
housing (4) will spin slowly.
√ check free play of tee housing up and down on the axis of
the inlet stem (3). If there is no movement, there could be
scale or deposits trapped between the main tee housing
bearings and the bearing cups, or the unit has been
assembled incorrectly. Take note if there is no free play
and refer to the troubleshooting guide for assistance.
NOZZLE HOUSING ASSEMBLY (5) REMOVAL
√ check the nozzle housing for free play (in and out) on the
axis of the tee housing nose (4). If there is no movement,
there could be scale or deposits trapped between the
nozzle housing bearings and the bearing cups, or the
unit has been assembled incorrectly. Take note if there
is no free play and refer to the trouble shooting guide for
assistance.
Nameplate Removal: the nameplate screws (58) with a 7/16"
socket or end wrench. Grasp the nozzle housing assembly with one
hand and gently pull off the tee housing (4). If the nozzle housing does
not come off easily or if there was no free play, there may be deposits
or scale built up between the cups (34) and the bearings (33). If so, use
a plastic hammer to gently tap on the nozzle housing to loosen it, then
remove from tee housing. The nameplate (6), outer bearing (33), and
seal (36), will come off with the nozzle housing assembly. Remove the
inside bearing and seal from the tee housing.
NOTE: Because the flange of the inside bearing is locked into the
groove on the tee housing, it is necessary to rotate the bearing to
loosen the flange. Use two (2) screwdrivers to gently pry up on the
flange of the bearing until you can grasp it with your fingers.
Inspect the seals to be sure the jacket has not worn down thru to the
spring.
√ examine the bearings for wear. They should be free
from cracks, grooves on the O.D and should fit inside a
nozzle housing cup (34) with a minimum of side to side
movement.
√ inspect the inside of the cups for grooves or surface wear
marks that could create a sealing problem.
Remove the bevel gear retaining ring (19); pry one of the ends out of
the groove on the nozzle housing with a small screwdriver, working
your way around until it is completely removed. Remove the bevel
gear and the (49) o-ring.
√ visually inspect the nozzles; look down the end of the
nozzle with the aid of a flashlight to see that there is no
blockage of the stream straightener.
Remove the nozzles for cleaning if necessary using a large adjustable
wrench or a pipe wrench.
Bearing Cup Removal: Before removal of the bearing cups, the
bevel gear (11) should be removed. Insert tool # T-1 thru the bearing
cup on the bevel gear side of the nozzle housing at a slight angle. Then
line up the stepped side of T-1 with the bottom end of the cup. Using
an arbor press, support the nozzle housing and press out cup. Insert
tool # T-1 and remove remaining bearing cup.
GEARBOX COVER (2) REMOVAL
Invert machine so that the gearbox cover (2) is facing up. Remove the
2 gearbox cover screws (56) and lockwashers (57). Insert a stiff blade
putty knife between the gearbox (1) and gearbox cover (2); tap on the
end with a small hammer, then pry up on gearbox cover until the o-ring
(54) is visible. Slowly lift the gearbox cover while holding the idler
shaft (17) which may be lifted with the gearbox cover due to suction
of the lower idler shaft bearing (28).
If the idler shaft is pulled out with the gearbox cover, the idler gearsets
may disengage from the rest of the geartrain. If this occurs, simply
remove the loose gearsets after the oil has been drained from the

9
spray.com | 1.800.95.SPRAY | Intl. Tel: 1.630.665.5000
gearbox (1). When draining oil, be careful not to lose the 2 carbide
thrust washers (23).
√ visually inspect the gearbox cover o-ring (54) for swelling
or cracking.
√ inspect the idler shaft lower bearing (28) and the final
shaft lower bearing (30) for wear on the flange surface
thickness and the I.D.
√ inspect the rotor shaft thrust bearing (26) for wear on
the flange surface. If the flange thickness has worn
down 50% to 1/32", then it must be replaced. Likewise
if the I.D. has worn and the end of the rotor shaft has
excessive side to side movement, then replacement is
recommended.
Removal of 26, 28 and 30 Bearings: Using a ¼ - 28 or ¼ - 20 tap;
insert into I.D. and screw down with tap wrench until bearing is forced
up out of gearbox cover bore. Once the tap is bottomed out, use pliers
to finish removing 26. If the tap does not force the bearing up after
bottoming out in the casting bore, change to the next size of tap (5/16
- 18 or 5/16 - 24).
28 and 30: Using a 5/16 - 18 or 5/16 - 24 tap; insert into I.D. and screw
down with tap wrench until bearing is forced up out of gearbox cover
bore. Once the tap is bottomed out, use pliers to finish removal. If the
tap does not force the bearing up after bottoming out in the gearbox
cover casting bore, change to next size of tap (3/8 - 16 or 3/8 - 24).
GEARTRAIN REMOVAL
NOTE: the rotor must be removed prior to removal of the geartrain.
Remove the rotor shaft assembly (26) and the rotor shaft spacer (42).
Next, remove the idler gear shaft (17) and the 3 gearsets (23). The
remaining final drive gear shaft assembly (18) and the 2 gearsets
(23) can now be removed. A medium length screwdriver with the tip
bent at 90 degrees can assist by prying up on the final shaft bearing
retainer (15) while pulling on the final shaft (18) with your fingers.
NOTE: Do not use pliers or vise grips to pull on the final drive shaft, as
the shaft may be damaged.
√ inspect the gearsets for wear on the teeth. Replace
gearsets when teeth are worn down by approximately
20-25%.
NOTE: The lower idler gearsets (26) with the thrust washer and
the rotor shaft pinion gear (16) will wear faster than the rest of the
gearsets due to rotation speed. Compare gearsets to get an idea of
the wear on the teeth.
√ inspect the idler and final shafts for wear; look for obvious
grooves or highly polished areas. Replace as necessary.
√ inspect the gearset bearings by testing them on the
idler or final shafts; if there is excessive side to side
motion, then replacement of the gearset bearings is
recommended.
NOTE: The idler gear bearing is not a replaceable spare part where
oilite bearings are concerned (normally lubricated gearboxes only).
√ inspect the rotor shaft assembly: check the pinion gear
(16) for wear on the teeth. Inspect the chromium oxide
coated surface for wear from the carbide bearings. If
there are grooves or cracking evident, the rotor shaft
assembly (21) may need to be replaced.
Final Drive Gear Shaft Disassembly: Replacing upper final shaft
bearing (29): Using an arbor press; press the final shaft assembly (18)
out of the bore of the final drive gear (25). Support the final drive gear
and press on the final shaft. Remove the final shaft bearing retainer
(15).
√ inspect the o-ring (51) for cracks or swelling; replace as
necessary.
√ inspect the final drive bearing (29); the I.D. should spin
freely on the larger diameter of the final shaft and pinion
(18) with minimum of side to side motion. Replace the
bearing if the flange thickness is less than 1/32" or if
there is excessive side to side movement of the final
shaft.
Remove the final shaft upper bearing (29) and final shaft seal (38),
using tool #T-7 from the tool kit. Support final shaft bearing retainer
(15) in an arbor press, and press out bearing and seal. The seal will be
damaged in the process and should be discarded and replaced.
GEARBOX DISASSEMBLY
Remove 3 gearbox bolts (40) with a 3/8" deep socket. Remove the
three lockwashers (41). The gearbox (1) can now be removed from the
inlet stem (3). If the gearbox (1) does not come off easily, there may be
deposits or scale built up between the inlet stem (3) and the gearbox
(1). Insert a medium screwdriver between the gearbox and the tee
housing (4) to pry the gearbox loose from the inlet stem.
√ inspect the gearbox stem o-ring (53) for cracks or
swelling, replace as necessary.
Remove the upper rotor shaft bearing (47) or (47) with pliers.
√ inspect the upper rotor shaft bearing (47) for cracks in the
carbide insert, or for obvious wear marks. Check the fit
of the upper rotor shaft bearing (47) over a rotor shaft for
proper bearing clearance.
√ check for wear on the 52 spring seal (lubricated gearboxes
with 47) and replace if worn.
√ inspect the upper idler shaft bearing (27) for excessive
side to side play.
Bearing 27 Removal: Using a 5/16 - 18 or 5/16 - 24 tap; insert into
I.D. and screw down with tap wrench until bearing is forced up out
of the gearbox bore. If the tap does not force the bearing up after
bottoming out in the casting bore, change to the next size of tap (3/8
- 16 or 3/8 - 24).
Bearing 46, 14 and 45 Removal: Remove the lower rotor shaft
bearing (46) and the rotor shaft seal housing (14) from the gearbox
by using tool # T-4. With gearbox upright, insert T-4 through bore that
housed the upper rotor shaft bearing (47), and either strike T-4 with a
hammer, or use an arbor press. The seal housing spacer (45) protects
the rotor shaft seals (52) from being damaged during disassembly.
TEE HOUSING AND INLET STEM
Remove ring gear retaining ring (20) with a small screwdriver. Lift out
ring gear (12) and bevel gear (10) with your fingers. The tee housing
can now be lifted off of the inlet stem (3).
√ check the seals (35) to be sure the jacket has not worn
down thru to the spring.
√ examine the bearings (35) for wear. They should be free

10 spray.com | 1.800.95.SPRAY | Intl. Tel: 1.630.665.5000
from cracks, grooves on the O.D and should fit inside a tee
housing cup (32) with a minimum of side to side movement.
√ inspect the inside of the cups (32) for grooves or surface
wear marks that could create a sealing problem.
√ inspect the inlet stem (3) for grooves worn in casting that
could prevent proper sealing.
Bearing Cup Removal: Insert tool # T-2 inside of tee housing and
line up stepped side of tool with the bottom end of one of the cups.
Using an arbor press, support the tee housing and press out cup. Repeat
procedure with remaining cup.
ASSEMBLY PROCEDURE
INLET STEM ASSEMBLY
Stand up inlet stem (3) in inverted position (3 bolt holes facing up). Check
to see that the three 5/16 - 18 bolt holes are free of oil or water. Install
upper tee housing bearing (31); be sure to line up tab of bearing in notch
of inlet stem so that the bearing flange sits flat on the machined surface
of the inlet stem. Carefully install the tee housing seal (35) with the
spring facing up towards the 4 ports in the inlet stem. See Photo # 1 on
page 15.
In cold temperatures, it is recommended that the seals be heated slightly
in warm water, so that they will fit over the inlet stem O.D. easily. It is
recommended that bearings and seals always be changed in pairs.
TEE HOUSING ASSEMBLY
Lubricate cup O.D. with a small amount of food grade gearbox oil. Using
tool # T-3 and an arbor press, press cup down into tee housing until the
flange is seated flat on the tee housing. Repeat procedure for other cup.
Wipe a small amount of food grade gearbox oil on I.D. of bearing cups.
This reduces the initial friction between the seals and cups. Invert tee
housing and place over bearing and seal on inlet stem.
Install lower seal, spring facing down towards the ports in the inlet
stem. Next, place the lower 31 bearing over the inlet stem with the tab
facing up.
Place tee housing bevel gear (10) on bearing. Line up notch on the I.D.
of the bevel gear with the tab on the bearing as shown in the photo
# 2. Rotate the bevel gear (10) and the bearing (31) until the notch on
the bevel gear lines up with the locator mark on the inlet stem. The
assembly should match the photo # 2 at this point. Line up notch of ring
gear (see photo # 4) with drive lug on 5 tee housing (see photo # 2).
Install the ring gear retaining ring (20); place one end into groove in tee
housing, then work the ring into the groove and press into place with a
small screwdriver. Be sure the retaining ring is completely seated in the
tee housing groove.
Place the 3 gearbox bolt o-rings (52) into the counter bores of the inlet
stem. Lubricate the o-rings and the 1" bore of the inlet stem with gearbox
oil. This will prevent twisting of o-rings during assembly.
GEARBOX ASSEMBLY
Install a new o-ring (55) on the upper rotor shaft bearing housing (47).
Place the (47) into the top end of the gearbox (1). Install a new o-ring (53)
on the gearbox, using a small amount of oil for lubrication.
NOTE: Flow-thru machines do not have a seal protector (45), or a seal
retainer (14) which has 2 (50) o-rings and 2 (52) seals.
For Lubricated Gearboxes: Invert the gearbox, and place the seal
protector (45) into the center bore of the gearbox. Install two (2) new
rotor shaft seals (37) and o-rings (50) on the seal retainer (14). Lubricate
the o-rings and the bore of the gearbox, then place the seal retainer into
the gearbox until it is seated against the seal protector.
Installation of Center Rotor Shaft Bearing (46): Replace o-ring (50),
and lubricate with oil. Place lower rotor shaft bearing (46) into center
bore of gearbox; and line up the flat on the flange with the large bore in
the gearbox. This is important to prevent interference with the geartrain.
Press down with your fingers until (50) o-ring is seated. Place tool # T-5
with a 12 oz. hammer or use an arbor press to seat the flange of the
lower rotor shaft bearing is against the gearbox bore face.
IMPORTANT NOTE: In order to maintain proper alignment between the
upper and center rotor shaft bearings, the flange of the lower rotor shaft
bearing (46) must be completely seated against the face of gearbox (1)
bore.
Inspection of Bearing Alignment: Place the #T-8 seal protector over
the end of the rotor shaft assembly (21), and insert the rotor shaft thru
the upper (47) and lower (46) rotor shaft bearings. The rotor shaft should
spin freely; if there is resistance, it is probably because the flange of the
lower rotor shaft bearing is not completely seated against the gearbox.
Reseat the lower rotor shaft bearing (46) with the tool # T-5, and test the
alignment once again.
ASSEMBLY OF GEARBOX TO INLET STEM
Check to see that the three 5/16 - 18 bolt holes in the inlet stem (3) are
free of oil or water. Invert the gearbox and line up the tab on the gearbox
(see photo # 3) with the notch on the bevel gear (10). Once the tab and
notch are engaged, the gearbox can be rotated if necessary to line up the
bolt holes. If the bevel gear (10) is aligned properly with the locator mark
on the inlet stem, the gearbox bolt holes will be lined up with the inlet
stem bolt holes. Refer to photo # 2. Apply a small amount of anti-seize
compound to the threads of the bolts. Install the 3 gearbox bolts with
lockwashers.Handtightenbolts,thentorqueto30ft/lbsforStainlessSteel,
23 ft/lbs for Bronze. If you do not have a torque wrench, tighten the bolts
until snug. Do not overtighten.
GEARTRAIN ASSEMBLY
Final Drive Gear Shaft Subassembly:
1. Install the final shaft seal (38) into the final shaft bearing retainer
(15) with the spring facing upwards. Using an arbor press, press
the final shaft upper bearing (29) into the final shaft bearing
retainer (15).
NOTE: the flow-thru type gearbox does not use the final shaft
seal (38).
2. Align the square drive of the final drive shaft (18) with the square
of the final drive gear (25). Press the drive gear onto the shaft
using an arbor press.
3. Install a new o-ring (51) on the final shaft bearing retainer.
4. Install the two gearsets on the shaft according to the type of gear
ratio. Refer to photos # 5, 6, and 7. Be certain that the (23) gearset
with the undercut for the thrust washer (24) is on the bottom end
of the shaft, facing the gearbox cover (2).

11
spray.com | 1.800.95.SPRAY | Intl. Tel: 1.630.665.5000
Idler Gear Shaft Assembly: Place the 3 gearsets on the idler shaft (17)
in the proper order according to the type of gear ratio. Refer to photos
# 5, 6, and 7. Be certain that the (23) gearset with the undercut for the
thrust washer (24) is on the bottom end of the shaft, facing the gearbox
cover (2).
Lubricate the (51) o-ring with gearbox oil. Place the final drive gear shaft
subassembly (18) into the gearbox and seat the shaft by pressing down
on the gearsets. Hold the idler gear shaft subassembly (17) in your right
hand and place into the gearbox next to the idler shaft upper bearing
(27). With your left hand holding the idler shaft, move the subassembly
over until the idler shaft (17) drops into the idler shaft upper bearing
(27). Rotate the gearsets with the right hand to assist in meshing with
the gearsets on the final shaft (18). Press down on the idler shaft to be
certain that it is seated (see Photo # 8). Place the 2 thrust washers (24)
with the lapped side facing up (towards the gearbox cover bearings).
NOTE: the thrust washers (24) are lapped on one side only.
Place the rotor shaft spacer (42) on the rotor shaft (21). Place tool #
T-8 seal protector on the rotor shaft end. This tool protects the rotor
shaft seals from damage during installation of rotor shaft. Push rotor
shaft thru lower rotor shaft bearing until pinion gear engages with (21)
gearset. Remove the T-8 seal protector from the rotor shaft. Rotate the
rotor shaft to be certain that all of the gears are properly engaged, and
the rotor shaft bearings are aligned.
NOTE: Flow-thru machines do not have rotor shaft seals and therefore
you do not need to use tool # T-8 seal protector when installing the rotor
shaft assembly.
Gearbox Lubrication: Fill the gearbox with oil. The oil level should
just cover the (21) gearset on the final shaft (18) as shown in photo # 8.
All Lubricated machines are supplied with the following type of oil:
OIL TYPE: Food Grade U.S.D.A Acceptable H-1
QTY: 14 oz. (414 ml.) S.A.E.-90
Note: Flow-thru machines do not have oil in the gearbox, they are
lubricated by the cleaning solution.
Oil Alternatives: For non-food industry applications, H-2 lubricants
can be used such as Keystone Keygear 90, KLC-20/50 or KSL-365.
Lightweight gear oils SAE 50-90 are also suitable. It should be noted
that heavy weight (140) gear oils or greases will alter the performance
of the machine regarding cycle times.
GEARBOX COVER ASSEMBLY
Use tool # T-6 to press the rotor shaft thrust bearing (21)
into the center bore of the gearbox cover (2). Use tool
# T-5 to press the idler shaft lower bearing (28) and the final shaft lower
bearing (30) into their respective bores (refer to exploded view). Install a
new o-ring (54) with lubricant.
Lubricate the bore of the gearbox and the gearbox cover o-ring with
gearbox oil. Align the gearbox cover with the shafts (# 17, 18, 21) and
the dowel pin hole in the gearbox. Press down until o-ring is seated.
Install split washers (57) and gearbox cover screws (56). Torque
screws to 100 in/lbs for Stainless Steel and 80 in/lbs for Bronze.
Do not overtighten.
ROTOR INSTALLATION
Turn machine right side up. Place rotor (9) on rotor shaft (21). Install
lockwasher (57) and rotor nut (59). Tighten the nut while holding pressure
against the rotor with a medium sized screwdriver wedged between the
inlet stem and the rotor or use needle nose pliers to hold a fin on the
rotor. Torque the rotor nut to 100 in/lbs for Stainless Steel and 80 in/lbs
for Bronze. Be certain the rotor nut is tight, and that the rotor shaft is not
rotating while tightening the nut. Rotate the rotor (9) with your finger or
a small screwdriver. The rotor should rotate freely and the tee housing
should begin to move slowly.
NOZZLE HOUSING ASSEMBLY
Bearing Cup Installation: Lubricate cup O.D. with a small amount of
food grade gearbox oil. Using tool # T-3 and an arbor press, press cup
down into nozzle housing until the flange is seated flat on the nozzle
housing. Repeat procedure for other cup.
Bevel Gear Installation: Clutch Drive: Wipe a small amount of
gearbox oil into the groove of the nozzle housing (5). Install a new o-ring
(49). Place the nozzle housing bevel (11) on the nozzle housing. Install
the bevel gear retaining ring (19) with a small screwdriver, be sure the
retaining ring is completely seated in the groove of the nozzle housing.
Pin Drive: Place the bevel gear dowel pin (44) into the hole in the
nozzle housing. Install a new o-ring (49). Line up the slot on the bevel
gear with the pin, then install the bevel gear retaining (19) with a small
screwdriver, be sure the retaining ring is completely seated in the groove
of the nozzle housing.
Nozzles and Stream Straighteners: Tap stream straightener into
nozzle with plastic faced hammer. Place a small amount of anti-seize
compound or Teflon tape on the threads and the radius on the end of the
nozzle. Insert the nozzle (7) into nozzle housing (5) and tighten with open
end wrench or adjustable wrench.
NOZZLE HOUSING TO TEE HOUSING ASSEMBLY
1. Place one of the nozzle housing bearings (33) over the nose of
the tee housing (4), align the locator marks on the tee housing
casting and the back of the bearing (refer to photo #’s 9 & 10).
This will allow the bearing to fit flush against the tee housing.
Rotate the bearing slightly and it will lock into place against the
ridge cast into the tee housing.
2. Install one of the nozzle housing seals (50), the spring side facing
outward towards the ports in the tee housing.
3. Wipe a small amount of gearbox oil on the I.D. of the bearing
cups (34) in the nozzle housing (5). This reduces the initial friction
between the seals and cups.
4. Place the nozzle housing assembly (5) over the seal and bearing
on the tee housing.
Nameplate, Bearing & Seal Installation:
1. Install the outer seal (36), with the spring facing inward toward
the ports in the tee housing.
2. Align the locator mark on the nozzle housing bearing (33) with
the dot on the nameplate (6). See Photo #10. Push the bearing
into the nameplate so that the flange of the bearing is seated
against the nameplate. Install the nameplate and bearing onto
the tee housing nose, check that the name is right side up.
3. Install the nameplate screws (58) and the lockwashers (57).
Torque screws to 100 in/lbs for Stainless Steel and 80 in/lbs for
Bronze. Do not overtighten.

12 spray.com | 1.800.95.SPRAY | Intl. Tel: 1.630.665.5000
FINAL INSPECTION
1. Check for end play (in and out) of nozzle housing on the axis of
the tee housing nose. There should be some free play.
2. Check end play (up and down) of tee housing.
3. Rotate the rotor with your finger or a small screwdriver. The rotor
should rotate freely and the tee housing should begin to move
slowly.
NOTE: If you get negative results on any of these final inspections then
refer to the Trouble Shooting Guide that begins on page 13.
STATOR INSTALLATION
Place the stator (8) into the inlet stem (3) by rotating slightly until the
weld on the I.D. of the inlet stem is in between 2 of the fins of the
stator. The weld on the inlet stem keeps the stator from rotating. The
stator retaining ring (39) can now be installed using a pair of needle
nose pliers.
PROBLEM SOLUTION
Excessive Tee-housing bearings wear
Visually inspect the bearing for cracks or signs of corrosion. Check the bearing clearance
between the I.D. of the cup (31 & 33) and the O.D. of the bearing. If the bearings show signs
of wear from deposits, sediment or other foreign matter, or have excessive side to side
movement in the bearing cup, replacement is recommended.
Excessive gearbox bearing wear If there is excessive side to side play of one of the gear shafts (17, 18, and 21) and one of the
mating bearings (26, 27, 28, 29, and 30) then replacements is recommended.
Poor cleaning performance
Water Pressure & Flow: Is there sufficient pump pressure or water flow at the tank cleaner?
Minimum operating pressure is 30-40 psi measured at the inlet of the machine. Minimum pipe
or hose diameter is 1 ½" I.D.
Nozzle Housing Rotates Slow or Not At All: Upon inspection of the nozzle housing bearings
(33), is there a buildup of deposits, sand or scale? Inspect the seals (36) for signs of wear.
Replace bearings, cups and seals as necessary. If the nozzle housing cups, bearings and seals
need replacement or cleaning, it follows that the tee housing cups, bearings and seals will also
need the same.
Erratic rotation of nozzle housing
If you are able to observe the machine in operation and notice the nozzle housing rotating,
then stopping briefly, then rotating again, this could be symptoms of the following:
• Clutch o-ring is worn or corroded and is not seating completely against the nozzle
housing bevel gear.
• Damaged bevel gears (10, 11): inspect the bevel gears for bent or excessively worn teeth.
If the teeth are worn down approximately 25%, or if one or more teeth are bent, then the
bevel gear(s) should be replaced.
Worn clutch o-ring
Inspect the clutch o-ring (49) condition. If the clutch o-ring is cracked, or if corrosion has
shrunken it in size and it is not filling the o-ring groove on the nozzle housing completely, then
replacement is recommended.
Nozzles clogged Inspect the nozzles for obstructions by solid particles trapped in the stream straighteners (13).
Use Teflon tape on nozzle threads prior to re-assembly.
TROUBLESHOOTING GUIDE
This section lists common problems that may be encountered during the operation of TankJet®series. Proper operating environment and preventative
maintenance can prevent many problems. A brief explanation of the problem & solution is followed by directions of where to look in the Operation &
Maintenance Manual for further assistance or explanation.

13
spray.com | 1.800.95.SPRAY | Intl. Tel: 1.630.665.5000
PROBLEM SOLUTION
Machine configuration & cycle time
(Inadequate cleaning)
Verify that the rotor/stator combination, nozzle size & gear ratio are configured properly
for the type of cleaning required. Contact your local distributor or representative for further
recommendations.
Cleaning solution composition &
temperature (Cleaning and wear
problems)
Check to see that the proper concentration and type of chemicals is being used for the material
being cleaned, and that the solution is heated to the proper temperature.
Loose rotor nut
Check to see that the rotor retaining nut (59) is properly tightened on the rotor shaft. If the rotor
nut is loose, the rotor may be rotating on the shaft, instead of rotating the rotor shaft through
the geartrain. Tighten the rotor nut as described in the Rotor Installation. Torque setting should
be 100 in/lbs.
Rotor shaft difficult to turn
• Misalignment of the carbide rotor shaft bearings (46, 47) can prevent smooth rotation.
Rotate rotor shaft bearing with Tool # T-5, then check the alignment once again.
• Foreign material jammed in geartrain. Remove gearbox cover (2) for inspection. Remove
foreign material, reassemble geartrain and install gearbox cover (2) as described.
Rotot shaft turns, but the tee housing does
not
This is an indication of possible geartrain malfunction. If the rotor shaft pinion gear or any of
the gearsets (23) are worn out, then the tee housing will not rotate. Remove gearbox cover (2)
for inspection, replace worn gears as necessary.
Deposits, scale, foreign material in the tee
housing bearings
• Inspect the seals (35) for signs of wear. If they are worn out, they will allow particles
in the cleaning solution in between the cups and bearings, which will alter the
performance of the machine. Replace bearings, cups and seals as necessary.
• Install an inline strainer to filter out sediment in the cleaning solution.
Erratic rotation of tee-housing
If you are able to observe the machine in operation and notice the tee housing rotating, then
stopping briefly, then rotating again, this could be due to improperly installed ring gear. The ring
gear notch (see photo # 4, page 16) must be locked into the tee housing tab (photo # 3, page 16).
Clogged stator or rotor Remove stator retaining ring (39) and lift out stator (8). Remove any foreign objects from
the stator or rotor that could be altering the normal flow of cleaning solution.
Excessive water leakage
In the CIP version of TankJet® 360 series, some water leakage at the gap between the tee
housing & gearbox and at the gap between the nozzle housing & tee housing is normal. There
are two small holes in the tee housing that rinse the bevel gears, ring gear and the inside
of several of the castings to prevent a buildup of deposits or sediment that could promote
bacteriological growth.
Worn tee-housing seals
If TankJet 360 series is allowed to operate for a prolonged period of time after the seals have
worn out, foreign particles will lodge between the inlet stem and the tee housing bearings and
cups and cause abrasive wear on these parts. Corrosive chemicals can also have an effect on
the sealing effectiveness. If the grooves or corrosion is severe, even new seals will not seal
completely due to the uneven sealing surface.
Excessive water leakage at the top and bottom of the tee housing indicates a sealing problem
which can be caused by:
• Seals worn out; no longer functioning properly. Replace worn seals.
• Seals improperly installed. The spring side of the seal (the open section of the seal)
faces the ports on the inlet stem.
• Inlet Stem (3) casting or tee housing cups (32) have wear grooves which prevent the
seals from sealing. Replace the cups. Reassemble the machine and then check for
excessive leakage. If there is still excessive leakage after installing new cups and
seals, the inlet stem may have to be replaced.

14 spray.com | 1.800.95.SPRAY | Intl. Tel: 1.630.665.5000
WARRANTY
For newly purchased units the warranty is 18 months from the date of shipment or 12 months from the date of installation, whichever
occurs first. This warranty includes manufacturing defects but does not cover the wear parts that include the o-rings, seal and bushings.
This warranty will be void if parts other than those supplied by Spraying System Co. are used.
PROBLEM SOLUTION
Worn nozzle housing seals
Excessive water leakage around the nozzle housing indicates a sealing problem which
can be caused by:
• Seals worn out; no longer functioning properly. Replace worn seals.
• Seals improperly installed. The spring side of the seal (the open section of the seal)
faces the ports on the nose of the tee housing.
• Tee housing (4) or nozzle housing cups (32) has wear grooves which prevent the
seals from sealing. Replace the cups. Reassemble the machine and then check for
excessive leakage. If there is still excessive leakage after installing new cups and
seals, the tee housing may have to be replaced.
No nozzle housing free play
If there is no free play (in and out movement) of the nozzle housing (5) on the axis of the tee
housing (4) check one of the following:
• Scale or deposit buildup between nozzle housing cups (34) and bearings (33). Remove
the nozzle housing assembly (5) from the tee housing (4). Inspect the bearings (33)
and cups (34) for deposits and / or scale buildup. Remove the scale or deposit buildup
from the cups and bearings. Inspect the nozzle housing seals (36) for wear, replace
as necessary, and then reassemble the nozzle housing to the tee housing. Assembly
Nozzle Housing to Tee Housing. Inspect once again for free play.
• Improperly assembled: remove the nozzle housing assembly (5) from the tee
housing (4). Inspect the nozzle housing bearing (33) that is seated against the tee
housing. Refer to Assembly Procedure; Assembly Nozzle Housing to Tee Housing.
No tee-housing free play
If there is no free play (up and down movement) of the tee housing (4) check one of the
following:
• Scale or deposit buildup between tee housing cups (32) and bearings (31). Inspect the
nozzle housing bearings and cups as described above for deposits and/or scale buildup.
If the nozzle housing bearings and cups are in need of cleaning or replacement, the tee
housing bearings (31) and cups (32) will also need the same. Inspect the tee housing
seals (35) for wear, replace if necessary. Reassemble and test for free play once again.
• Improperly assembled: dismantle machine and note whether the ring gear (12) or
bevel gear (10) are properly assembled in the tee housing. Inspect to see that the
upper (31) bearing flange is seated flush against the inlet stem. Reassemble the
machine as described in the Assembly Procedure.

15
spray.com | 1.800.95.SPRAY | Intl. Tel: 1.630.665.5000
PRODUCT VIEWS

16 spray.com | 1.800.95.SPRAY | Intl. Tel: 1.630.665.5000

17
spray.com | 1.800.95.SPRAY | Intl. Tel: 1.630.665.5000

18 spray.com | 1.800.95.SPRAY | Intl. Tel: 1.630.665.5000

19
spray.com | 1.800.95.SPRAY | Intl. Tel: 1.630.665.5000

20 spray.com | 1.800.95.SPRAY | Intl. Tel: 1.630.665.5000
TANKJET®360 WITH TWO NOZZLE HUB
13-5/16"
8-1/4" MIN.
FROM CENTER
6
-1/4"
MIN. OPENING
12
-1/2"
10
-1/4" MIN. TANK OPENING.
14
-1/2" MIN. CLEARANCE
FROM CENTER OF MACHINE.
13
-5/16"
360 TRIPLE NOZZLE
12
-1/2"
10
-1/4" MIN. TANK OPENING.
14
-1/2" MIN. CLEARANCE
FROM CENTER OF MACHINE.
13
-5/16"
360 TRIPLE NOZZLE
TANKJET 360 WITH THREE NOZZLE HUB
13-5/16"
8-1/4" MIN.
FROM CENTER
6
-1/4"
MIN. OPENING
12
-1/2"
10
-1/4" MIN. TANK OPENING.
14
-1/2" MIN. CLEARANCE
FROM CENTER OF MACHINE.
13
-5/16"
360
TRIPLE
NOZZLE
Ø 6.25 in. (158 mm)
Min. Tank Opening
Ø 10.25 in. (260 mm)
Min. Tank Opening
Ø 8.25 in. (210 mm)
From Tank Center
13.3 in.
(338 mm)
Ø14.5 in. (368 mm)
From Tank Center
13.3 in.
(338 mm)
12.5 in.
(318 mm)
This manual suits for next models
2
Table of contents
Other Spraying Systems Cleaning Equipment manuals